Clamping the Transom Planks

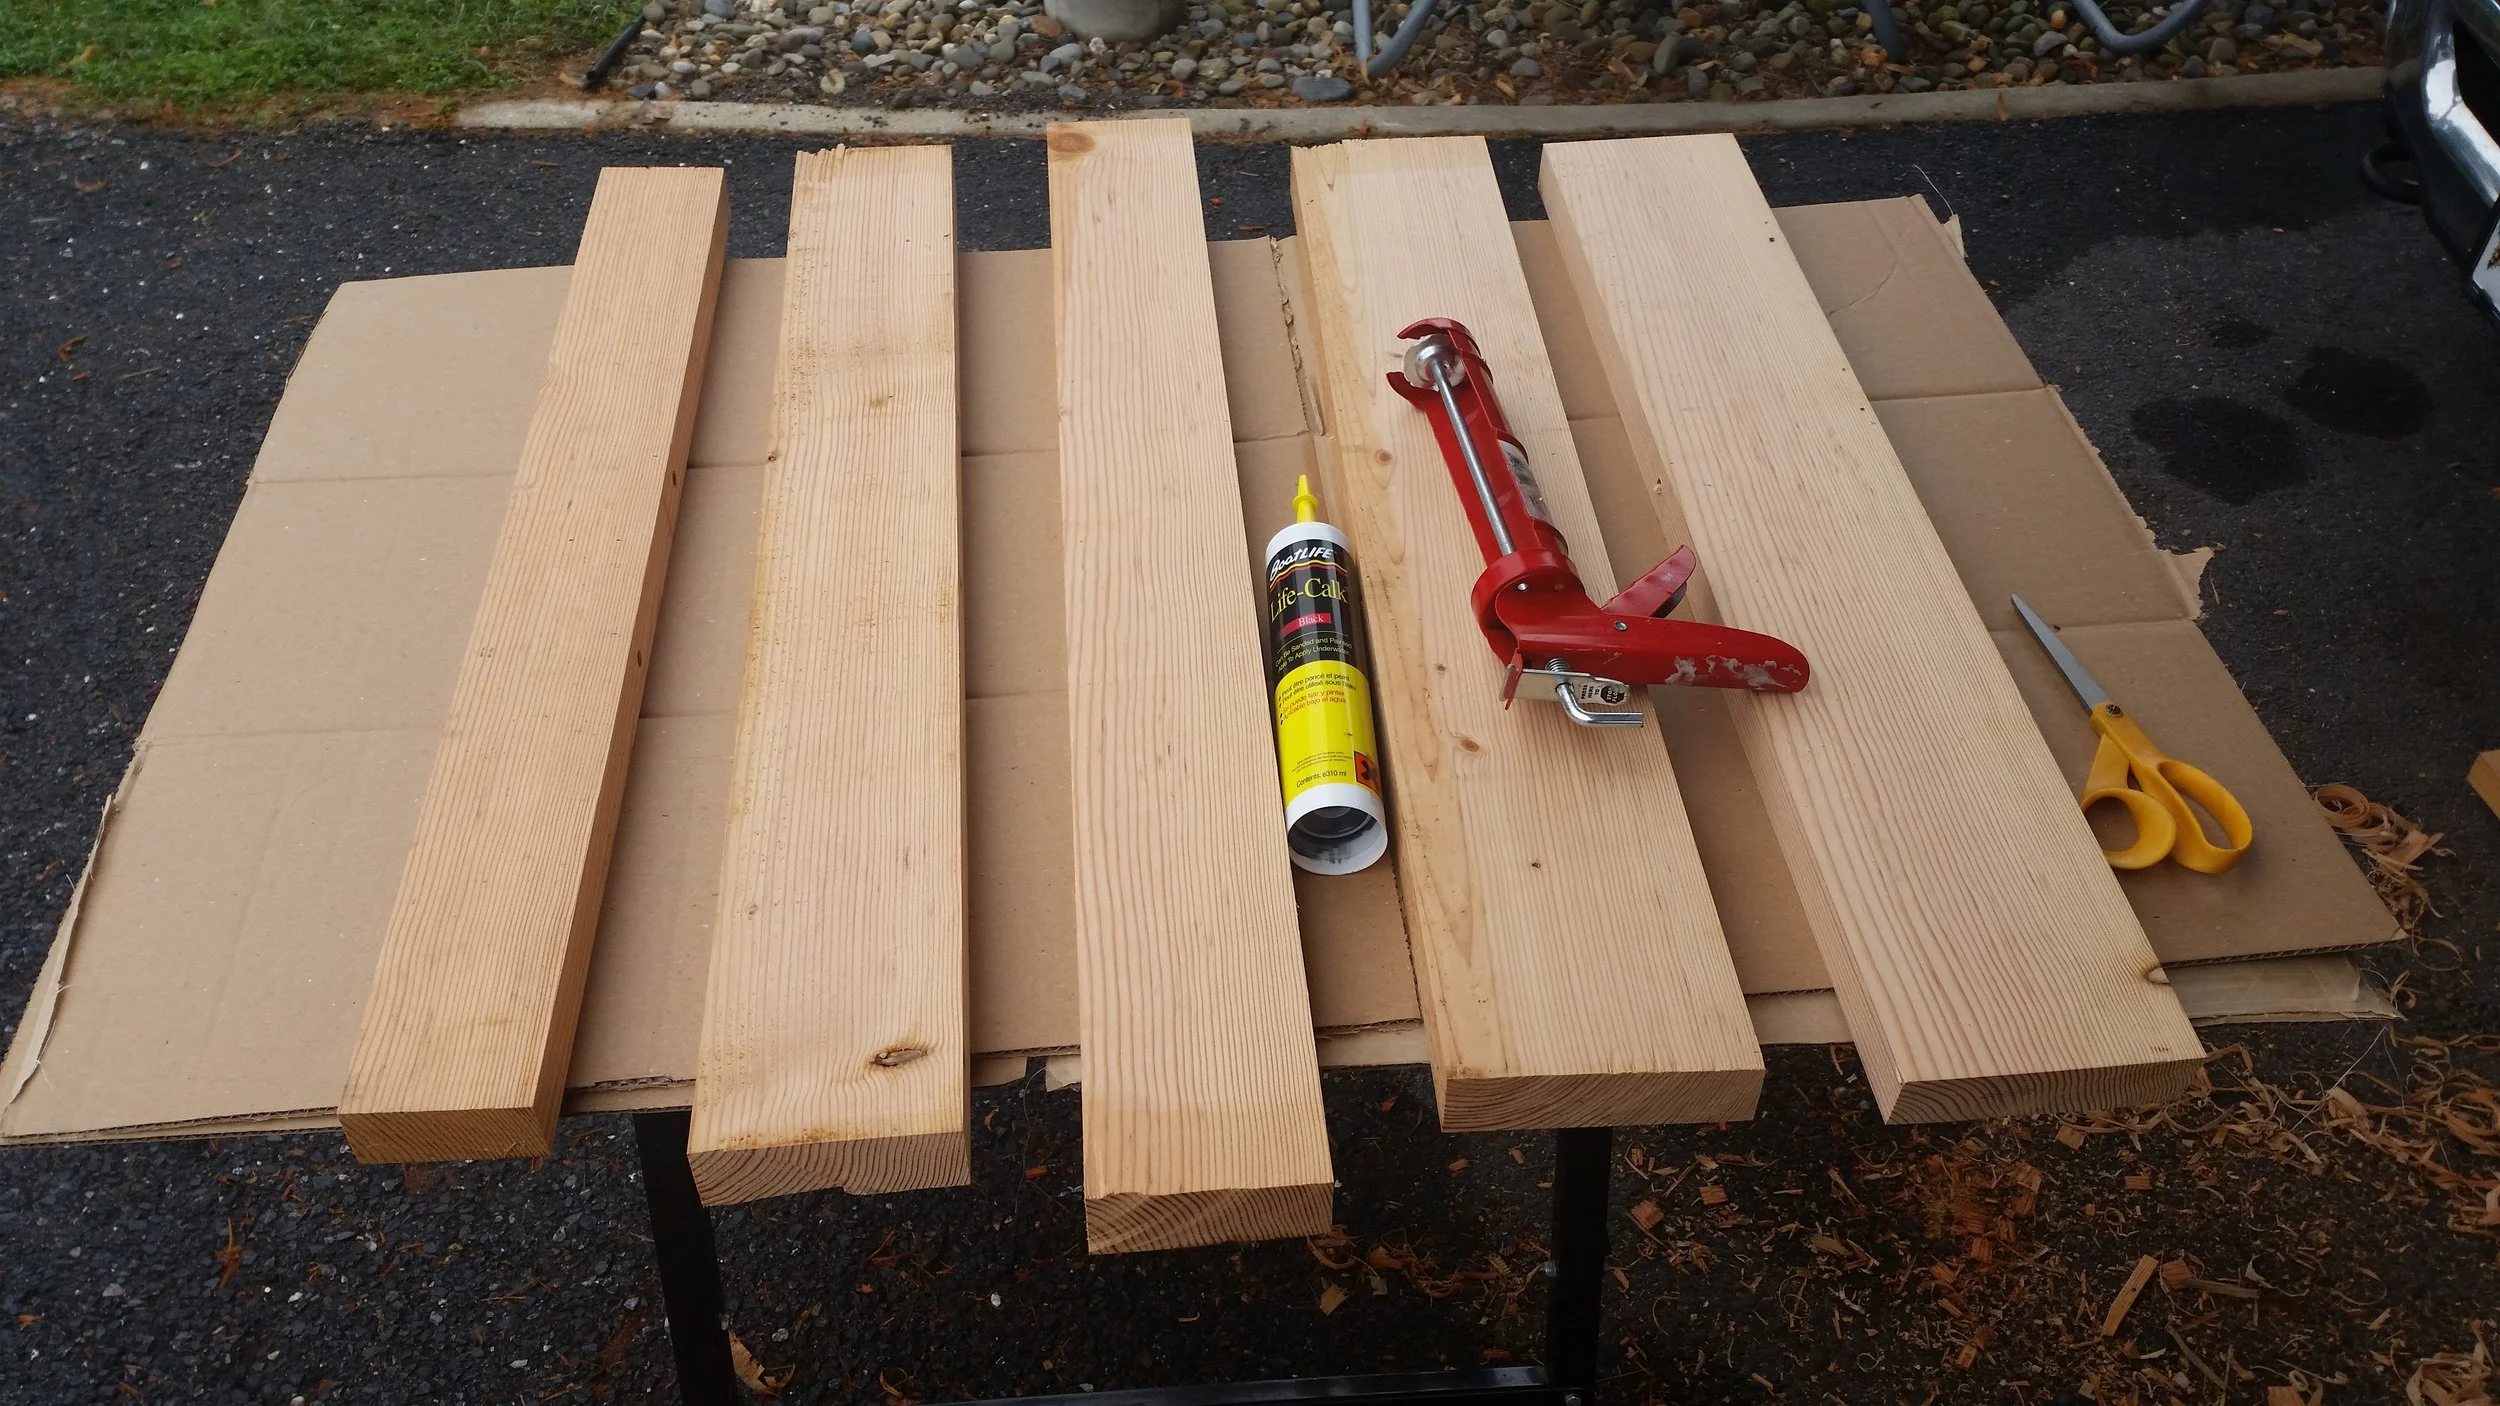
The planks were all oriented with their respective faying surfaces in the proper direction and all the materials needed at the ready. For this procedure, we need:

  • Bedding Compound
  • Wood Glue
  • Dowels
  • Table Clamps

Everything was setup on an elevated work surface protected by an old box which can be discarded at a later point in time. The process is relatively simple, glue goes in the holes and bedding compound on the surface of the wood.

You can choose to glue the strakes together which will yield a solid board that will work very well to keep water out of the boat and keep the interior of the hull dry, for a while. A dinghy, unlike a piece of furniture, will be exposed to the harsh marine environment. The hull will sit in water where it will swell and then sit on the deck where it will dry out. It will be exposed to both fresh and salt water, and lastly, it will be exposed to the full heat transferred via the suns radiation.

Over time, the planks will begin to shrink and swell and the joints between them will become very stressed as the boards push and pull on each other. Eventually, cracks will develop in the board and un-seal-able leaks will become the bane of your dinghies existence! To avoid these issues, wood glue will not be used on the interface between the planks, instead a soft rubber polysulfide material will be used as it will allow the wood to shrink and swell without opening the seams.

While polysulfide will hold the planks together, it is never going to be as strong of a bond as wood glue, so some wood glue will be used to help secure the planks. The wood glue is only used on the interface between the dowels and the boards, giving the boards the flexibility to move on the dowels without tearing open a seam.

The wood glue I used is Titebond III, a water proof and outdoor rated wood glue. The polysulfide I used is Boat Life Life Caulk in black. Life Caulk is readily available in Black, White, and Mahogany. I chose black because I'm finishing the dinghy bright and black lines between the boards seems more cosmetically pleasing than white or purple lines. 
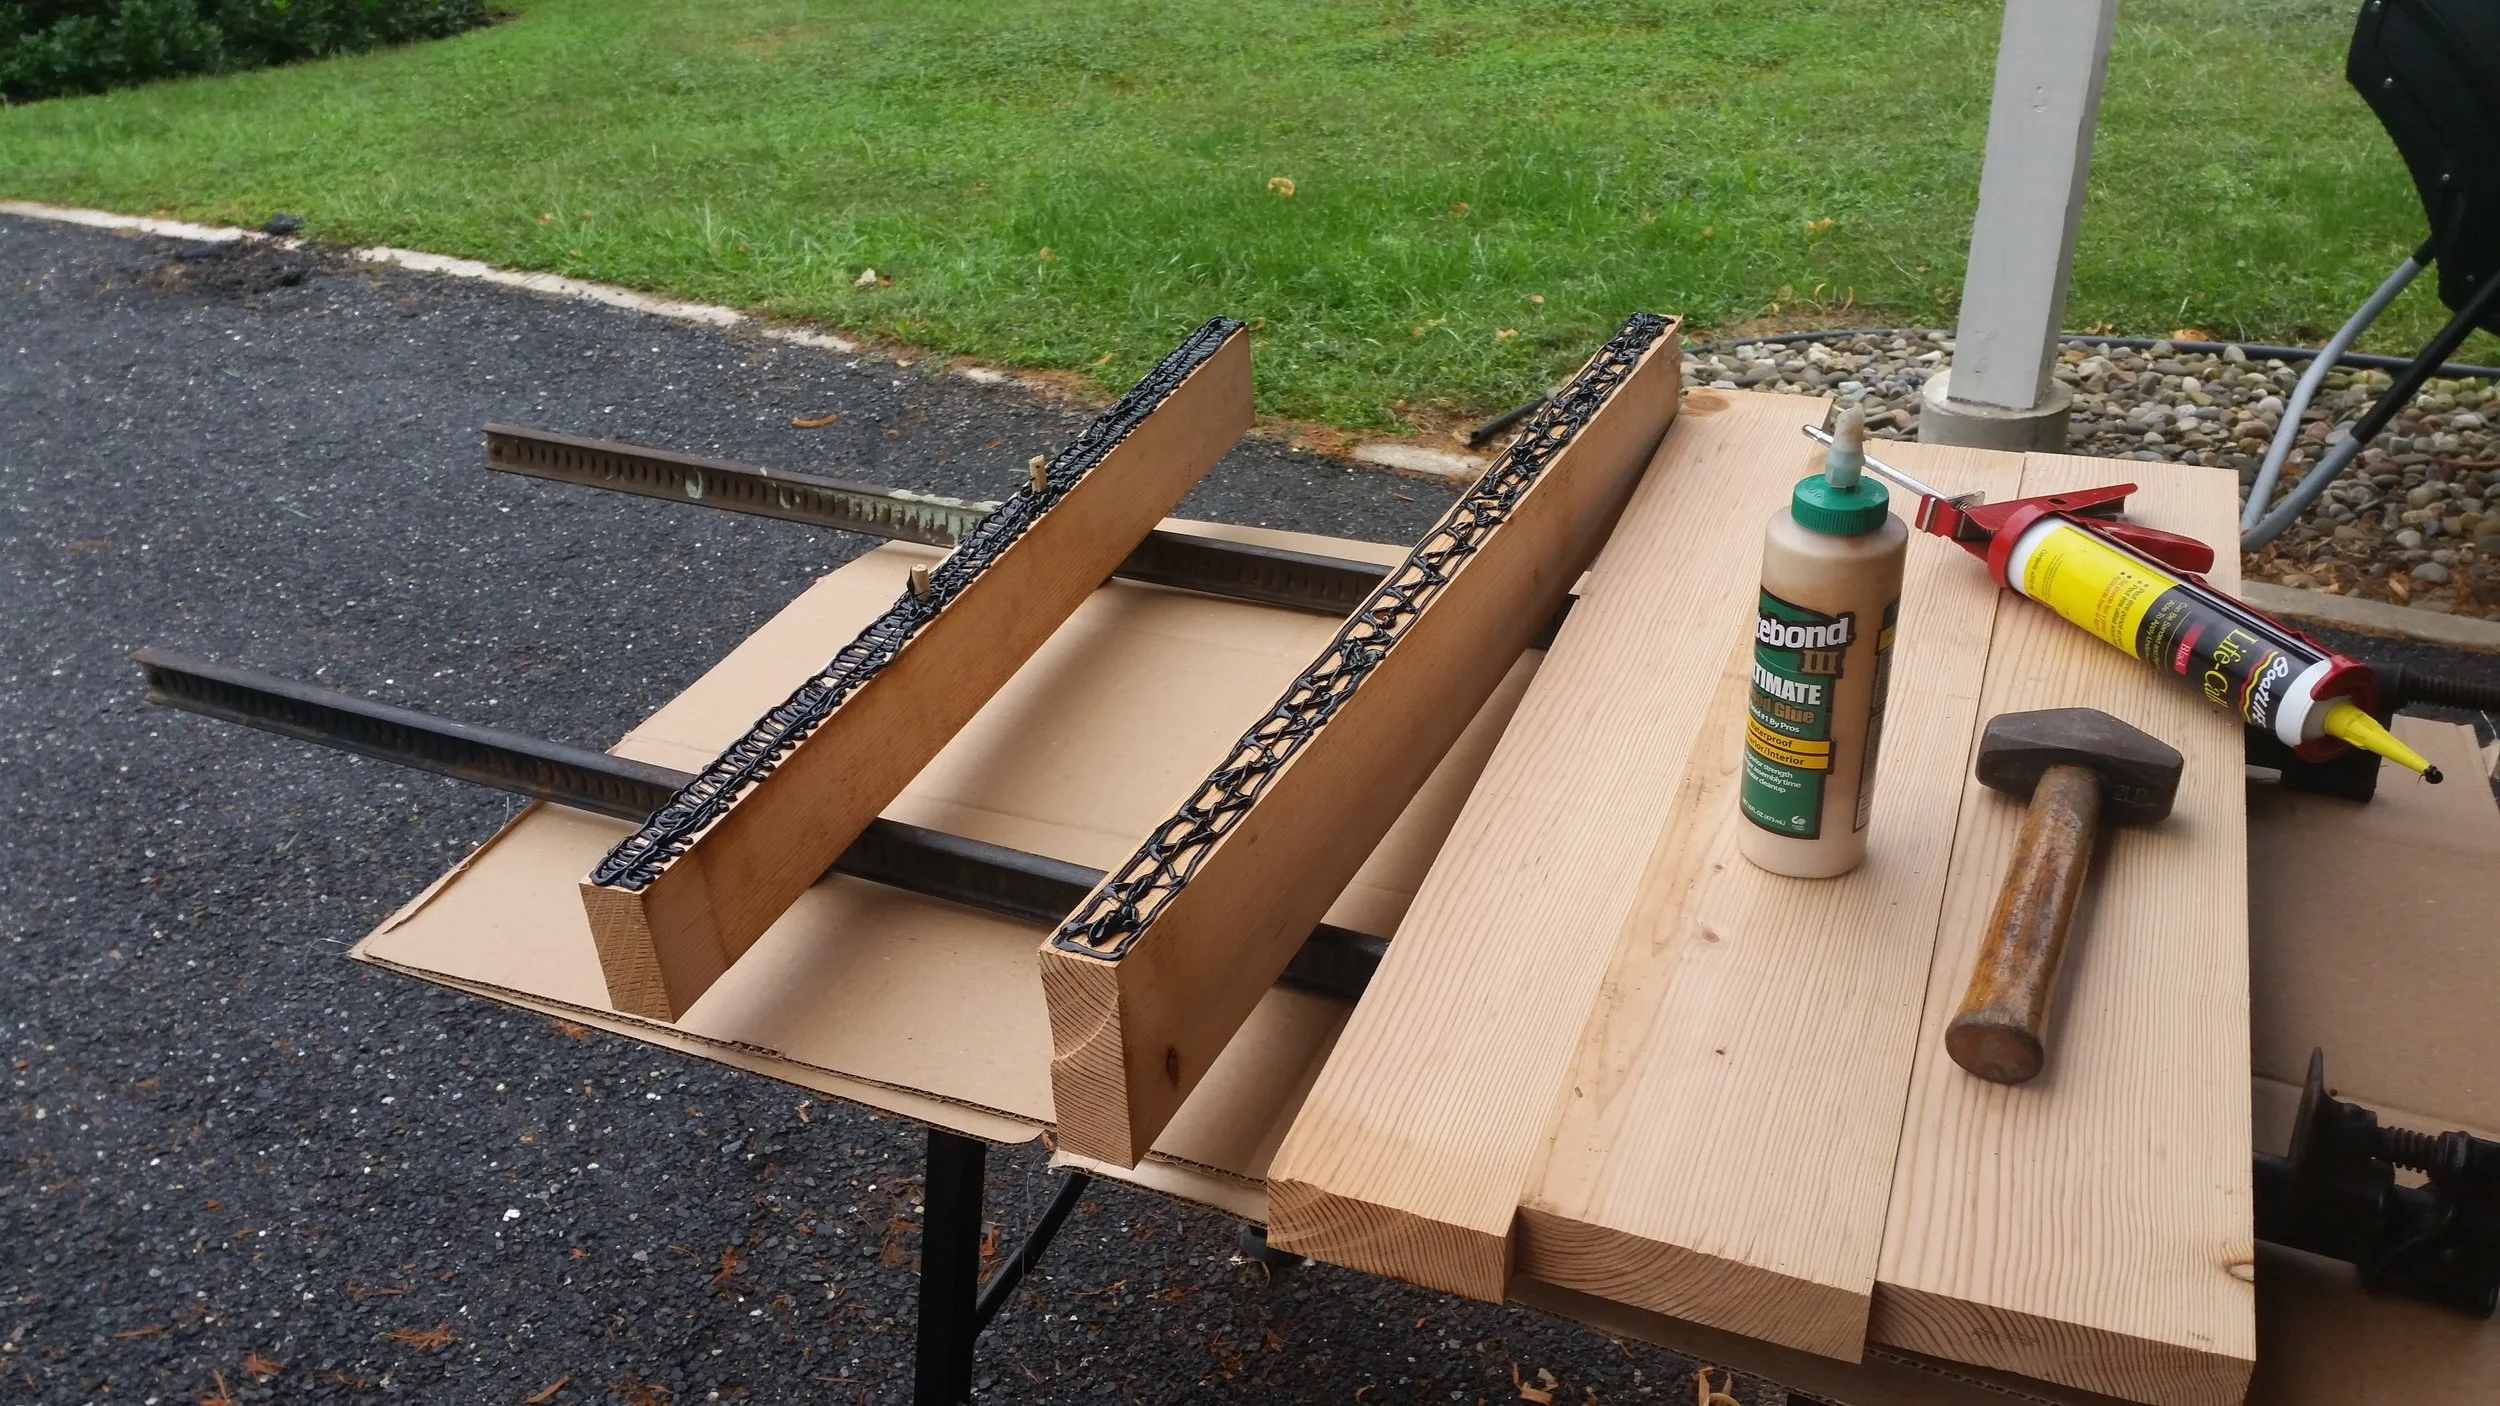
Wood glue was carefully placed only into the dowel hole and quickly followed by the dowel. A mallet proved indispensable to driving the dowels all the way down the hole as the wood had swelled with all the rain we have been having. The faying surfaces were covered with a very liberal amount of polysulfide bedding compound. It was laid down in a pattern where the outer perimeter is covered and then a zig zag between the lines connecting the perimeter line. When clamped down, this material will spread everywhere and provide a very uniform gasket that will keep water out from between the boards.

Once all the boards are glued, doweled, and bedded, apply pressure to the entire assembly with a set of table clamps. This will squeeze out most of the bedding compound, leaving a thin layer in the joint on the faying surfaces. You can attempt to scrape this excess off or just leave it to cure and peel it off later. It is actually easier to leave it in place at the moment instead of disturbing a gooey monster!
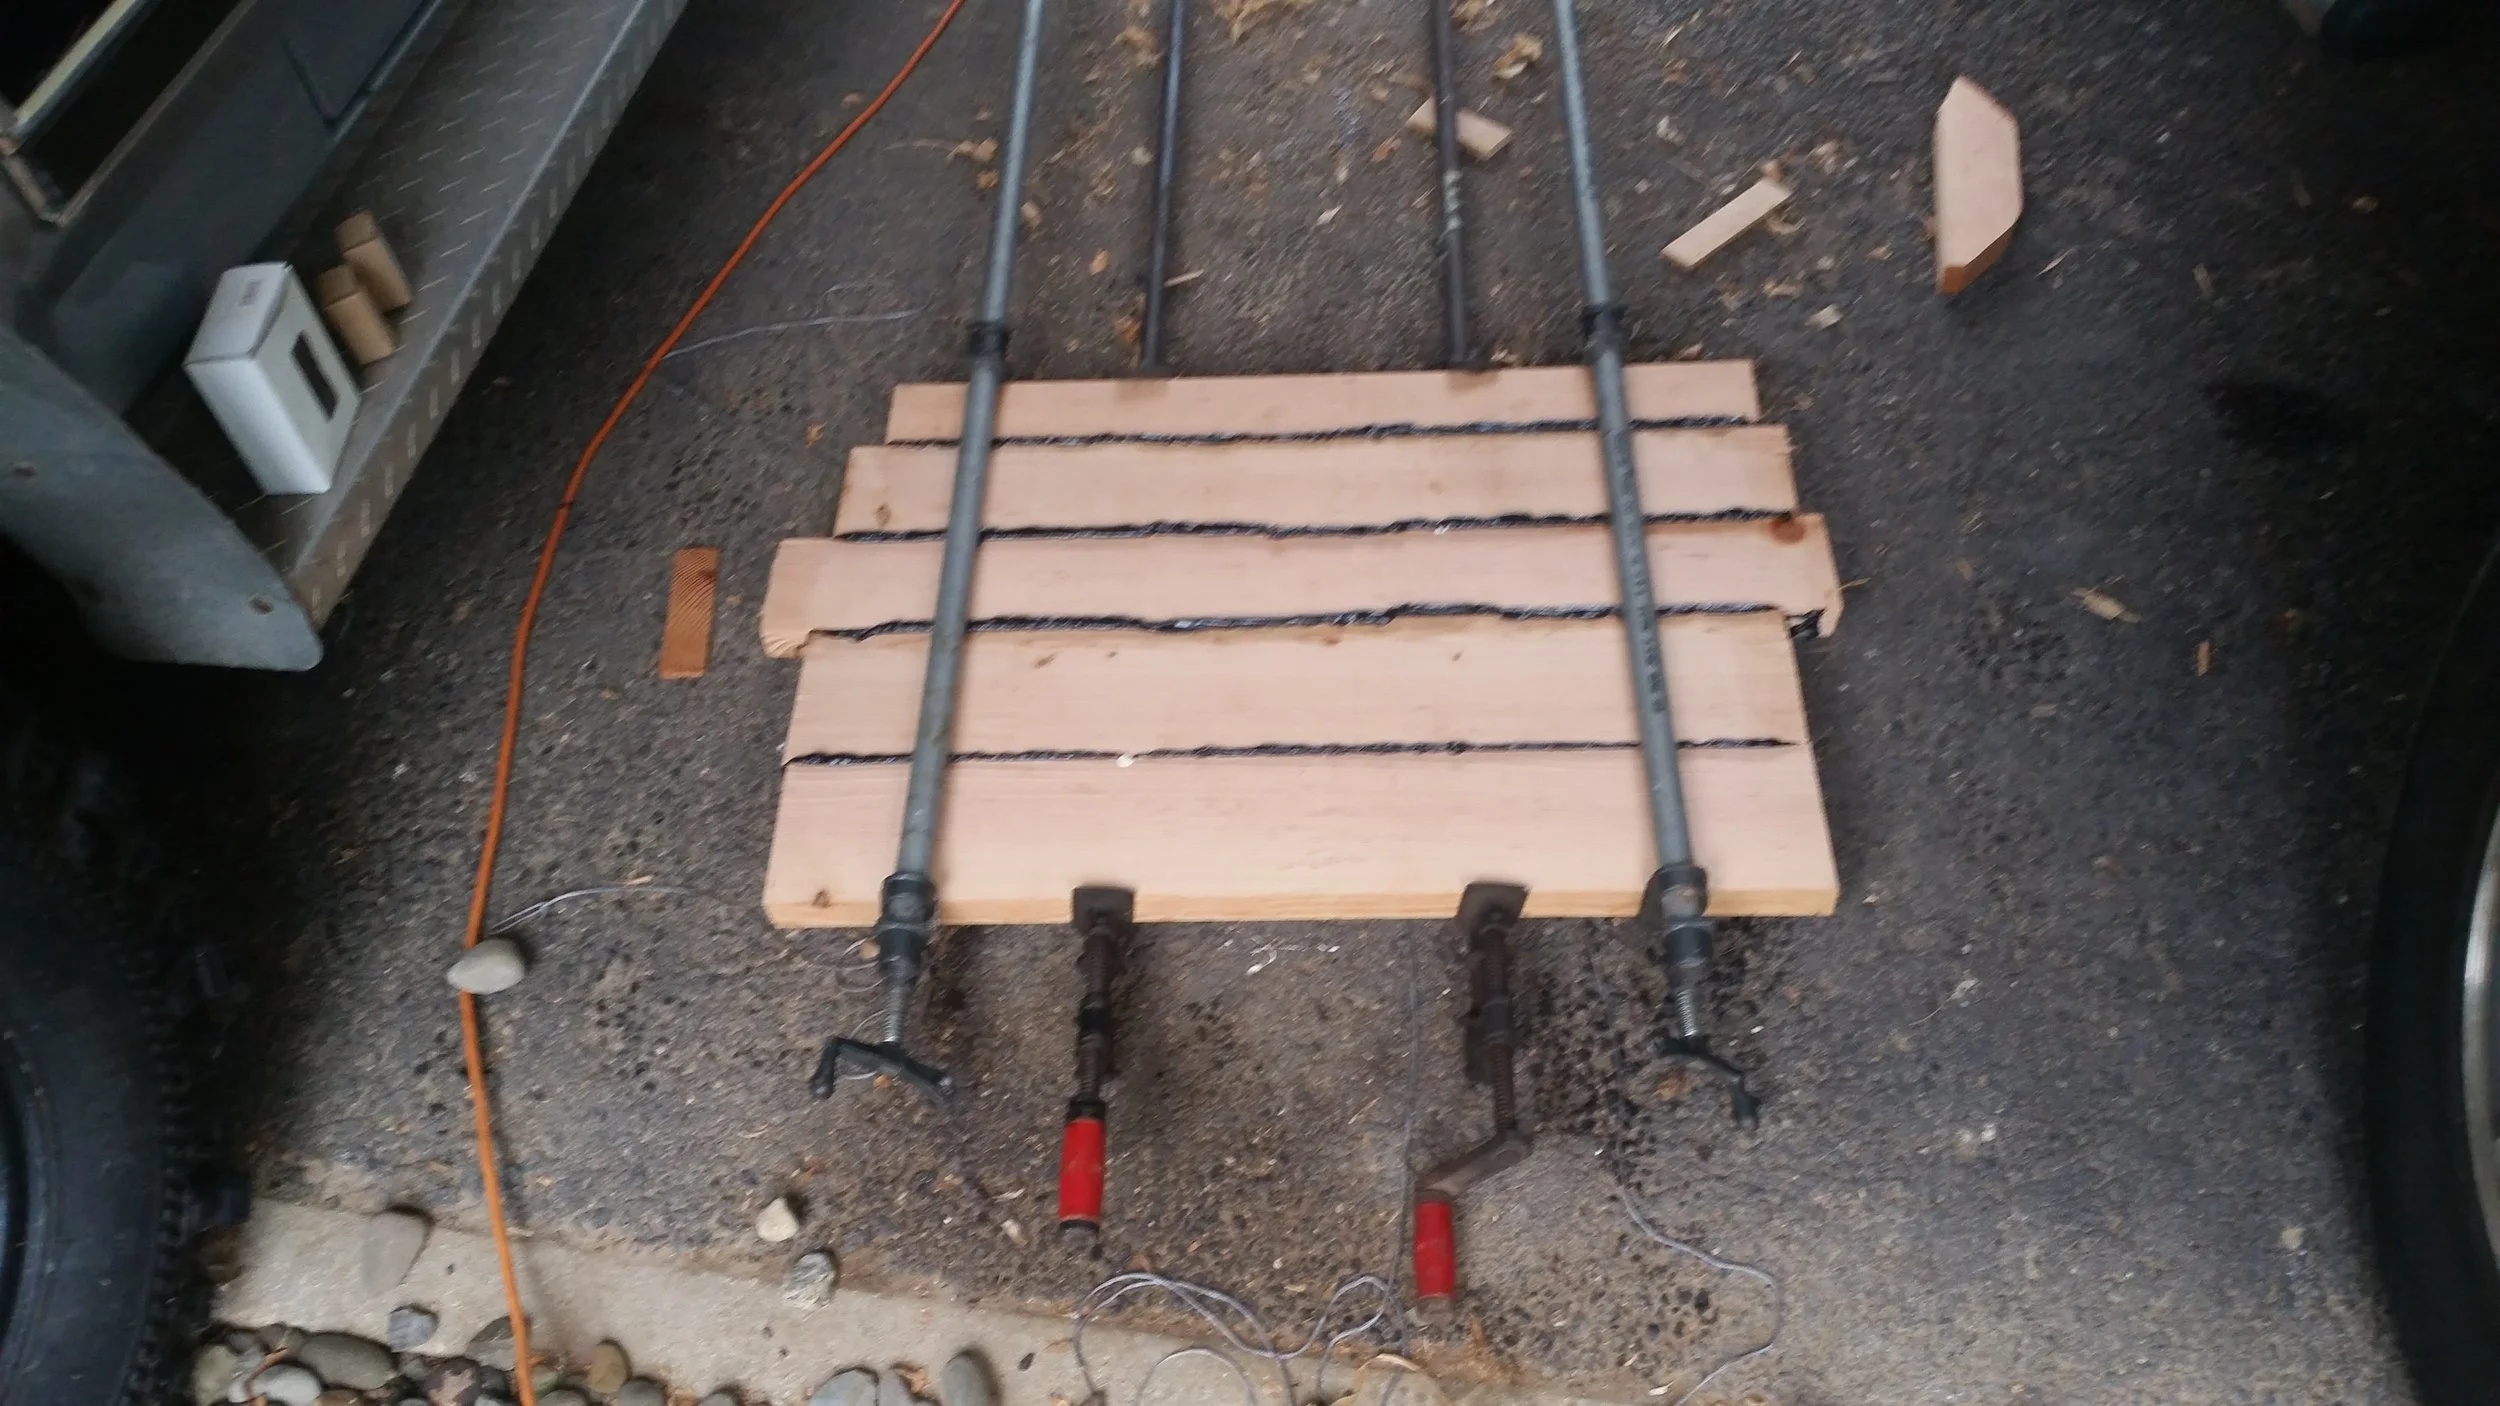
The board was moved to the ground and another set of clamps was set on it. Final clamping pressure was achieved on the boards and the last bit of excess oozed out from between the planks! Setting the clamps on opposite sides prevents the boards from bowing under a unilateral pressure. Having the clamps on opposite sides will even the forces placed on the boards and ensure that the result is a flat transom.

With the clamps exerting significant force on the boards and the glue and bedding compound curing, the boards were allowed to sit for the next four days. I waited until the polysulfide felt like a hard rubber instead of the squishy goo that it started out as. This change in state signals to me that the bedding compound is fully cured and the clamps are no longer needed to provide support to the boards. 

Shiplap Siding Tools

These little hooks were manufactured out of metal straps that cost $0.92 instead of paying $50 to $80 for mass manufactured tools. 

The concept is simple, slide the hook onto the top of the last plank installed and rest the next plank in the hooks that hang out. The new plank is now level, straight, and held in place while you are free to move around and screw it into the studs. 

You don't have to measure and hold each plank as you try to get a uniform result, instead you simply rest the plank and get to work. It is a good idea to audit your work periodically and measure the amount of plank displayed to make sure you are within the tolerable limits of your job.

When you are shopping for tools for your project, don't be swayed to purchase the most expensive tool for the job and focus more on making the right tool for the right price for the job!

Doweling the Transom

With all the planks revised and jointed, it is time to drill the holes and cut the dowels that will help support the transom planking. I could clamp and screw the transom planking to the sternpost and transom frames but this would require careful measurements. 

Instead, I'm going to glue and bed the transom together into a large flat panel which I will then attach to the sternpost. To support the planks from sheer forces and from pulling apart, I'm going to glue dowels into the top and bottom sides of the planks and clamp them together.

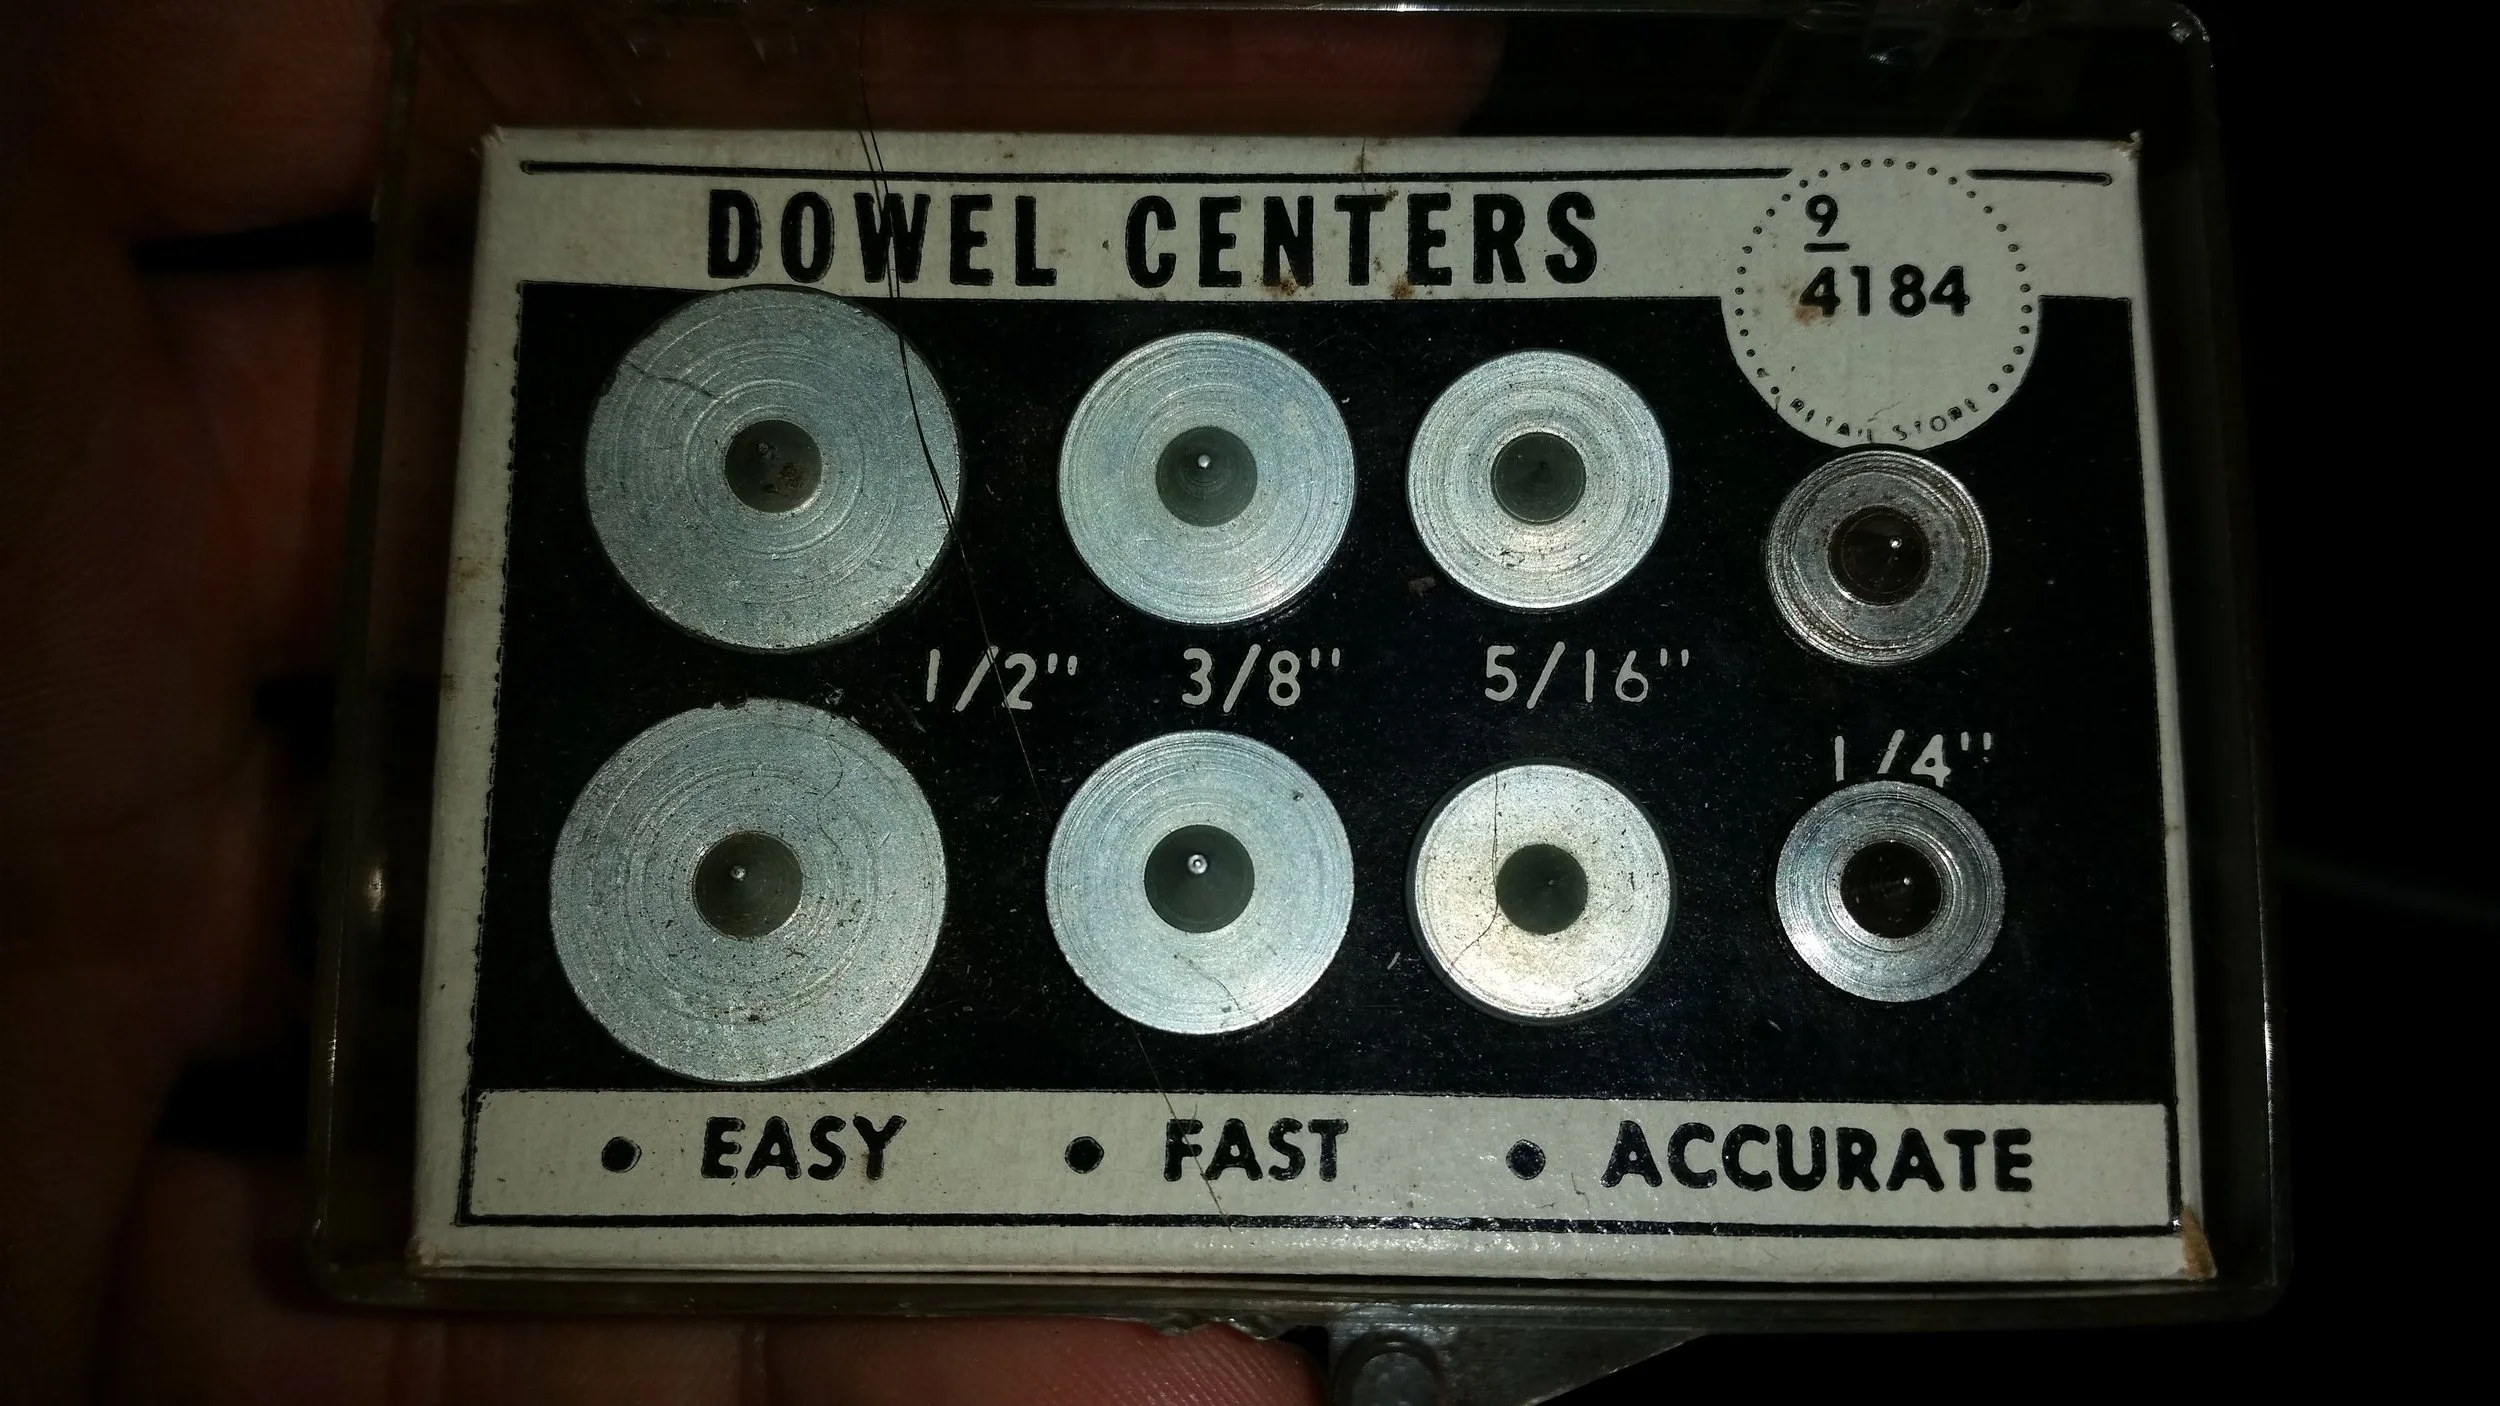
Dowels will slide into the strakes and provide support to sheer forces placed upon the transom until the transom is screwed to the transom framing. The only problem with dowels is they need to be perfectly aligned or they will not work. If the holes are slightly offset, the dowels will jam and not allow the planks to mate. To avoid this, I used a dowel centering tool, making the process both easy and fast!

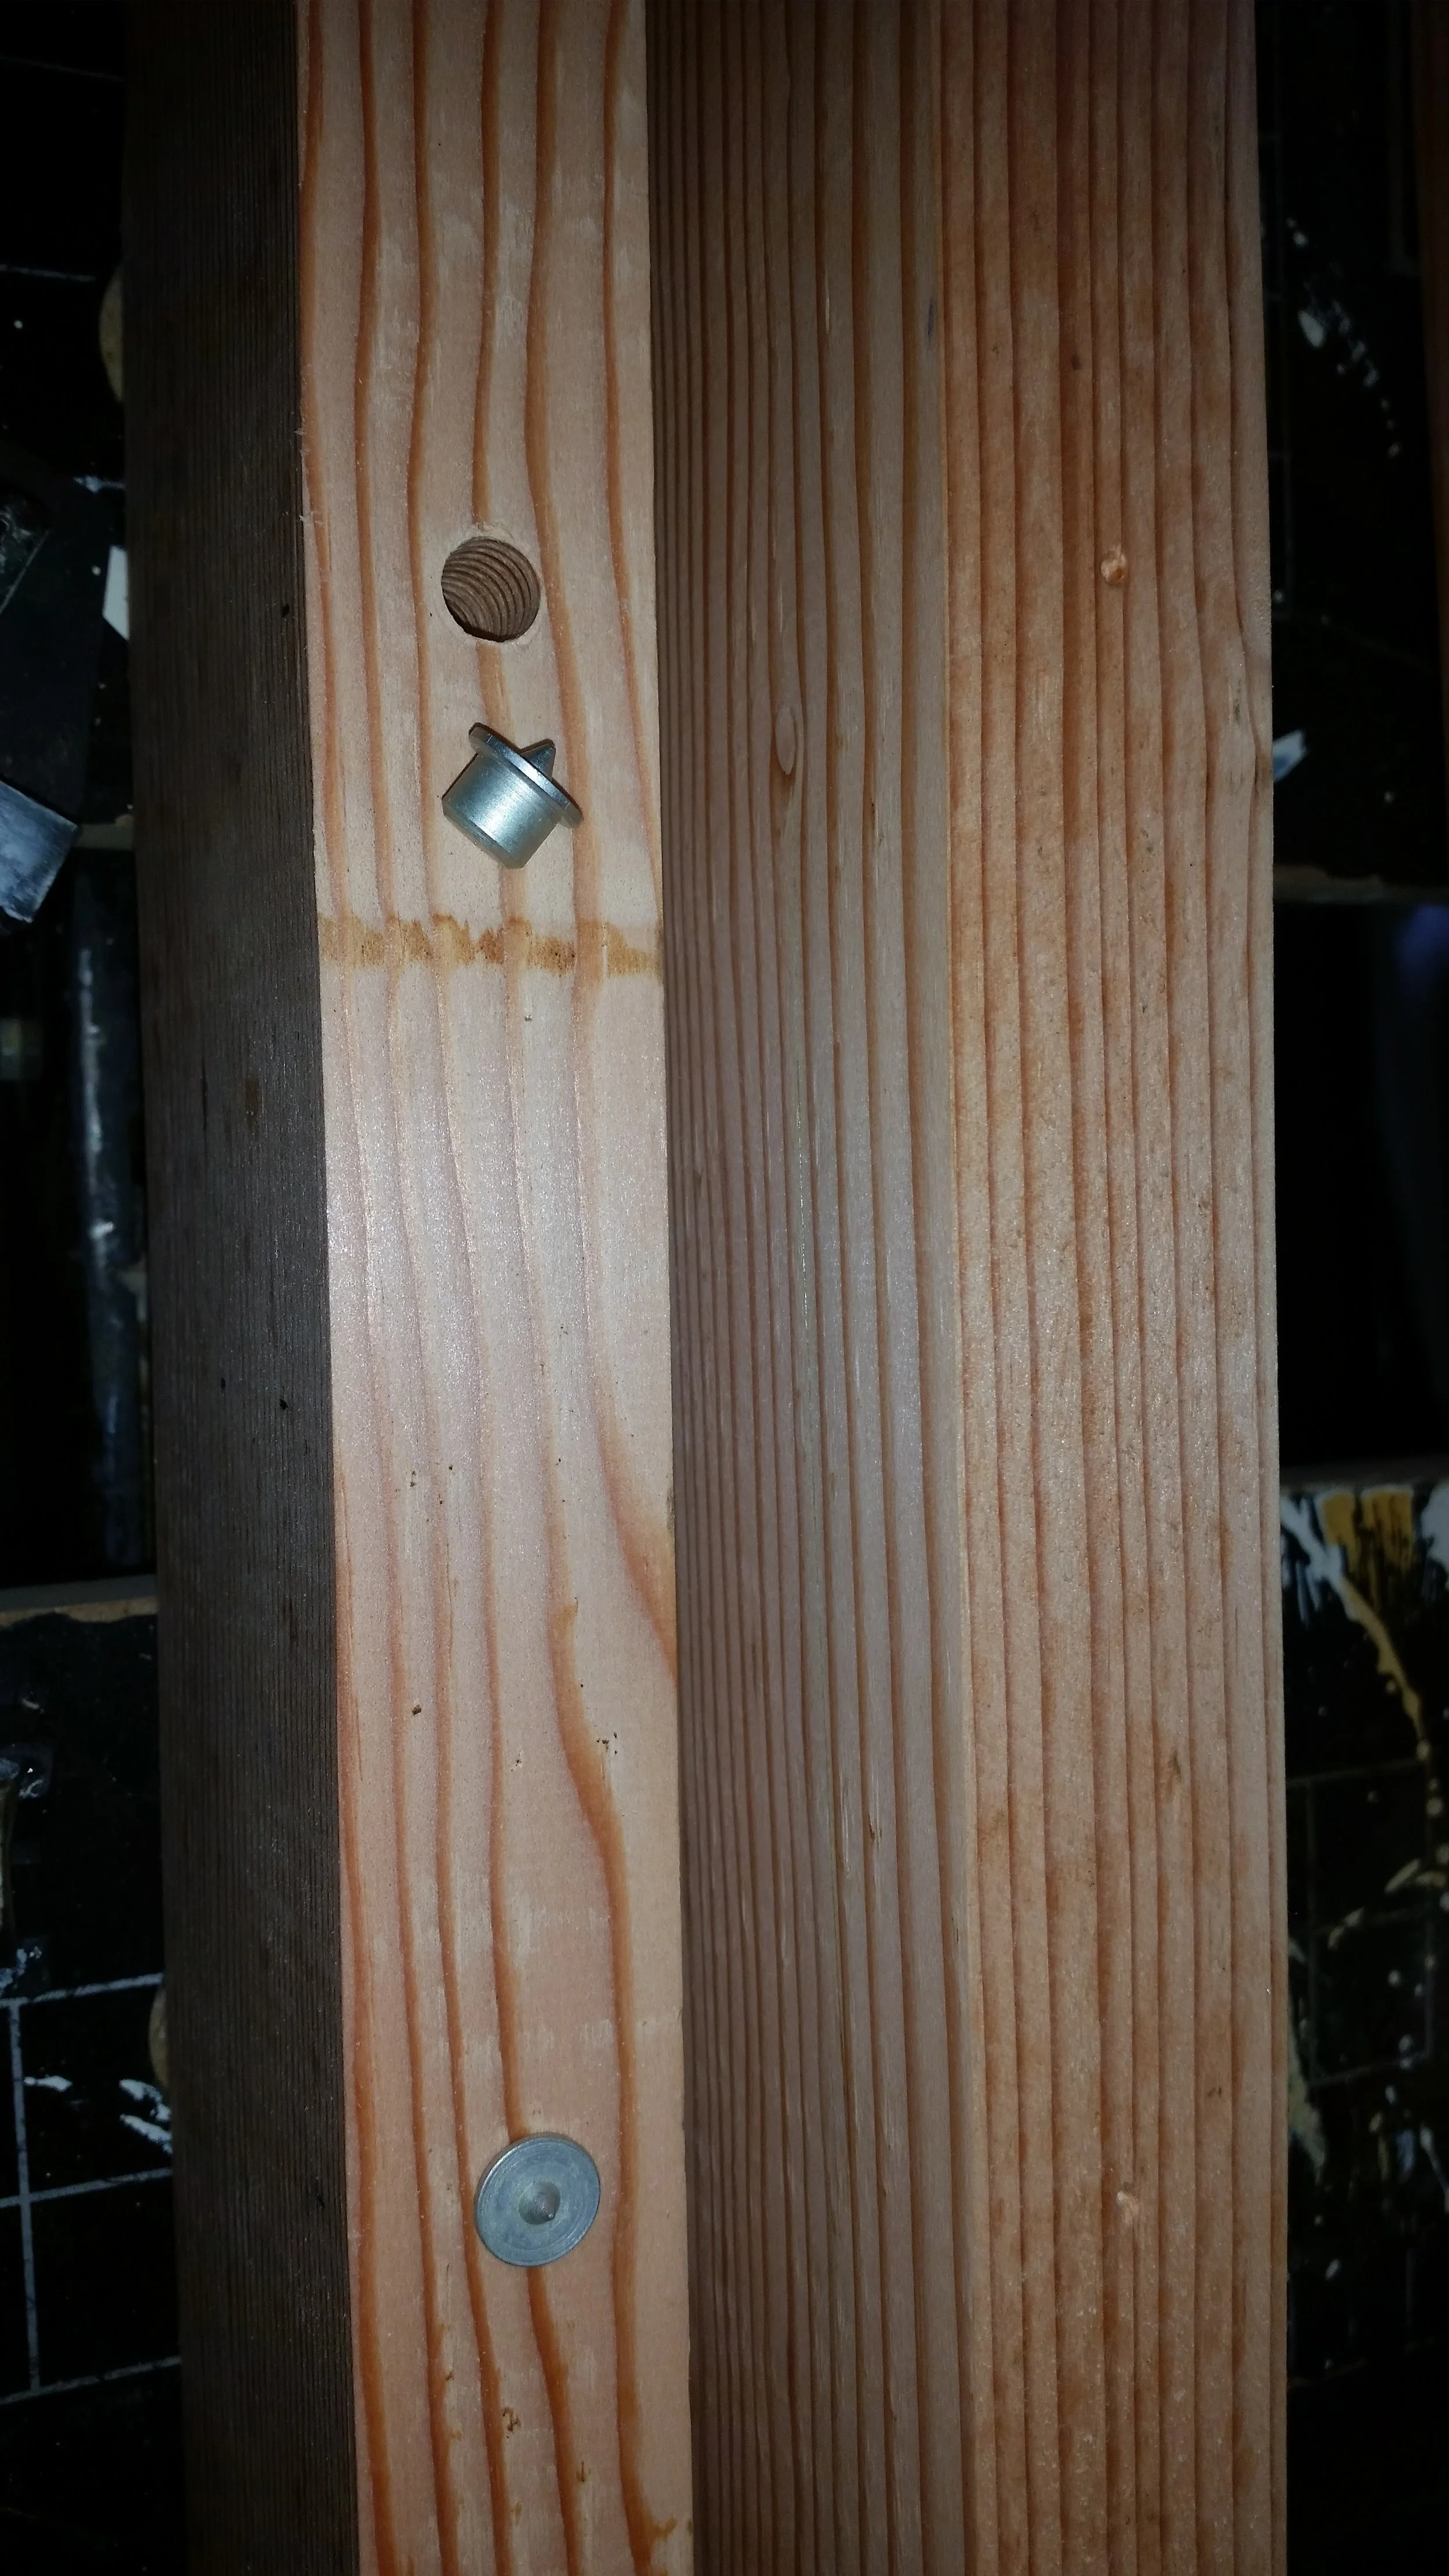
The process is simple and straight forward, simply drill two holes in the top of the bottom strake using a drill press and then insert the dowel centers into the holes. Now position the faying surfaces of the planks and press them together, the pins will mark pilot divots into the opposing strake. Simply drill the opposing holes on a drill press making sure to follow the marked divots.

Following this simple procedure, the holes could all be drilled in a uniform fashion. The dowels themselves were set to stagger that was I would avoid running into a previous hole if the strake were rather thin. I also made sure the bottom and top strake would not have the soft wood dowel exposed after I trimmed up the shape of the transom.

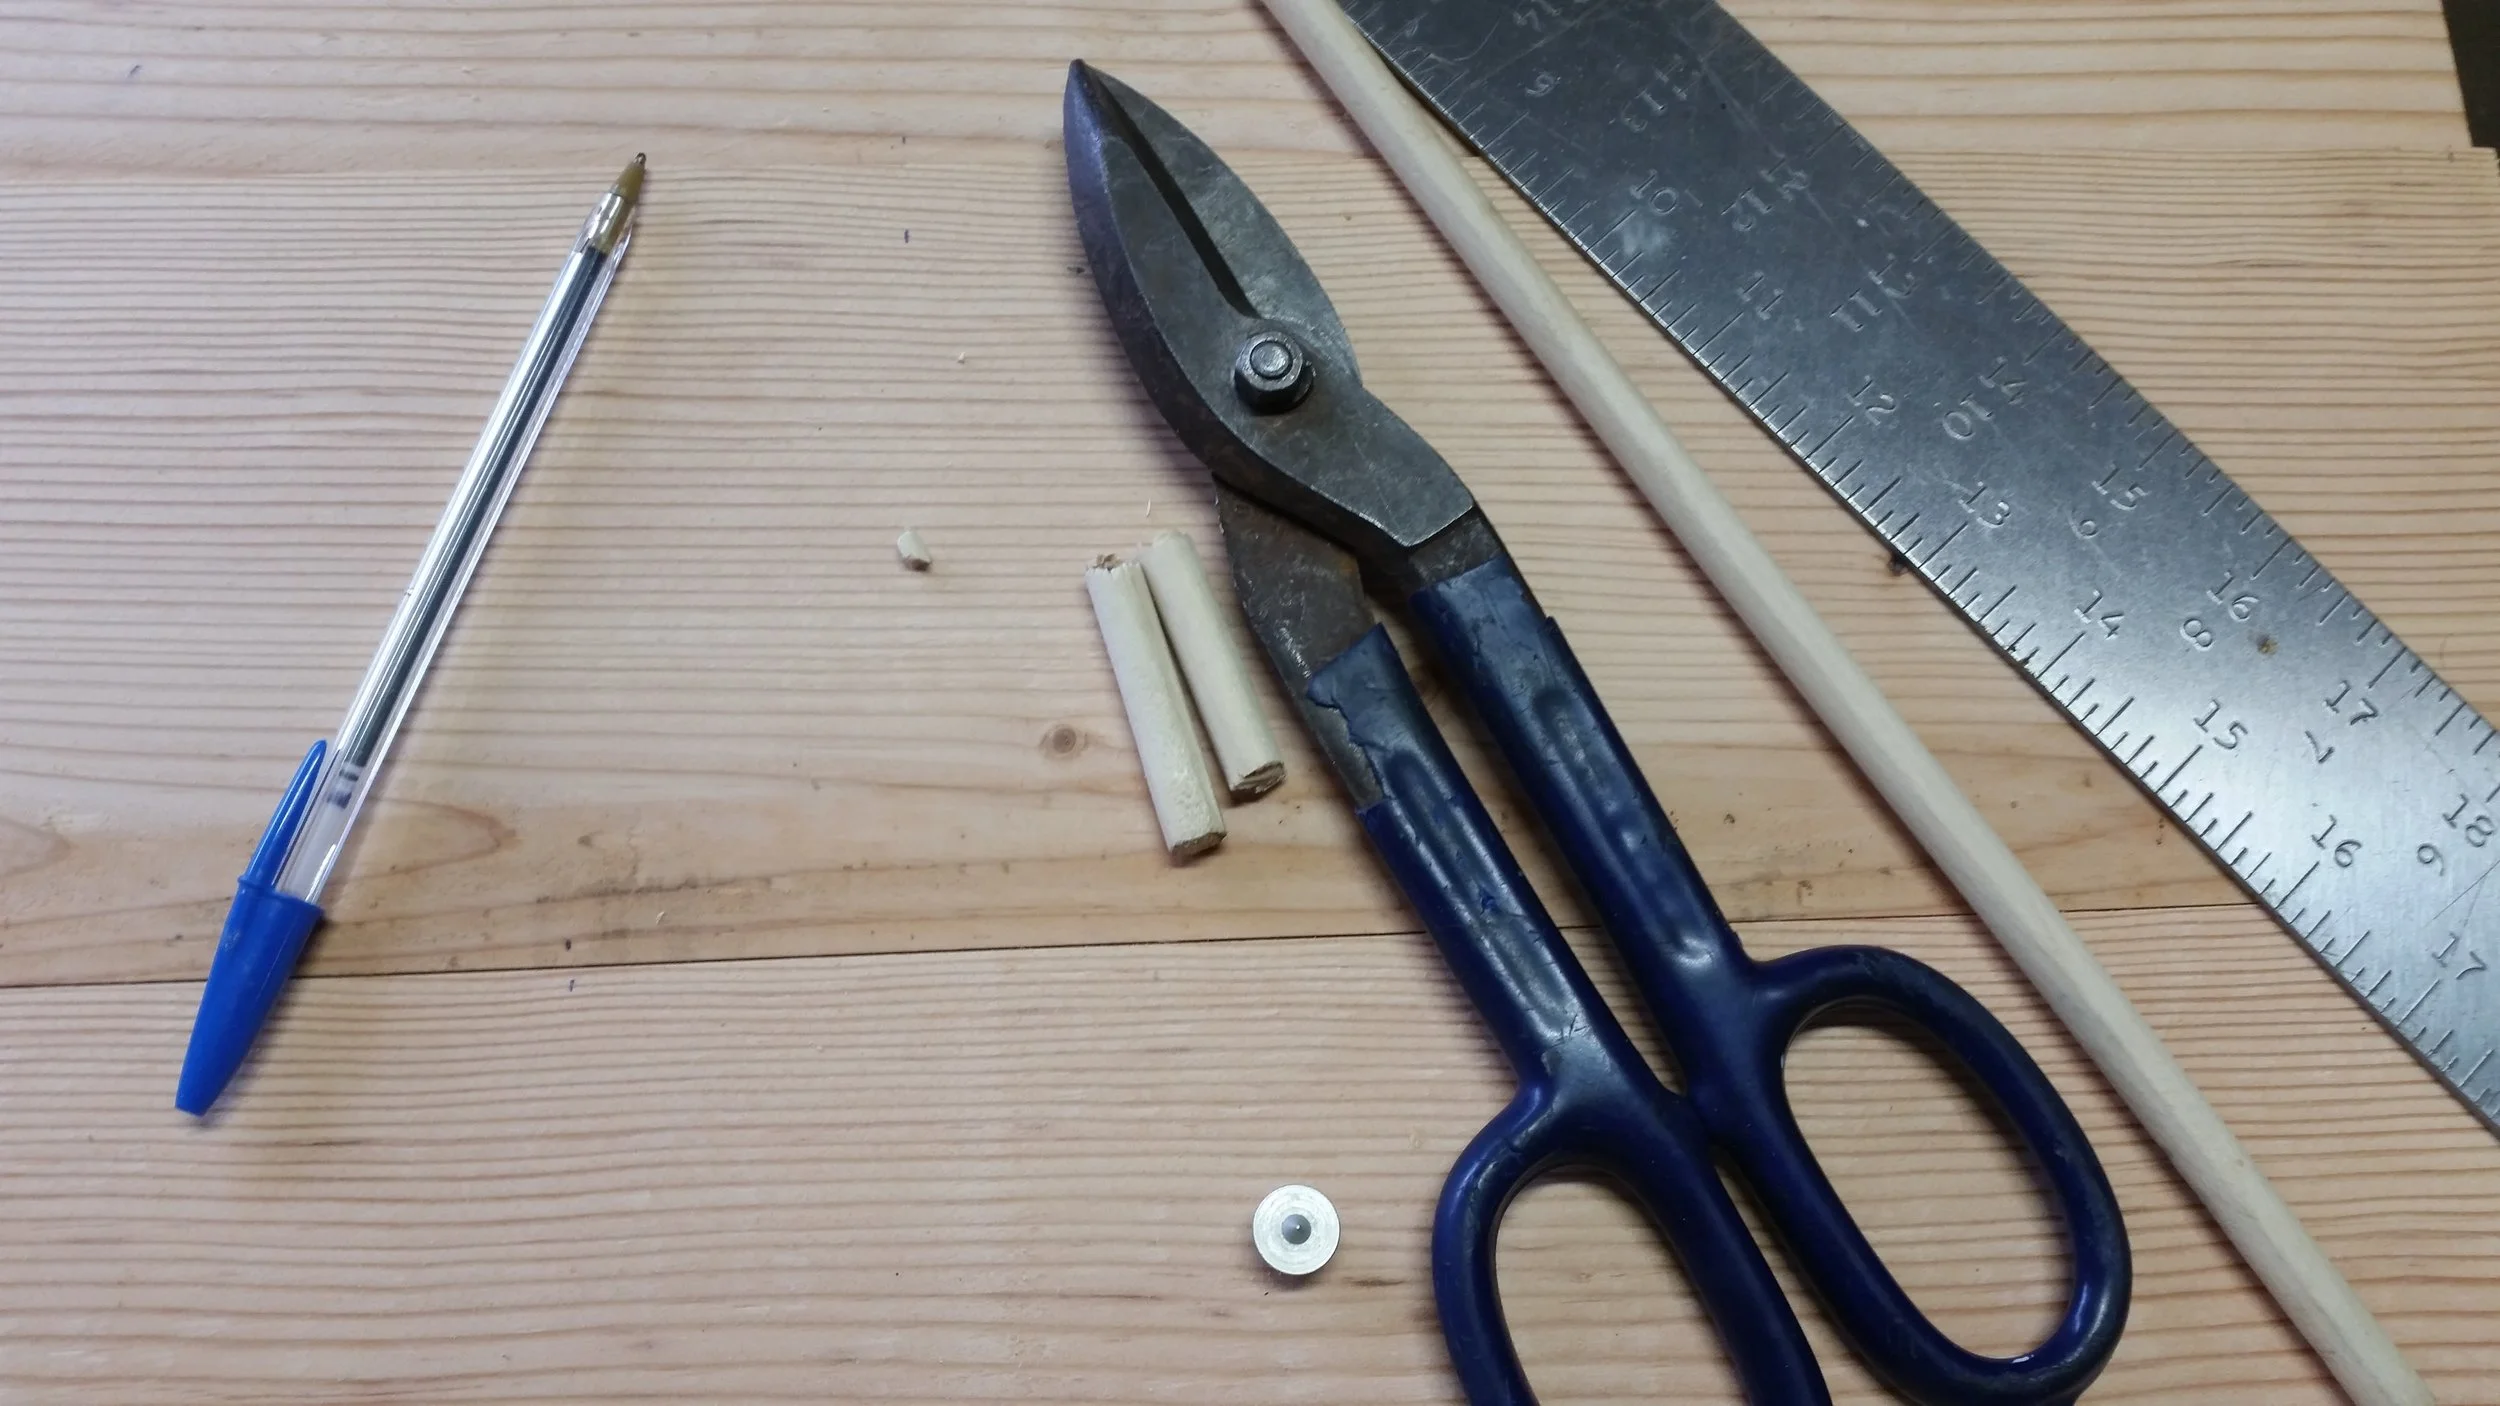
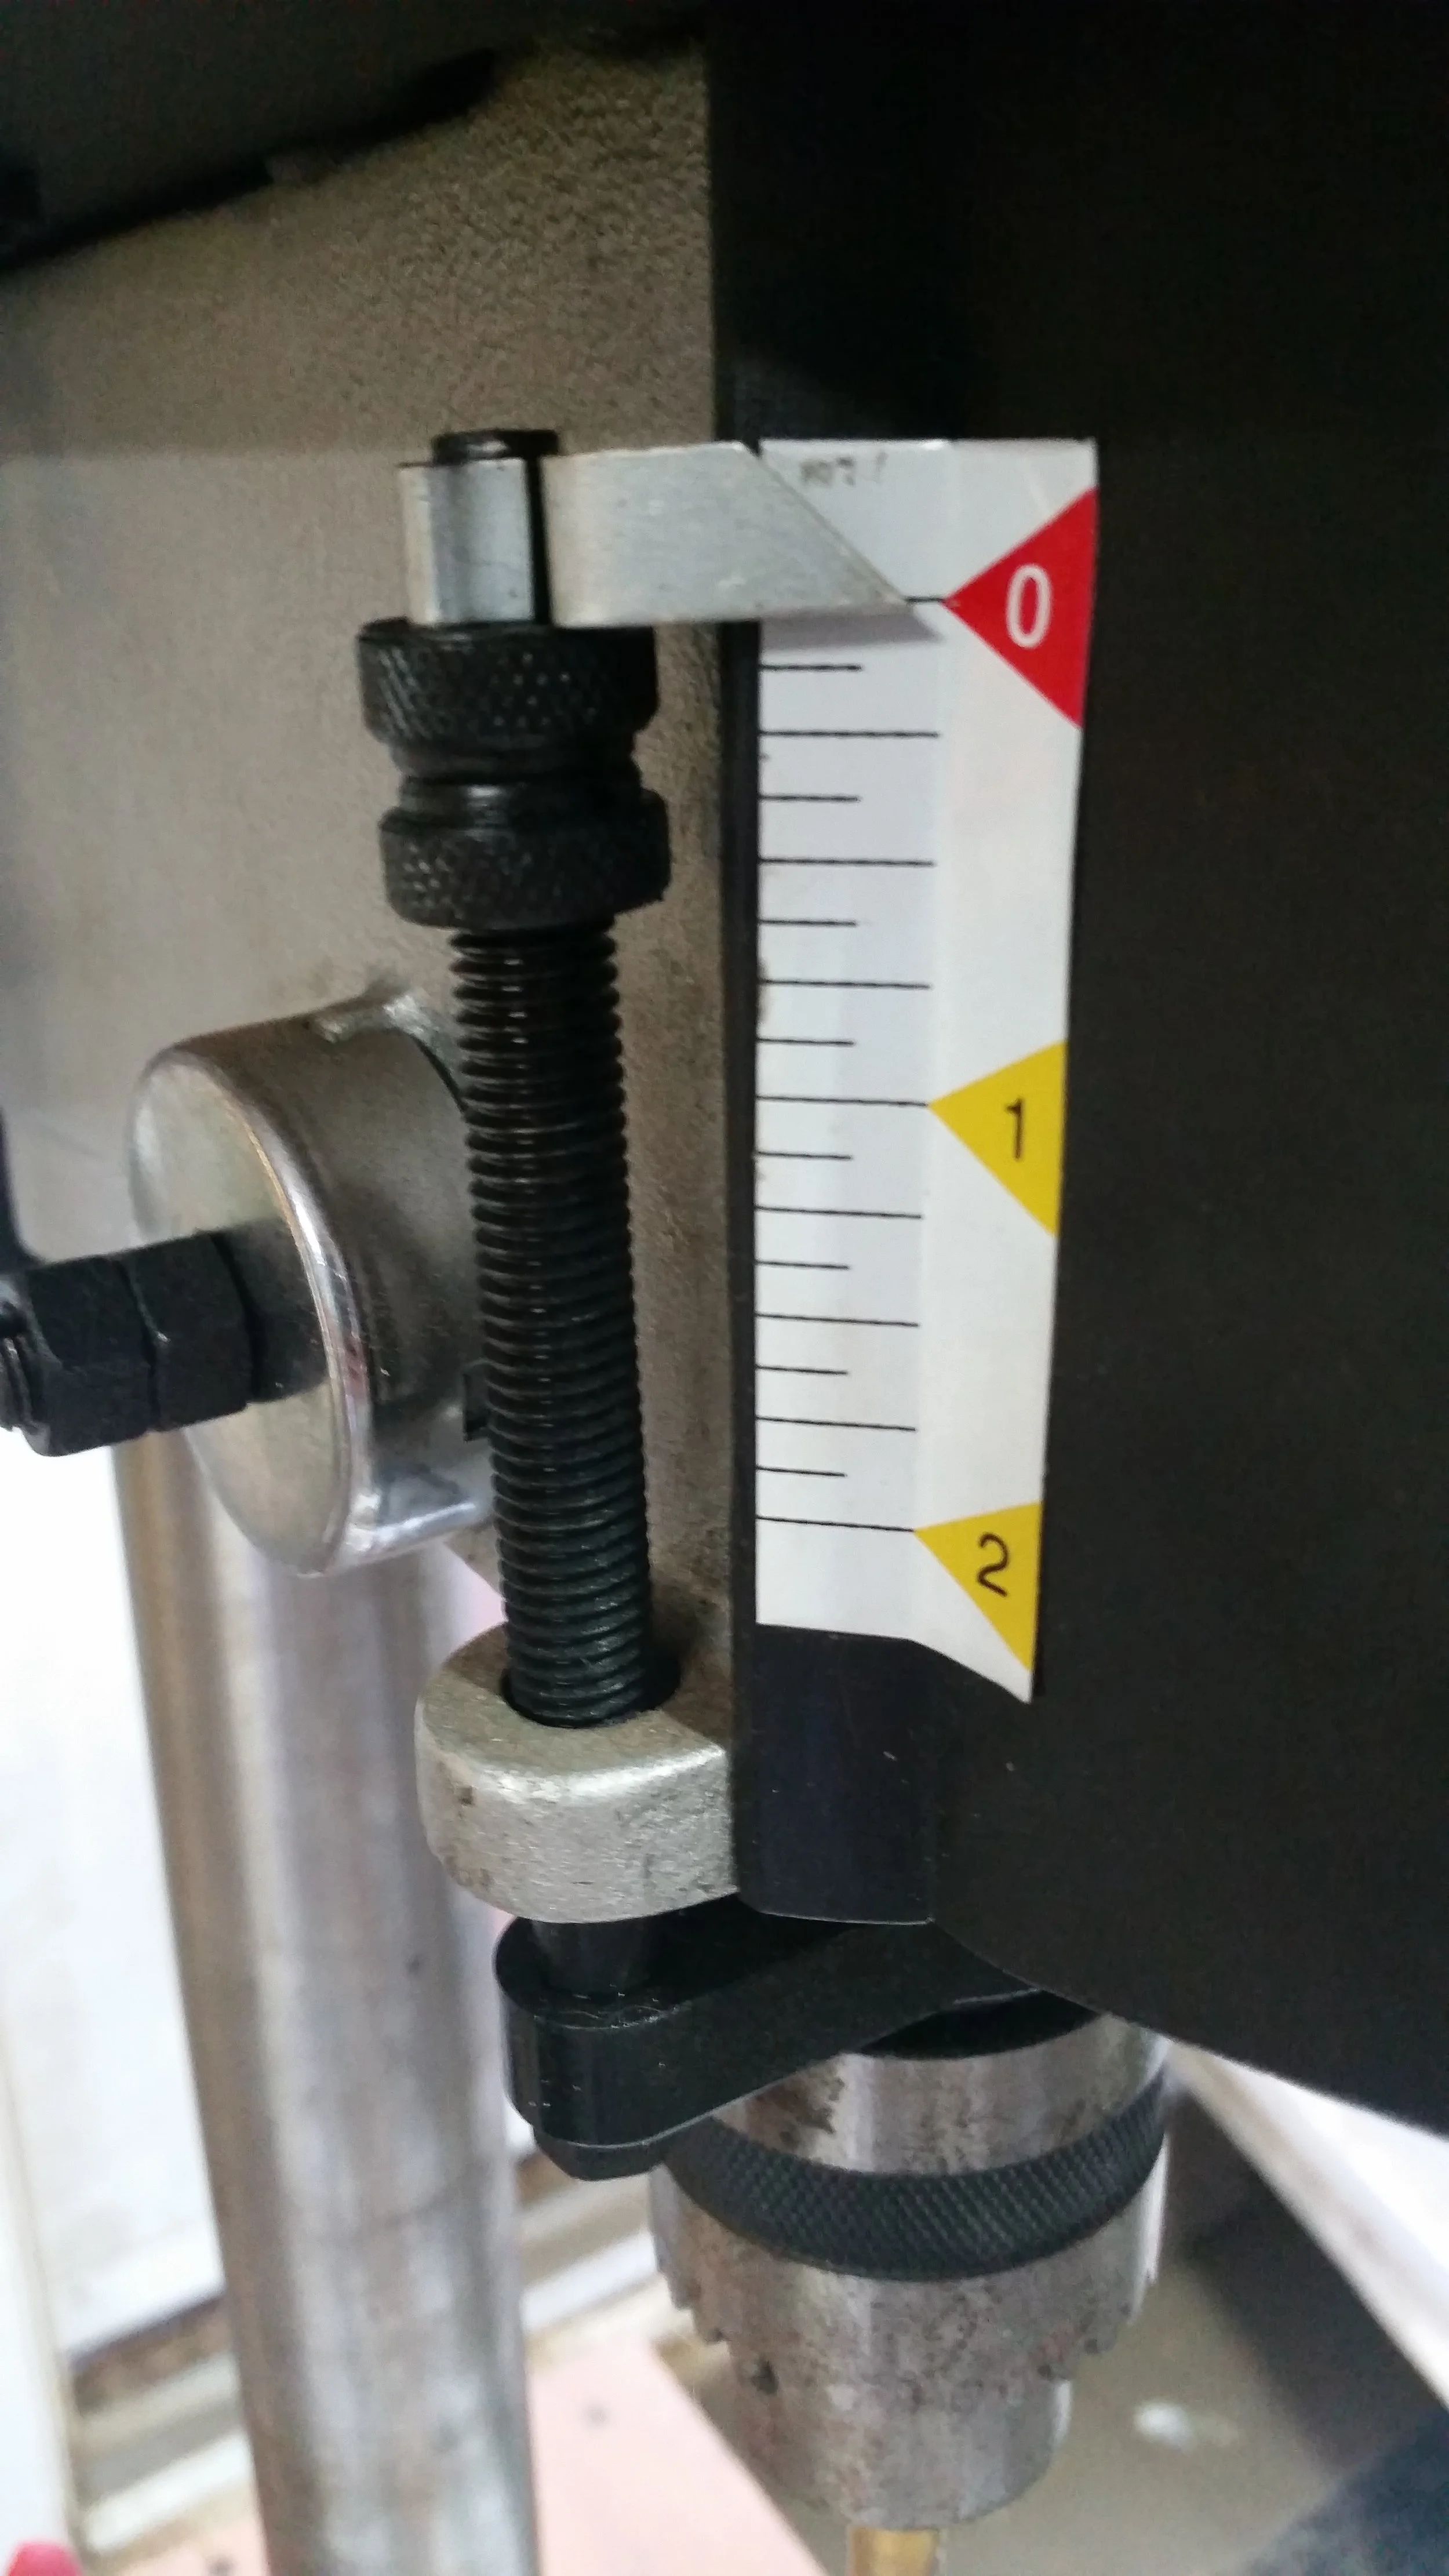
The dowels were easy to cut to size using strong sheers. The soft wood cuts with the sheers just like scissors and paper. The dowels were cut to 2 inches, and set into holes that were 1 inch deep into each plank. I followed the gauge on the drill press for controlling the depth of bore into the planks.

With everything cut and drilled, we are ready to glue and bed the planks together and let the curing process begin!

Reusing a Shackle, Halyard Eye Splice

Your current halyard shackle may be working just fine when your halyard needs to be retired. Reusing your current shackle will save on the cost of replacing your halyard.

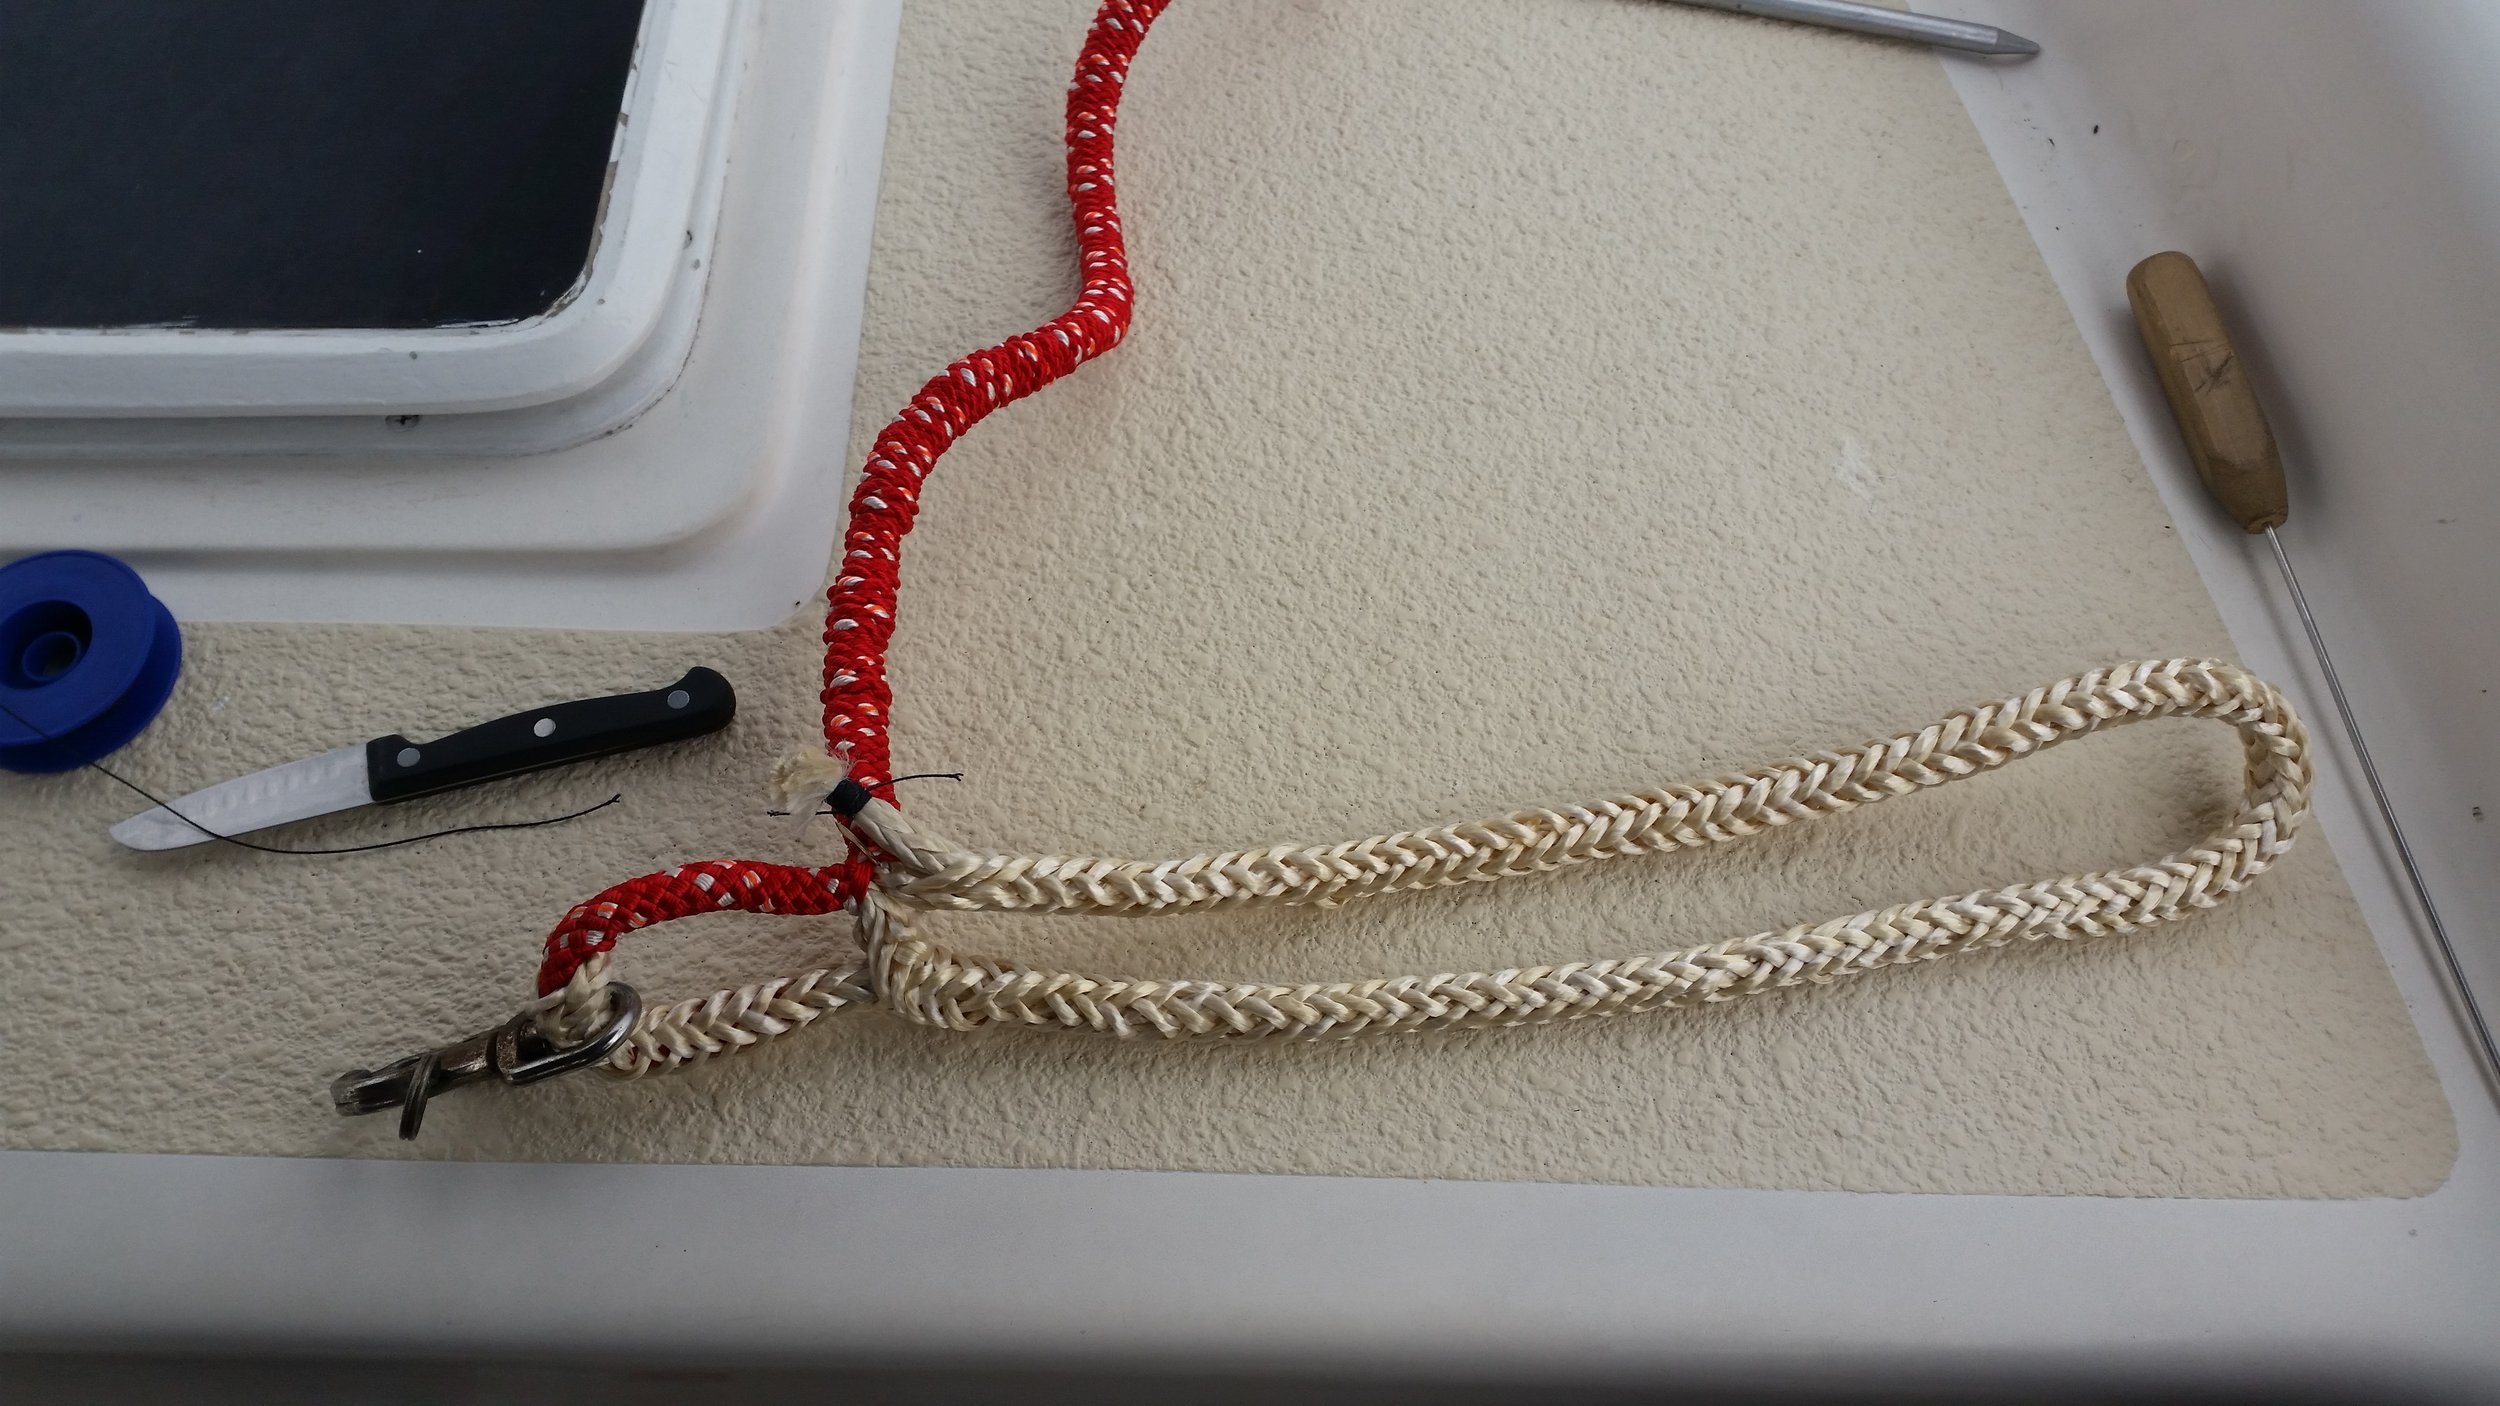
While this shackle may look rather old and worn, the owner of this yacht trusted it and wanted to reuse it on his new halyard.

The most important thing to remember when splicing your shackle to the new halyard is to remember to slide the shackle onto the line before you make the eye splice in the halyard!

In this example, we are going to use 10mm VPC from New England Ropes. The first step is to pull the core out of the cover. Be sure to insert a needle through the rope just next to the area where you pulled the core out to avoid the line from scooting around.

At this point, the simple straight forward-ness of a Double Braid Class II eye splice ends.

The cover is fed into the core and then tapered gradually to reduce any hard steps that could result in stress points on the halyard when under load. At this point, the core and cover trade places and the cover is fed into the core and the core becomes the cover.

With the cover inside the core and tapered gradually, it is time to complete the splice. Further down the line, you want to pull the core out of the line. You want to pull out plenty of core to allow easier work while splicing. Also, be sure the slide the shackle onto the tail, all the way up to the loop that you pulled out.

The splice will be as big as the span between the cover entering the core and the beginning of the loop. The use of needles through the line will prevent the line from scrunching up in the area of the eye.

Instead of tape, I simply whipped the end of the core and inserted it into the back of the fid and fed it through the loop.

The eye splice is now formed and all that is left to do is taper the tail and feed the loop back into the cover.

Tapering is performed the same way it would be carried out on single braid dyneema. The only difference in tapering the core and tapering single braid dyneema is the VPC core is much softer in your hands compared to dyneema.

With the bury section tapered, be sure to pull the section all the way through the core, ensuring that the area where the cover enters the core now enters the loop as well. With the tail buried all the way in, pull on the scrunched loop to bury the entire tail completely. 

Once the tail is buried into the loop, you need to milk the loop back into the cover. I like to tie the line to a winch or mooring cleat and pull hard on the eye splice and let the cover swallow the core back up. At the very end, you will have triple thickness (Cover, Core, and Core) line entering the cover designed for single thickness. This basically means that you need to pull really hard in forceful snaps to get the last bit of loop to be swallowed up by the cover. 

Once the eye splice is complete, you need to whip the splice to lock it in place. You must use a needle and whipping thread driven through the cover and core to lock the splice in place. The whipping does help to make the splice look prettier, but it also serves as a structural lock to hold everything in place.

Siding Butt Joints

Butt joints are a nifty trick that lets you plank a row that is longer than the longest board you have available. Siding planks tend to come in twelve foot sections. On regular houses, a single wall could be much longer than twelve feet and butt joints are necessary. On tiny houses, butt joints are used for different reasons.

Due to windows, doors, and other features on the side of a tiny house, there are rarely sections where a twelve foot plank will not reach. Instead, butt joints are utilized to use off cut siding planks. For example:

The windward side is seven feet wide. 
Three inches on each side is needed for trim space, so each plank needs to be six feet and six inches long.

If you cut a twelve foot plank at the six foot six inch mark, you now have a perfectly good plank that measures five foot six inches left over as an off cut. Instead of throwing these off cuts out, you can reuse them on the leeward side.

If you use a plank that is five foot six inches long, you need an additional piece that is one foot long. Connecting them with a butt joint will fill in the necessary length and give the tiny house the appearance you are looking for.

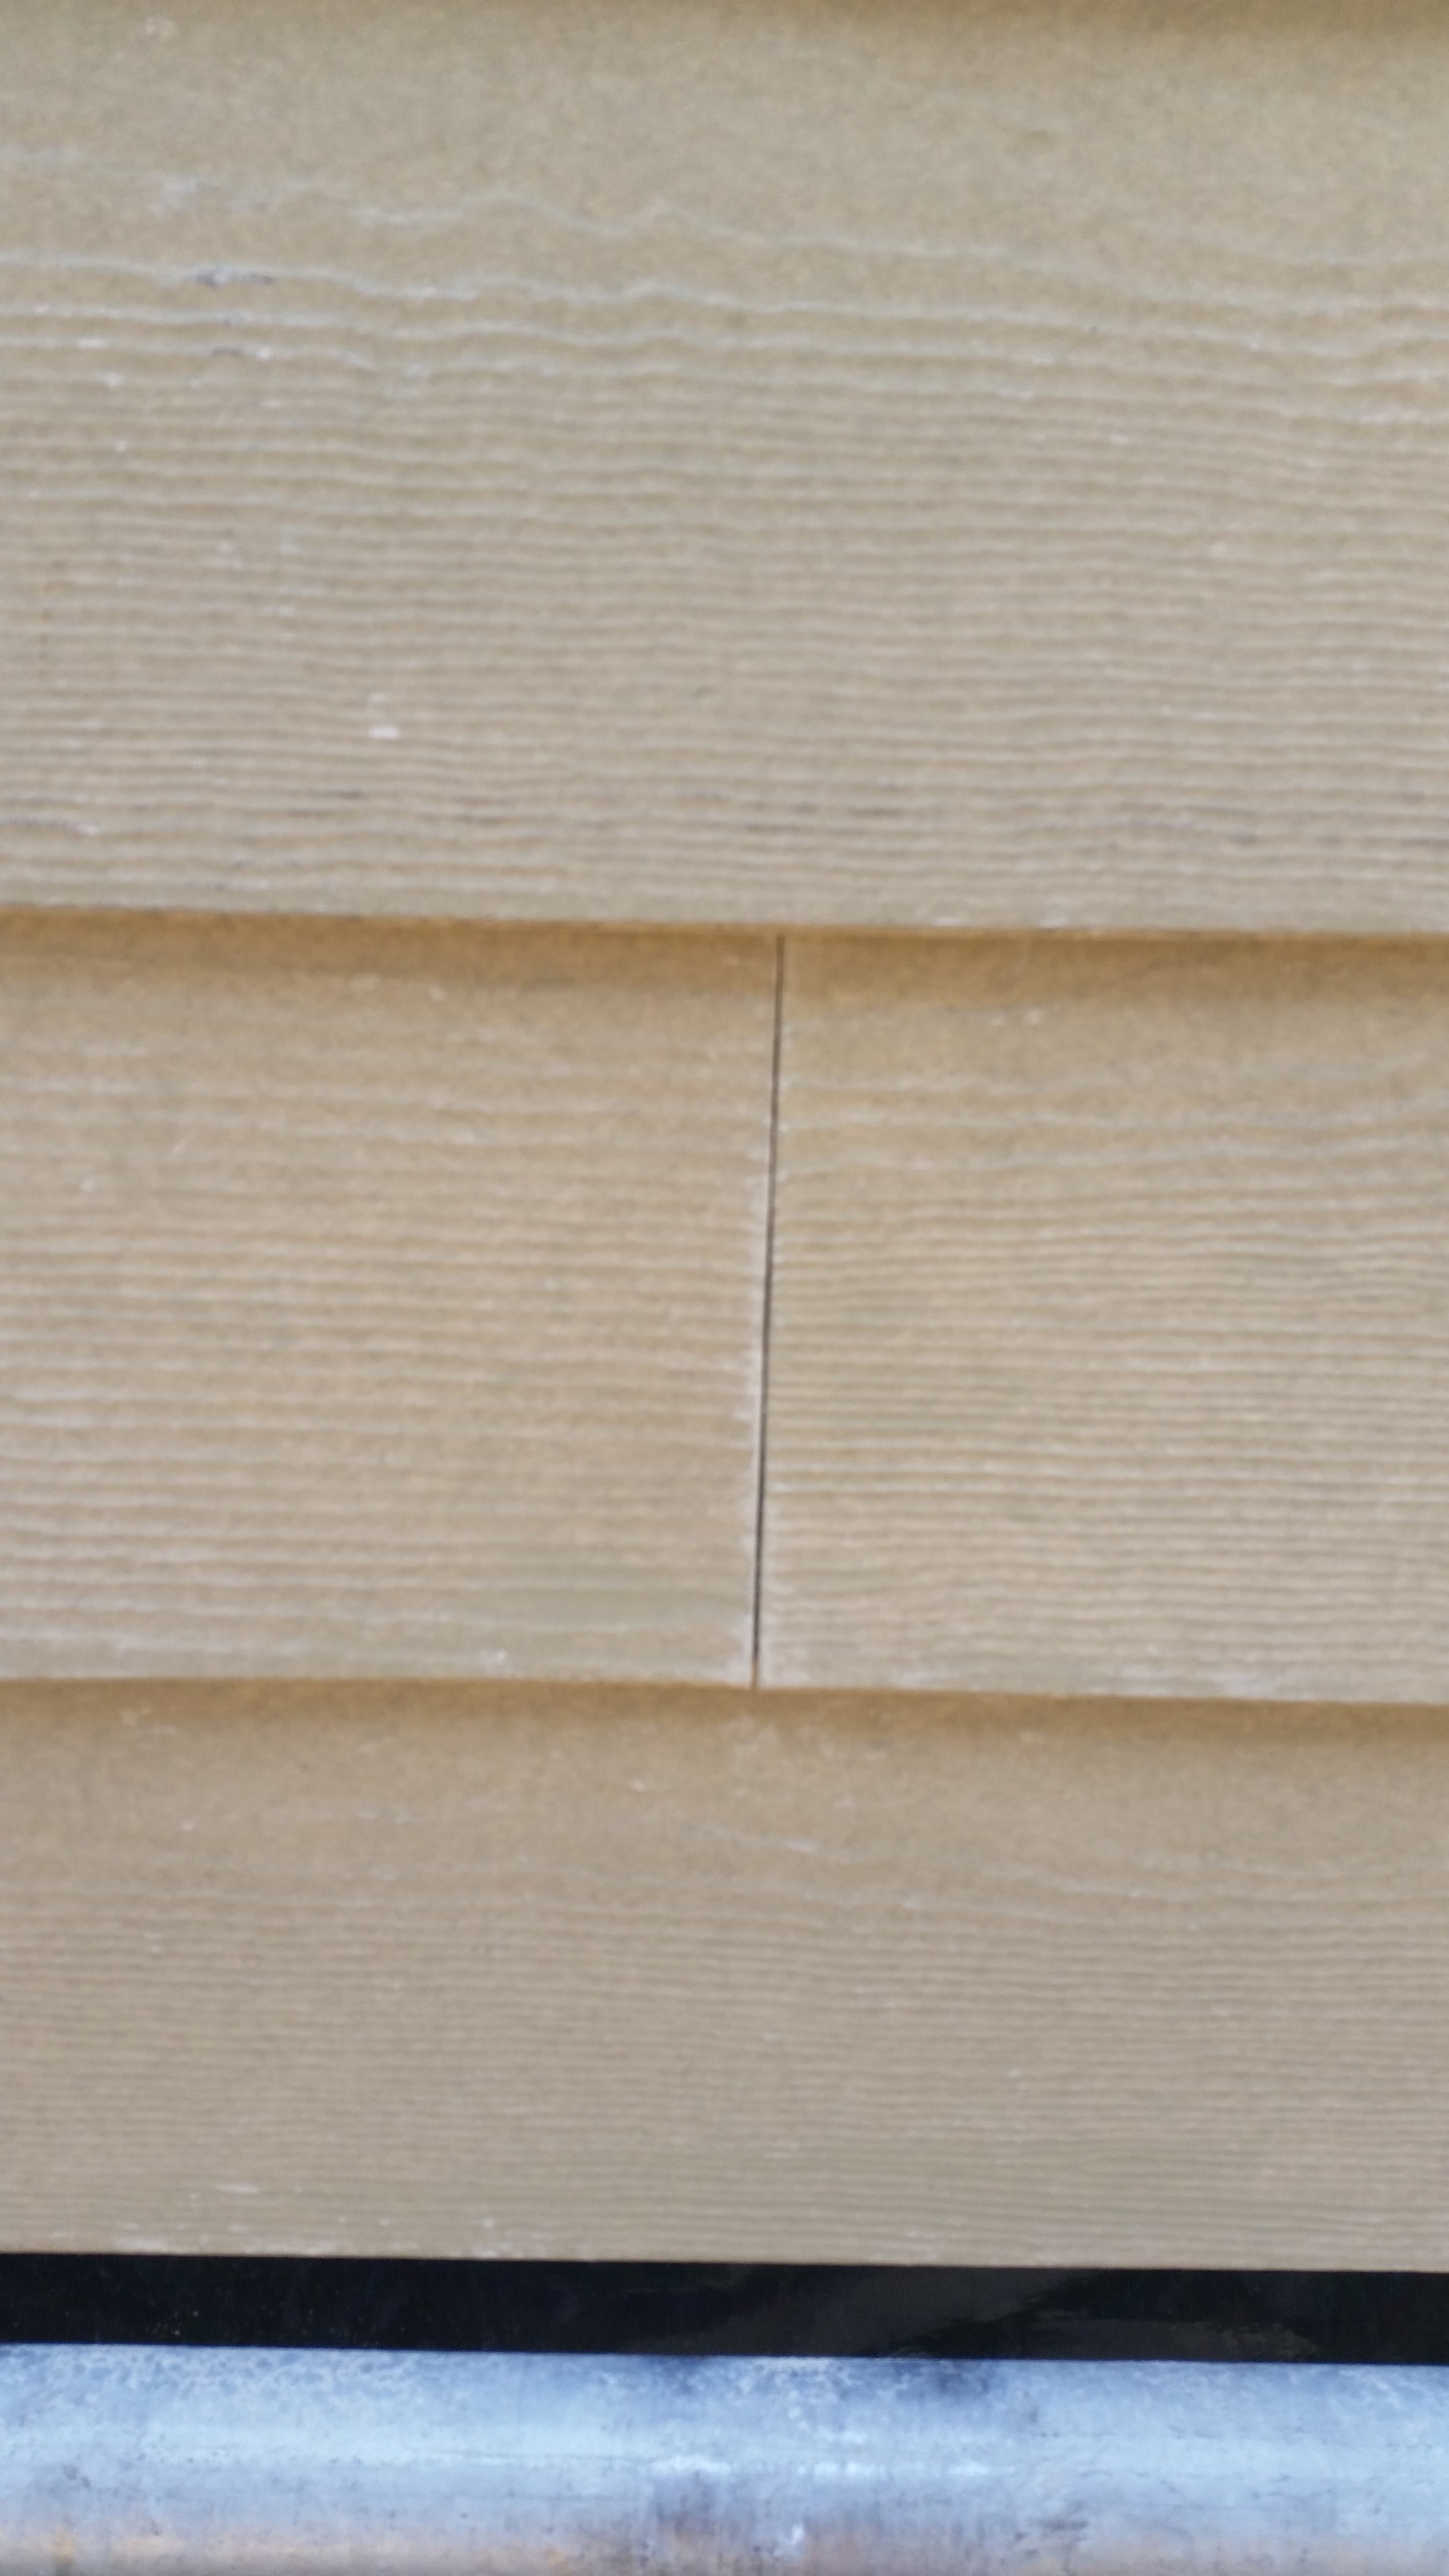
Butt joints are merely edge setting two planks next to each other close enough that they appear to blend together. The corners on the lower end of the butt joint are weaker and can be lifted by strong winds (which is why they should only be used on the leeward side and never on the windward side). 

To guarantee a tight butt joint, be certain to only use "primed edge" sides for the butt joint. The siding planks come coated in primer, and the edges that have primer on them are perfectly square and flat. Edges that you cut with a hand saw may be off by a few degrees. While it may look straight enough in your hand, they will result in an open looking butt joint that will draw a lot of attention.

By placing two "primed edges" next to each other, you are sure to have a very tight butt joint that will blend into the house and not be noticed.

Butt joints also allow water to penetrate the siding, which is why it is a good idea to place extra tar paper under each butt joint. A tar paper shingle will help shed any water that works its way in between the butt joint.

Carefully staggering butt joints on the leeward side of the tiny house will allow you to reuse off cut sections of siding that would otherwise be lost as waste. Reusing your materials will help reduce the cost of materials by reducing the amount of waste you generate. Reducing your costs and wastes is a big part of tiny house living, so why not start this philosophy during the construction process?