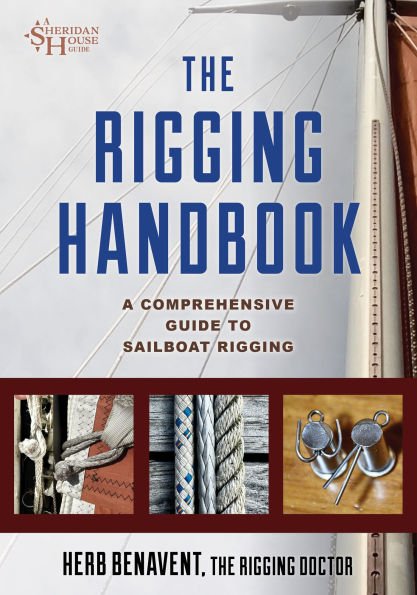
Running Rigging

Swell Bridle

IMG_2730.jpeg

Imagine being anchored or moored in the perfect spot! You are tucked away behind a point of land that blocks the elements from reaching your boat so that you can enjoy some much needed relaxation on an idealized white sandy beach. While on shore, you notice that your mast is really tossing about, and that actually everyone’s mast is really going even though you are protected from the prevailing winds and seas. What is going on?

Being tucked behind a point of land will protect you from the winds, and most of all, the seas that come with the wind; but it doesn’t mean you are safe! Sometimes, as the waves pass by the point, they will actually turn and come behind the point of land perpendicular to the winds. This means that your bow will point into the wind like it always does but your boat will now lay beam to the seas. This is the perfect recipe for a horrible anchorage!

You are in paradise with a terribly rolly anchorage, isn’t there any way to fix the only problem? Thankfully there is!

All you need to do is turn the boat so that it now points into the seas instead of into the wind. Sounds easy enough, but how do you fight nature? The answer is always “Rigging”.

Setting up a swell bridle is very simple, all you need to do is treat your motoring line or anchor rode as a point of attachment instead of a mooring line or anchor rode!
It also helps to have a steady wind that blows consistently to keep you in position. If your anchorage has a particularly strong current, you might need to use the rudder to also help hold you in the right attitude (by turning the rudder away from the anchor or mooring). Since the boat wants to point into the wind and not into the swell, you need to make the boat turn and be anchored from its side.
You could simply tie the snubber or mooring to your spring cleat, but that will relinquish any semblance of control and could make matters even more rolly! To control the attitude of the boat and have it point perfectly into the seas, you want to use a bow line and a stern line in combination. I also like to setup a spring line to the system as this makes retrieving the whole setup easier when you are leaving.

IMG_2728.jpeg

Where to attach these lines? The bow line is tied to the mooring pendant or anchor rode with a bowline or hitch knot, respectively, and led to a cleat. I like to keep this point tied very close to the bow when I’m setting up because it makes everything that follows simpler. The next line that I attach is the stern line which I lead through a snatch block mounted close to the stern and back to a winch in the cockpit. If you are setting this up to an anchor rode, these are the only two lines you will need, if it’s to a mooring pendant then one more line will follow.
The bow line is just cleated off close to the bow while the stern line is led all the way back and to a winch. To control the attitude that your bot will lay to the anchored position, all you need to do is ease out the bow line a little and winch in the stern line. As you do this, the boat will begin to rotate away from the wind (mind you this needs to be setup on the side that you want to have facing the wind) and into the oncoming swell. Simply do a few feet out on the bow line and then crank in on the stern line, then repeat. Being how the bow line is just cleated off, it is easy to let it out but difficult to haul it back in, so going little by little helps negate the need to haul the line back in.
If you do go too far and need to pull the bow line back in, you can always release the stern line and pull the bow line in by hand as the boat swings around and the bow line goes slack, but this also means starting over on the stern line which can be a lot of additional cranking!

Little by little, you ease the bow and crank in the stern, slowly rotating the boat and positioning it broadside to the wind and anchor while pointing the bow into the waves. Suddenly, the boat goes from rolling to gently rocking as the waves move from the beam to the bow. Paradise restored!

IMG_2724.jpeg

With an anchor rode, the snubber becomes the bow line and the stern line is merely tied to the rode with a hitch knot of your choice (I personally prefer the Magnus Hitch). When you are done and want to leave, the stern line is released and the rode is hauled in with the windlass, allowing you to untie the lines as they approach the bow. On a mooring pendant, it’s a bit different!

The bow and stern lines are tied to the pendant with a bowline (that way they both fit through and also requiring less line length from each of these ropes. This setup would make leaving the mooring almost impossible since the bowline can not be untied while under load! This is where a third line comes into play simply to make departure easier. A 2:1 breast line is set.
Simply tie the breast line to the spring cleat, fish it through the pendants eye, and then lead it back to the spring cleat.
I set this line up at the same time I’m setting up the stern line while it’s close to the bow before I start to rotate the boat, but if you didn’t, it can easily be rigged with the aid of the dinghy or a swim.
Having the line go out and back creates a 2:1 purchase system which means that you can pull the mooring pendant close amid ship without the aid of a winch (as long as it’s not too windy). By pulling the eye close amid ship you can then release and untie the bow and stern lines when it’s time to leave. Leaving the mooring is easy, simply untie one of the ends of the spring line and pull the tail through the eye quickly as you drift away beam to the wind. Once the line is back on deck, you can then start spinning your propeller without fear of fouling it with a line. If you wish to sail off the mooring, simply raise reefed sails before releasing the breast line. Once you are free, you can set more sail as needed.
Swell bridles are a wonderful trick to have in times of need, but it is important to only use them for short duration and while you are with the boat. A wind shift could cause the boat to cross over to the wrong side and the keel can chafe on the rode or mooring line. If the winds pick up, being broadside will present a lot more windage and you could begin to drag anchor! Use it with supervision, and enjoy the peaceful rocking of the boat bow into the waves.

Mizzen Spinnaker

Why do some boats have a mizzen mast?
So that they can fly their Mizzen Spinnaker!

Adjustments.jpeg

The mizzen spinnaker is a spinnaker sail that attaches to the mizzen mast and adds more sail area when cruising off the wind.
While this sail requires a significant amount of work to set, and you can’t change tacks with it up (because the main boom is in the way) it does provide a significant amount of speed, power, and stability to the ride. The boat becomes more balanced as the headsail is not the only sail in operation.

Adjustments.jpeg

While you could get a sail in that space aft of the mast by setting your mainsail, the mizzen spinnaker sail is far enough aft that it doesn’t block the wind from reaching the headsail, meaning you can sail on a deep broad reach without any sail loosing its wind.

Adjustments.jpeg

This allows you to carry more sail on a broad reach while still having a more balanced helm and plenty of power as you sail towards your destination.
The mizzen spinnaker is a great sail, but it is not a sail to set if you are in close quarters or going to be jibing anytime soon. It takes a fair amount of effort to set and douse the sail, making it ideal on a long passage where the sail will be up for hours (if not days)!

Soft Shackles

Hank on sails are wonderful, and so is synthetic rigging! The problem is bronze hanks are a bit brash on the Dyneema and can lead to costly and early replacements of your headstays. The solution: soft hanks.

79DF5FF2-2332-45A0-93E9-6A8D372AEE7F.jpeg

Soft shackles are notoriously large to allow them to loop around all sorts of items, making them very useful in all applications on a sailboat! The problem is when they are really big, they are also really long.
A bronze hank is roughly 2.25 inches long (internal length), meaning that the sail resides about 2 inches behind the stay.
To replicate this same position with soft hanks, the soft shackle needs to be made very small so that it will keep the luff of the sail close to the stay.
I made these soft shackles using 1/4” Dyneema and they are being tested on our next transatlantic voyage.
I will be keeping an eye on how these work out and reporting back on how they hold up!

Mainsail and Trysail

While the trysail is a smaller version of a mainsail, it is not to say the same thing as a heavily reefed mainsail.

Adjustments.jpeg

While some people advocate that a third reef in the mainsail is the same as a trysail, I would like to counter that point.
I personally have a mainsail with three reef points and a trysail, I can tell you that they are not the same animal!

A mainsail, no matter how reefed, will always include a boom. As seas toss you around, the boom can begin to swing around, especially if it looses wind pressure when you go down into the trough between waves. The boom can easily injure parts of the rig and kill anyone it hits! Try sails do not use the boom.
By not being boomed out, they also can be shaped with more ease. A reefed mainsail will always have a flat foot that will extend out over the side of the boat as it follows the boom that is eased. The trysail will remain mostly over the deck. When on a run, the sail will remain with the clew over the deck and simply billow forward a bit. If you jibe, it is no different from a headsail flipping from one tack to another. No drama and no damage!

Adjustments.jpeg

When on a run, the center of effort of the sail is closer to the middle of the ship which means less weather helm which means it’s easier to maintain control in a storm. If you change course and want to beam reach or go slightly to windward, all you need to do is sheet the sail in and it will flatten out.
We find the trysail to be incredibly versatile, even in non-storm conditions. If we are going downwind and need to ease the mainsail far out, the torquing from the boom holding the sail so far to the side of the boat will give tremendous weather helm and it will steal wind from the headsails, compounding that problem!
The trysail will let air go by to the headsails which will pull the yacht downwind and keep the center of effort over the deck to reduce weather helm.
If the trysail is so versatile, why don’t people use it more?

The answer is simple, they have a single tool but not the complete set. This means they can use it but it’s not easy to do so. For most, a third reef is simply the next reef after the second reef. Easy enough to do and they are well practiced at it. But the trysail requires removing the mainsail and sliding the sail onto the track, switching over the halyard and running the sheets to the clew. Doing this in a storm is impossible and dangerous which is why they simply put in a third reef and call it a day!

For me, having the complete kit means that putting up the trysail involves releasing one halyard, pulling another, and tying on one sheet.
Our trysail lives hanked on to its own track with its own independent halyard attached and ready to roll. The trysail track is to starboard of the mainsail track, so the starboard sheet is always attached. All I need to do is toss the port sheet over the boom and tie it to the clew and hoist the trysail up! If the weather is really bad and I don’t feel like messing with the port sheet, then we raise it with only the starboard sheet and just stay in port tack.
With the trysail up, I can get everything tucked away and tied up while the boat sails along comfortably in horrible conditions. If it gets too nasty out there, I can also easily and effectively heave to with the trysail.
This sail is so versatile, I never leave port without it set at the base of the mast ready to hoist at a moments notice. The difference between me and everyone who avoids the trysail is I have created a method to deploy it easily and that convenience means that I can use it easily.

How Long Should Your Docklines Be?

This is a loaded question with three answers to it.


First answer: for permanent docklines in your home slip, the lines should be the length from boat cleat to dock cleat and a little more to tie it off or an eye splice at either end to the exact length needed to keep the boat in the perfect position.
As you can tell, there is no set rule with this one about lengths since these are purpose made lines with one single application.

Bow and Stern: length from boat cleat to dock cleat

Spring: length from boat cleat to dock cleat

Second answer: for the day sailor or weekend cruiser, the lines should be made relative to the boat length. The bow and stern lines should be 2/3rds the boat length and the spring lines should be 1x the boat length. These lines will be used for tying up to new piers or to other boats when you are rafted up. The bow and stern lines will have a short run to their cleat and therefore don’t need a lot of extra line. The spring lines will run a longer distance for and aft so they will need to be a full boat length.

Bow and Stern: 2/3x boat length

Spring: 1x boat length


Third answer: for the serious cruiser, short docklines will not suffice. Day sailors and weekend cruisers have the opportunity to choose what weather they go out in, so they can choose to only sail on the good days! As a full time cruiser, you will be forced to sail in all the weathers: good days and awful nights! Your docklines will need to be up for the challenge.
The bow and stern lines need to be 1.5x the boat length and the spring lines need to be at least the boat length.
Why such long bow and stern lines? Imagine a horrible situation where you enter a port in the dark in a storm and manage to get the bow up to a pier where you can toss a line to shore and be held to a fixed point. You were smart and came up on the lee side of the pier but now the boat is being blown off from the pier and there is no way you can get the stern up to the pier under motor. How do you tie up in this situation? Easy! Having a really long stern line will allow you to walk the stern line up to the bow and toss it to shore. Now all you need to do is pull the stern in from land where you can get the proper leverage and angle to do so safely.
This may sound rather far fetched but we did just this one night in the Mediterranean where we were being pounded by 50 knot winds and short, close together seas. After being hammered for a day and a half, we sailed into a marina and tied up in 40 knots of wind. It was a horrible experience, but we made it through safely because we had a long enough line.
The bow and stern lines need to be long enough that you can toss it from the other position. Being able to toss the bow line from the stern or the stern line from the bow will make all the difference when those rare situations rise from the deep.
Once you are in the slip, you can then tie up the spring lines which should be at least the boats length (but longer is useful). Long lines are also needed if you sail into places with extreme tides. Tides greater than 10 feet are common on the Atlantic coast of Europe and the USA, and when you tie up to a quay and the tide goes out, you will need to constantly adjust your lines (if you tied to a close cleat). This is laborious and time consuming, so it won’t work out! You need to tie to a cleat that’s far away from the boat so that when the tide changes the line just changes angle slightly and won’t need any adjustments. Reaching a far away clear also means that you will need a long line to reach it!

An additional line that will be very handy is a Breast Line. This is a short line that runs straight out from the boat to the pier and is used to keep the boat close to the pier for easy boarding. This line is too short to setup to a fixed pier for a long time as tides will be a bother, but it can be left permanently attached to a floating pier (as the tide will not change the length from the boat cleat to pier cleat).

Bow and Stern: 1.5x boat length

Spring: 1x boat length (or longer)

Breast: 1/2 boat length (minimum 10 feet)

While many lines are convenient to have when tying up, you also need to store them when underway. Lots of thick heavy lines will get in the way when they fill up all your lazarette space! The ideal is to have 2 bow lines, 2 stern lines, 4 spring lines, and breast line.
When we are going to be in a place for a long time, especially if you are going to leave the boat unattended for a long time, it would behoove you to double up the lines. Thankfully, any marina you are leaving the boat in will probably have a chandler nearby which means you can buy some additional lines! When you finally leave the port, you can decide to bring them all with you or retire your older lines and keep the new ones.