
Double Braid Backsplice

Back splices work exceptionally well at preventing the end of a rope from unraveling. It secures the end of the rope into itself and makes sure that none of the strands can work their way loose and fray. A back splice is simply a splice where the end of the line is doubled back on the line itself, tucking its ends back into the line.

An alternative way to finish the end of the line is to whip it, but whipping is not as strong as a back splice. If the end of the line will be subjected to a lot of abuse, whippings can become chafed and break, leaving the tail free and able to unravel. In these situations, a back splice is much more secure and will hold up over the years, even with the frequent abuse.
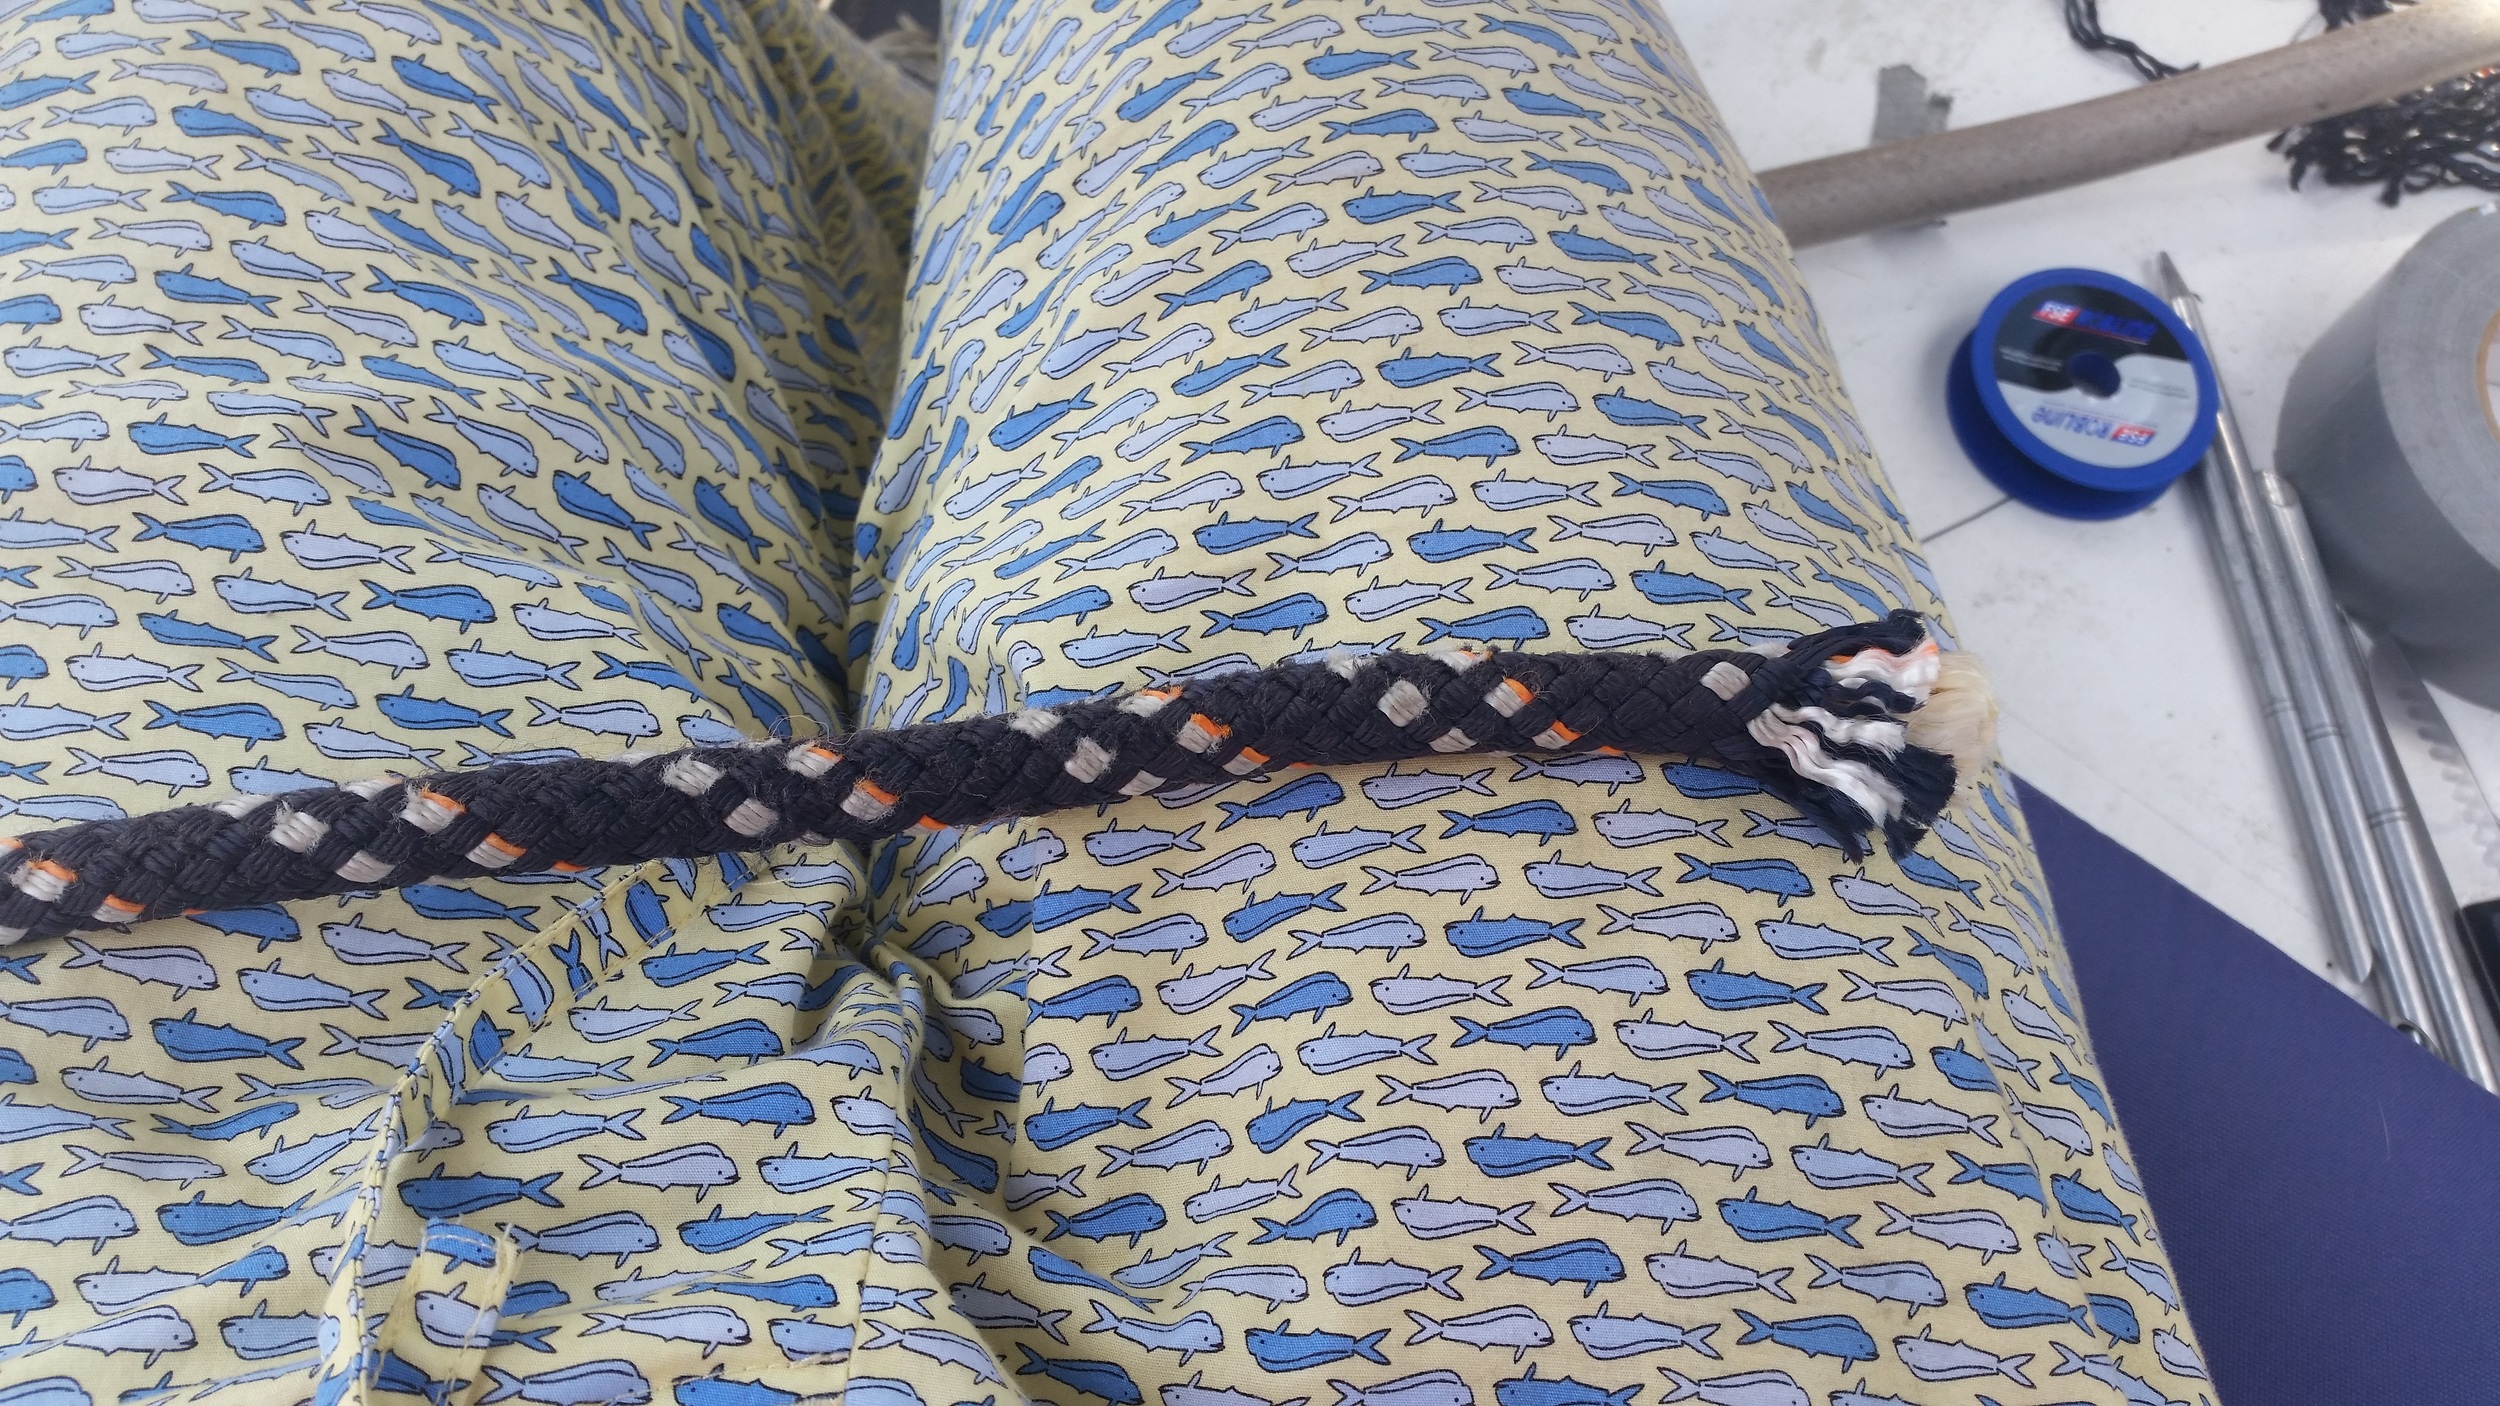
For this example, I will be putting back splices in the ends of our jib sheets. We will be working with New England Ropes VPC, but the methods are the same with any double braid line.
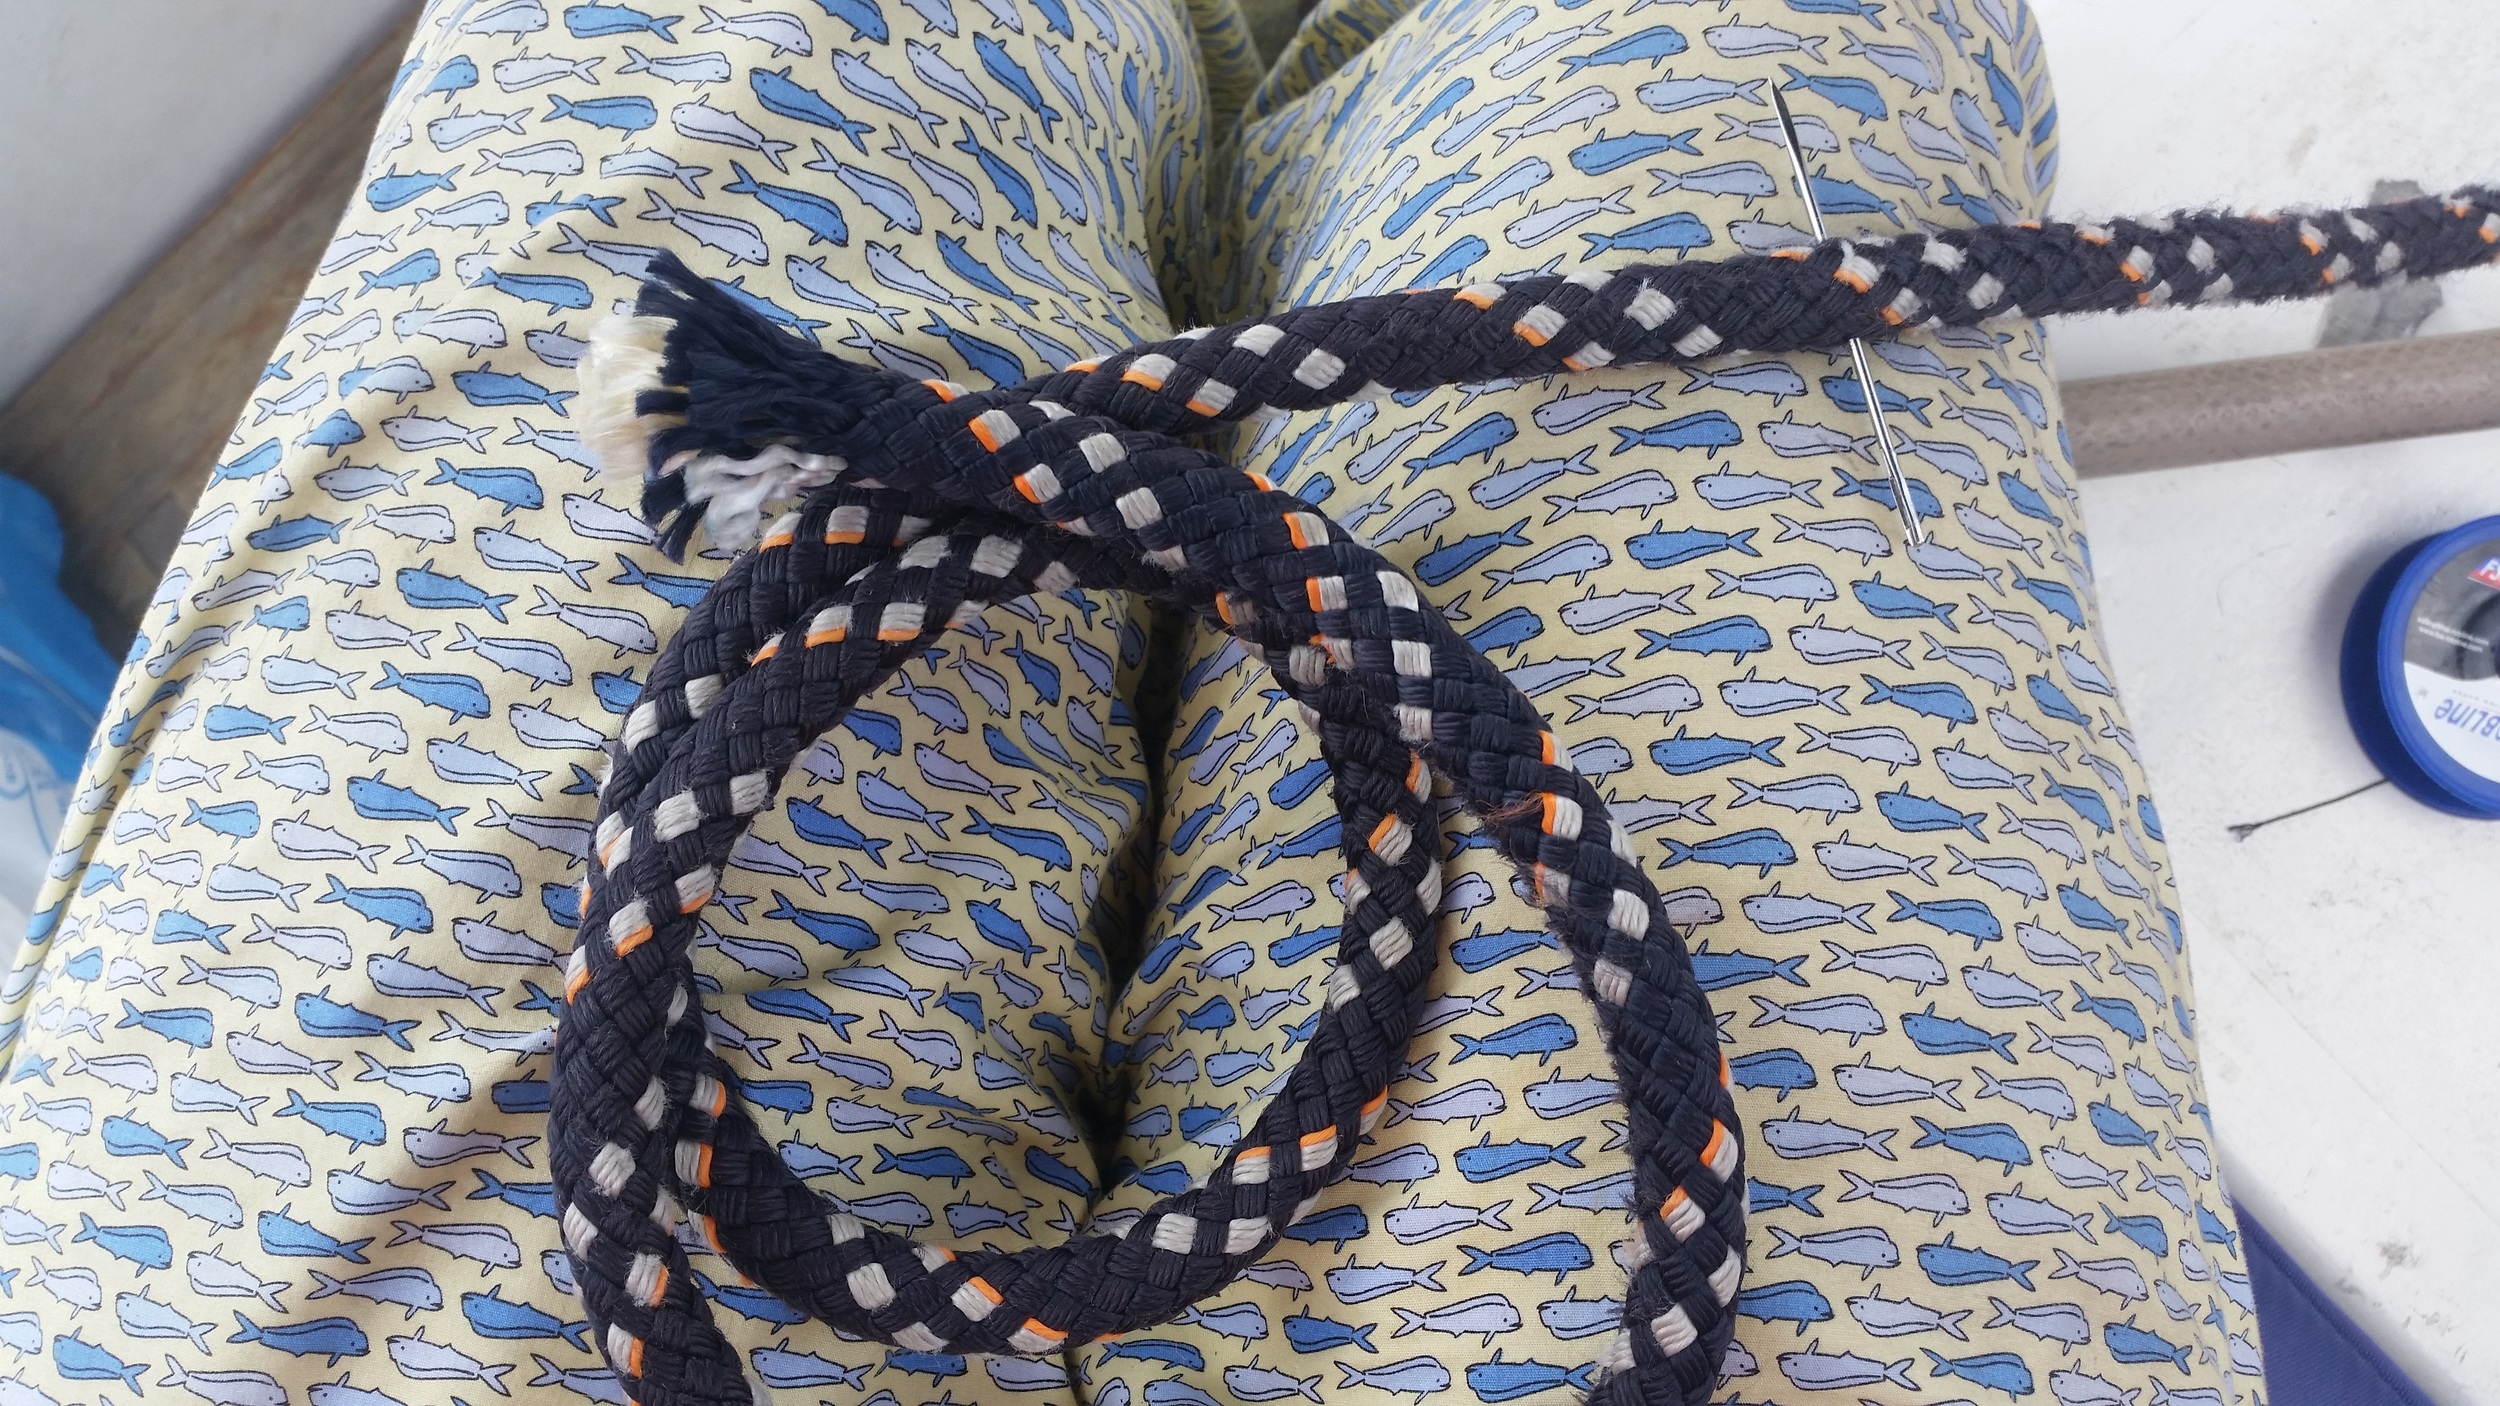
The first step is to place a pin through the cover and core several feet back into the line. This will prevent the core from sliding too far out of the cover and will make your life easier later on in the process.

Next, open the threads of the cover to expose the core further back and pull the core out of the cover.
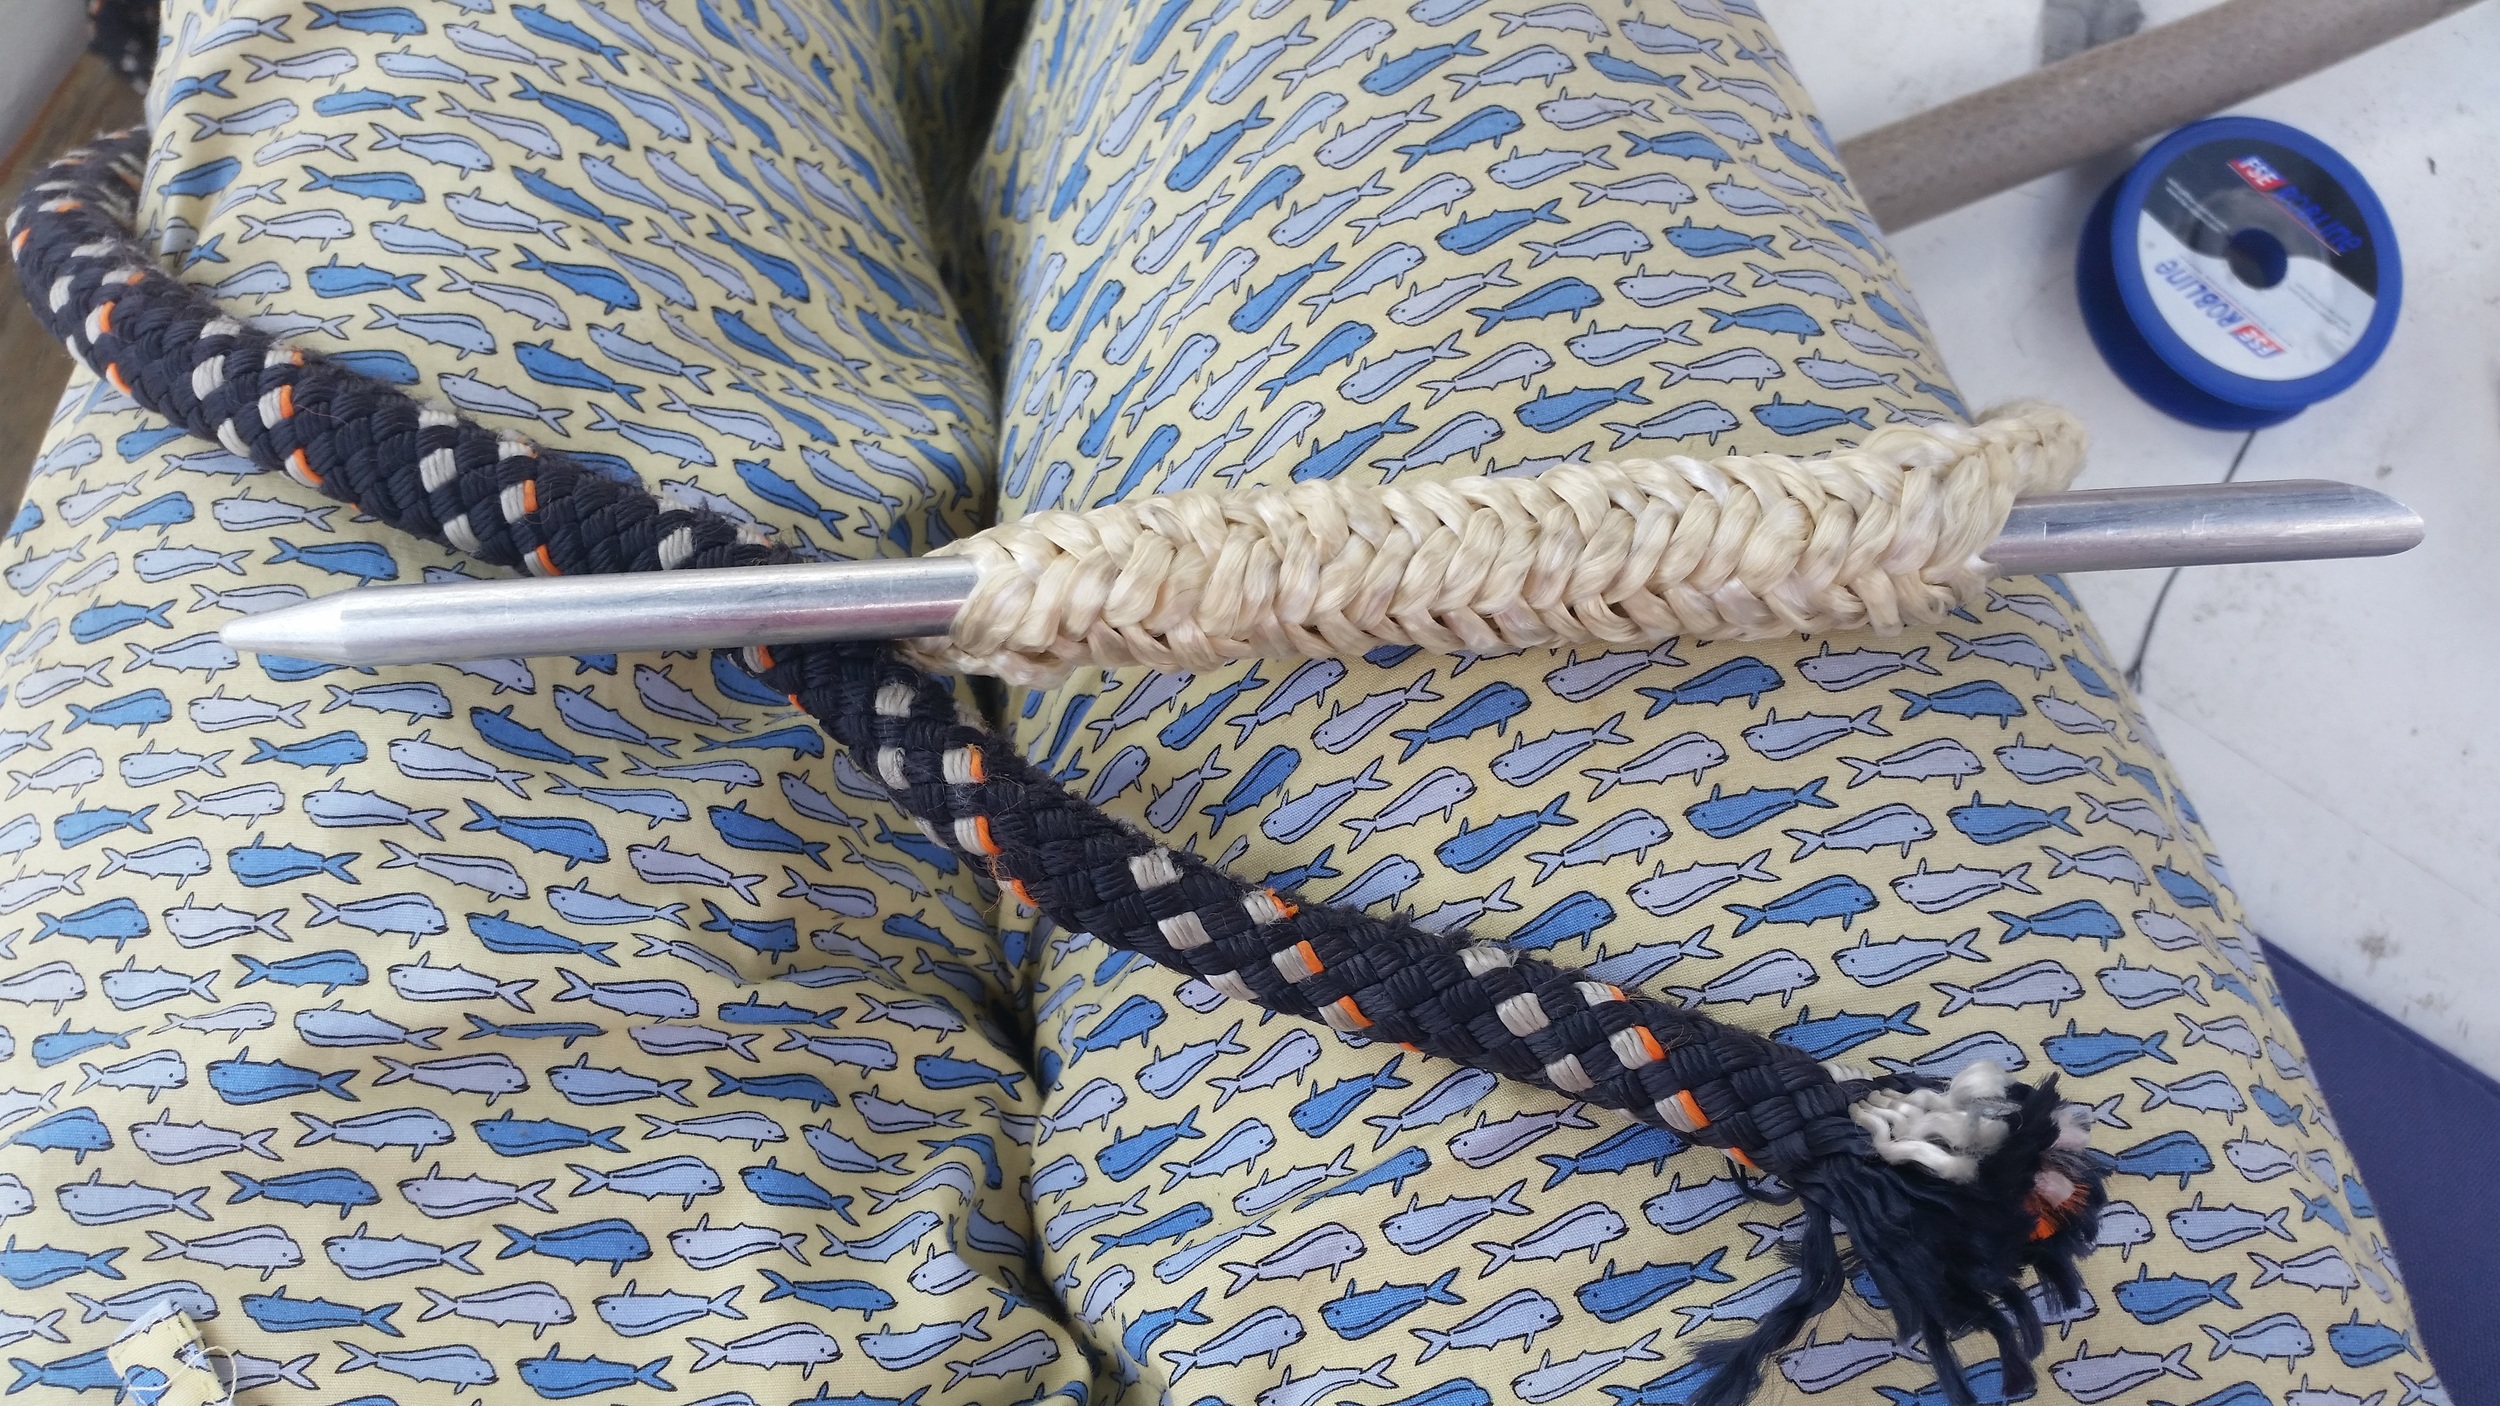
Pass a fid through the core in the opposite direction of the line. The fid should enter the core a few inches back from the end of the line and exit just before the core re-enters the cover.
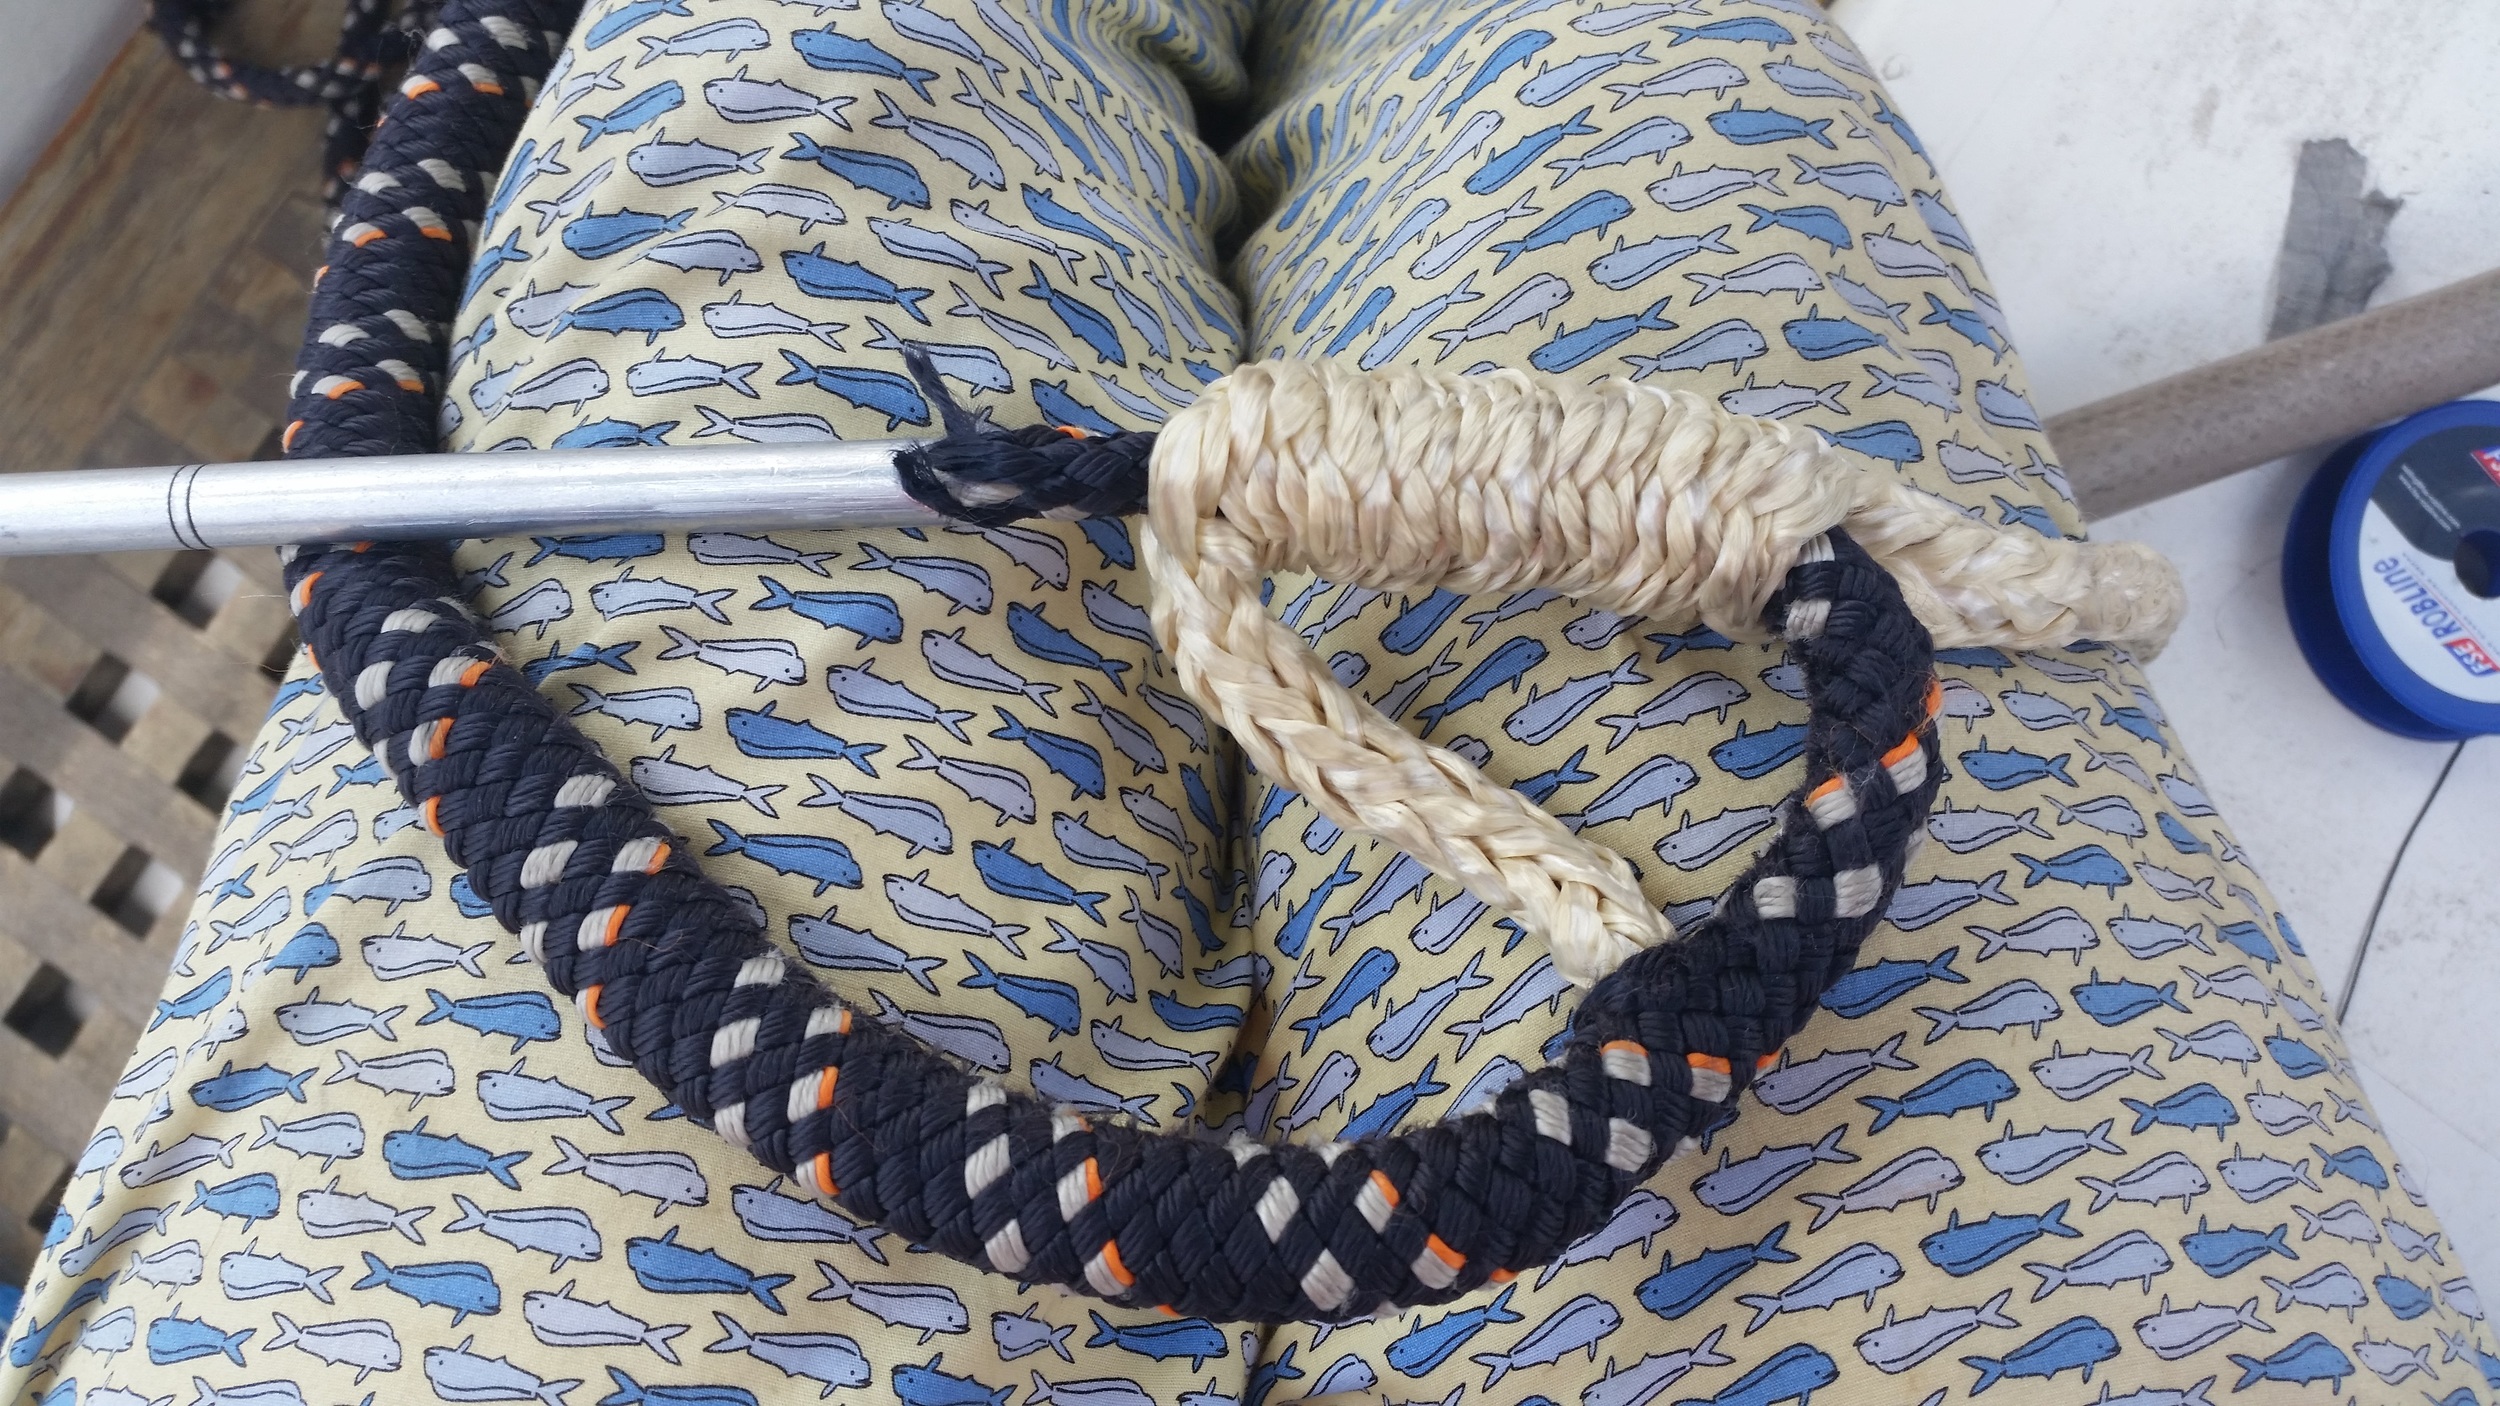
Feed the end of the cover back through the core. This will create a loop where the cover turns back on the core and runs in the opposite direction to the rest of the line.

Pull the cover through the core and well out the other side, allowing the core to bunch up over the cover. Then taper the cover by selectively cutting the threads. VPC is covered in groups of four threads that are woven together. By selecting and removing three of the four threads of each grouping, the cover can be neatly reduced in a systematic and organized manner. This allows you to reduce the bulk of the cover and produce a consistent taper that will still maintain itself neatly woven.
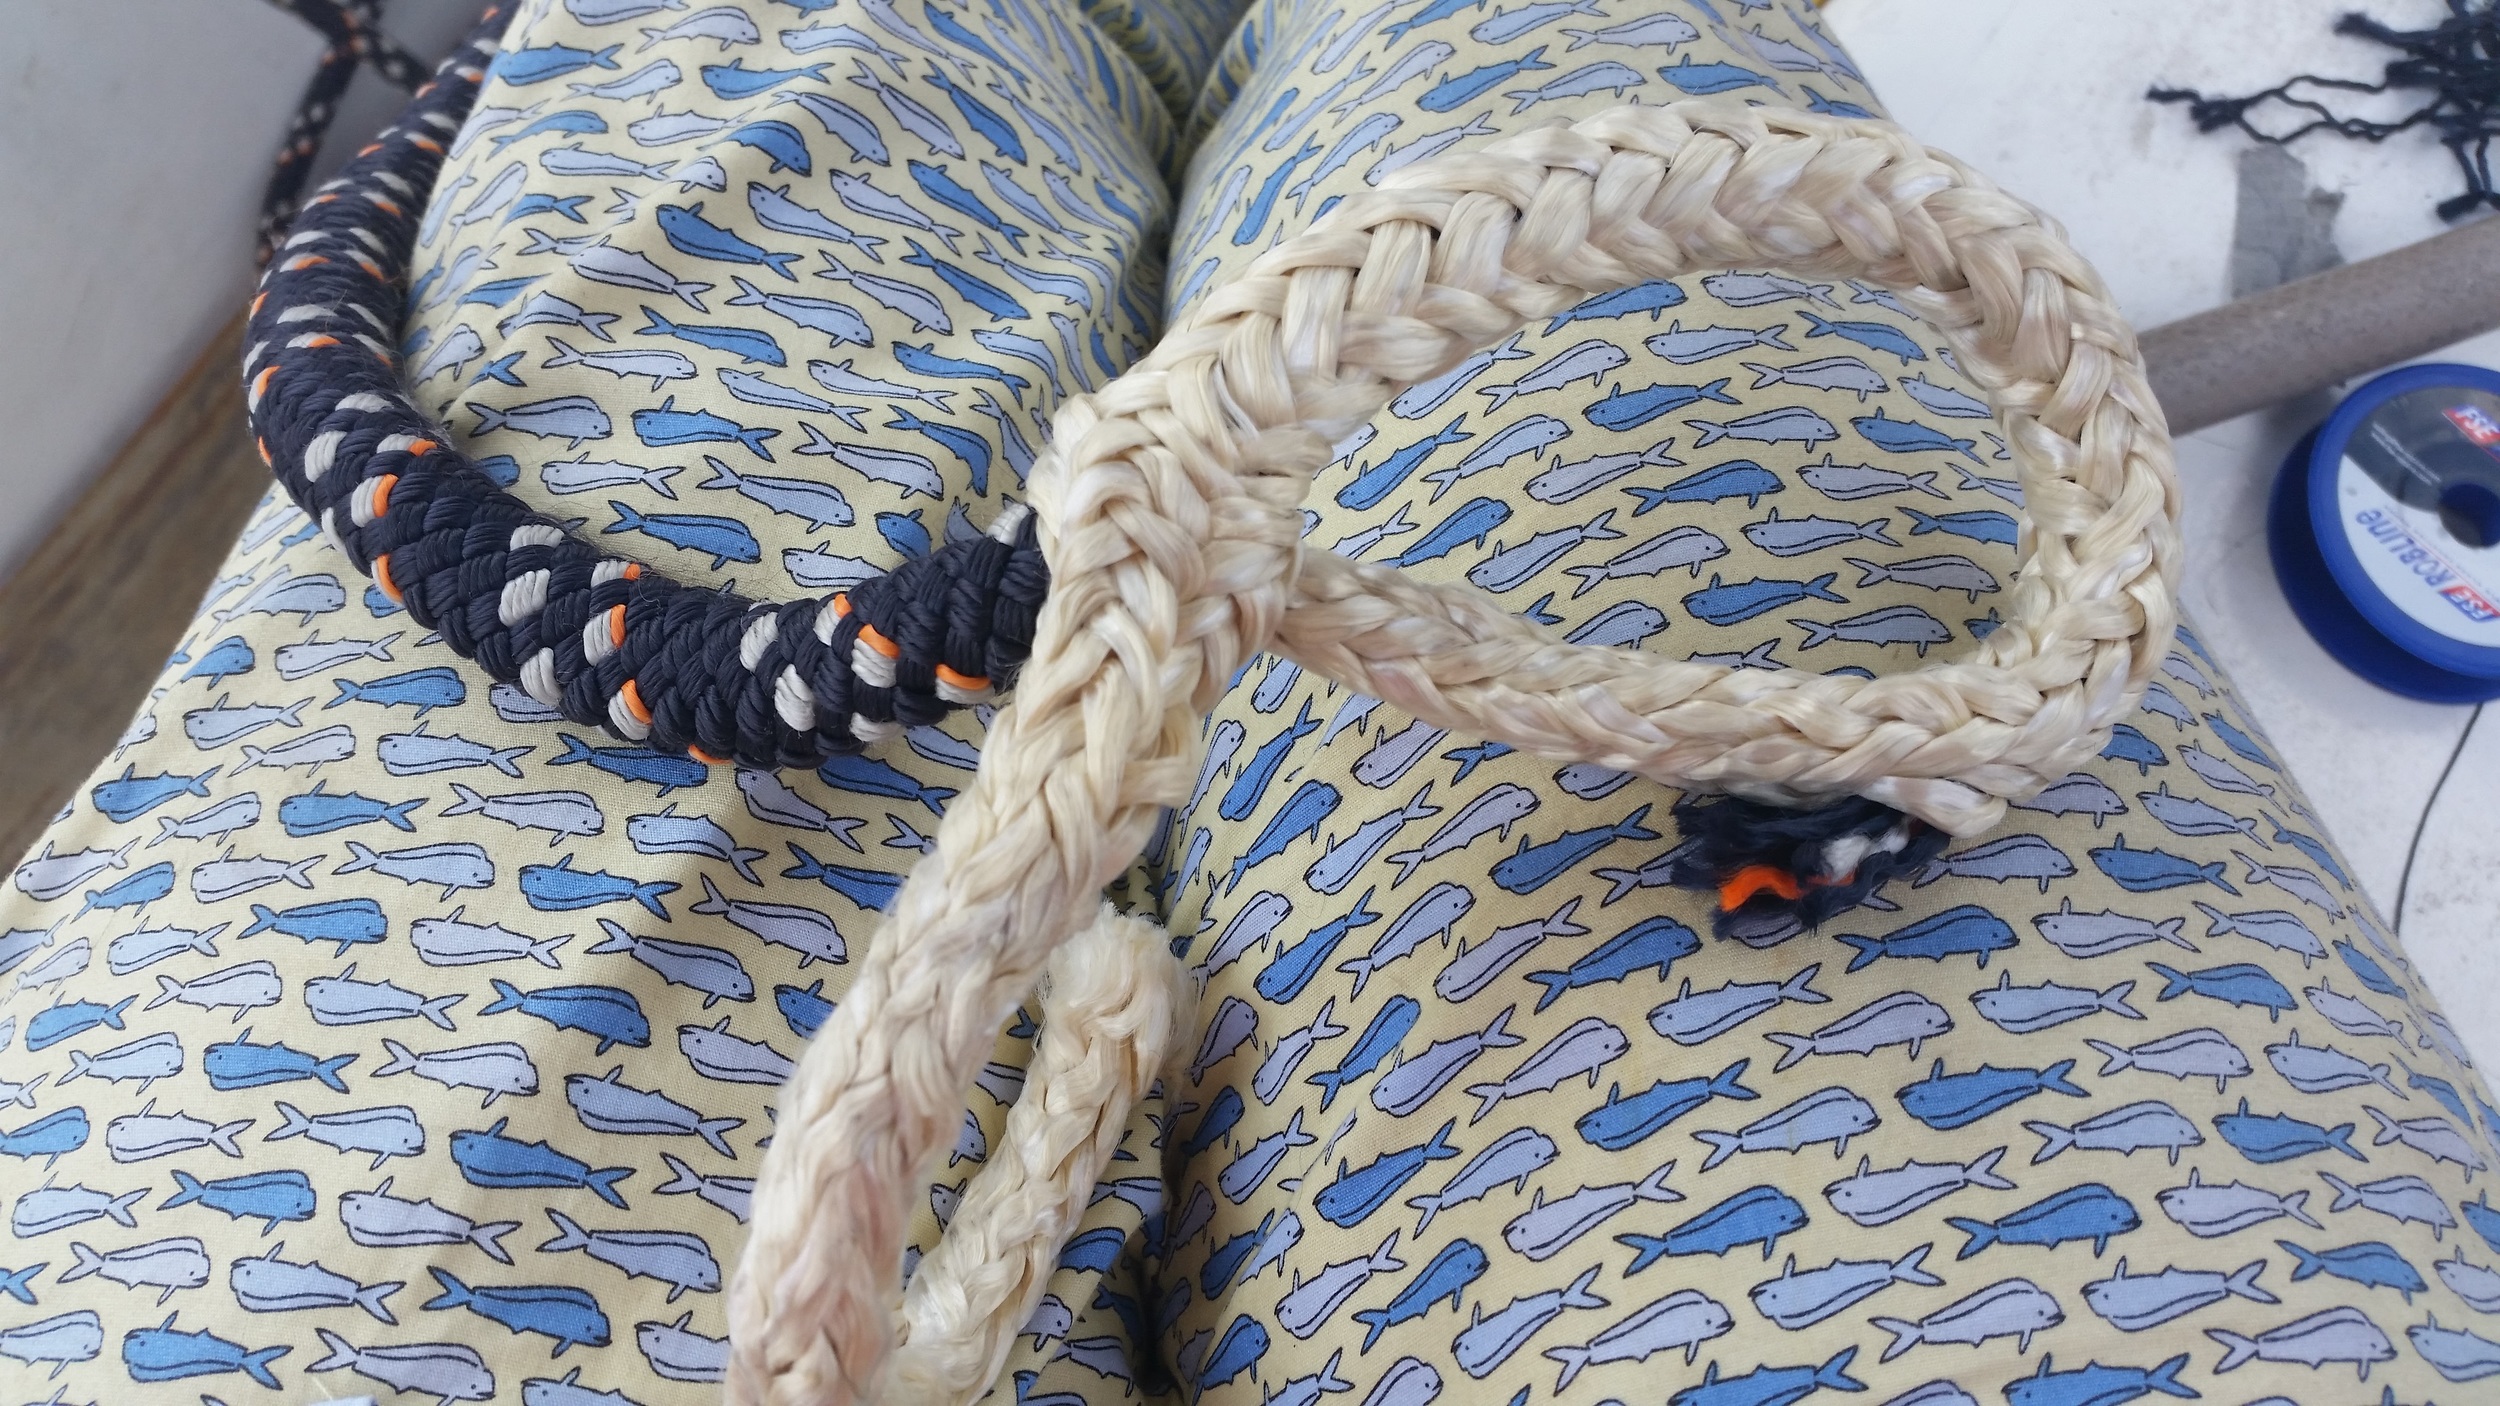
With the cover tapered, milk it back into the core. As you work it back into the core, the cover will disappear into the core and the transition from cover entering the core to pure core should be seamless.

Cover follows the blue arrows. Core follows the orange arrows. They move in opposite directions forming a loop with one another.

Cover follows the blue arrows. Core follows the orange arrows. They move in opposite directions forming a loop with one another.

The core splits out of the cover and goes to the left, doubling back and exiting to the right. The cover splits off the core and goes to the right entering the core as it passes by. The core and cover are going in opposite directions and form a loop with a tail. The tail should be longer than the amount of cover buried in the core, otherwise the back splice won't work out in the end.
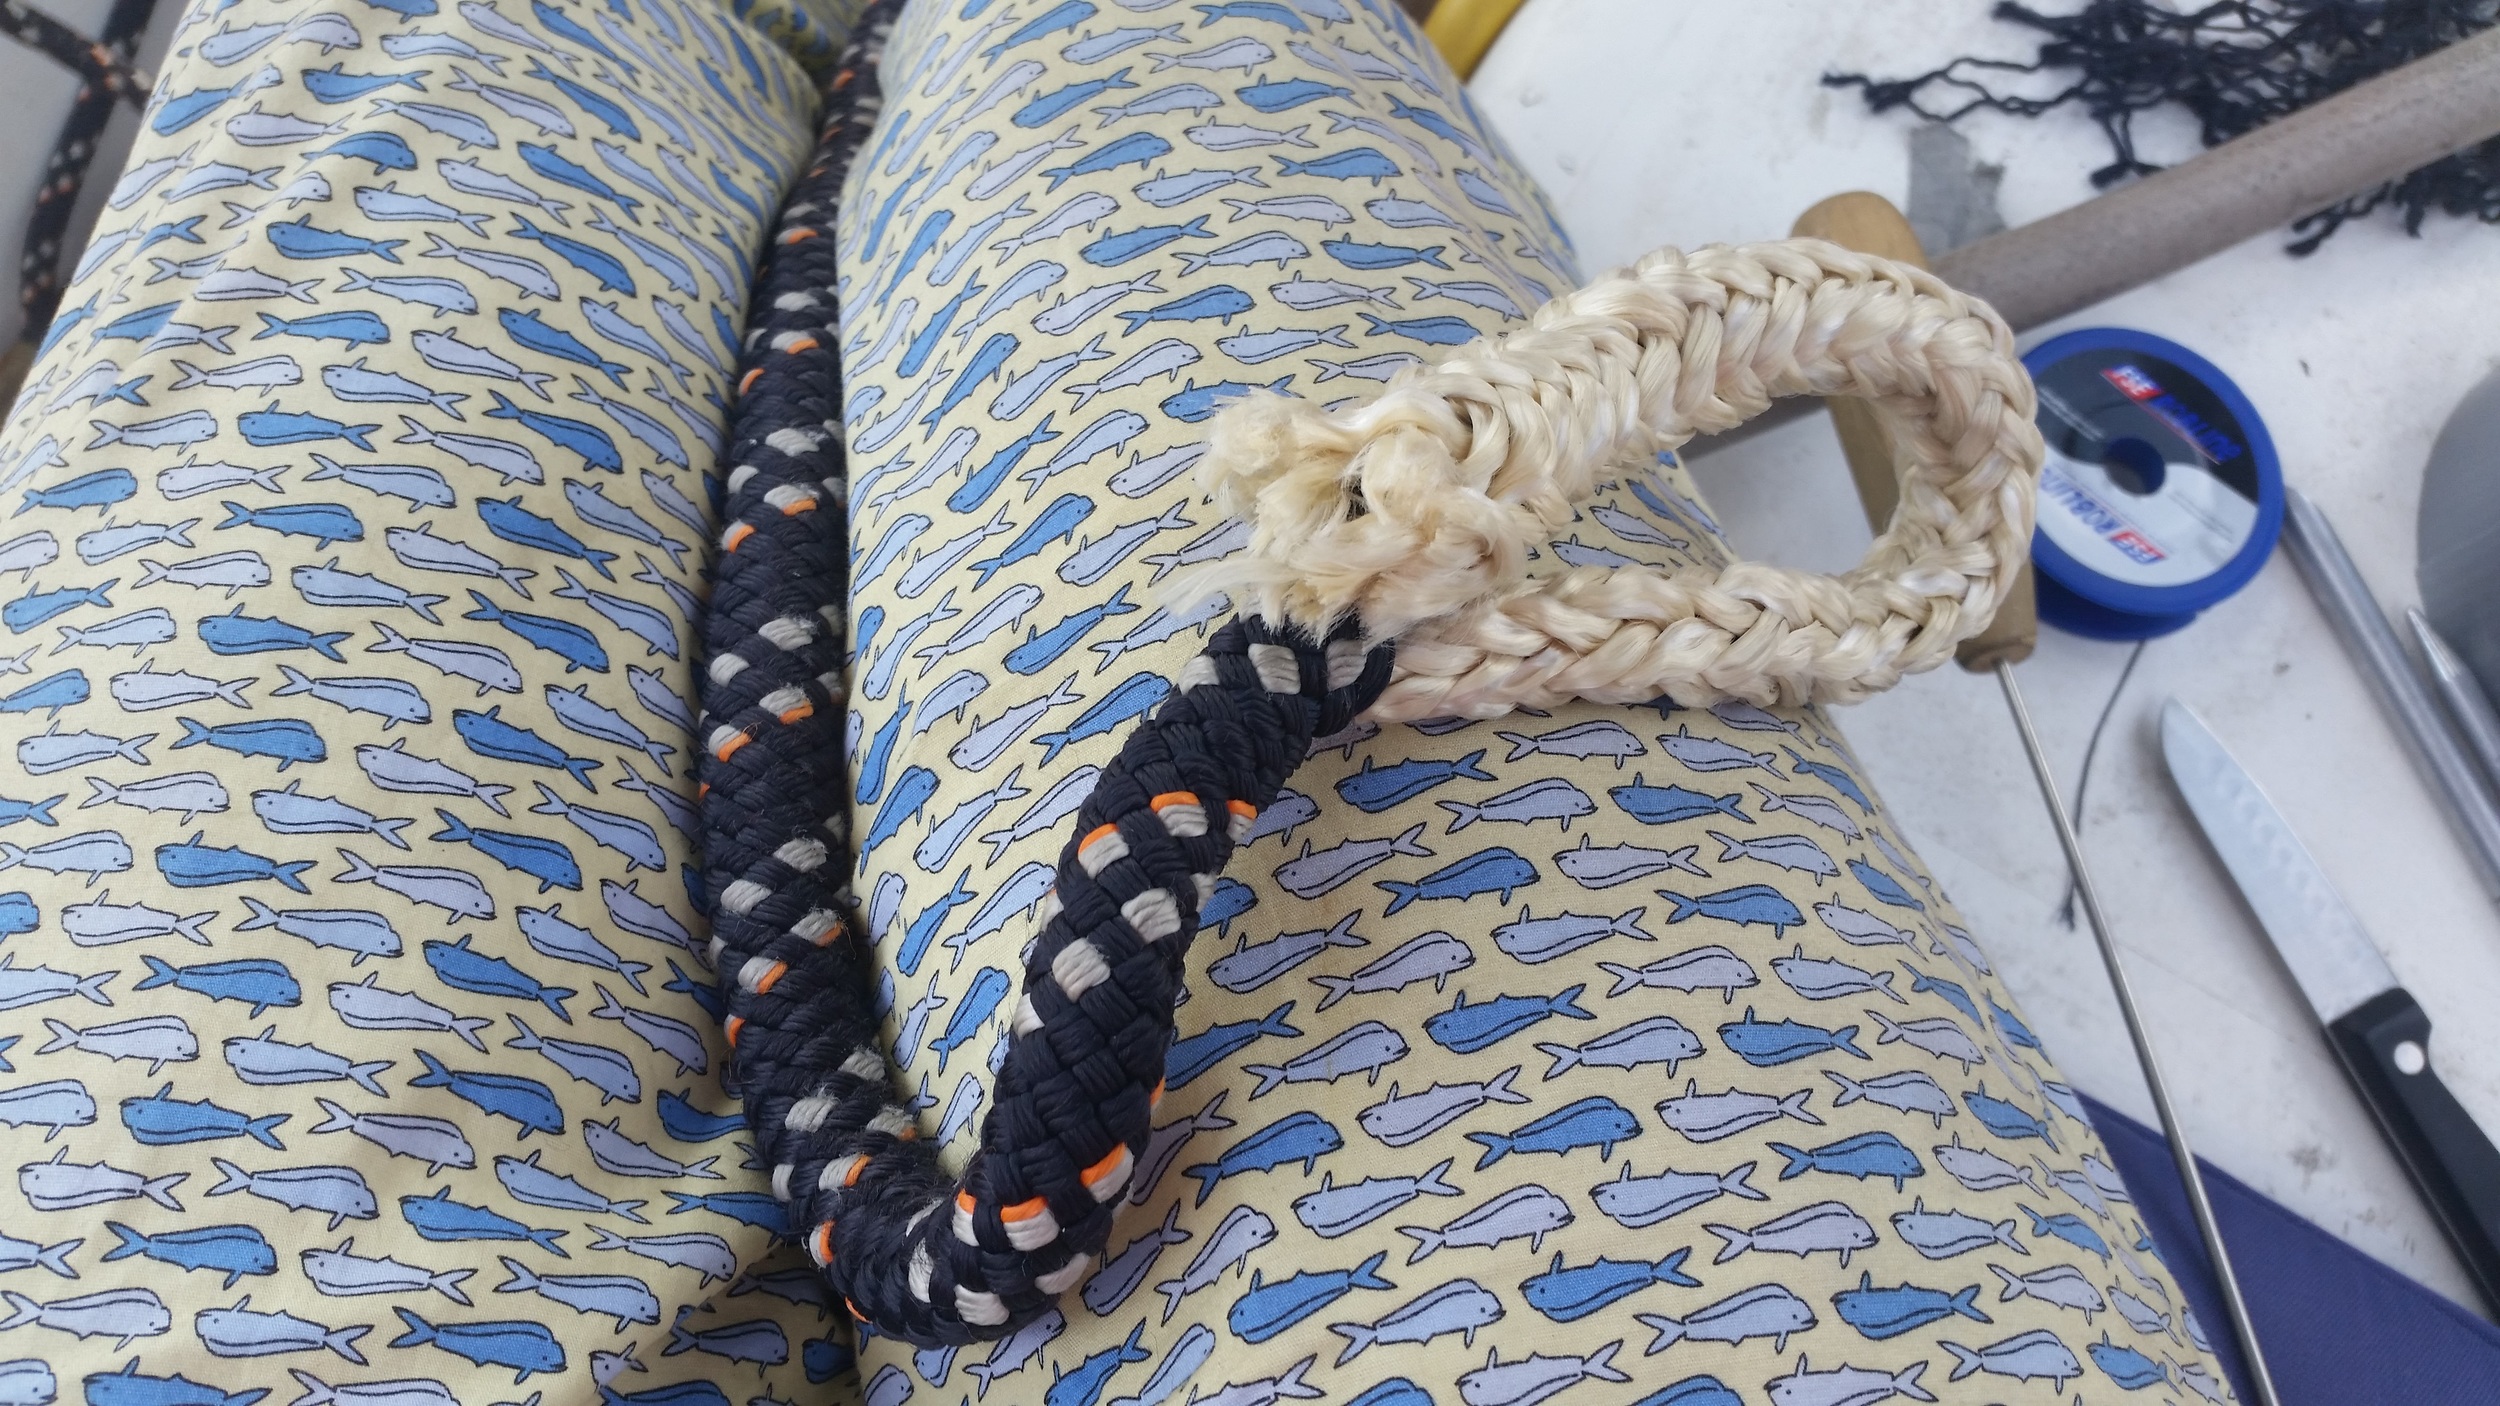
The excess core is removed, leaving what looks like an eye splice. The cover will be very loose over the core leading all the way back up to the pin that is holding the two in a static position relative to each other.
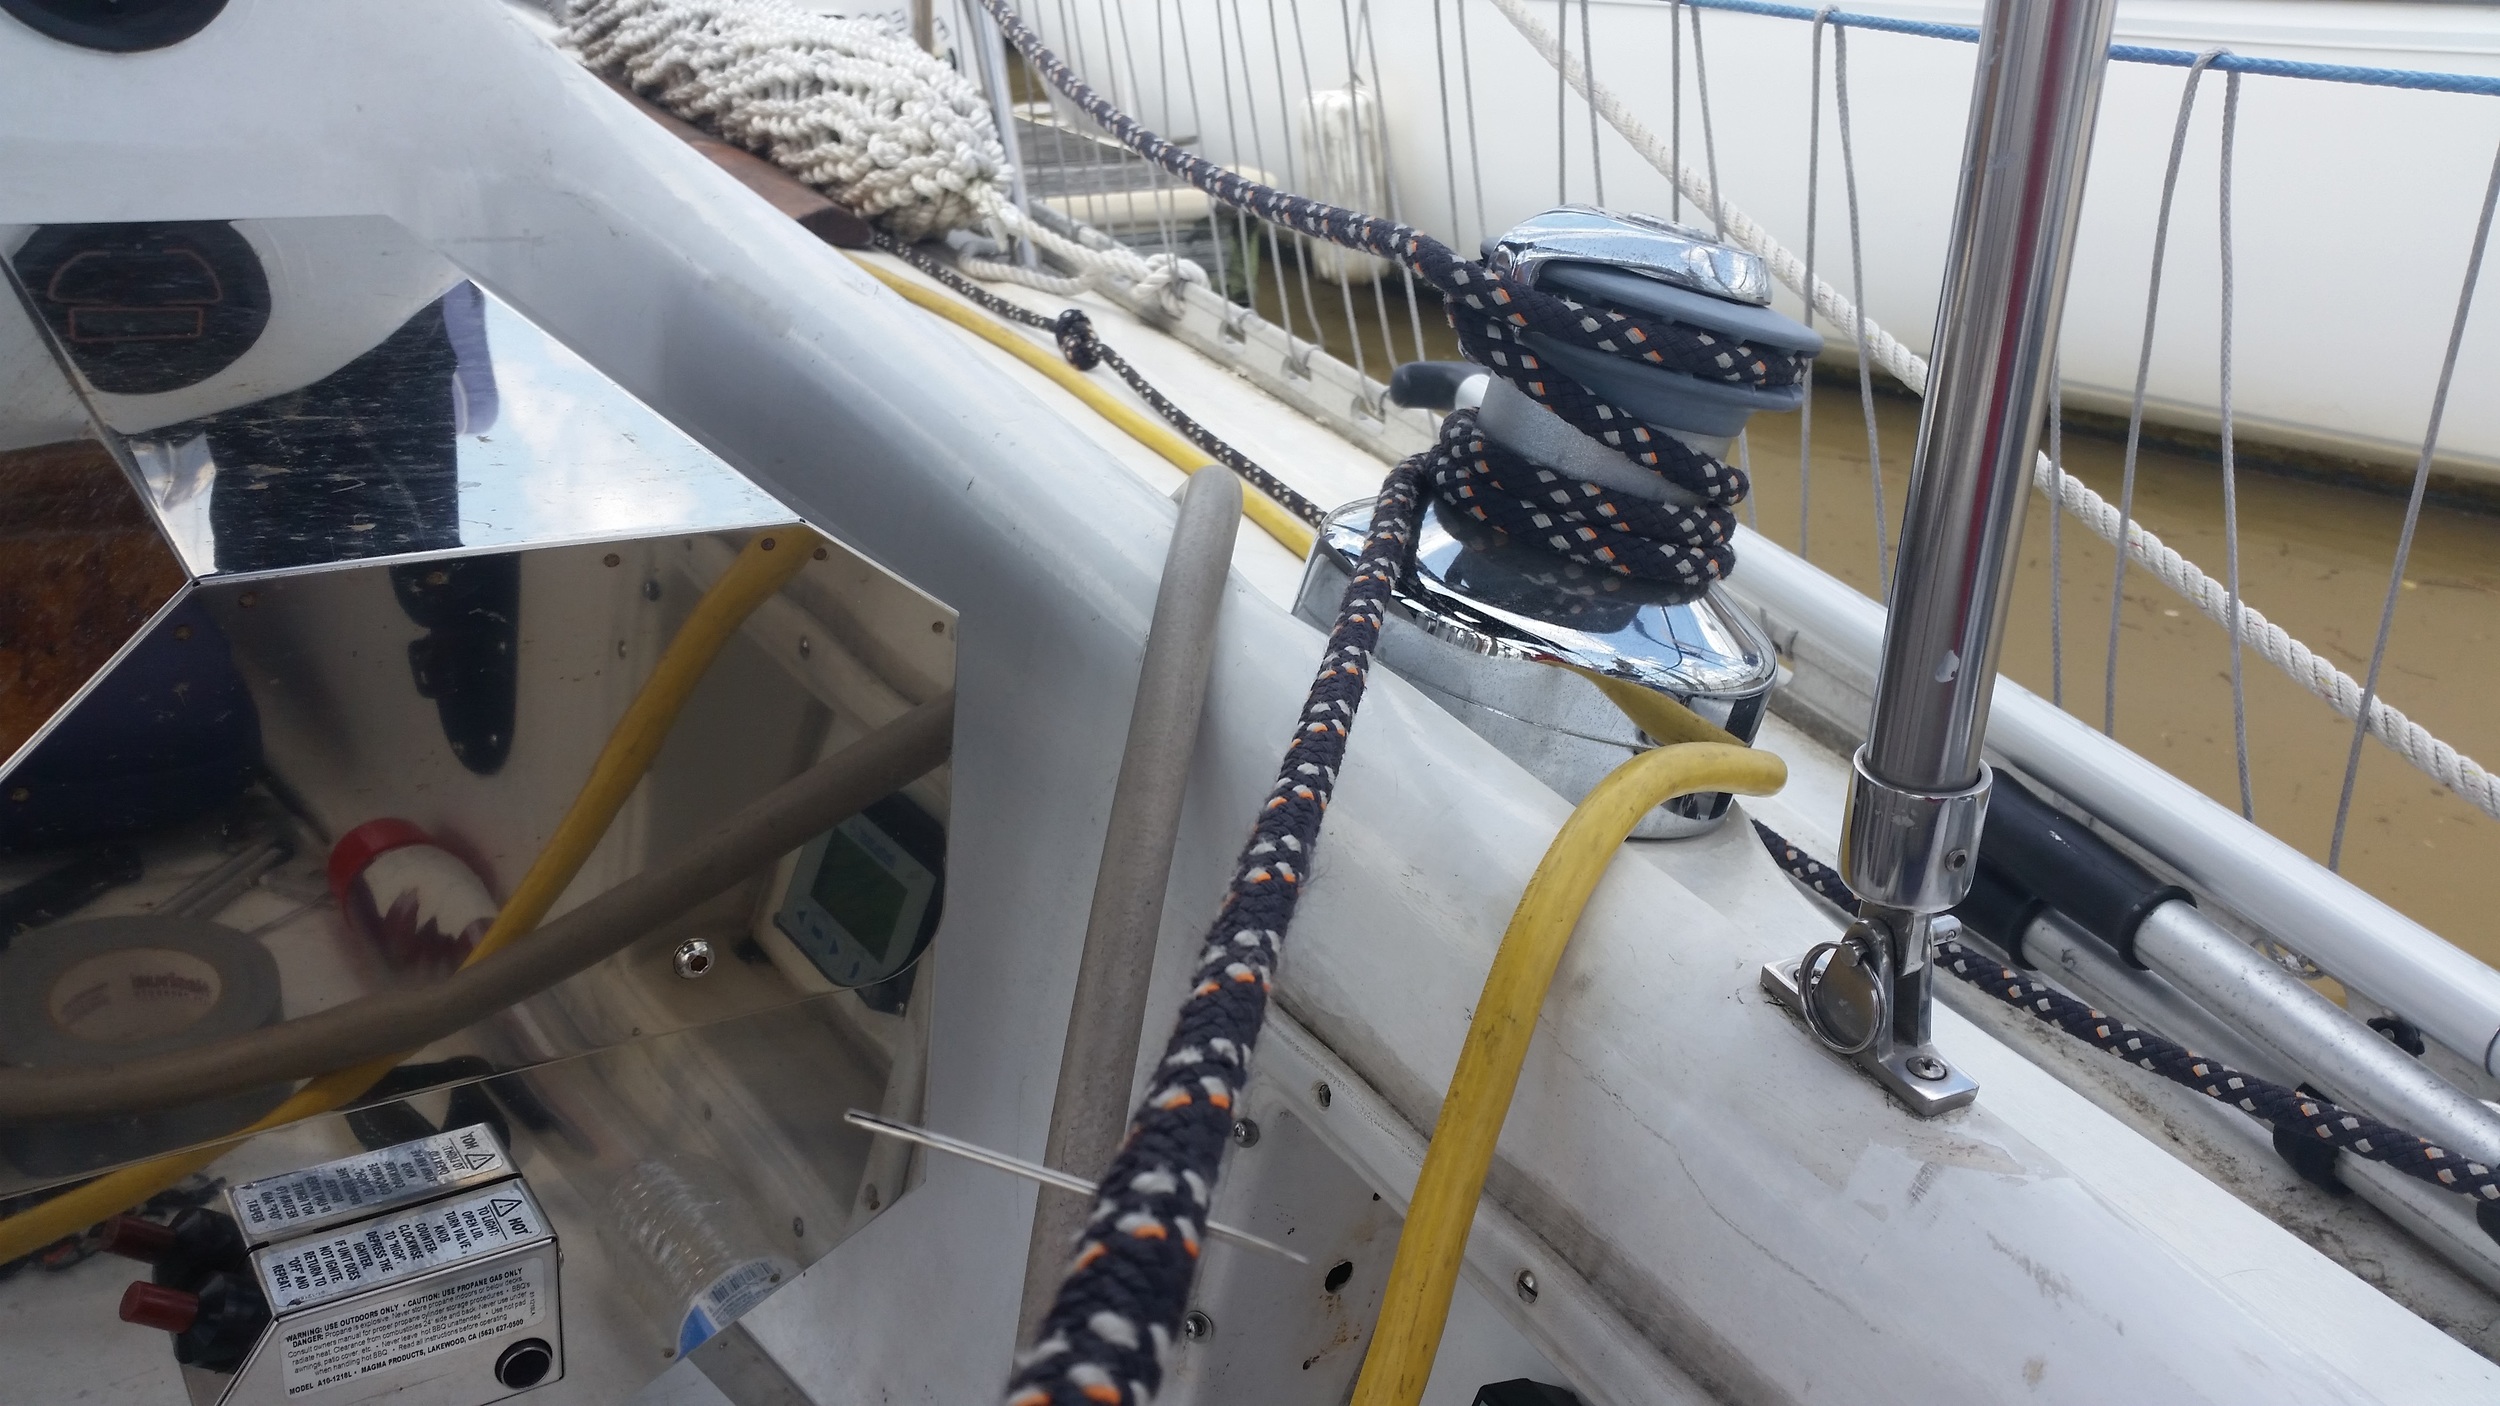
Secure the line to a strong anchor. I use one of the secondary winches in the cockpit, winding the line around the drum so that I can pull against it with a great amount of force to milk the cover over the core and complete the back splice.

Pulling hard on the cover and milking the cover over the core will allow the core to slip back into the line. The cover that is now inside the line will be pulled by the core back into the line, making the end of the rope double back on itself.
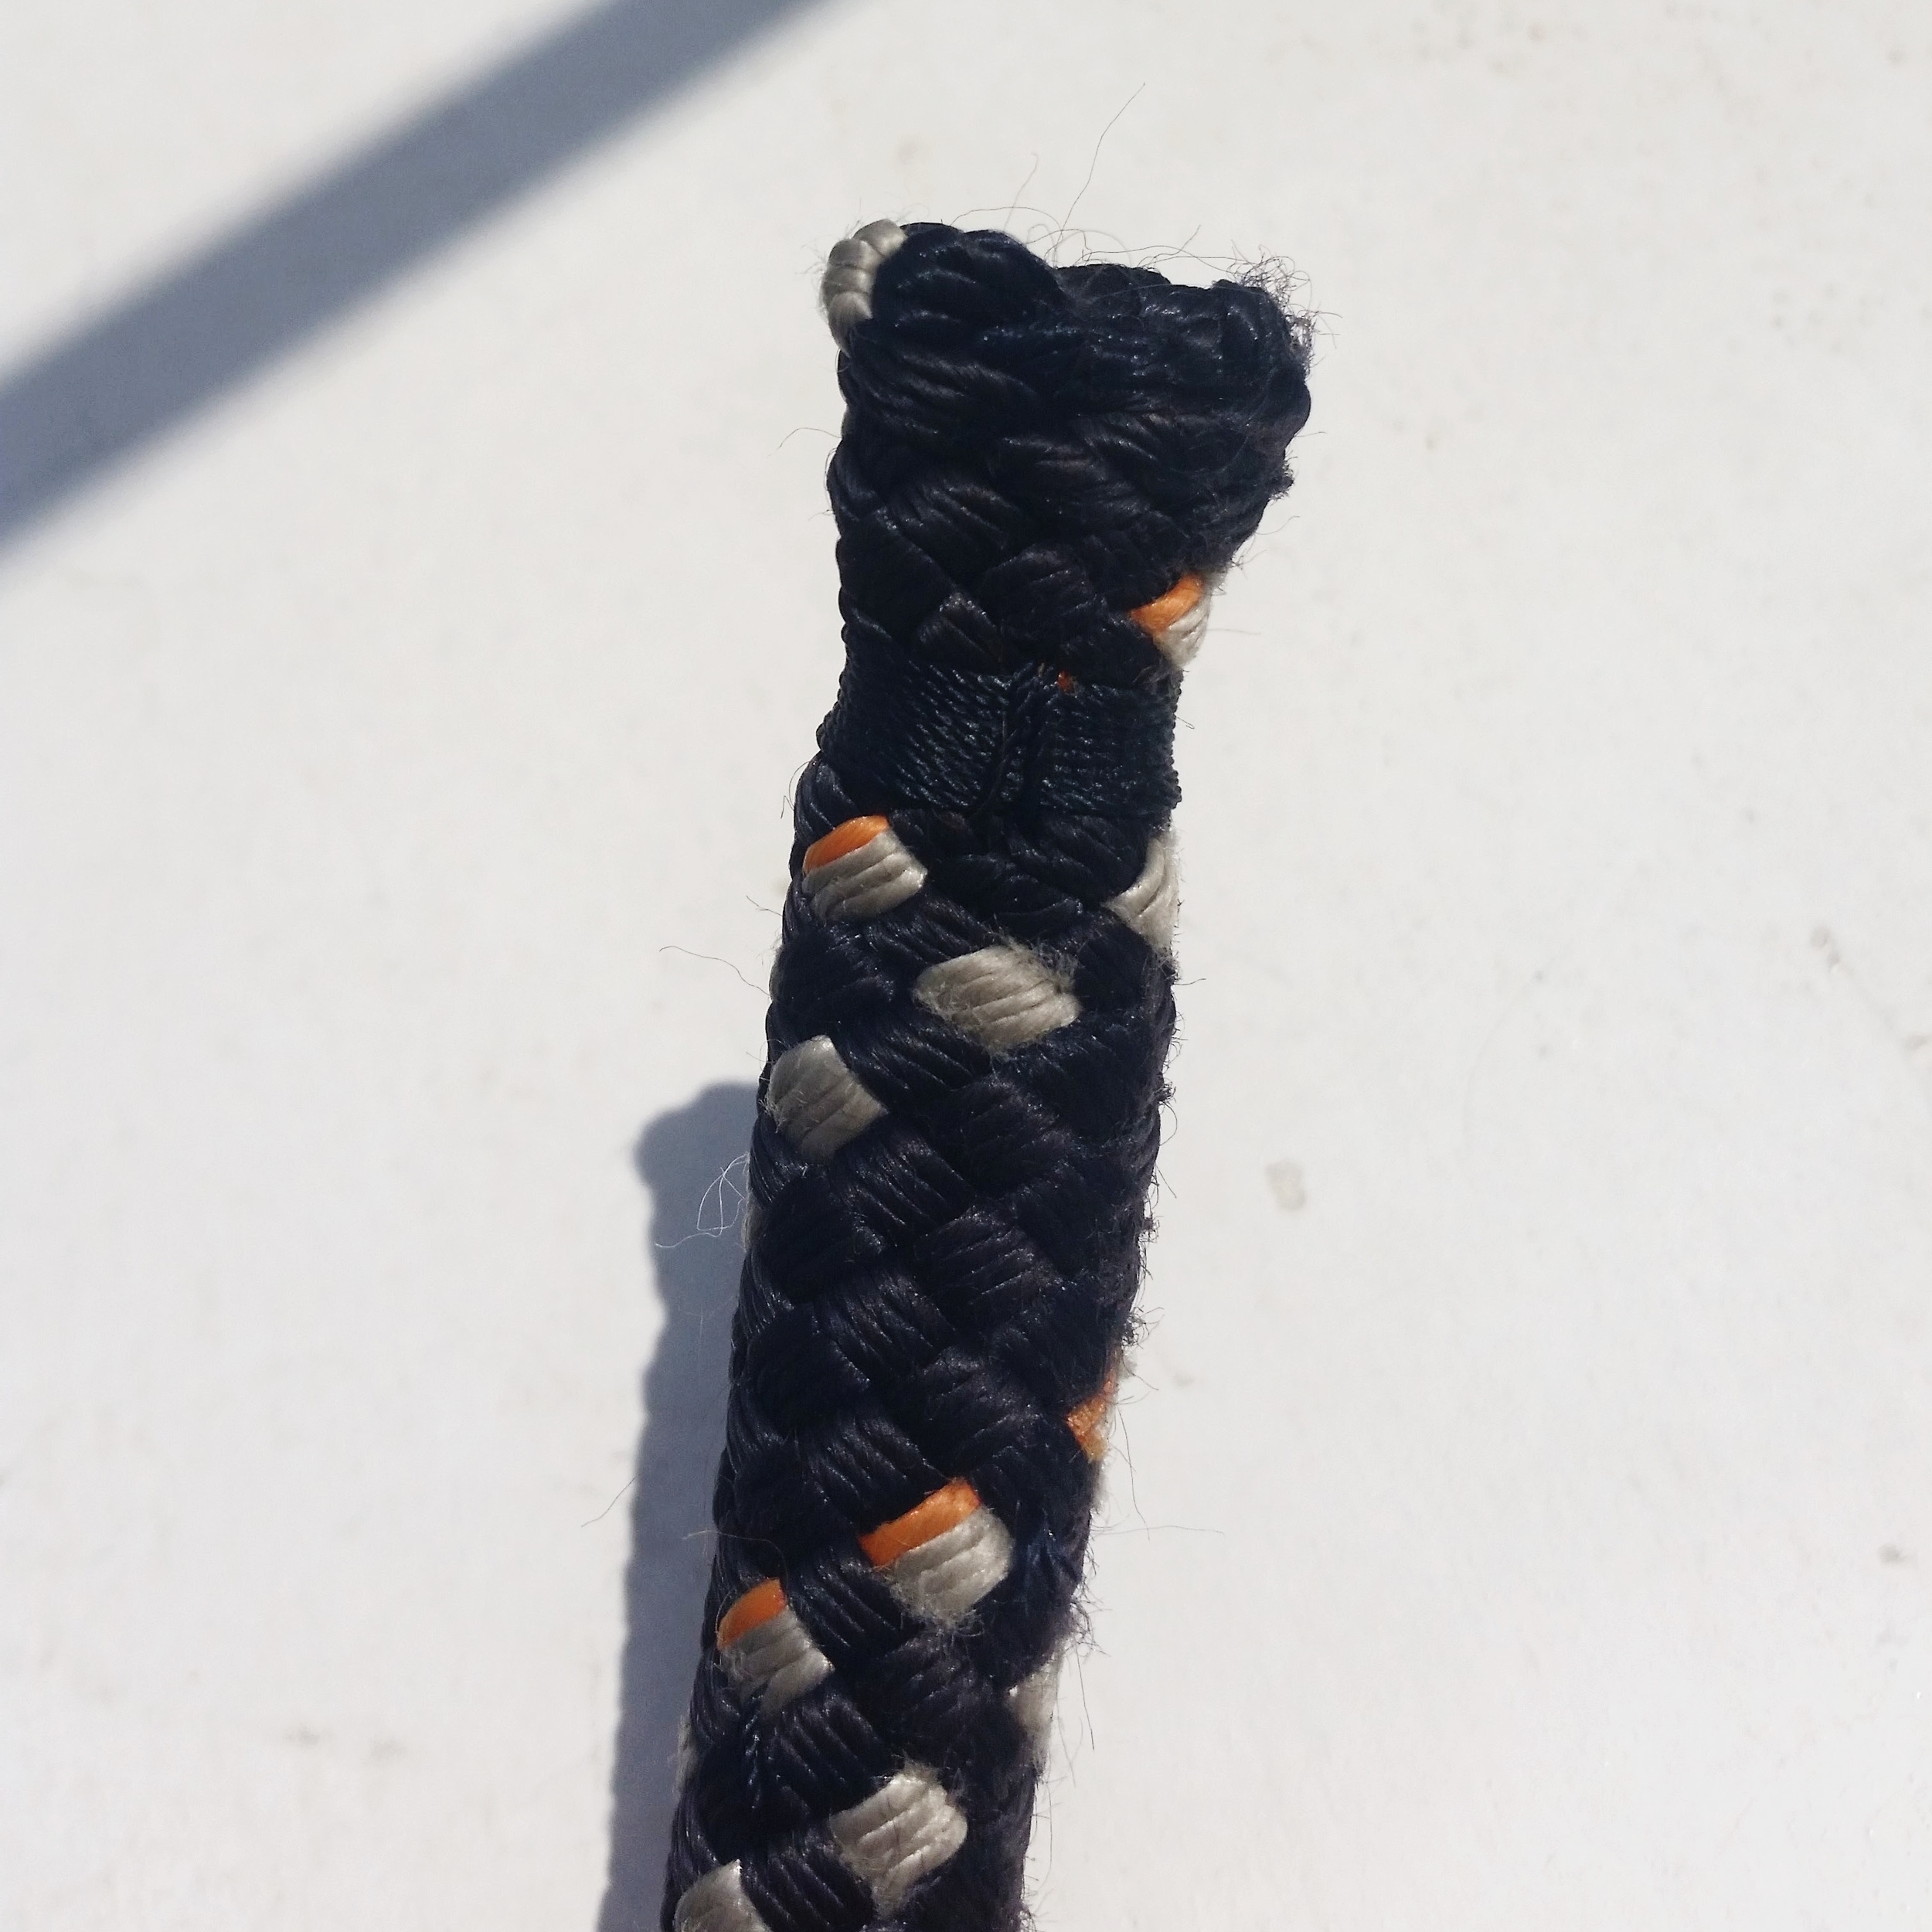
Whipping the end will ensure that nothing works itself loose. It was stated earlier that back splicing is better than whipping, yet back splicing uses whipping! The whipping in a back splice is not as critical to hold the line together. If the whipping chafed away and fell out, the splice would still hold and keep the end of the line together until a new whipping could be installed. A line that was only whipped would begin to unravel as soon as the whipping had come out.

Is that a bad egg?

Eggs can keep for a very long time! As they get older, their risk of going bad does increase. If your eggs are rather old and you question their freshness, simply test them before you crack them open. 

upload.jpg

Simply fill a container with enough water to float an egg and then set the eggs you wish to eat in the container. If an egg has gone bad, it will ferment and then float in the water. 

Good eggs sink, bad eggs float! If it floats, dump it without breaking the egg open (it will stink up your entire boat). If it sinks, break it open into a bowl and visually inspect it. If it was good, add it to the recipe; if it was bad, it can be disposed of without contaminating the rest of the good eggs. 

Designing the New Dinghy

Our plan to build a dinghy from set plans has been changed somewhat. The plans will build a dinghy that is 3.5 feet wide, 8.5 feet long, and have a plumb bow with an angled transom. This will make for an efficient rowboat, but this no longer fits our needs.

Maddie wants to have an outboard motor as a backup in case we end up anchoring miles from the nearest shore. We decided that we will buy a propane powered outboard and use it as a backup to the oars for as long as the outboard lasts. The moment it starts to die, we are going to throw it out and not bother repairing it (I have talked to outboard mechanics and they all tell me that the propane units don't work well once the repairs begin). 

Change #1: The outboard means that we need a vertical transom to hang the outboard. 

I measured the space on the deck, and 3.5 feet is a bit wide for where we want to store the dinghy. 3 feet would be much more comfortable on the deck. 

Change #2: The beam needs to be reduced from 3.5 to 3 feet.

The dinghy will live on the deck between the mast and the dodger, but it can't cover the chimney and it needs to cover the salon hatch (the salon hatch leaks). The space available on the deck to comfortably hold the dinghy is 9 feet, and the smaller the dinghy is, the easier it is to build, hoist, and control. I personally need 4 feet in the dinghy (I have long legs) and Maddie needs more space as well. Quickly, the length kept being bumped up until 7 feet seemed reasonable and comfortable (in a small sense). 

Change #3: The length needs to be reduced from 8.5 feet to 7 feet.

As you can see, these are some rather drastic changes that we are making to the design of the dinghy, so much that I decided to scrap the plans and design one myself!

I began sketching out the design of the dinghy on a 3/4 inch piece of particle board. I marked 1 foot increments on the panel, and then marked the boats centerline, bow, and stern. I decided that the bow would rest at Station 0, and the beam of the boat would be around Station 4 (3 feet), with the transom being 24 inches wide at Station 7.

I then set small nails into the board marking the bow, stern corners, and desired beam at station 4. These nails set into the particle board and will hold the batten in place while I trace the curvature of the hull. Once the curvature of the hull is traced, the nails and battens are removed and the design is complete.

This sketch will provide a rough idea what the footprint of the dinghy will be and lets us verify that the dinghy fit before I build it!

Measurements were taken from the sketch and then transferred to the deck of the sailboat to make sure it will fit all of our requirements for the dinghy. It turns out that it did not! The transom was covering chimney which means that the dinghy would need to be removed from the deck if we want to start the fire or risk covering the inside of the hull with soot! Then some creative thinking led me to measure the dinghy in reverse on the deck and set it at an angle, this seems that it will fit and work. The transom hides behind the dorade vents and mast, and the beam of the dinghy covers the hatch while the chimney sits next to the bow. This will probably lead to a soot stain on the starboard bow of the dinghy, but I can live with that.

Our next step will be to trace out a paper template of the dinghy and set it on the deck and make perfectly certain that it will fit on the sailboat. The design process continues as we figure out what our ideal dinghy will be before the first piece of wood gets cut.

Heavy Rainfall and Trash

People often forget that trash left out on land will eventually make its way into the oceans. Trash left on the sides of roads or accumulated around buildings will stay on land for a period of time until wind and rain will wash the land clean and relocate the trash into the waterways. 

This fact is made very clear after strong rainstorms pour down on the land nearby. When nearly four inches of rain fell in a few hours, massive flooding occurred inland as the rivers overflowed. Loose debris that were deep inland were swept away and flushed down the river into the bay which leads into the ocean. 

The waters where we live became cloudy with all the suspended mud and plant debris that was flushed away from places far inland.

Luckily, this storm flushed out a lot of organic matter, leaves and branches, with only a few pieces of plastic. Trash continues to flow past the marina on its way out into the bay which will eventually lead it out into the ocean.

Trash never goes away, it just moves around.

Riding Out a Series of Storms

Storms at sea are inevitable. This is a simple truth. 

If you are going to be out on the water for any length of time, the weather will eventually change. When it does, it will either improve or degrade. No one seems to complain when the weather improves, but everyone wonders what happens when the weather gets bad!

The answer is simple, you ride out the storm!

There are a few key requirements you need to safely survive a storm:

  1. A tether and jacklines
  2. Storm sails
  3. Enough water to drift in

The tether and jacklines will keep you attached to the boat and safe. Jacklines should always be rigged and you should always clip in, especially when the weather gets bad. During severe weather, we clip in even when we are sitting comfortably in the cockpit. You never know when a boarding wave will wash across the boat and float you right out of your protected cockpit and into the unprotected storm seas! 

Storm sails are very small sails made out of very heavy sailcloth material. They are specifically made to handle heavy weather and a crucial part of your storm plan. Flying regular sails is very dangerous in very high winds, the sails can overpower the boat as well as shred in a powerful gust. Storm sails should always be ready to raise when they are needed.

The last part of the equation is having enough water to drift in. A properly setup boat will drift along in the roughest of waves and strongest of winds indefinitely and not sink during the process. There is no amount of equipment that can prevent a sailboat from breaking up on a lee shore if it runs aground.

During a storm, the most dangerous obstacle you can encounter is land! Most boaters head for shore when a storm approaches, but if you can't make it into a safe harbor in time, you should do the opposite and head further out to sea; putting as much distance as possible between you and land before the storm strikes.

In our situation, we found ourselves in a river, with land on all sides and a severe storm approaching. I expected the storm to be a low pressure because the clouds had been gradually building and becoming lower throughout the day. Low pressure winds tend to build gradually as you get further into the storm. Low pressures also suck you into them, knowledge which I planned to use to my advantage! 

The river may look wide, but the deep water is very narrow. Most of the water near the shore is actually very shallow and the river is littered with crab pots and obstructions! Not the best place to get caught in a storm.

To make the most of the narrow water we had, we moved our boat towards the southern edge of the deep water. I expected the low pressure approaching from the North to pull our boat in a northern drift across the river at a slow rate. This would give us enough time to drift while hove to while the storm moved past.

We sat waiting with our storm sails rigged, ready for the winds to draw us in!

As the storm approached, a stiff cold wind struck the boat. This was not a low pressure, but instead a high pressure with strong cold winds blowing away from the storm. This meant that we were not going to be drawn North across the river, but instead we were being pushed South onto the very close shallow water. We hove to and waited to see how the storm played out.

As soon as the high pressure hit, I set the sails to heave to. We were flying the trysail and the staysail with a reef in it, acting as our storm jib to balance out the trysail. Getting the boat to heave to was frustrating at first, but once we got in our slick, everything calmed down on board our sailboat, Wisdom.

We were drifting through the water at 0.5 knots with only 0.25 nautical miles to shallow water, meaning that in 15 minutes we would run aground! The choice was made, to claw our way off the lee shore and work our way out into the river toward deeper water in winds of 35 to 40 knots.

Once out into the middle of the river and with more water to leeward, we set the sails to heave too again.

We hove to during the storm with more water to leeward as the storm continued to build. The winds stayed at 40 knots for almost a half hour as the waves continued to build, luckily they were calmed by our slick to windward, so any breaking waves would come upon us as gentle rollers. 

The end of the storm seemed magical! Sunlight began to pierce through the clouds as if to tell us that it was over and we survived!

Even though the storm had passed, we still had the storm sails set and ready for more. We are firm believers in "Reef early, shake late"; meaning you make your sails smaller before it gets bad, and you wait a while before you make them bigger again in case bad weather returns. As pleased as we were to have made it through that torrential storm, the clouds on the horizon never cleared up and the blue skies seemed to be swallowed up again. This was only the beginning of the series of storms that would fall on us!

We continued sailing along under trysail and staysail until the storm was much closer. Maddie and I decided that we would try heaving to under trysail only this time to see how that felt. We don't sit around and dream of sequntial storms to test out various storm tactics, but when the oppertunity presents itself, why not experiment a little? 

We made it through the first storm with 40 knots of wind hove to under the trysail and storm jib, but we did feel that we were heeling over a bit much and the boat had trouble keeping its bow into the wind. The decision was made to try this storm under just trysail, hoping that the gear and junk on the deck will provide enough wind resistance to keep our bow from riding through the wind.

The second storm was equally as powerful, with winds holding a steady 40 knots as well! This proved to be an excellent test for our storm tactics as we could compare heaving to under trysail alone and trysail with storm jib on the same tack, same day, and same conditions. 

You can hear from the calmness in Maddies voice that the severe storm is not of concern. We were both calmly waiting for the storm to pass as we slowly drifted through the seas. 

During the first storm (hove to with trysail and storm jib) I stayed at the helm even though it was locked over. I was ready to take the helm should the situation arise because I did not feel completely safe. We were close to shore and heeling over very far. During the second storm (hove to under trysail alone) I felt much safer! Maddie and I both huddled up under the dodger to stay out of the rain. Neither of us was at the helm because we felt no need to be. We knew we were safe as the boat gently rose and fell through the waves during a steady 40 knot blow!

We did have one concern during the second storm, and that was a bouy that was near by. We turned the chart plotter to face forward so we could watch our position relative to it on the screen as we slowly drifted through the water. Visibility was null, so we were unable to see it with our eyes, but we decided that we would run if we got too close to it, get past it, and then heave to again. That was our biggest concern during the storm. Not "will we sink?" "will we capsize?" "will we survive?", no, simply "where is that bouy?"

As stated before, staying clipped in to the boat, with the right sails set up, and plenty of water to drift through is the key equation to safely surviving a storm at sea. They are very easy steps that will ensure you are safe and happy while your boat floats through the water until the storm finally passes.