Chainplate Fabrication: Part 1

Chainplates carry out the stressful function of connecting the stays to the hull. All of the force placed on the stays is transferred to the hull via these metal plates. Chainplates come in a variety of materials, but the most common materials are stainless steel and bronze.

In the world of stainless steel, 316L (the L stands for low carbon) is the ideal material for chainplate fabrication as they suffer the least from corrosion. 

When your chainplates succumb to the effects of crevice corrosion and stress fractures, it is time to replace them. Sailboat manufactures mass produce their chainplates at the time of production, but older sailboats need to have custom made chainplates fabricated as they are no longer in stock.

To manufacture your own chainplates, you need to locate the raw material: 316L Stainless Steel. 316L is readily available in various shapes and sizes, but for chainplates, you want to use "bar stock" or "rectangular". If you have the choice between the two, opt for "rectangular" as all the sides are sided and the metal is actually rectangular. "Bar stock" is mostly rectangular, but the edges are not completely square and you will spend a lot of time surfacing the metal instead of making your chainplates.

When you receive your metal bars, the first thing you need to do is polish them. A smoother surface is easier to spot fractures and cracks as well as being eaiser to keep corrosion at bay. To polish the metal, begin with a random orbital sander with 40 grit paper, then move up to 80 grit, then 120, then 220.


At 220, you should start to see a faint reflection in the metal. The grain of the metal will still be very present at this point but the metal will begin to shine. 

You could continue through finer and finer sand papers, but I like to switch over to a wet stone at this point. Be sure to keep the stone lubricated with a light oil such as WD-40. This will reduce friction and clear the stone of metal dust. If you work dry, the abrasives will clog almost instantly. When the oil begins to look black, I like to wipe it off and start again with clean lubricant.
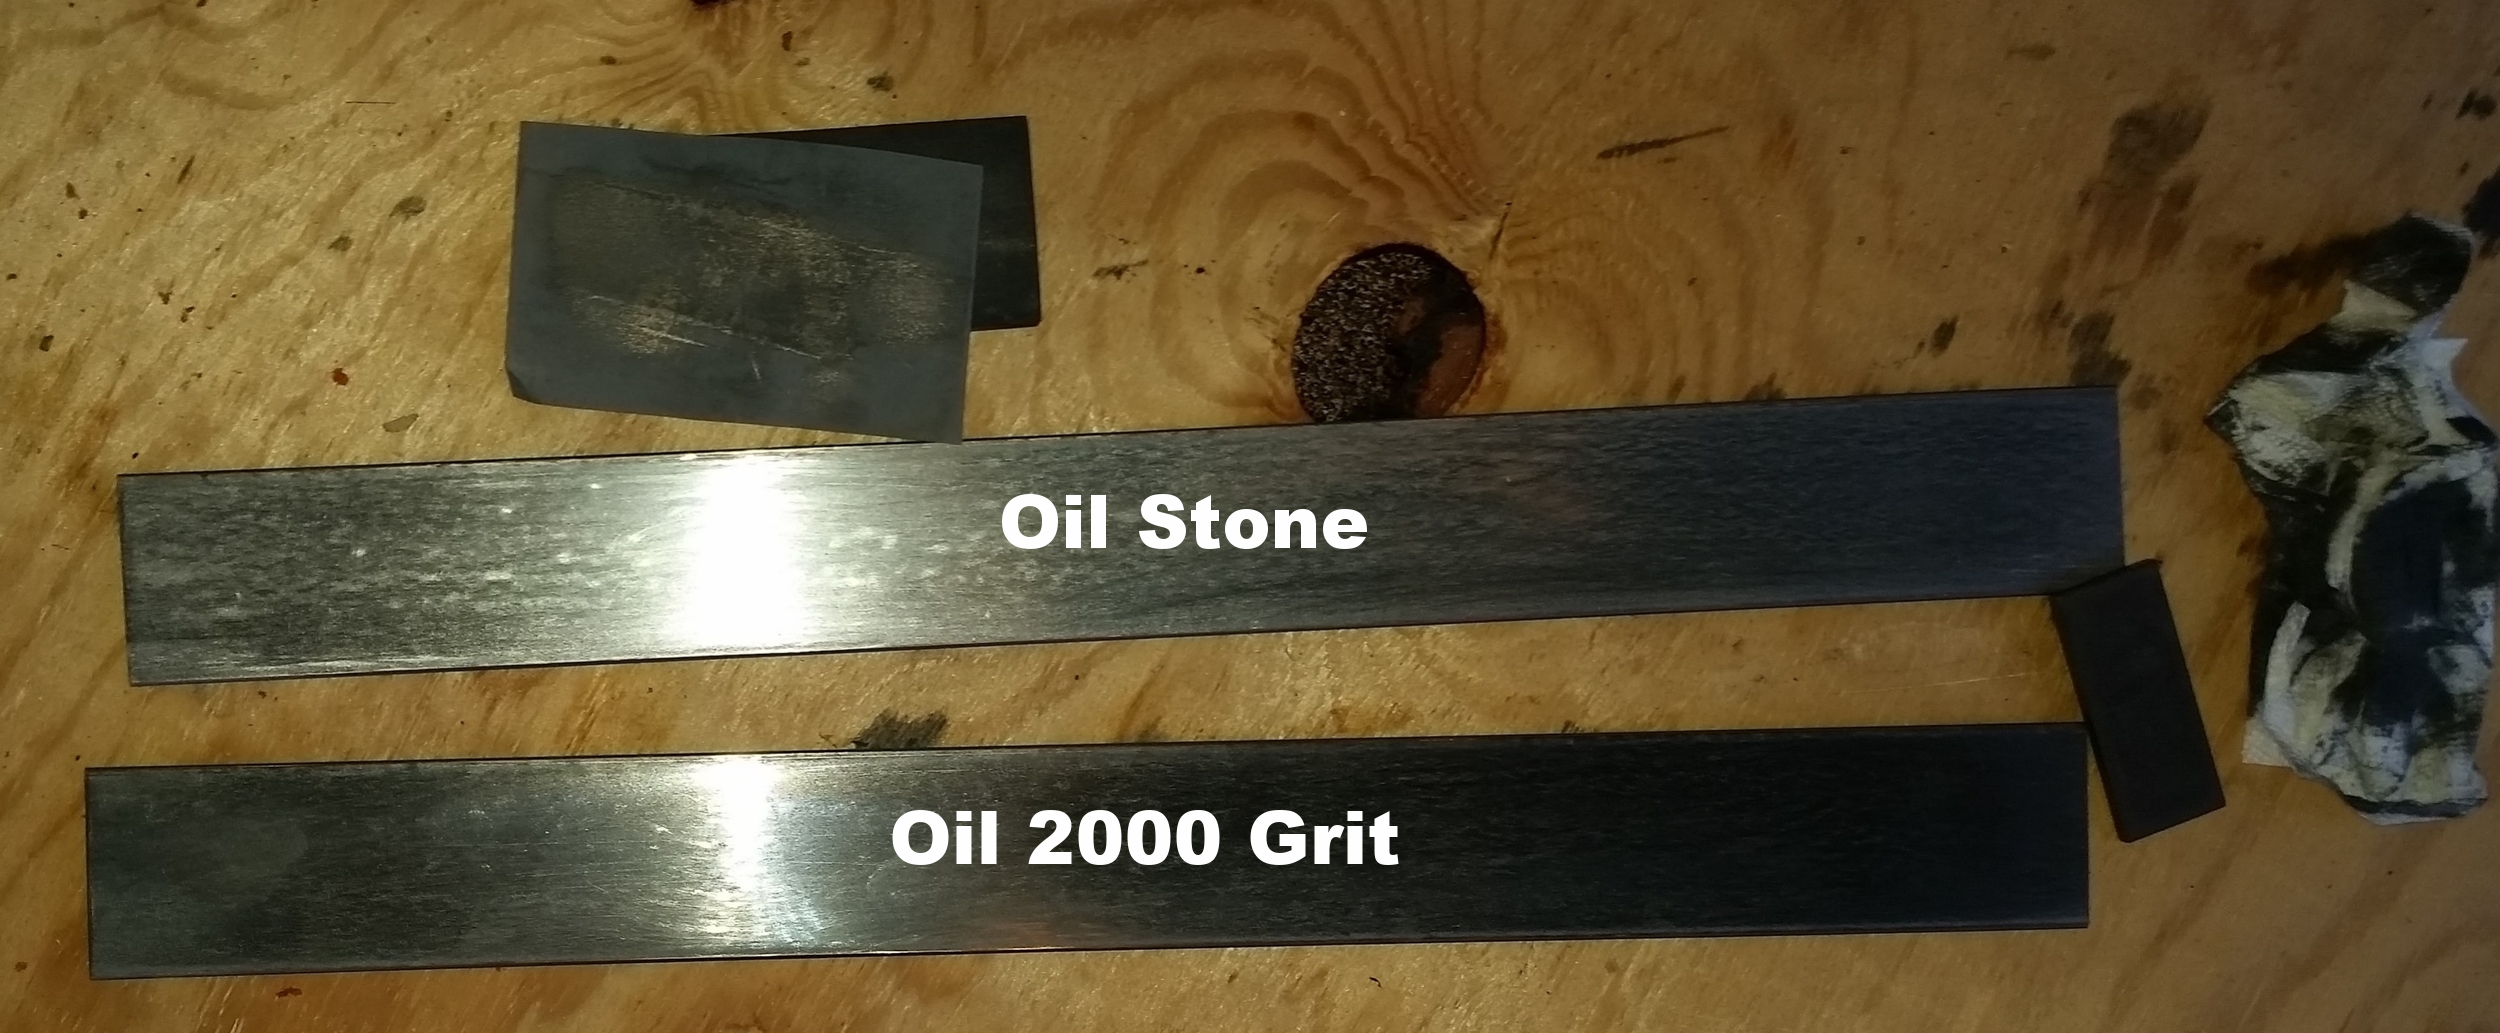
After the stone, I follow up with 2000 grit sandpaper lubricated with oil. This will produce a good polish which will work as a low quality mirror. Once the metal is "as polished as it can" with oil sandpaper, I switch over to water and 2000 grit sandpaper. A gentle stream of water running over the bar will avoid the black debris characteristic of oil since it is constantly being flushed away. 

I continue polishing with the wet sandpaper until it is a better quality mirrored surface.

The "orange peel" that can be seen in the metal is caused by the grain structure of the crystalline formation of the steel. Further polishing would remove this effect, but it would take considerably more time. Mirrored chainplates are nice from an aesthetic point of view, but do not offer any additional corrosion resistance. Being how these chainplates are hidden away in a locker and in the head, the owner of this yacht was satisfied with this level of polish and fabrication continued on to the next step.

One important point to note, don't drill a single hole in the chainplate until at least this level of polish has been achieved. The sand paper used to get to this level would get torn up by all the edges of the holes. Sanding a solid and smooth surface is much easier on the abrasives.


My First Sail

I grew up in Puerto Rico where the strong tropical sun would burn me to a crisp in no time! To combat the harmful UV rays, I would wear long sleeve rash guards and a sheet over my legs. It wasn't long before I realized that this sheet could turn my simple kayak into a square rigger!

This simple queen size bed sheet was tied to the kayak and raised to catch the wind. Here you can see my dog and I riding the wind effortlessly! I tried many variations, using the paddle as a mast, a yard, and even as a dagger board. 

Back then, I never imagined myself owning a sailboat; let alone living on one! It's incredible how much can change in just a decade!

Crevice Corrosion

Stainless steel is a wonderful metal that "stains less" than regular steel. Regular steel will begin to rust when left exposed to air and moisture as the iron in it will form a layer of iron oxide. Stainless steel will not rust as quickly because it contains more chromium which forms a protective layer of chromium oxide on the surface. This protective layer shields the rest of the metal from the corroding, giving stainless steel its wonderful qualities.

While stainless steel won't rust the way regular steel will, it does corrode in a distinct fashion: Crevice Corrosion. Crevice corrosion occurs in areas where the chromium oxide layer has broken down, usually in areas that are deprived of oxygen or very moist or exposed to acidic vapors.

Chainplates usually live in closed up and tight areas of the boat where crevice corrosion can begin. This in combination with the immense stress placed on these metal pieces can lead to fractures and breaks in the chainplate.

While crevice corrosion does show warning signs, they are often overlooked as they are miniscule. The most common sign of crevice corrosion are horizontal fracture lines running perpendicular to the loads placed on the chainplate.

One recommended method to find these fracture lines is to remove the metal fitting, wash it with acid and scrub it completely clean; then inspect the metal piece under a bright light with strong magnification. As you can imagine, this method is highly impractical!

The method I use is to look closely at the metal fitting with a strong light source aiming at it. I do not use magnification or any other fancy gadget. As a dentist I have a lot of experience with finding microscopic cracks in teeth. I am able to see these fractures with my naked eye, and you can too if you take the time to look closely at the metal in front of you. Imagine that there is a crack in the metal and you need to prove that it's not there. When you see it, you know it's there; alternatively, when you can't find it, you were proven wrong. With this frame of mind, you will be more focused on finding the smallest of flaws in the item you are inspecting. 

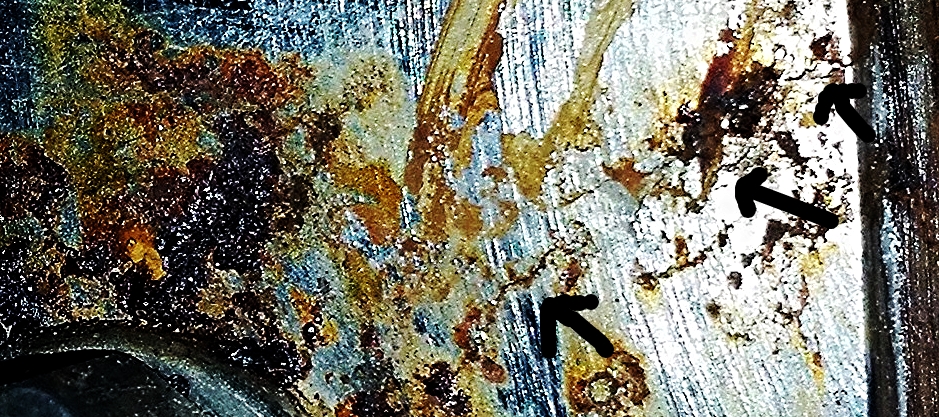
Do you see the fracture line?

Do you see the fracture line?

This is the same image but heavily zoomed and contrasted to accentuate the fracture line, along with some helpful arrows point to the crack. Can you see the crack line on the original image?

This is the same image but heavily zoomed and contrasted to accentuate the fracture line, along with some helpful arrows point to the crack. Can you see the crack line on the original image?

These cracks are tiny and tend to occur horizontally across the surface due to the combination of stress and corrosion. Eventually, they will lead to catastrophic failure!

Keep a close eye on your stainless steel fittings for these tiny cracks. The moment you see them, it is time for immediate replacement of that part. 

We're Getting Married!

Maddie and I are getting married today! 

We met on Tinder 2 years ago and she moved aboard right away (per my request). It was a rough adjustment for her at first, transitioning from living in a land house with lots of space to a narrow sailboat. 

The first year was a mixed bag, there were fun times when we would relax on the deck, and then there were the not-so-fun times when we were re-powering and on the hard. We worked on projects together, like when she helped me paint Tooth after I finished building him, or choosing the colors for the synthetic rigging on Wisdom.

During her first year, she learned the basics of sailing and came to trust Wisdom through all sorts of weather. Then we set off on a month long sailing trip out into the ocean where she really fell in love with sailing!

It was on that trip that I proposed to her and we became engaged.

One year after that, and a lot of planning later, we are getting married. We will tie the knot and start our journey as a married couple. I figure if we can live together in a small boat, we must be compatible. 

I always maintain one rule on the boat, I am captain and she is Admiral! Following this simple chain of command, we work very well together and make decisions as a couple in a way that makes both of us happy. I look forward to a long lifetime of cruising together.

Installing the Rafters

The structure is now rather flimsy with all that weight aloft and hardly any support to it. The structure wracks in the wind since it lacks support from the roof.  The rafters will connect to the ridge beam and tie them to the wall frames. On a boat, these rafters are analogous to futtocks leading to the chine log.

The rafters are connected to the ridge beam with strong-ties and to the wall frames with hurricane anchors. The rafters are set 24" O.C. with exception to the butt block bolts. The rafters near the change in pitch of the roof are doubled to give each point more strength as the roofs change pitch.

The trusses sit a bit lower than the rest of the rafters to allow a sandwhich plank to be set between the truss and plywood roof to add the extension.

The tiny house is starting to take shape as it looks more and more like a house. Later on, boards that will be analogous to floors in a boat will be installed in the rafters below the ridge beam to tie them all together and make the structure even stronger!