Rainwater Plumbing: Deck to Tank

Getting the tank in the bilge was pretty straight forward. Getting the water to the tank is a little more complicated. 

To accomplish this task, a small aqueduct needed to be constructed. Nowhere near the level of grandeur of the ancient Romans, but the same principles still apply. In general: the starting point needs to be higher than the ending point, there should be no inclines, and tight bends should be reduced.

Having the deck as our starting point and the bottom of the bilge as our ending point makes the first point easy to accomplish. Now we just need to make sure the flow rate stays adequate during the entire journey.

Water flows downhill. If there is any incline, the speed of the water will decrease and flow problems will ensue. To keep the speed of flow adequate, water needs to drop rapidly to gain speed that will shuttle it along the less declined sections. With this speed, the water will then flow quickly to the water tank down in the bilge.

Tight bends are another problem, simply because of the added resistance they impart on the passing water as the fluid attempts to make twists and turns.

With these concepts in mind, it is fair to say that plumbing the water tank is rather straight forward. This pleasant state of mind will take you all the way to the starting point of the project where you soon realize that sailboats are a collection of compromises.

The low spot on the deck is next to the cockpit, so the hose will begin at deck level and drop down quickly as it makes its way to the bilge. This will give the water a quick burst of speed that will help make everything else flow nicely. From the cockpit lazarettes, it then needs to work its way past the steering mechanism and into the bilge where it reaches the flexible water tank. This is where the problems begin!
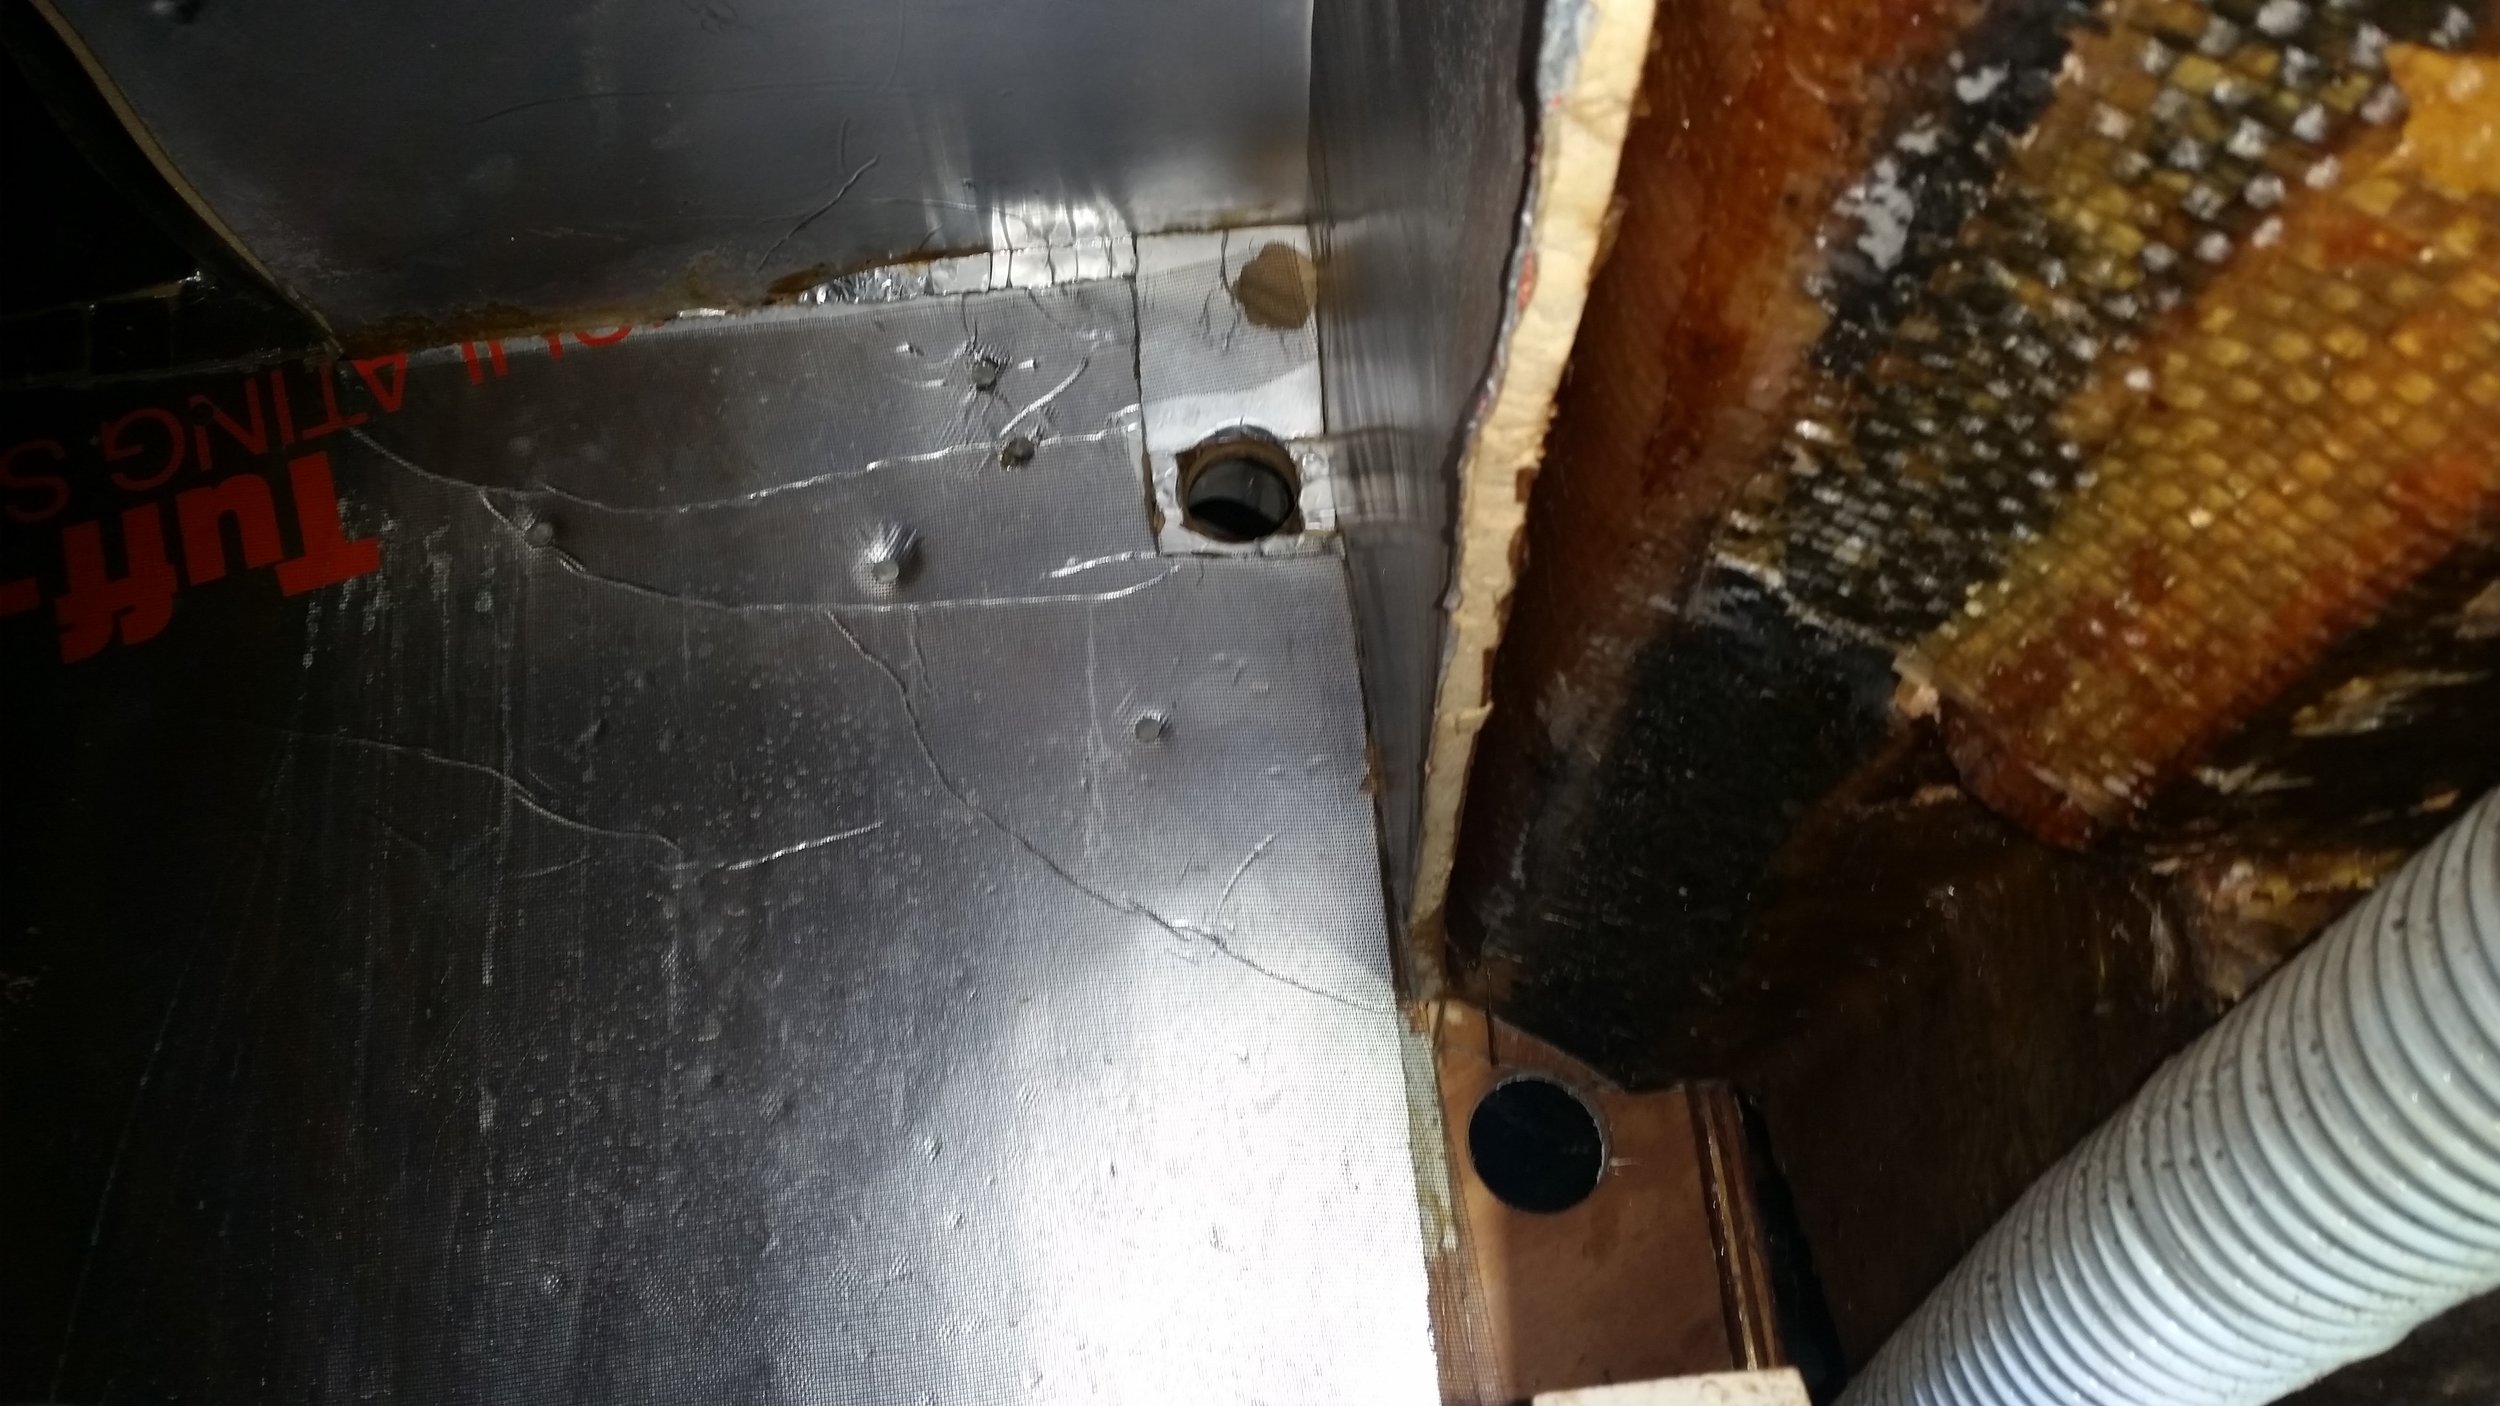
 

The starboard side was easy. The old diesel exhaust hose used to run through the hole visible at the top of the area. The port side is rather packed full of hoses. The three hoses visible are the cockpit scupper drain, cockpit manual bilge pump and electric bilge pump hoses. Adding an extra hose on this side will prove challenging.

The hoses all need to run over the top of the metal frame to the steering quadrant to avoid interfering with our steering, and this makes the available hose space even more limited.

The final decision was to drill a new hole below all the other three holes on the port side and then have the hose ride up over the metal frame and then quickly back down again. Hopefully, the water will have enough speed that it will be able to flow up and over the little hump and into the tank without much issue.

Once past this point, the hoses are joined in a Y where they follow along as a single hose to the tank. From this point forward, everything is a steady decline with no upsets on its way to the water tank.

The next step will be getting the water out of the tank so we can use it!
Climbing the Mast: Questionable Halyard Splice

When you climb the mast, your entire life is hanging by a single rope: the halyard. If there is any failure in the halyard, you will fall. This will result in either serious injury or death! It is wise to only climb a mast on a halyard that you think can support your weight. If you have any questions about the halyards ability to support your weight, don't use it!

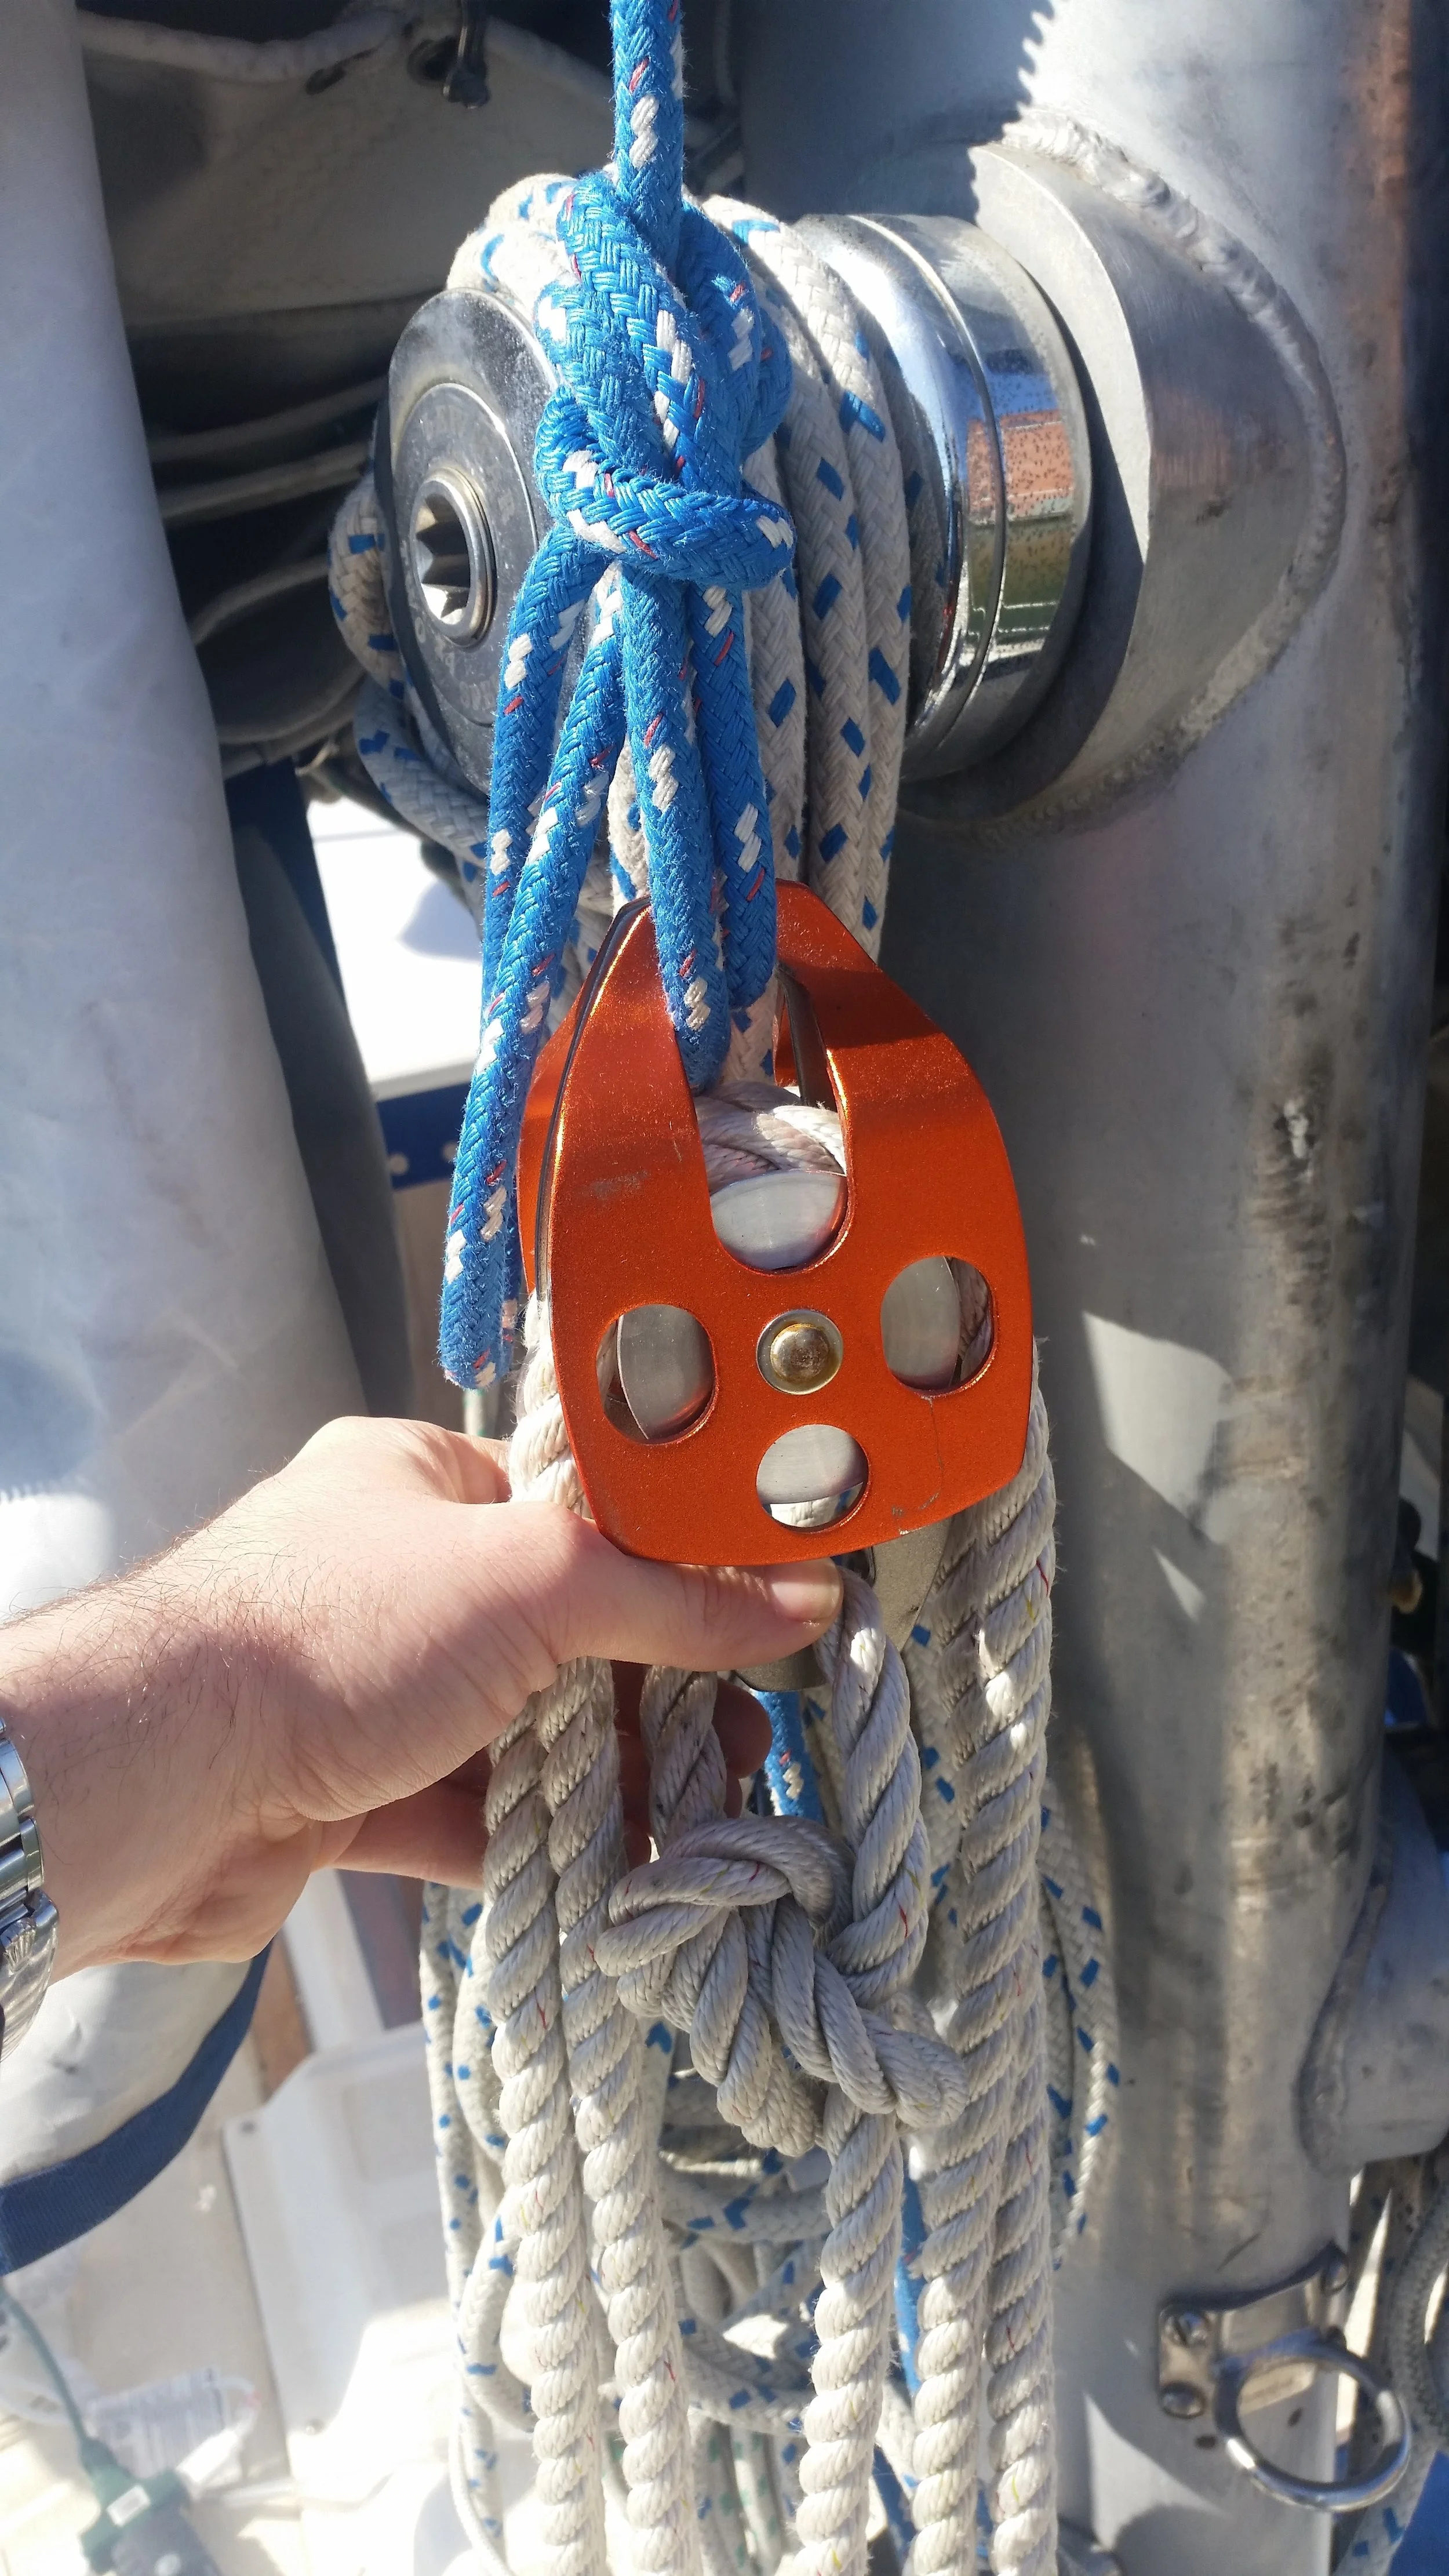
The halyard on this yacht was in good condition but the splice was a bit questionable. If you attach your gantline to the shackle, always verify that the splice is in proper condition. You can't see inside the eye splice, but you can feel inside. Feeling the eye splice will let you note any discrepancies in the core and cover. W

When feeling this eye splice, the core seemed to disappear right as it entered the eye. It felt like if the eye splice was performed by cutting the core and only burying the cover. There is no way I would trust my life to such a cheap shortcut!

The rest of the halyard seemed to be in good enough condition and of sufficient strength to hold my weight, so I simply tied the halyard to the top block of my gantline. I couldn't fit the shackle through the slot on the block, so instead I tied a bowline in a bight. The end with the shackle simply hangs and dangles aside while the knot securely connects the block to the halyard.

If you don't feel safe with a piece of equipment, don't rest your life on it! Find a way to only support your life by the components that you feel are strong enough to bet your life that they will hold well. If you can not assemble a safe method to raise yourself up the mast with the reliable components, do not climb the mast! 

I personally climb my own mast using the shackle because I did the splice and buried plenty of tail into the splice. On other peoples masts, I typically tie a knot onto the top block of the gantline because their splices look weak or inadequate. If you have a weak splice on your own yacht, do consider replacing the splice (or halyard entirely) with one that is strong enough to support your life.

Rainwater Tank

With the deck plates installed, the next item on the list was to install the water tank that will hold all of this glorious fresh water that has fallen from the sky and onto our tiny sailboat in the big blue ocean. Pretty much all the space in the boat is currently occupied as storage or tankage. There isn't really much space left to stash a large watertank, or is there?

The battery box for the electric motor was installed where the old diesel motor used to live. A platform was made for the batteries to rest on, but there was still a space under this battery box that went unnoticed. A small access hatch was made to grant access to this tiny cavern and to the bilge beneath the new electric motor, but no plans existed for this space and it remained empty for many years.

Making this space a water tank would be very difficult as there is little access to do work and I would loose access to the bottom of the electric motor. This would make the yearly maintenance where I grease two zerts fittings rather tricky to carry out. If I can't make the whole space a water tank, what if I put a water tank into the space?

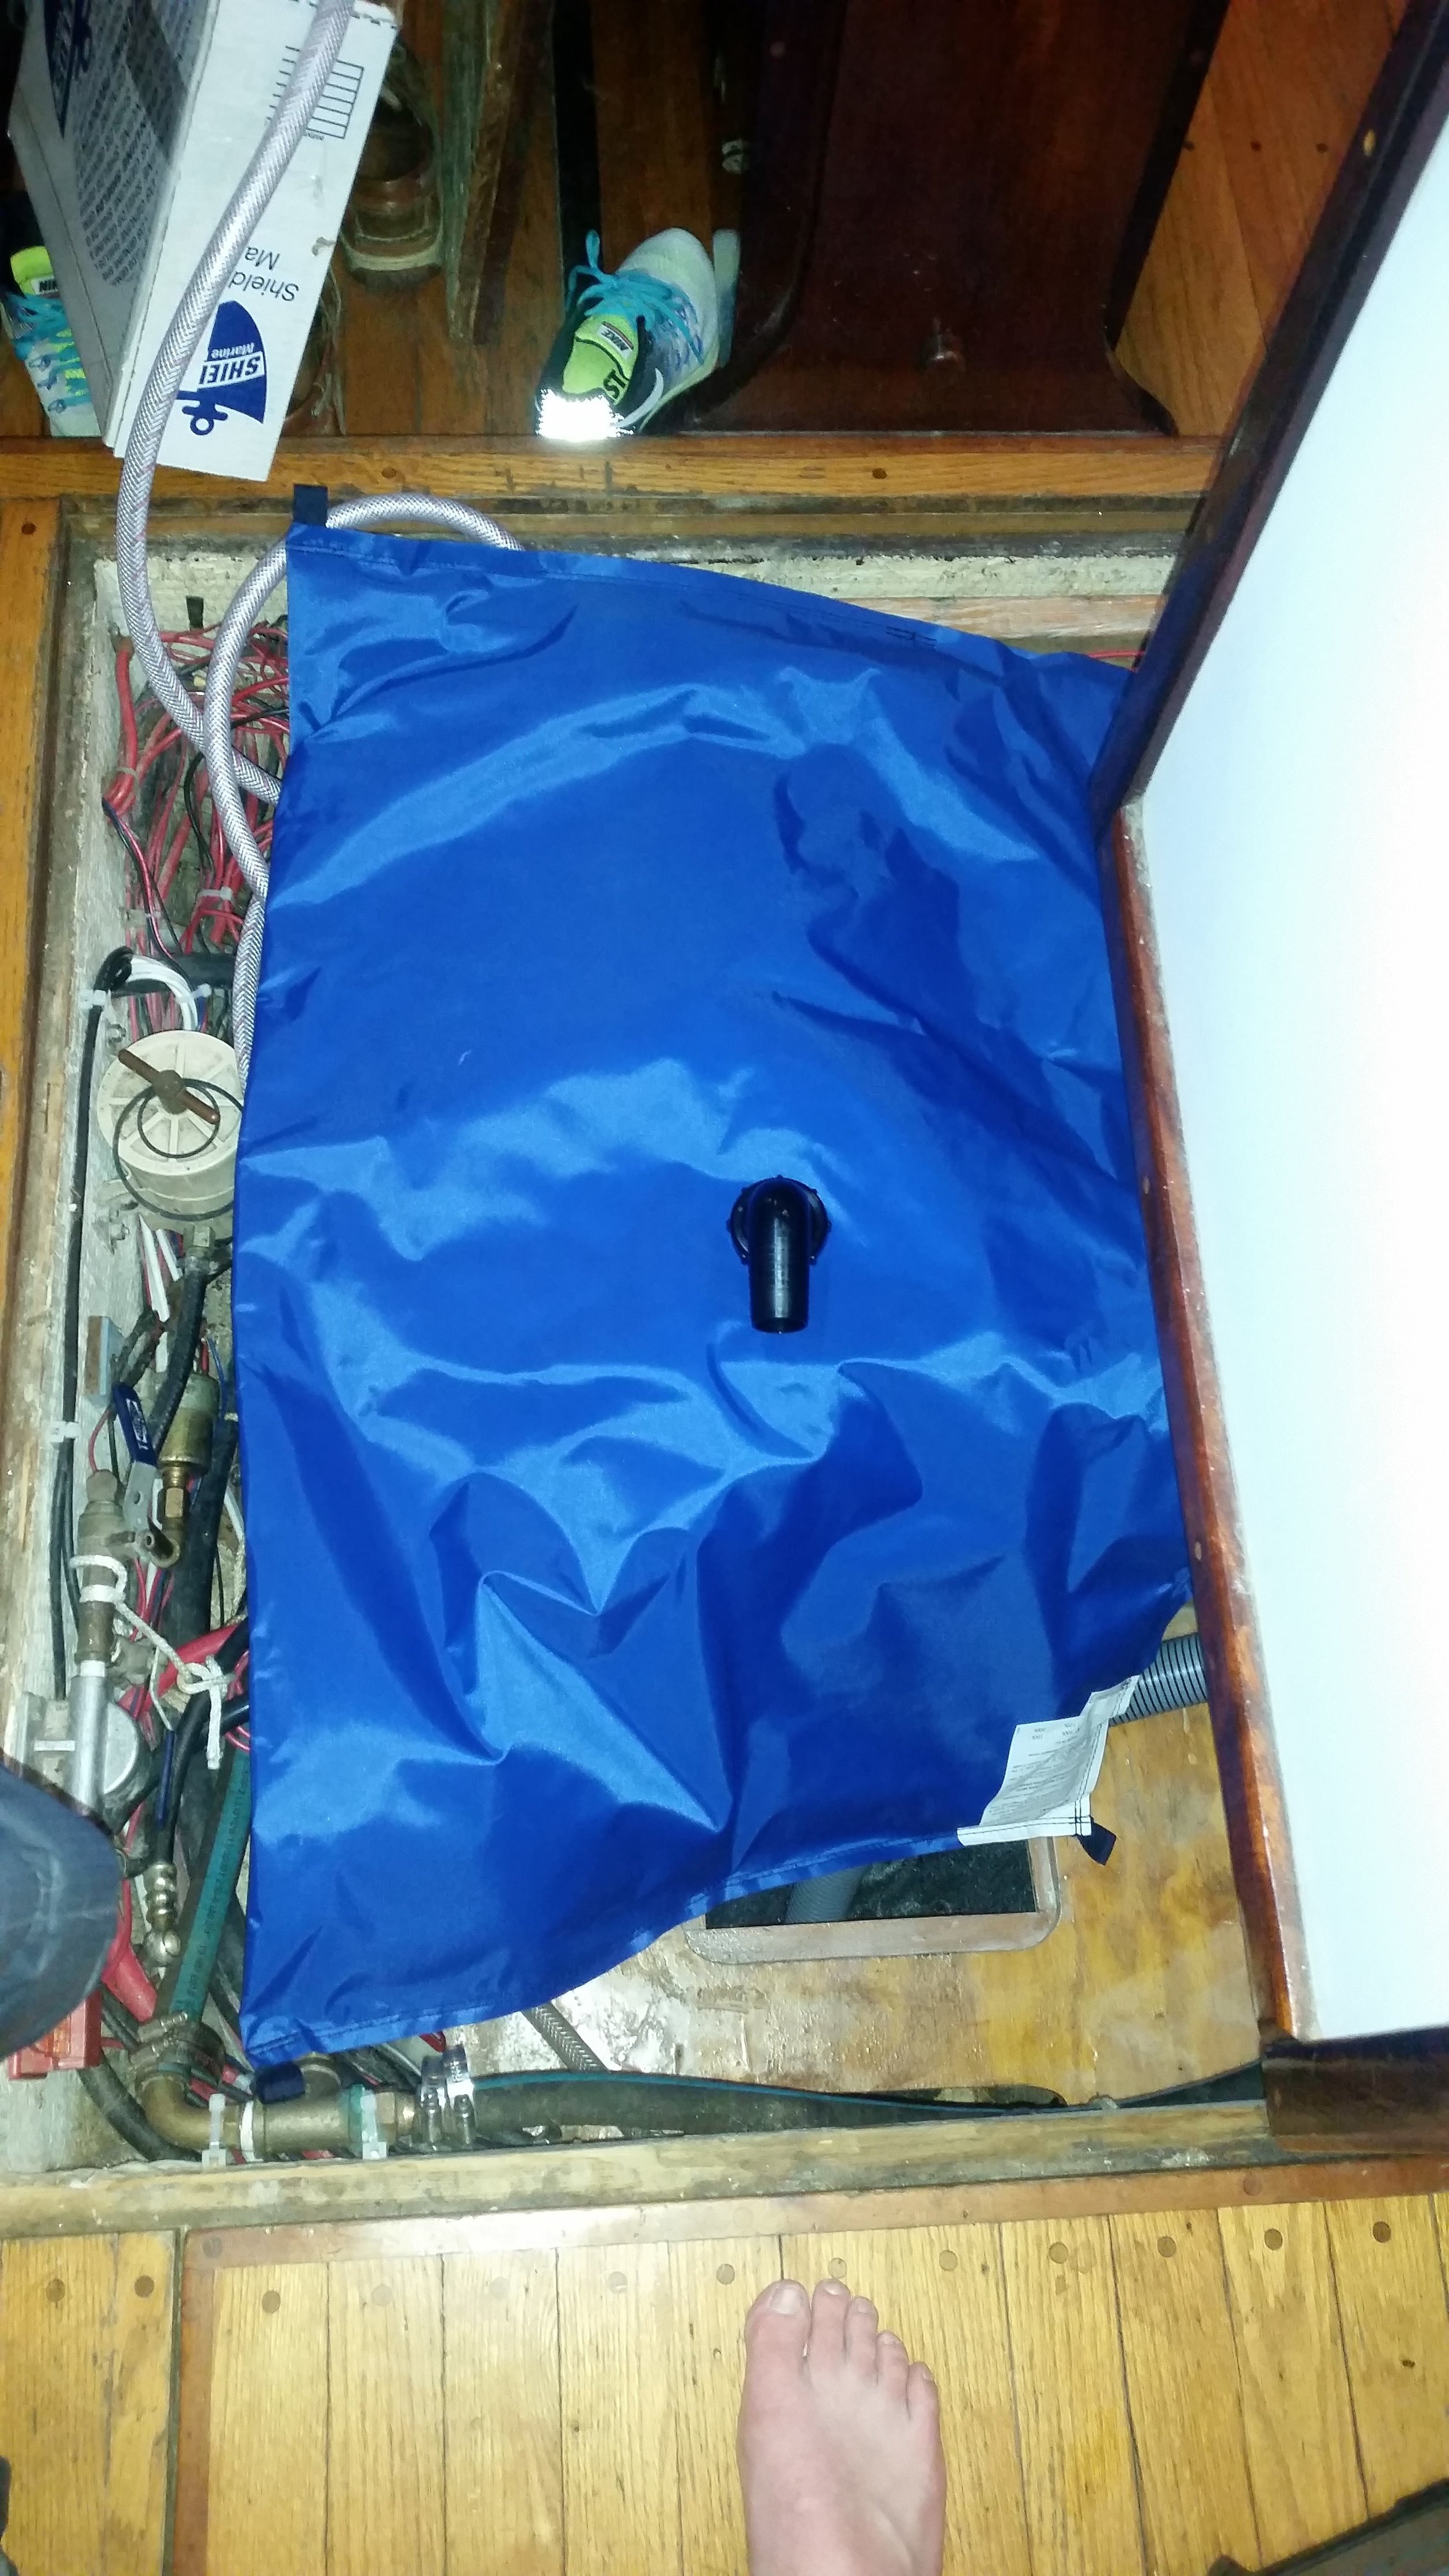
The thought of stuffing a flexible water tank down through the hole and into the void seemed to be the easiest method of converting this lost space into a valuable resource container.

When this space was converted from motor holder to battery box, no efforts were taken to smooth the sides or clean it up. After a few years, this is what the location has become: a dusty dirty place where sharp fibers poke out waiting for a new flexible tank to puncture.

I contemplated the idea of grinding everything smooth and fairing up the surfaces. I could lay down new cloth and apply a smooth coat of epoxy to turn this roving bumpland into an ice skating rink! Then I realized that I would have to do all of this through a 6x10 access hatch.

On to Plan B! Stuff a bunch of thick fabric into the hole to line the edges and make everything feel smooth and soft. I used the felt I had leftover from when I made the hanging garden on the stern to line the walls. This felt is made out of recycled water bottles, so it won't rot in the dark and eventually moist environment of the bilge. I know water will get between the tank and the hull at some point and this felt will sit in that damp sandwich for a long time! Choosing a rot resistant cloth will make my life so much easier in the years to come.

The flexible watertank I used is by Plastimo. This is their 100L model which will fill up the space beneath the batteries. There are two sides to connect the inlet and outlet on the tank. Be sure that the inlet is on the top and the outlet is on the bottom (this is per the manufacturers recommendation).

With everything ready and in place, it is time to fold up the tank and stuff it through the little hole. Once inside the hole, the tank can then be unfolded, oriented, and laid out flat. 

The tank is in position, filling up most of the space available. I don't think we will be able to fit 100L of water into the tank because of the space constraints, but we will be able to carry as much water in there as we would have if we decided to build in a rigid water tank.

You may notice the batman tape on the small outlet hose. This is to fight chafe in the darkest of alleyways. I was worried that the hose clamp would dig into and cut the fabric of the water tank, causing it to fail us prematurely. Over the hose clamp, I tied a double constrictor knot. This knot pulled the tongue of the hose clamp down flush with the surface of the hose, making the whole assembly feel much smoother. The line also helped to soften any sharp edges of the hose clamp. To make sure that the line doesn't budge as we slosh around in the open ocean, I wrapped the whole thing in duct tape. Now the dark knight will protect our water tank against the injustices of chafe!

The next step will be getting the water to the tank and out of the tank.

Trimming the First Layer of Bottom Planks

The bedding compound between the bottom planking and the dinghy has fully cured, allowing me to get in there with a small circular saw and trim up the overhangs. 

The planks are trimmed to fit flush against the keel into the rabbet, but they are allowed to overhang the chine without regard for reason. After the bedding compound is cured, the planks can all be cut off a little proud but still close to the actual chine.

This makes it so much easier to work, as I don't have to worry about being perfect while I'm planking. Once everything is cured and set, I can treat all the planks as one giant piece of wood and work it all together. This allows me to cut, plane, and sand the entire portion of the hull into a fair and smooth surface. Best of all, I don't have to worry about coming up short on either side since I'm working with a longer than needed plank.

Now that the chine is roughly  trimmed, the knife edge bow is much more pronounced. The entire purpose of this setup is to reduce the amount of wave slap that we experience while rowing Tooth II. Since I have trouble with "middle ground", I made the bow of this boat a knife that will slice through waves instead of the standard flat bottom that is common on a tiny dinghy of this size.

Saltwater Plumbing

To get your seawater into the galley sink, you need to do some modifications to your current plumbing. The seawater enters through a through-hull fitting and seacock. Rather than drilling a new hole in the hull for your galley sink, why not simply tie into an existing seacock? 

There are important points to look for in a seacock to tie into: Current use and location.

Choosing a seacock is an important part of the process and will affect everything else that will follow. The water to the galley sink will be siphoned off from whatever was already using that through-hull. Through-hulls are sized appropriately to the device that they are feeding, so in a sense you will be stealing needed water away from another part of the boat. It is a good idea to pick a through-hull that is used when the galley sink will not be used. A safe choice is the air conditioners through-hull. When you are in a marina, you will be plugged in and running the air conditioner but you will also have access to fresh water and will not be using the saltwater for the galley. When you are sailing, the air conditioner will be off (because you are away from shore power) so the galley sink will have full authority over the water coming in the through hull fitting.

The next criteria location. Boats are typically setup with seacocks on both sides of the hull. It is good practice to set the discharge seacocks on one side of the hull and the intake seacocks on the other side of the hull. You want to make sure that the seacock you choose for the saltwater plumbing is on the opposite side of all your discharges. The worst thing you could have is the galley intake be located aft of the shower, galley, or toilet discharge. Shower discharge would bring in all the body soil and soapy water. Galley discharge would, in effect, recycle the water you are using to wash your dishes. Toilet discharge is absolutely disgusting and should be self explanatory!

When looking for a suitable seacock to tie into, you know you need one that is on the opposite side of all your discharges. The next criteria is how high the seacock is on the bilge. If the through-hull fitting is just below the waterline, it will come out of the water as soon as the yacht heels over. A through-hull that is lower in the bilge and closer to the keel will stay submerged for longer as you heel over and sail, thus allowing you continued use on either tack.

With the seacock selected, it is now time to tee in the waterline. The best way to tee in is to use bronze fittings. I assembled this setup using a bronze tee with bronze barb fittings for the hose I am teeing into, and a ball valve to the saltwater plumbing. I like to orient the lever of the valve so that any accidental hitting will result in the valve closing instead of opening. In our case, open is up and vertical; should anything bump into it, the valve will turn horizontal and close off.

The tee should be connected after the strainer that way any debris is filtered out before it reaches the pump. It is a good idea to double clamp all raw water fittings located below the waterline. If you notice, I double clamped the barbs of the tee, but I only single clamped the hose leading to the pump. This is because the tee is always exposed to the ocean pressure when the seacock is open, regardless of if I am using the seawater plumbing. When not in use, the valve is closed, so if the hose were to slip off the barb fitting, it would not cause a leak.

While sailing, the seacock is closed, so there is no concern of water leaking. The seawater plumbing is only needed for dishes, which occur around meal times. At these times, the seacock is opened and saltwater will reach the tee. After cooking, the dishes are cleaned with seawater, then the seacock is closed until the next meal. While in port, the valve is shut since the water in harbors is rather disgusting but the air conditioner needs flowing water, hence the double clamps on the tee, but not the valve.

Saltwater Open

Saltwater Open

Hot Water Open

Hot Water Open

From the tee, the saltwater hose leads to a small electric water pump mounted along the way, then to the next valving station. This station is where the magic happens! Sea water enters from the left, hot water enters from the right. In port, the sea water valve is closed (down position) and the hot water valve is open. Out at sea, the hot water valve is closed and the seawater valve is opened. If anything bumps into the valves, it will simply close the valve (instead of accidentally opening them). 

At the bottom of the valving is the waterline that feeds all the boats hot water faucets. This means that in port, we have Hot and Cold water in the galley faucet. Out at sea, we have Salt and Fresh water in the galley.