Cutting Plank Stock

In order to cut evenly sized planking stock, you need a way to make the same cut on a lot of wood and get reliable and repeatable results. Cutting by hand will include too much variability, for a job like this, you will need to use machinery that is set up to mill the lumber over and over without change.

To guide the planks through the bandsaw, you will need a rip fence; which is nothing more than a fixed wall that you slide the wood past. The rip fence is set next to the blade, and the gap between the fence and the blade will be the width of the resulting board. The kerf of the blade will be deducted from the stock, so it doesn't need to be factored into the measurements at this time.

Rip fences are available from hardware stores for a significant price. Most bandsaws will sell you a model specific rip fence that will fit their unit perfectly. The alternative is to make your own for cheap!
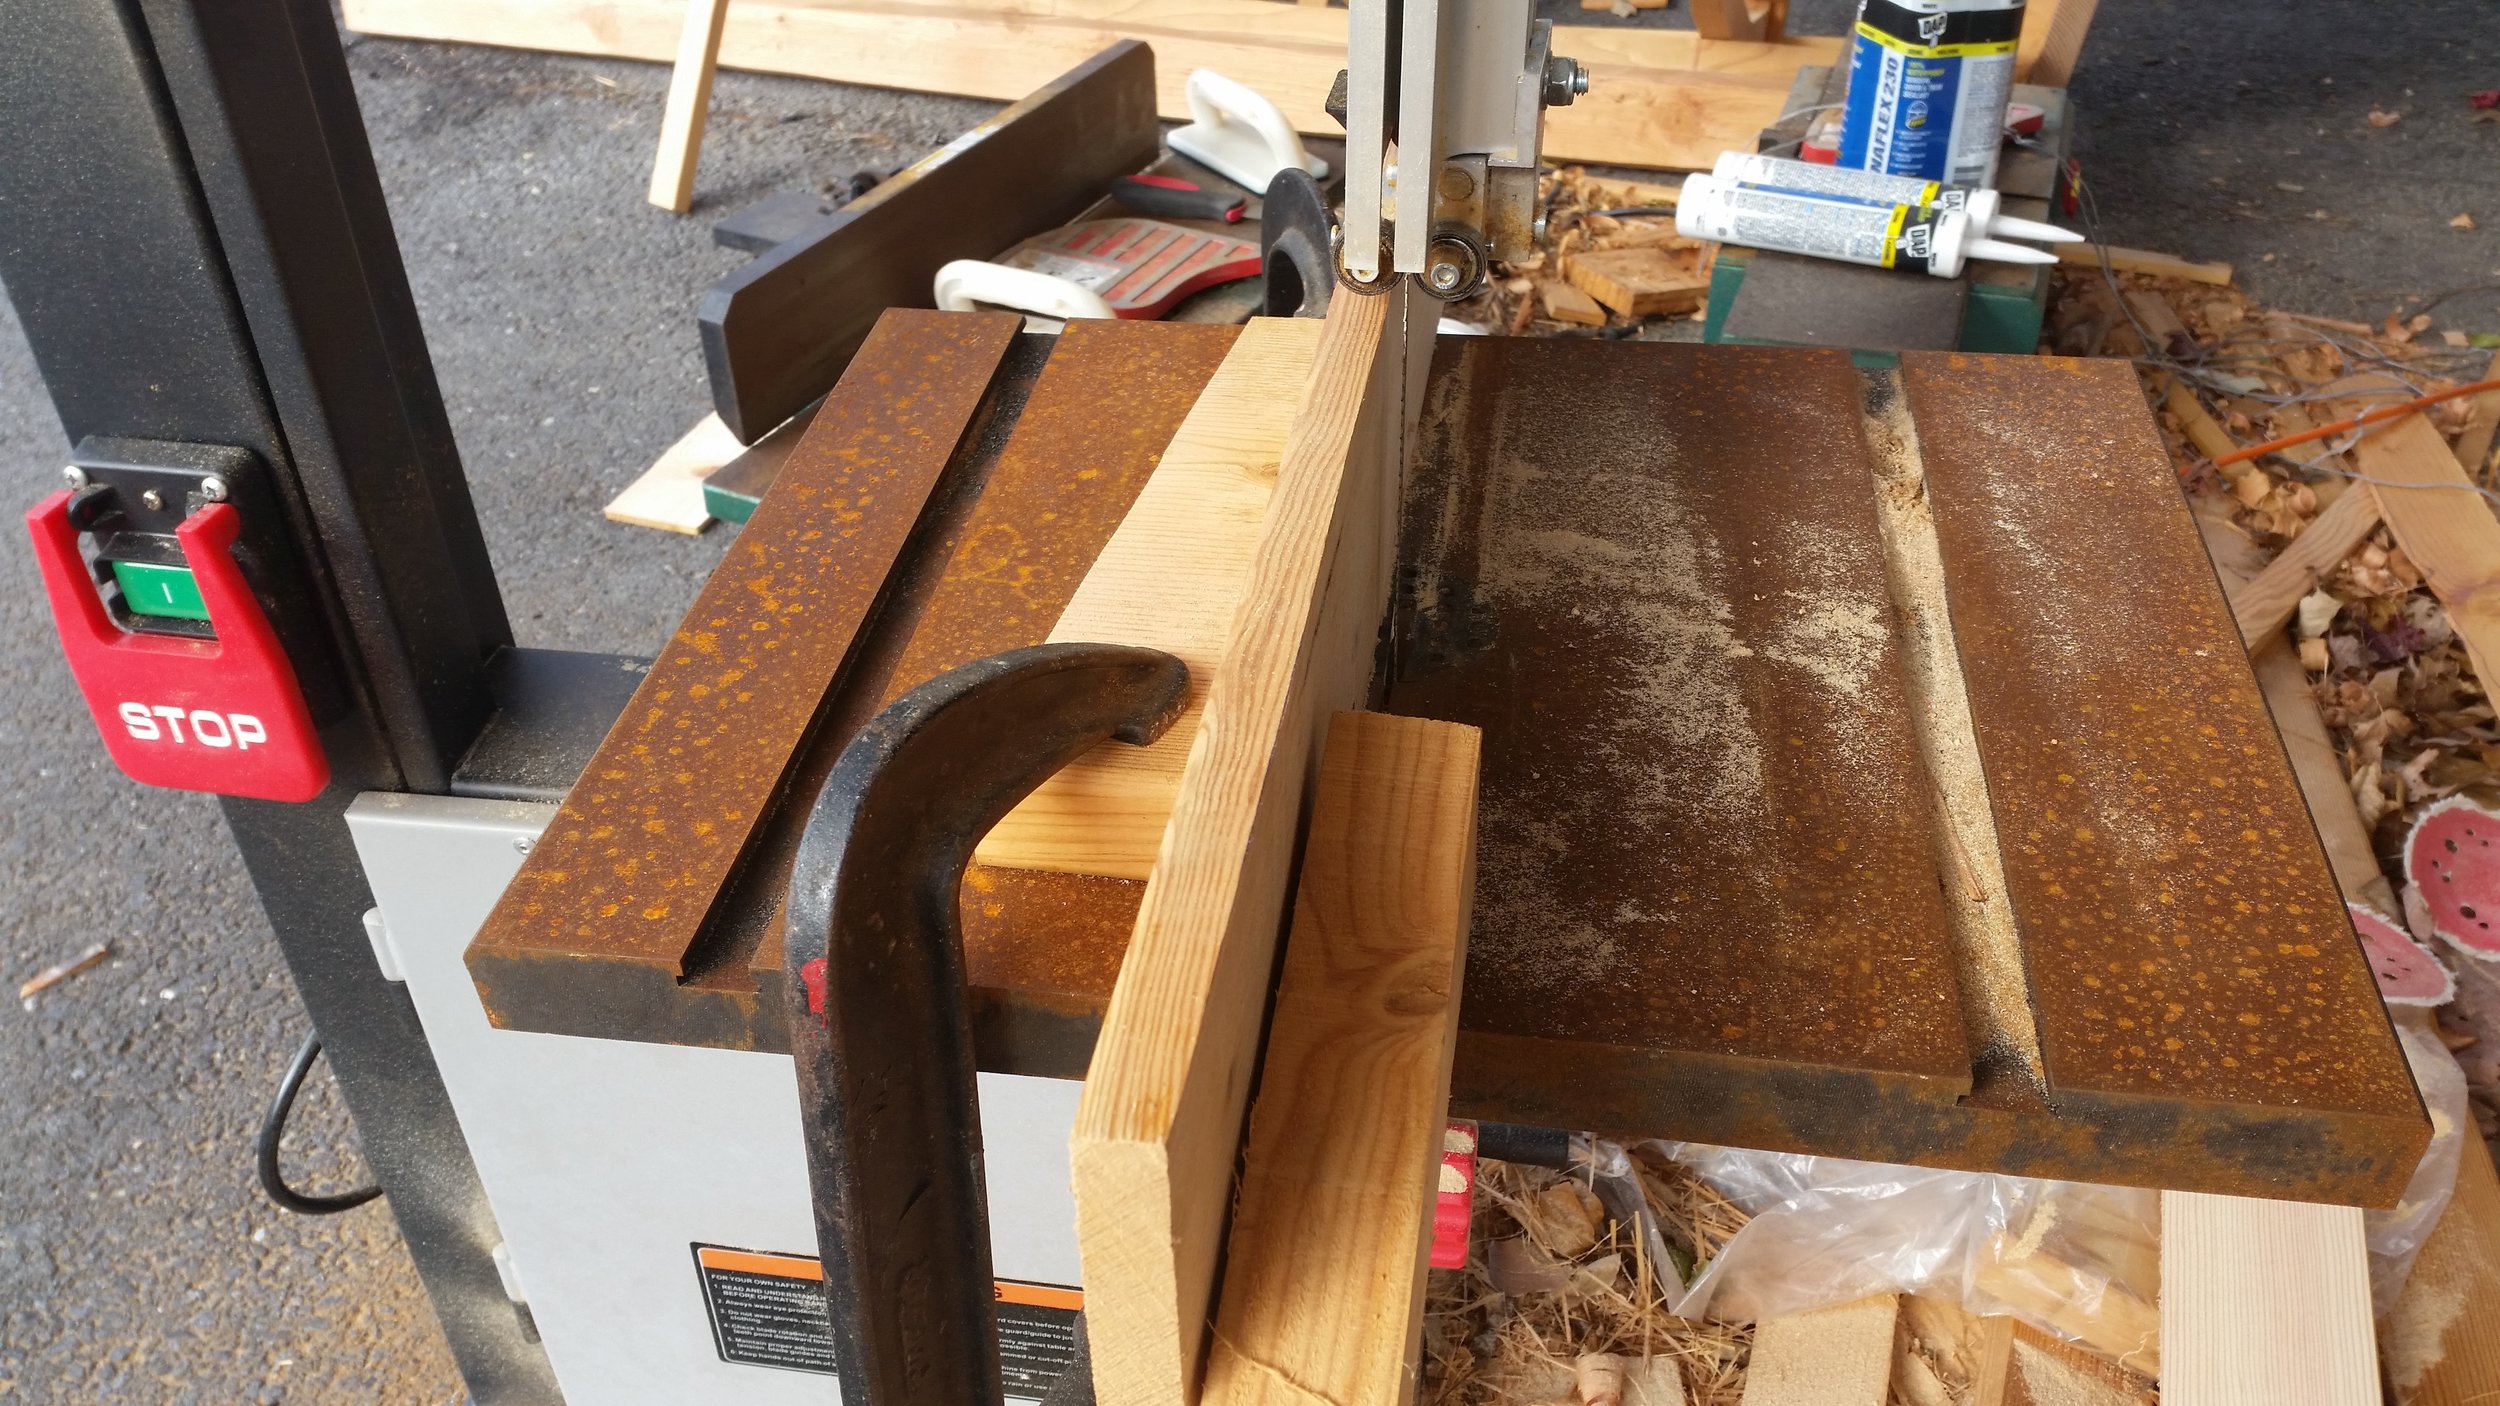
 

In the simplest of forms, a rip fence is just a vertical stop that is set square and perpendicular to the bandsaw's deck. All you need to do is attach a flat and vertical board to a flat and low board. Screwing them together in a square will ensure that your rip fence is square. If there is any discrepancy, a few passes over a jointer will restore this ideal right angle that you are searching fore.

With the rip fence assembled, you simply need to attach it firmly to the deck. Simple C clamps work well for this. The compression force the exert on the fence will remove the possibility of any movement. 
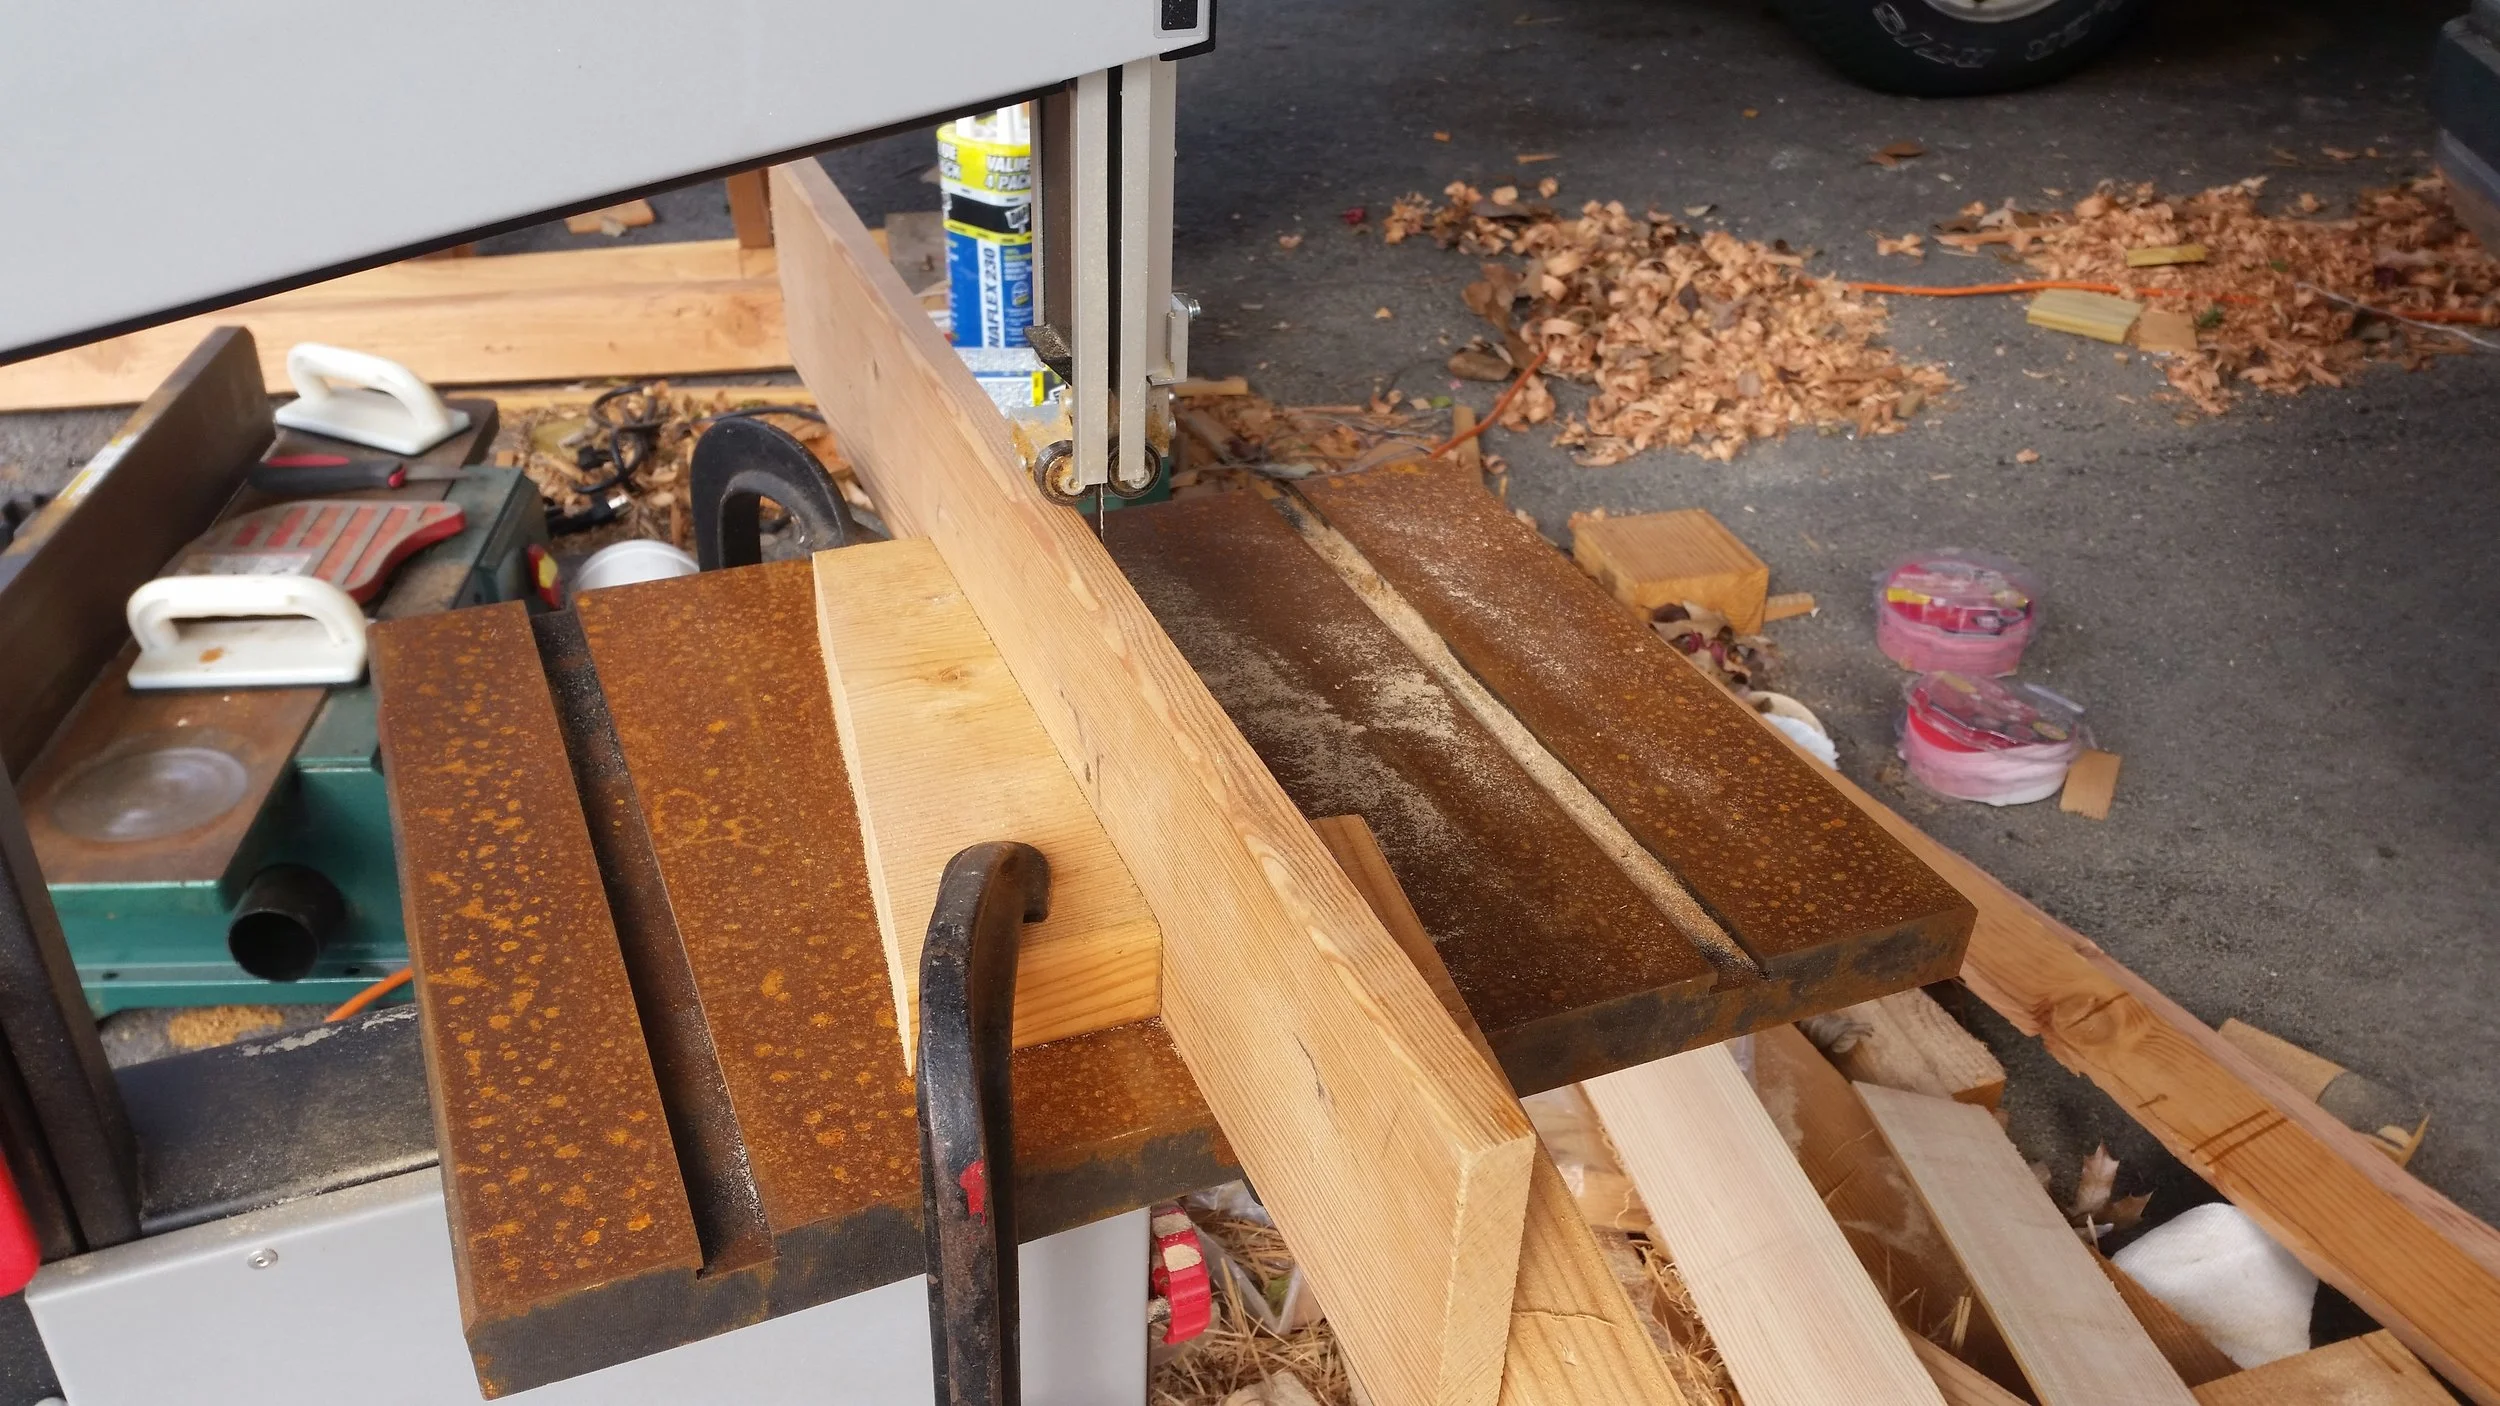
The concept is very simple: clamp the fence to the deck at the desired distance from the blade, then pass a test board through.

The test board needs to be measured for consistency. If the bandsaw blade is too slack, it will bow out and result in a thicker and off angled board. If the blade is too tight, it will snap! You always want your guides as low as possible and the blade as slack as allowable. 

With everything setup and verified for accuracy, you're ready to start milling your lumber!

With a rip fence on the bandsaw, resawing planks is very easy. All you need to do is push the boards through the saw while keeping pressure on them against the rip fence. It is always a good idea to use other sticks or boards to push the wood you are cutting. This is especially true of the last few inches of the cut. When the blade exits the end of the board, it will continue to cut whatever it comes in contact with. If your fingers are pushing the wood through, your blood will stain the wood as your fingers are sliced open (and possibly off) by the blade.

A push board will allow you to safely push the wood through the blade without any fear of amputation. I prefer to use a large block from the scrap pile. When it gets too cut up, I just switch it for another scrap piece.

Now you can safely mill your own planking stock instead of buying loads of expensive boards from the lumber yard!

Fiberglassing the Bilge Pump Supports

The bilge pump supports are positioned with lots of chop strand mat wedged between the endgrain and the stripped bulkhead. All we have to do now is glass everything together!

Being how this project site is also my home, I need to make sure that no mess occurs and all the work is contained. By working with smaller sizes, I am able to keep any issues to a minimum and produce a good final product with minimal disturbance to the rest of the boat!

The pure epoxy can be brushed onto the wooden supports with a paint brush just like if it were varnish. It is best to use a disposable chip brush with bristles as a foam brush could dissolve in the epoxy, destroying your ability to apply it and your batch of epoxy resin.

Be sure to saturate the chop strand mat at the ends. The idea of the chop strand mat is to hold wet resin in position as it cures. If you fail to wet the chop strand mat, there will be no bond to the bulkhead! Everything is covered in an even coat of epoxy, the frame, the ends, and the bulkhead as well. I used fast set epoxy simply because it is winter and the low temperatures will greatly delay curing. If it were warmer, I would be using slow or ultra slow hardener, as it would grant me more working time. 

Adjusting to Life Aboard

I won’t lie.   It took me about a full year to appreciate living on a sailboat.  When I moved in with Herby, I was accustomed to a life of walk-in closets and nick nacks, and while I still appreciate and admittedly sometimes dream about those things, I feel like I’ve solved some sort of life puzzle by letting go of the concept of “extra.”  I feel like I’ve figured something out and somehow cheated the system.  We grow up with one image of how our lives will play out.  We will go to school for thirteen years, enter straight into college where we will decide on a career, go to grad school for said career, and then immediately enter into that career before it’s too late because…..why?  Why would it ever be too late to start that job? Where is it going to go if I make it wait for a year? Why are we so tethered to society’s expectations of life as if it’s a straight line that never veers off in new directions before reaching its destination?  My life was on a straight trajectory towards the thing that I love; teaching art.  I was even offered a job, which was admittedly very difficult to turn down because everyone was saying I was crazy for doing so.  They would say things like, “That job will not be there in a year! What if that opportunity never comes back?”  I’m not worried, though.  I know that I’m still going to teach art because that is what I’ve been working towards for the past three years of education classes and student teaching.  But if living on a boat has taught me anything, it’s that life constantly offers you opportunities that don’t exactly fit into your plans, but taking them does not mean that those plans won’t happen.  It simply means you’re taking a more adventurous route. 

          When Herby mentioned his dream to sail across the Atlantic in our home, I thought he was crazy to ask me to put everything on hold for a year.  It wasn’t something I’d considered.  It was so off course if you’ll excuse the pun, and I’d been told all this time that I had to get a job as soon as I possibly could before someone else snatched it up.  But the longer I thought about it, the more I asked myself, “why don’t I want to do this?”  Why don’t I want to take advantage of this time before I have a serious job and kids?  The plan was to take the trip in 2018 and the longer I thought about it, the less that made sense.  One night we were lying in bed and I blurted out my feelings.  “Why are we waiting?  Let’s just go this year!” 

          Since making this decision, Herby and I have both faced opposition and questioning from collegues, family, friends, and complete strangers.  Most of them want to know if we’ll be safe and how we can possibly afford to take a year off from our lives here in Maryland.  The answer is simple.  Yes, we’ll be safe.  We wouldn’t just go do this without having done the proper research and attained all of the necessary equipment.  And as for how we can take a year off?  We’re just doing it.  There will never be a better time.  I was never destined for a normal life, and I sealed that deal when I married Herby. 

          When I first moved into the boat, I did so with the sure knowledge that this was a fun little phase.  Someday we would move into a house and have the normal life that everyone expected for us.  Life has thrown my straight path into a wavy uncertain squiggle and I’ve never been surer of anything before.  My life is an adventure. 

upload.jpg

Class II Double Braid Eye Splice

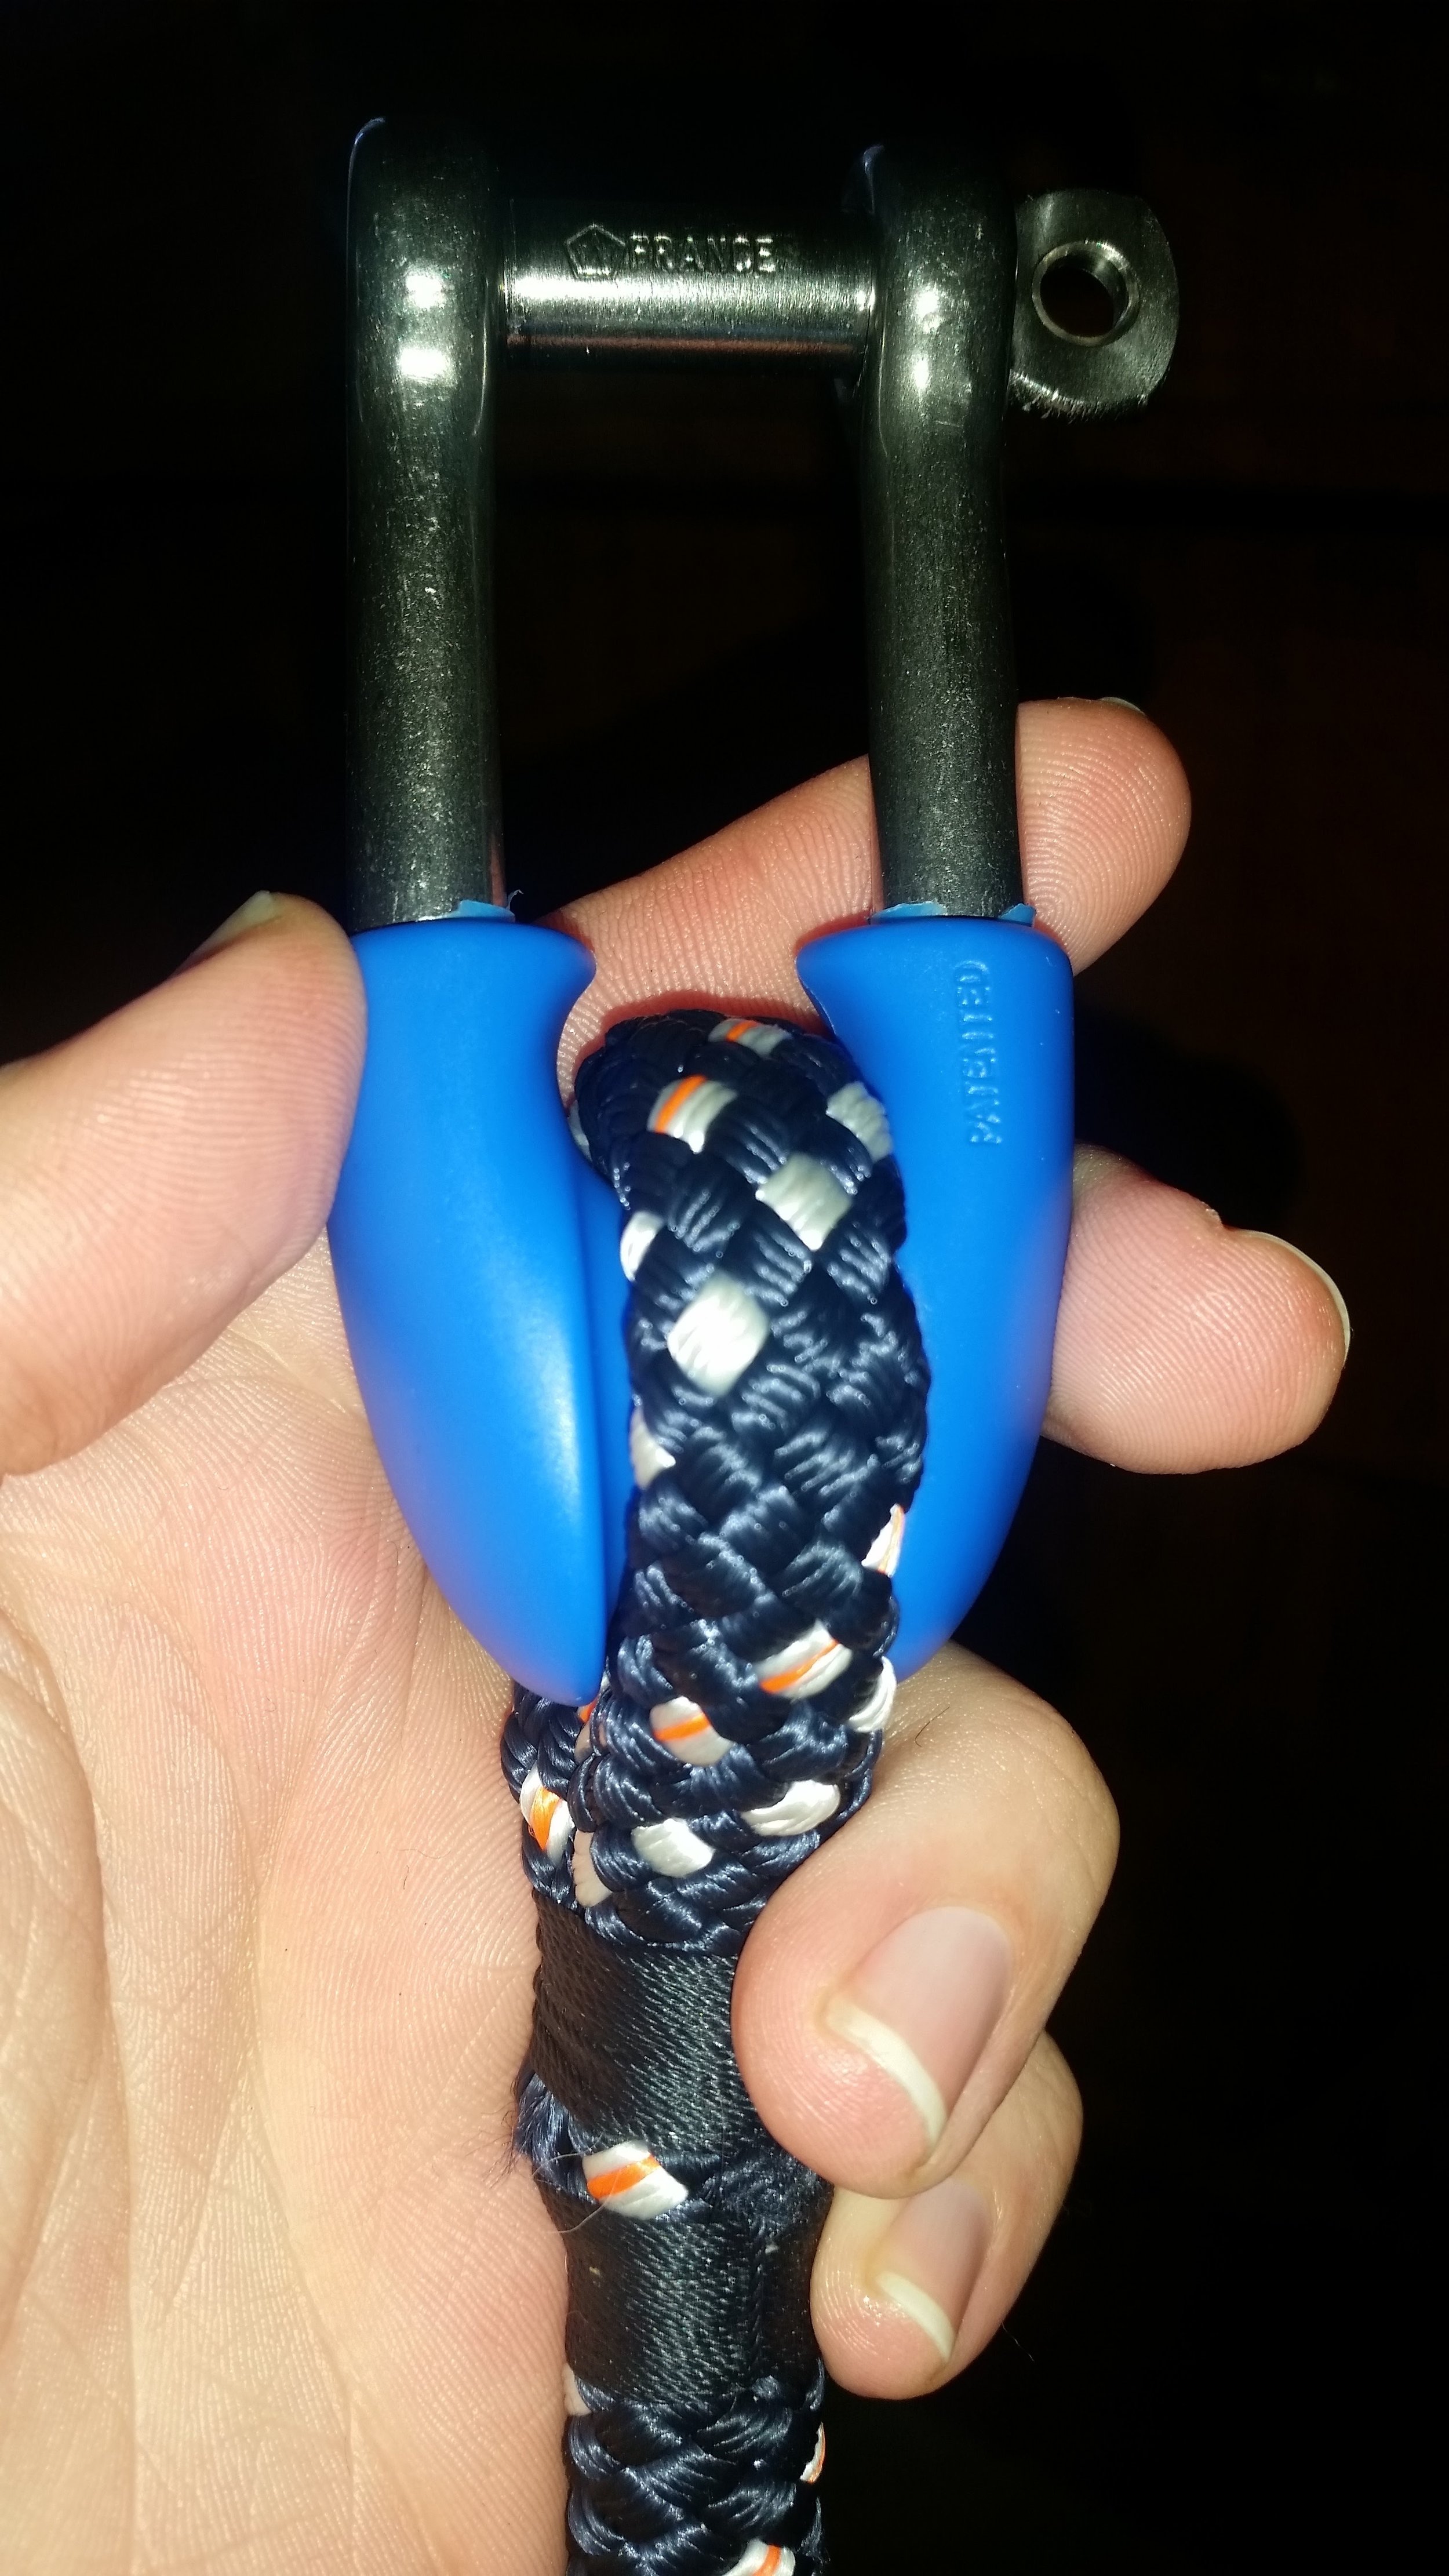
Eye splices are a great way to connect a shackle to the end of a line. In this example we will be attaching a halyard shackle to the end of the line using an eye splice. The line we are working with is VPC which is a technora/polyester blend. Since some of the fibers in it are technora, the rope counts as a high tech line and requires the use of a Class II Double Braid Eye Splice.

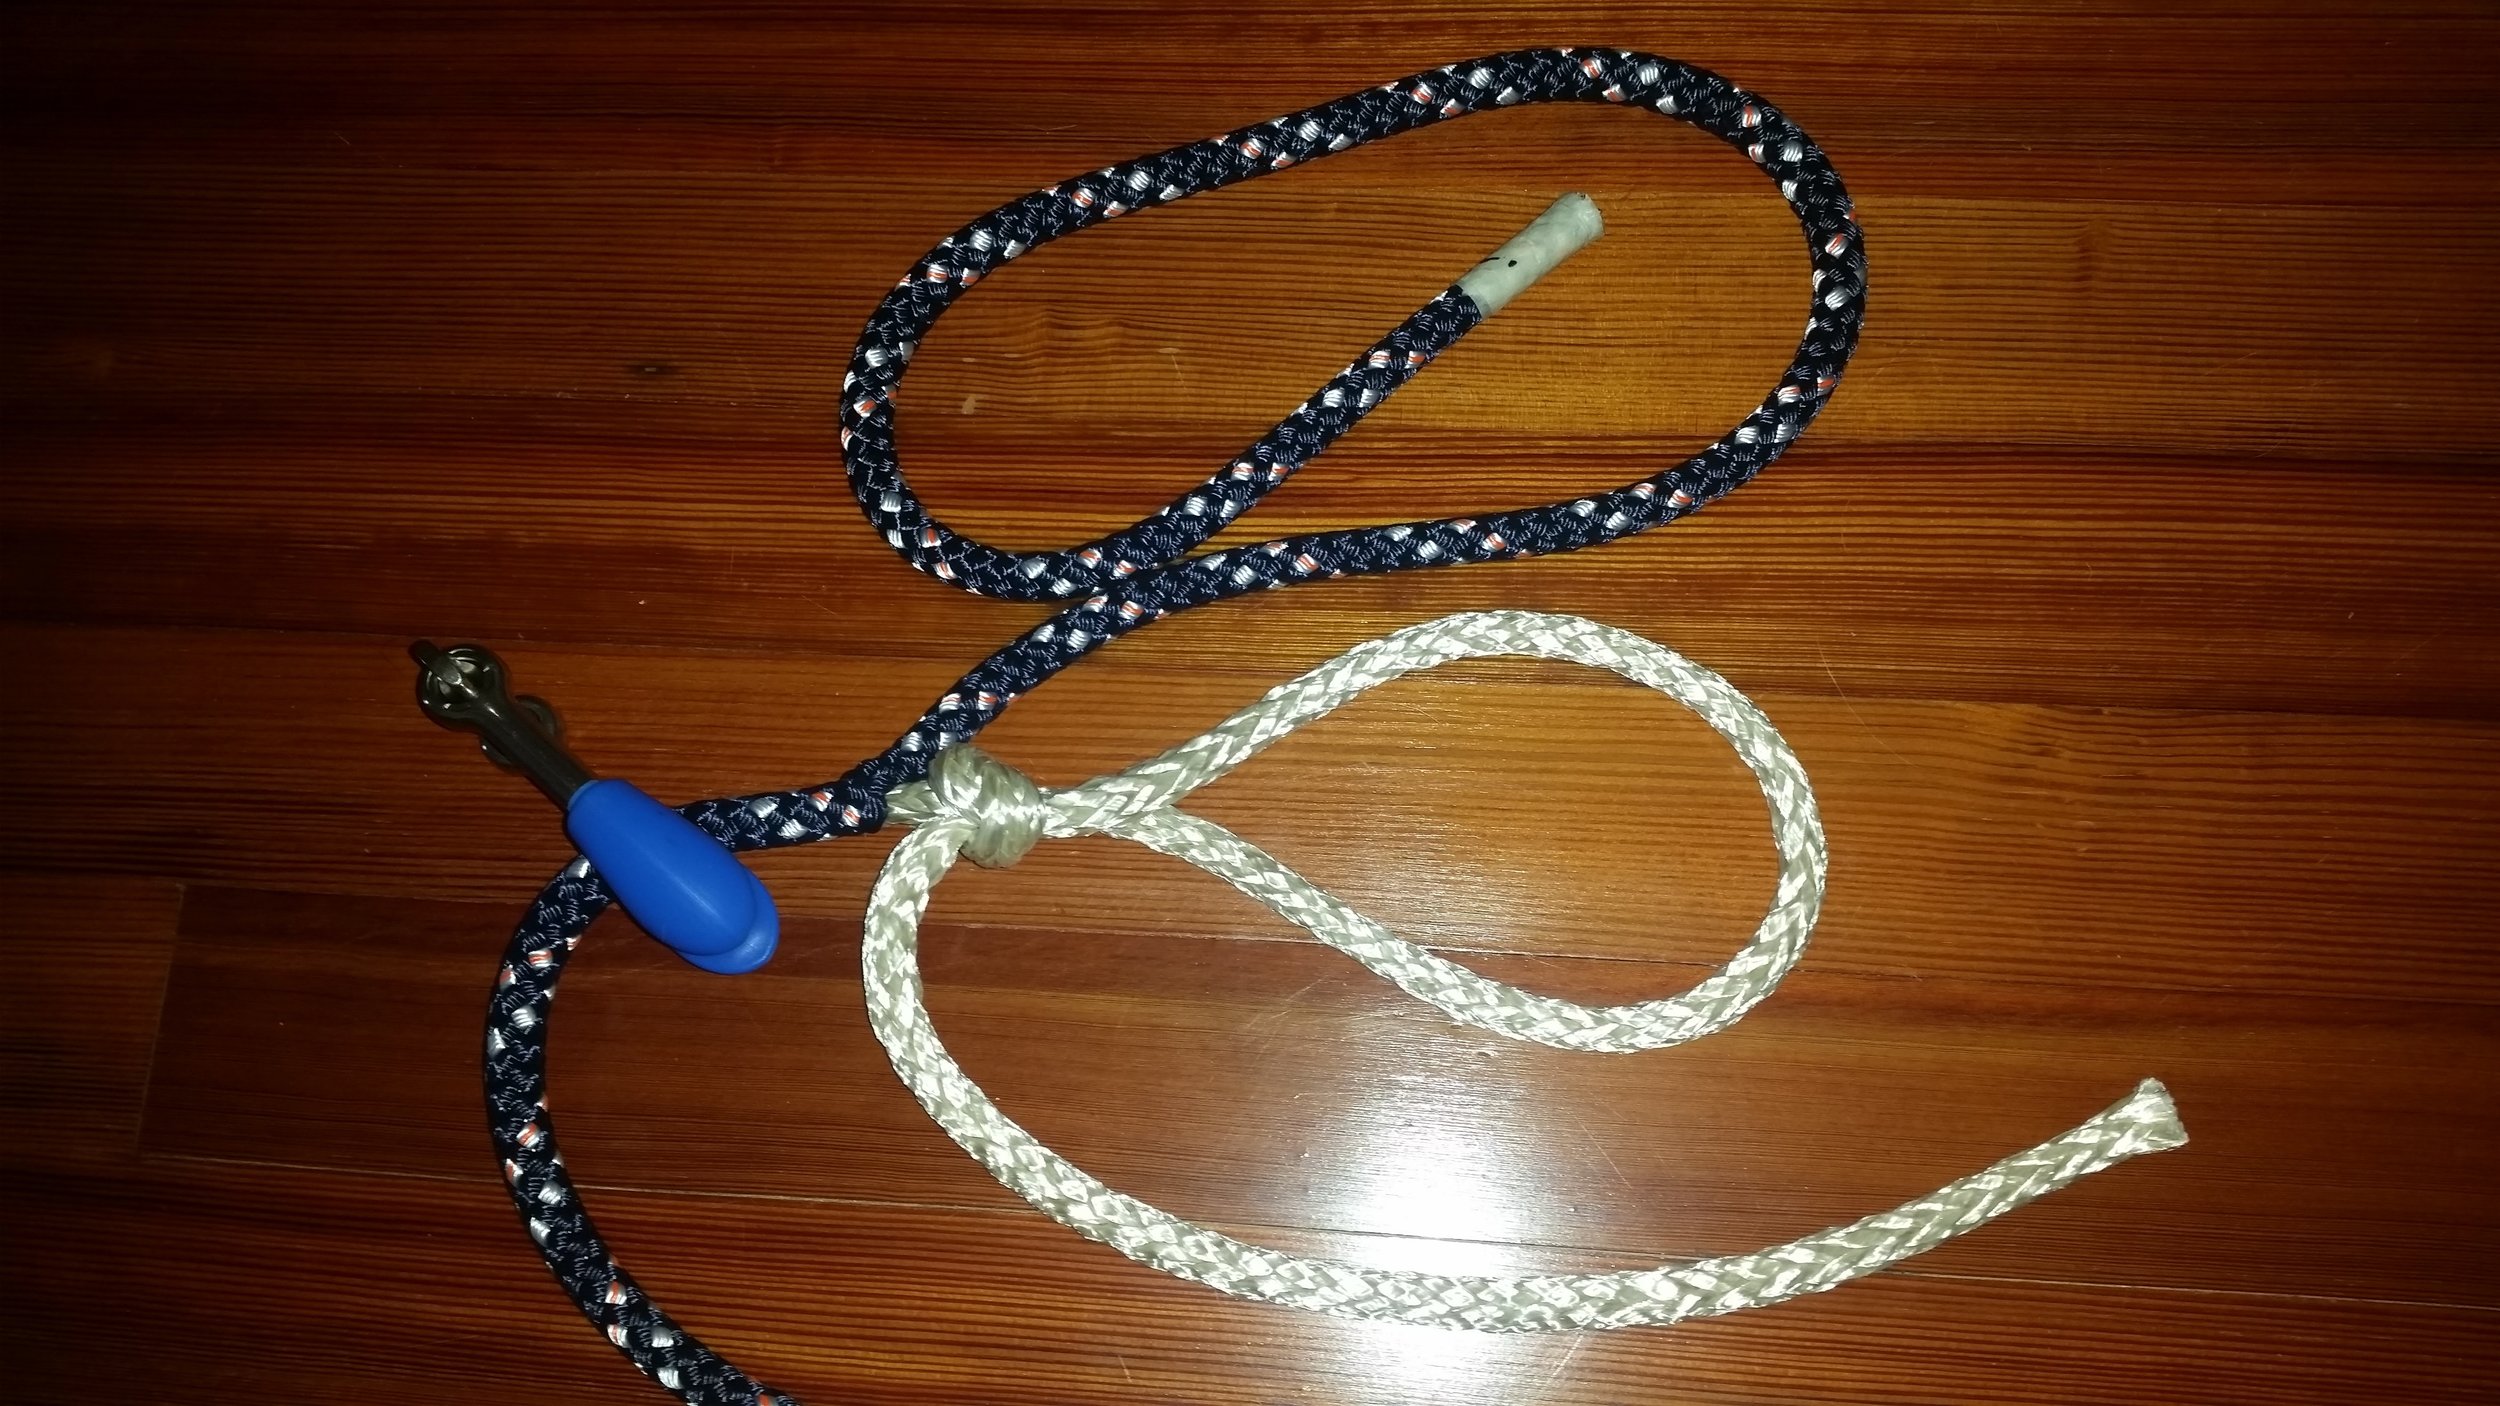
In the begging, everything is simple. You have your shackle and your VPC line. 

Then it all gets really complicated! But don't worry, it's not as wild and confusing as it might first seem. 

Your first step will be to put a pin through the entire line about 12 feet into the line that way the shifting core and cover won't affect the rest of the line. This will make your life easier later on in the splicing process.

Your second step will be to remove the core from the cover for the portion of the splice that will be buried. Since this is a Class II splice, you need to bury 2.5 fid lengths. The reason for this long tail is Class II cores are slippery. The longer the buried tail, the more friction can be passed to the tail to hold the splice in place. If you want to err on the safe side, simply make the buried tail even longer as this will increase the strength of the splice.

At 2.5 fid lengths (or more if you want to be safe) you will bend the rope and extract the core from the cover. When you bend it over, the cover fibers will stretch a bit and you can work them apart with a blunt pin or a small fid. Once the cover fibers are separated, you can insert a small fid and lift the core out of the cover.  

Once enough core is out of the cover for you to grab, you can simply pull the core completely out without the aid of any tools.

With the core removed from the cover, you might feel like proceeding with the splice! If you do, you will regret your life choices towards the end of the splice when the last bit of core doesn't want to go back into the cover and you are stuck with an unsightly bleb of core herniating out of the cover.

What you need to do now is equalize the core and cover. During the manufacturing process, the core and cover are woven at alarmingly fast rates. The result is a very tight core and cover that you might not be able to fit the fatter core after the splice into the cover. By equalizing the core and cover, the cover will be looser and it will help you later on to milk the core back into the cover. 

To equalize the core and cover, you will pull the core out of the cover and then milk the cover back over the core. This is why the pin through the rope is necessary, as it gives you a stopping point during the equalization. You will push the cover back as you pull the core out, then milk the cover back over the core. Repeat this three times and you will be done with this step. When you finish equalizing the core and cover, you will find that the core protrudes out a significant amount of core extending past the cover.

With the core and cover equalized, now is a great time to slip the shackle on for the halyard. The most annoying thing that could happen during the splice is beginning to bury the splice and realizing that you forgot to put the shackle on! If you put the shackle on now, you won't have to worry about remembering to put it on later.

With the shackle on, you can tie a slip knot in the exposed core to avoid it from sliding back into the cover.

With the shackle in place, you can measure the desired size of the eye by wrapping the line around the shackle. I prefer a small eye as this keeps the eye splice out of the shiv if your halyard ends up at the masthead. If you like a larger eye, simply give yourself more line to wrap around the shackle. On the other side of the shackle, you will bend the rope and pull the core out the same way you did for the tail. The slip knot in the tail will prevent you from accidentally pulling "tail core" into the loop instead of "core core."

20170319_094040.jpg

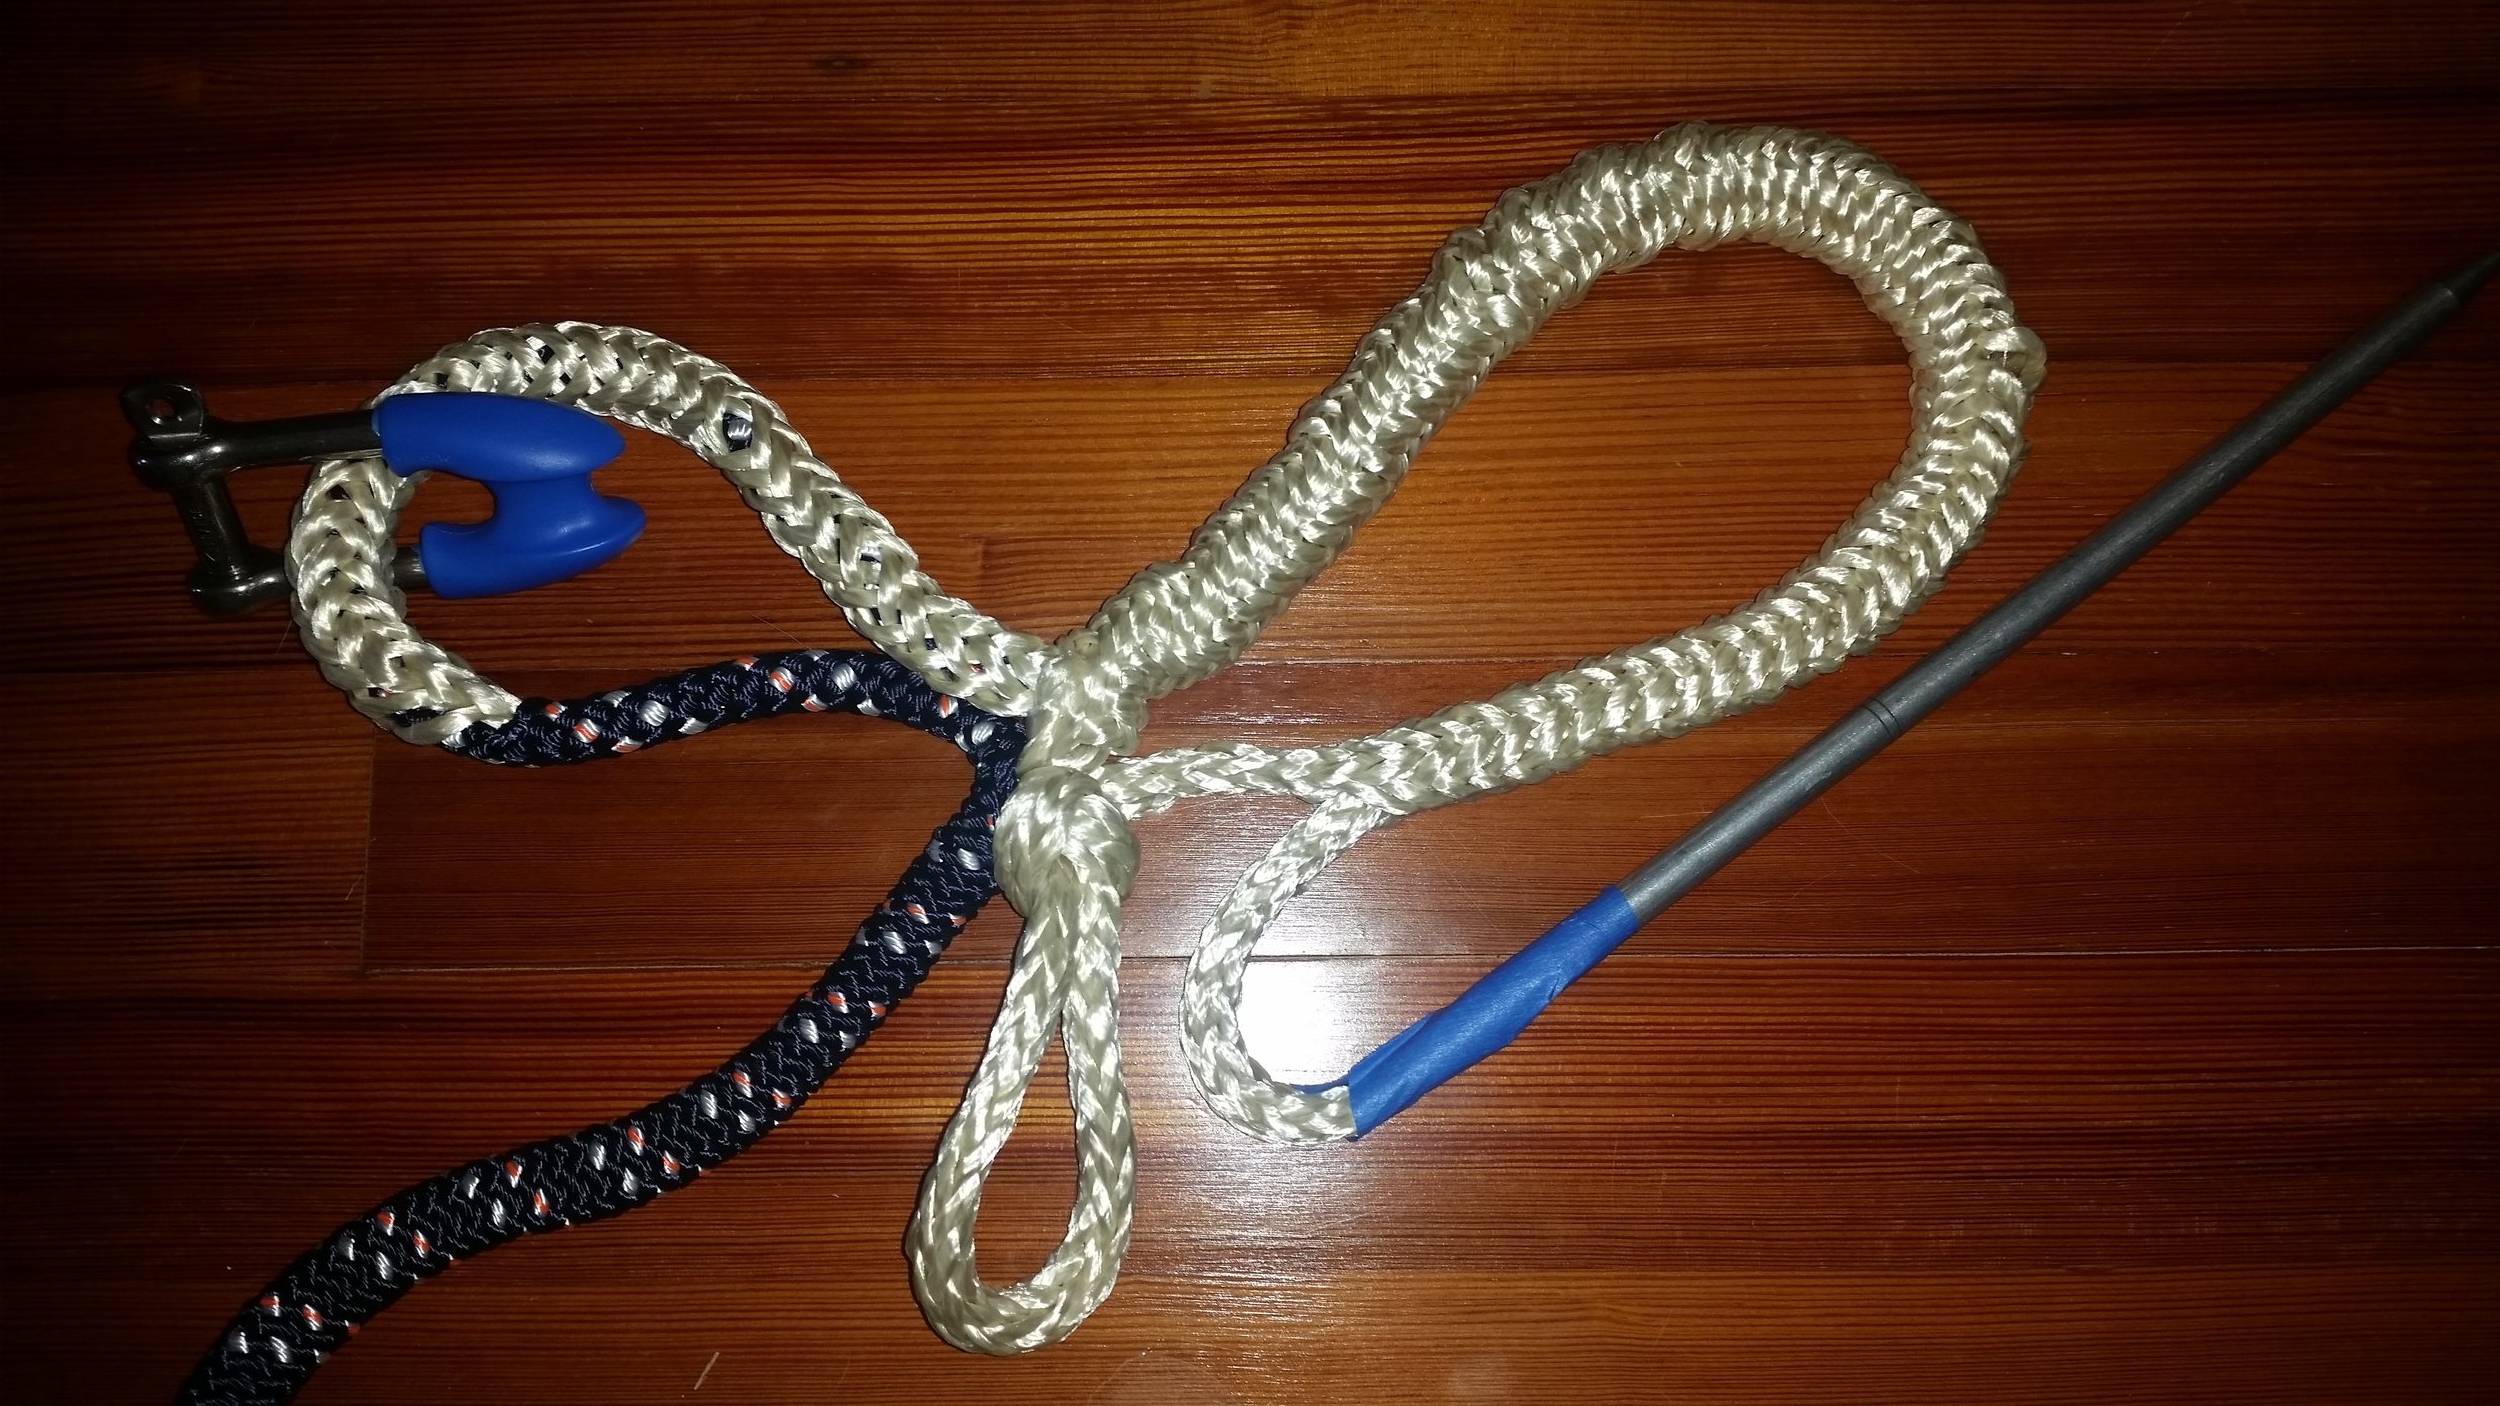
At this point, you have everything exposed to carry out the splice. The tail is tied off, the loop is tied off, and the shackle (remember to put the shackle on!) is in its place. It is time to start burying everything and wrapping the splice up.

Pass a fid through the tail core and bury the tail cover inside the tail core. This makes the entire splice look much neater and helps to taper the splice inside the line.

To make sure everything is tapered properly, you want to taper the cover inside the core that way the transition from cover over core to core over cover in the splice. This will keep stress on the individual fibers low and increase the strength of the splice.

The tail is now passed through the loop on the other side of the shackle with the fid. A portion of the loop is consumed by the slip knot, so you will have to end short of the full loop. This is not a problem as you will simply exit the loop shy of the slip knot and then stretch out the loop over the buried tail.

With the tail in the loop, and the loop stretched out, you can see that there is still a portion of tail that is not buried. This would be a problem, since Class II cores are slippery and you need all the friction from length that you can get. 

This last bit is easily buried by simply inserting the fid back through the exit hole and passing it through the remaining loop once the slip knot has been removed. Now, the entire tail is buried, all that is left to do is to taper the tail and then bury it again.

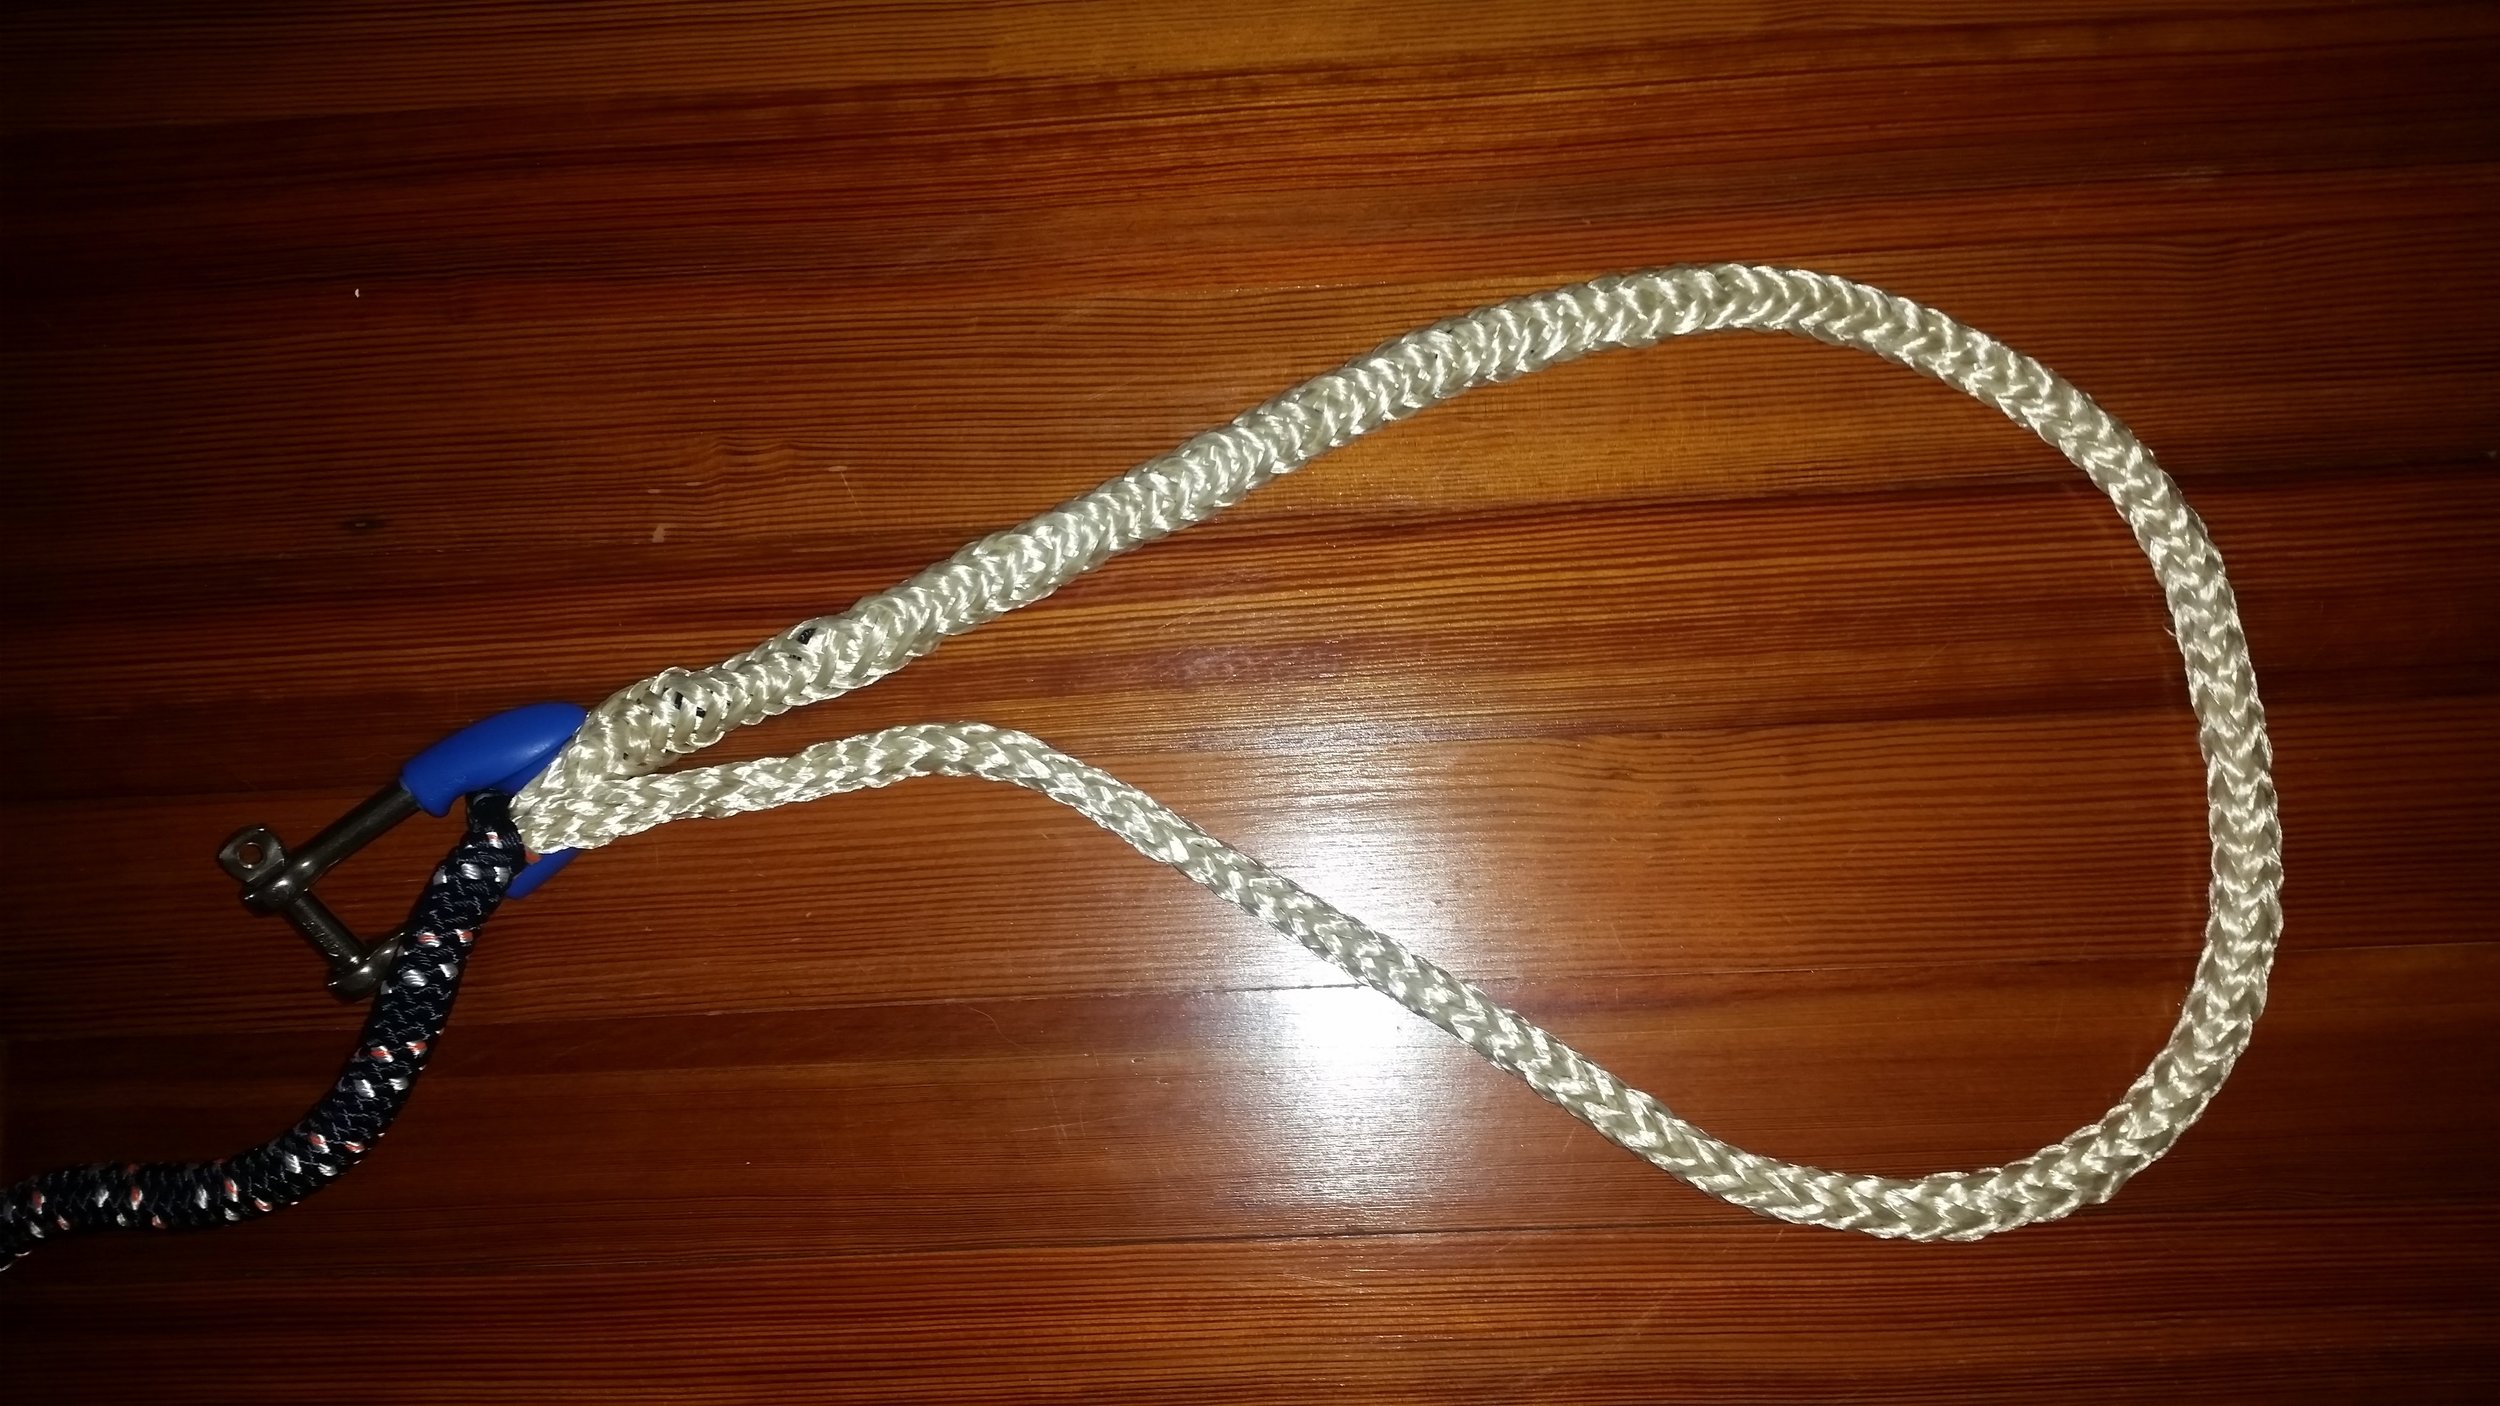
The tail was tapered systematically, creating a very gradual decline in thickness that will produce a very subtle taper that will reduce any stress on the individual strands and produce a very strong splice.

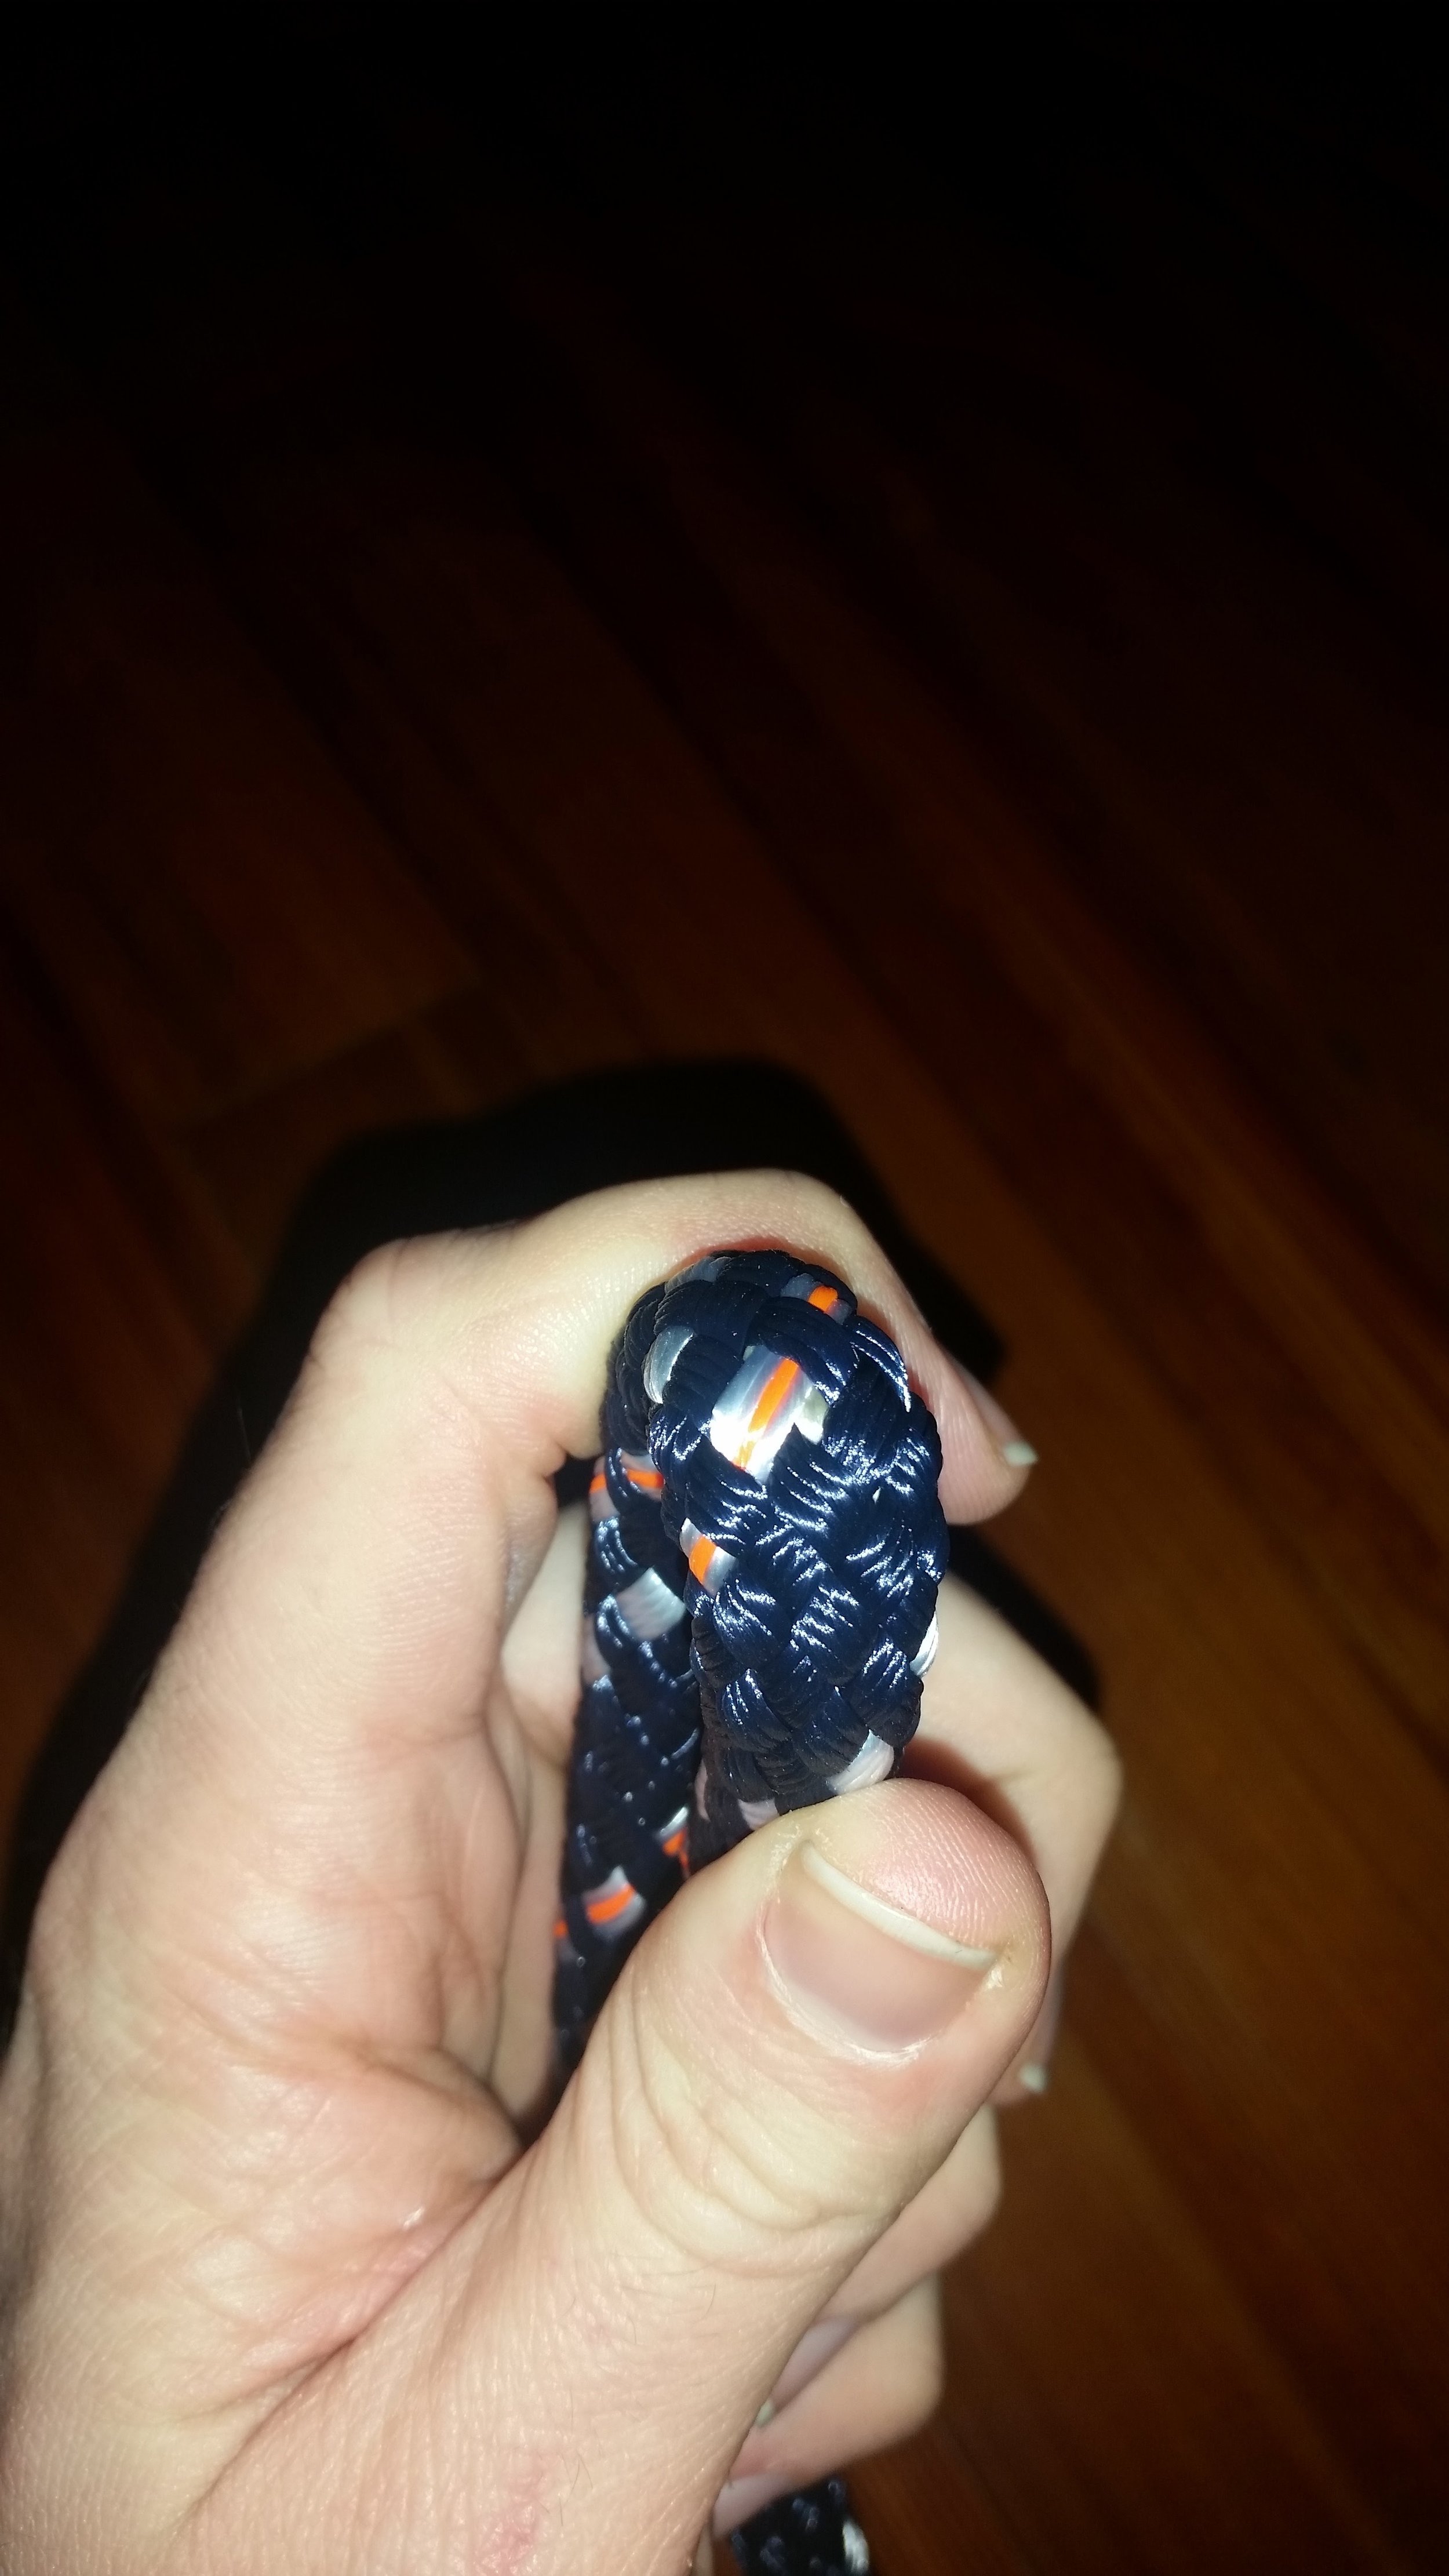
With the tail buried, you can see the gradual taper in the line as it goes back into the cover. All that is left to do now is to milk the loop back into the cover and whip the splice. Since the pin is still in the rope, securing the position of cover and core, this process is relatively simple. The cover will slip over the spliced core easily at first, then it will become more difficult. The last bit will be a bear to bury, and if you didn't equalize the core and cover at the beginning, it might not actually bury. Having equalized, you should know that with enough force, it will bury. 

To do the last bit, you need to tie the rope to a sturdy point, such as a cleat, and yank really hard on the end. The snapping force will bury the core into the cover in very small increments, but it will eventually complete the task.

Whipping helps to secure the splice and make everything look pretty. You can see the tight eye splice wrapping around the shackle as it turns back to bury in the line. You shouldn't worry about the tight radius turn over the shackle because making the eye larger will not change the radius of the shackle that the line turns over.

The final test is to feel the halyard and see if you can feel a step inside the cover where the splice ends. If you did a proper taper, the line will gradually get smaller until you reach the end of the splice and are unable to positively locate the end of the buried tail. This very gradual change in size reduces the stress on the strands and that will maintain the strength and integrity of the splice.

Morty Ate Chocolate

Dogs are not supposed to eat chocolate, we know this, and it has never been an issue in the past. Morty is a very lazy dog who spends most of the day sleeping on his side and the entire night sleeping on his back. 

Morty doesn't tear into to boxes or packages on the boat, which lets us be very relaxed about where we store things around him. For the past week, he has been sleeping next to a gift basket we received without bothering them.

We left Morty at Maddie's parents house while we all went out for a few hours. This is a usual occurrence, and Morty simply sleeps on the couch with his toys while we are away. When we return, he is always excited to see us, and then calms down to his usual state of laziness. This is when we noticed something was different about him.

Morty never calmed down. Instead he began bounding around us with a limitless amount of energy. He then began running into other rooms and running back to us, a behavior that he never does. This is when we found the source of his limitless energy, chocolate!

Somehow, he managed to find and retrieve a box of chocolates from inside a larger box set on a chair. Morty is a Corgi, and their most notable feature is their lack of vertical prowess. He didn't knock or damage anything else in the room in the process, but he did manage to shred the packaging and devour the nine chocolate truffles there within. I have no idea how he managed to get into the box, as the chair was sitting alone along a wall. There was nothing in the vicinity that he could have climbed on to get into the box. Either way, Morty used his magical corgi powers to remove the chocolates from the box and reward him with infinite energy.

Based on his weight, type of chocolate, and amount of chocolate that he consumed, we determined that he was not at risk of poisoning. Instead, he was hyped up on sugar and caffeine!

Morty's chocolate goodness occurred at 1PM, so we decided to spend the rest of the day trying to wear him out. At 11PM, we were exhausted and ready for bed while he was still going strong. Morty ran around, jumped on the bed, off the bed, around the floor, back onto the bed, off the bed, and around the floor again. This continued all night long.

We tried to sleep despite his best efforts, but occasionally he would land directly on us as he bounced over the bed. This woke us up at various hours throughout the night, and each time we awoke, he was wide awake with his ears perked and eyes wide open.

When I get up in the morning at 5:30AM, Morty is usually sleeping on his back between our feet and the hull. This morning, he was still running around, powered by his mystical power source. I decided to take him to my parents house for the day and let him run around the yard with their dog, hoping that he would run out of power by the afternoon.

When I left Morty at my parents house, it was 8:30AM. Morty had been awake for the past 27 hours and electric for the past 19 hours! Hopefully, the Morty will crash and we can all get some good sleep tonight. 

Should this ever happen again, I will be very tempted to put Morty in an exercise wheel connected to a generator. This would convert his limitless energy into a full battery bank in a matter of hours!