Provisioning

When provisioning for a trip, don't make the same mistake we made. We went out to the grocery store and purchased a massive amount of food! 

We had two full carts of food with everything stuffed into them. We had cases of waters, chips, fruits, vegetables, and canned foods, as well as everything else you can think of. 

We ate what we normally do, and all this extra food simply began to rot! What's worse is the canned vegetables were disgusting, so aweful that they are still in the back of a locker, just waiting to be thrown out. All the money we spent on wasted food could have been used towards anything else on the boat, but instead was thrown out as rotten lettuce.

Thinking that we learned our lesson from this fiasco, we decided not to go overboard with food provisioning on our future trips. When we set off for a 2 week cruise, we once again bought what we thought would be an adequate amount of food for the trip. Once again, the extra food we purchased began to rot and had to be thrown out.

The moral of the story is, only buy the normal amount of food that you would consume on a regular basis. If you buy extra food, it will go bad and you will have wasted that money. Instead of "provisioning" for a trip, what we do now is cast off. If we find that we need more of something, we will pull into a port and pick it up. 

This is an easy approach for us since we liveaboard. Our regular grocery shopping is what we consume in a regular amount of time. We typically go shopping every other week, so we know that we have around two weeks worth of food on board at any given moment. Instead of wasting money on extra food, we simply shove off and provision along the way.

Another word of warning: Canned vegetables are disgusting and there is nothing you can do to make them better. I have tried everything like adding them to delicious dishes, but all they do is ruin everything. Canned string beans are the worst offenders, followed by canned carrots and canned peas. Canned corn isn't that bad, and can be hidden in chili, but fresh corn is a million times better. Canned beans on the other hand are wonderful and they will keep for years!

While we don't stock up on extra fresh foods or foods that need refrigerating, we do stock up on rice, beans, and canned meats (Vienna Sausages are amazing) as these foods won't go bad and make a great meal that can be eaten while on watch.

Fiber Cement Siding Tools

Fiber cement siding is very easy to install in a shiplap pattern (called lapstrake on boats). This pattern of siding works very well to shed rain water and keep the house dry. Shiplap needs to be installed from the bottom to top, and progress proceeds quickly.

They do sell tooling to install the planks evenly, but these tools cost around $50 to $80 for a set.

These tools are great, and make installation quick and easy. Shiplap siding needs to be even and consistent. If the amount of overlap varies, the siding will look crooked, uneven, and ugly. These tools also let you install the siding alone!

If you don't have any tools, you need two people to install the siding. Each person needs to hold the plank, measure the overlap, and secure the plank. If there are any variations between the amount that overlaps, the job will look sloppy and the end result will look unsightly.

Tools are set to a specific amount of overlap, and simply slip on to the lower plank and hold the next plank in perfect place. A single worker simply sets the plank on the tools and screw it to the wall. Each plank will go on exactly the same as the previous plank with no variation. The result is a very even job that looks professionally finished. All of a sudden, an expensive tool sounds worthwhile!

It's a small price to pay for a high quality result that will last for years to come. The truth is, you can make your own set of tools for a fraction of the price.

I purchased a pair of metal straps which I bent into an "S" shape for $0.92 per metal strap. While the expensive tools are adjustable, allowing you to vary the amount of overlap, these tools are fixed in their size. 

I wanted 6 inches of exposed plank, so I need 2.25 inches of overlap. To manufacture this, I clamped both strips into a vise and beat them into shape with a hammer. I made sure that the bends occurred at the same position on both by forcing the bend to occur at the edge of vise jaw. Both tools were verified for symmetry, and measured to make sure that the length of the body was 2.25 inches.

Installing the siding was very simple, all I had to do was set the tools on the top of the current plank, and then rest the new plank in the tools. The tools held the plank in place while I screwed the plank into the studs.

Some tricks to using these inexpensive tools are:

  • Put the tool on the edge of the plank before you tighten the screws all the way, this makes it much easier to get the tool between the plank and the wrapping.
  • Tighten the plank once the tool is in place.
  • Place the tool half way on and halfway off the edge of the plank to facilitate removal after the new plank is installed.
  • Alternate the side you use the tools on with each plank to avoid manifestations of any discrepancy in the lengths of the tools you created.
    • If the tools are off but just a little bit, the planks will not lie evenly and the problem will compound as the siding goes on the house. For example, if the tools are off by 1/16 of an inch, this means that at the 16th plank, the planks will be off by a full inch! 
    • If you alternated the side you use the tools on, the planks would only be off by 1/16 of an inch on each plank, and the 16th plank will still only be off by 1/16 of an inch. 
    • From a distance, 1/16 of an inch discrepancy is very hard to detect, so if your tools are made even better than that, any discrepancy will be even less notable and the end result will be a professional looking job.

Rivet Tool

Copper rivets are a wonderful fastener to connect planks to frames. They combine the advantages of through bolting and screws with only one pitfall.  

Through bolts provide tremendous clamping pressure without relying on the substrate for resistance. A through bolt is places the forces on the opposing side which has its force disseminated via a washer or backing plate. The nut and bolt pull tightly towards each other and compress everything in between them.. The problem with through bolting is the ends are bulky. The nut protrudes and can offer a place to hook clothing and lines.  

Screws on the other hand are very low profile with only the head of the screw protruding. This head can be minimized by either using flat head or counter sinking. Screws go deep into the wood and leave nearly no trace behind. The problem with screws is they rely on the substrate for resistance to extraction. The little threads are all that offer mechanical resistance to their extraction. If the substrate is soft, the screw can pull out. At the same time, the material is under constant strain from the screw being forced into the substrate.  

In short, screws are low profile but place strain on the material they are inserted into. Bolts do not place strain on the material and instead place strain on the fastener itself, but are rather bulky. 

Rivets are both low profile, place the strain on the fastener, and are not bulky. They function by inserting a copper nail through the material and then mushrooming the end to lock it onto a copper rove, sort of like a copper washer. The only problem rivets have is they are time consuming and technique sensitive to install. 

As with any fastener, specialized tools make work much easier. Screws use screw drivers, nuts and bolts use wrenches, and rivets use clamps, hammers, and dies. 

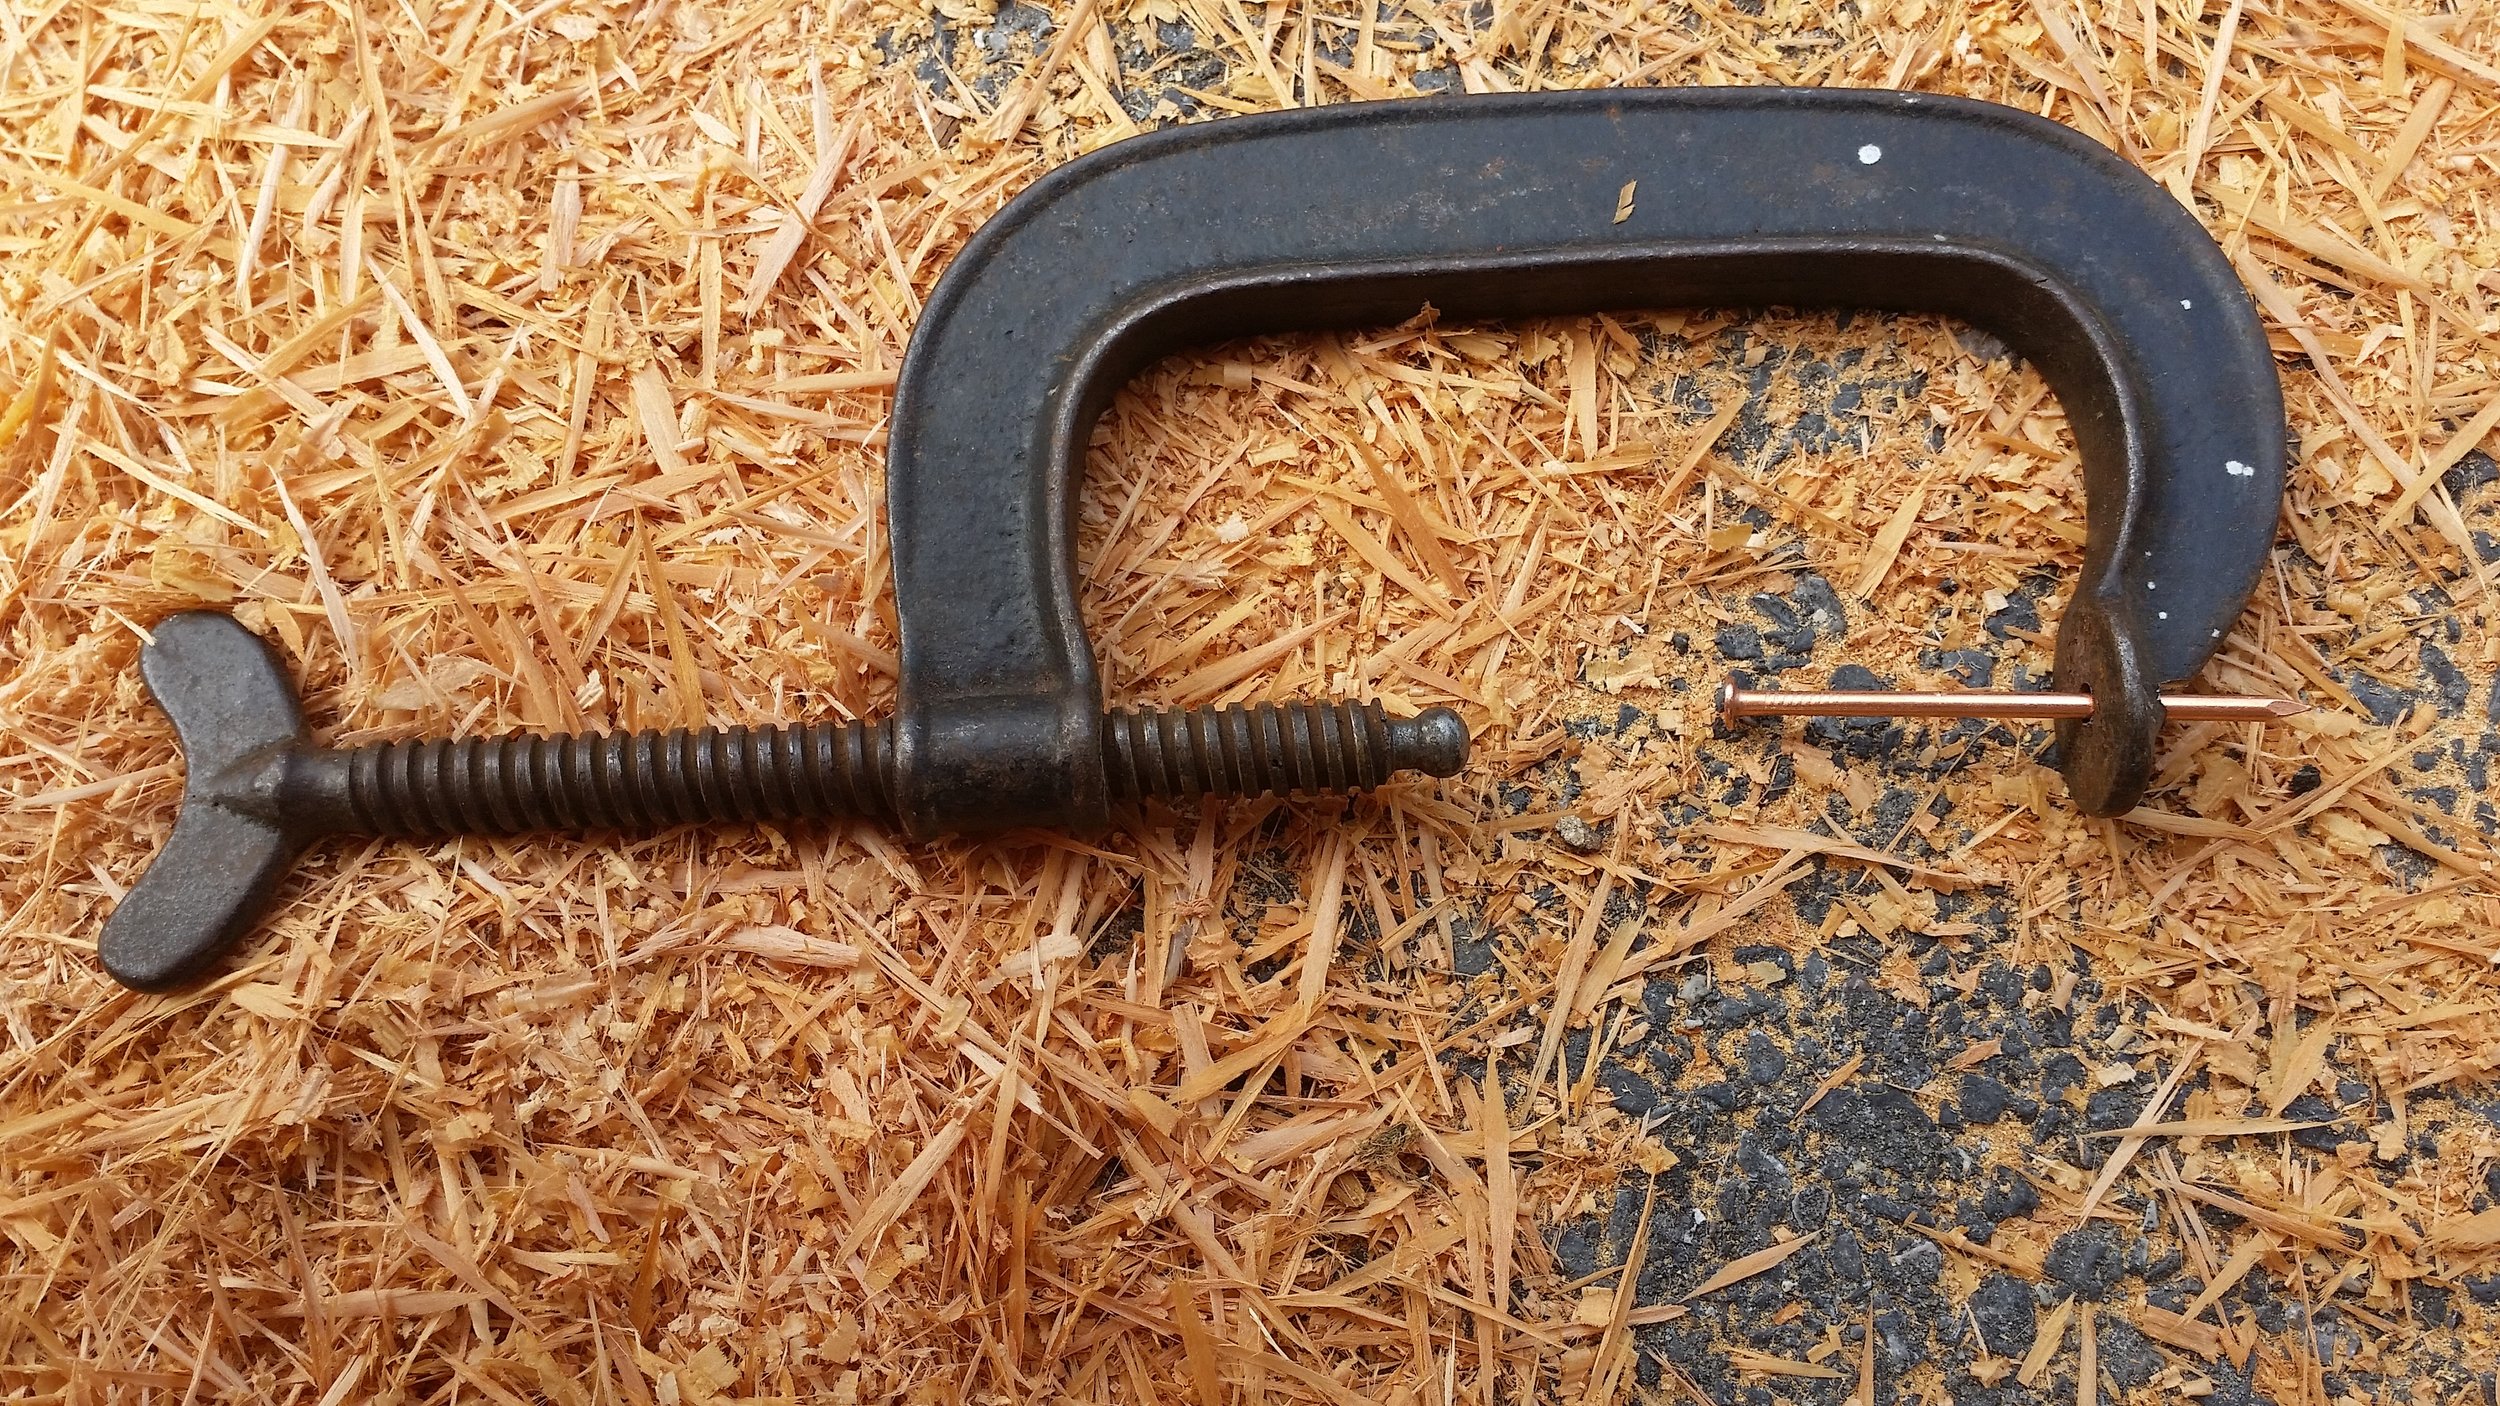
The rivet clamp is a great tool for inserting rivets and fitting the rove tightly to the strakes. It uses the mechanical advantage of an inclined plane in the form of a screw to tightly compress everything in the system. 

image.jpg

To make a rivet clamp, all you need is a large C-Clamp. Remove the lower pad from the ball and drill a hole through the top of the clamp. The ball at the end of the screw is excellent for compressing the head of the nail into the wood while the other end of the nail exits through the top of the clamp. 


image.jpg

Removing the lower pad allows the ball to fit into smaller spaces without distortion. If you are counter sinking the nail heads, the ball will fit down the hole with ease. 

image.jpg

Drilling small hole for the nail to pass will keep the rove in place as you clamp the unit down. Drilling a larger hole part way down the clamp will let you insert center punches into the unit to mushroom the head of the rivet while it is still under clamping pressure! When you remove the clamp, the rivet will continue to hold the strakes tightly as the mushroom head will not allow it to expand. 

This simple modification will let you insert rivets in a much more systematic way which will increase your speed and advance the progress of your projects.  

Balancing Sails

Balancing the sails may be viewed by some as sailing Nirvana, a perfect state which you know exists but can never quite reach. The truth is, balancing your sails is very simple.

When a sail fills with air, it begins to power up as its shape takes on the form of an airfoil. When the sail is properly trimmed and shaped like an airfoil, it will generate lift which will be transferred to the sailboat via the rigging and in turn move the sailboat through the water.

Perfect trim will have the air flowing evenly and smoothly over the both sides of the sail. This state will produce the maximum amount of power out of the sail. This is why when sailing, you want to trim the sail until the tell tales are streaming evenly on both sides of the sail. 

There are various sails on the boat, located in front and behind of the mast. If the sails are all powered up to their maximum, balance will probably not be attained.  The combined force from the sails will be localized into the "Center of Effort" or CE. This force is going to be counteracted by the "Center of Lateral Resistance" or CLR which is produced by the underwater profile. If the CE is ahead of the CLR, the boat will have lee helm and veer to leeward. If the CE is behind the CLR, the boat will have weather helm and veer to windward. If the CE is directly in line with the CLR, the boat will be balanced!

For purposes of balancing the boat, the rudder will be locked midship and not altered. This will keep the rudder in line with the keel and thus keep drag to a minimum. With the rudder center lined and locked, the CLR will not change. The relationship of CE to CLR can be altered by trimming the sails.

If the boat wants to turn to windward, this means that the CE is behind the CLR. 
If the boat wants to turn to leeward, this means that the CE is ahead of the CLR.

These are the only two options present when the helm is locked, and it no longer seems that complicated when you break it down to just two choices with no gray area.

Your sails will generally develop more power if you sheet them in, and less power if you ease them out. This means that you can generally alter your CE by either sheeting your sails or easing your sails.

If the yacht wants to turn to windward, you need to move the CE forward to meet the CLR and balance the boat. To do this, simply ease the main. Easing the main will reduce its efficiency and cause the CE to move forward as the headsails have not been altered. 

If your yacht wants to turn to leeward, you need to move the CE aft to meet the CLR and balance the boat. To do this, simply ease the headsails. Easing the headsails will reduce their efficiency and cause the CE to move aft as the main has not been altered.

That's it! Doesn't seem so complicated now does it?

If you ease a sail to the point that it starts to luff or develop leach flutter, you should sheet the sail in a bit until it calms down and then sheet in the opposite sail.

For example, if you have lee helm and you ease the headsail until it flutters, sheet it in a bit and then sheet in the main. Easing the headsail will move the CE aft, but flutter will destroy your sail. Sheeting in the main will also move your CE aft, and not cause premature destruction of your headsail. In the end, you can move the CE aft until it meets the CLR and the boat becomes balanced.

After you achieve perfect balance and are sailing along with your rudder center line and causing minimal drag, you may feel inclined to look at your sails once more. You will probably see that your sails are trimmed terribly. Tell tales will probably be twirling on one side of the sail, indicating that the sail is not trimmed to utmost performance. You may feel the urge to go trim the sail until all the tell tales are flying perfectly, but that would upset the balance of the boat by moving the CE either forward or aft. 

You need to remember that sails are an individual component that is tied together into the rest of the boat via the rigging to form a sailboat. The goal is not to have a perfect sail, but instead a perfect boat. If an over trimmed sail is needed to balance the sailboat, then that is what is needed to sail along properly.

Being able to zoom out and see the big picture is an important ability. This will show you that the tell tales don't really matter, and what is important is that the boat sails along through the seas.

Choosing Siding

Siding is the outer layer of the tiny house, and a large variety of materials are available for your choosing. Popular materials available are: Vinyl, Fiber Cement, and Wood.

Vinyl is famous for being maintenance free! The vinyl siding is available in many different colors, and you install the color that you want to use. It never needs painting or coating, as the vinyl is its own color. It is also very light weight, which is a wonderful bonus for a tiny house. The big weakness with vinyl siding deals with impact damage. Since it is made of weak plastics, it dents easily. It also doesn't hold up very well to strong winds.

On a tiny house being towed down the highway will expose the tiny house to hurricane force winds (64 knots or 73.6 mph) and road debris impacts on the siding. If you are never going to move your tiny house, vinyl may be a very simple option for your choice in siding material.

Fiber cement boards are much heavier than vinyl, but they are also much stronger. They hold up to impact and high winds much better, making them a wonderful choice for tiny house siding. Fiber cement does require painting, and this paint needs to be maintained over the years of the life of the tiny house. While this is added maintenance over vinyl, it does give you the ability to change the color of the tiny house over the years.

Lastly, wood siding is a wonderful material with the same benefits of fiber cement, but it is much more expensive. Wood siding can be finished with oils or varnish, letting you keep the look of wood that you can't have with fiber cement. Different woods can be troublesome to maintain painted. Some oily woods will be harder to make paint stick, and these woods will be condemned to paint peeling off the house.

If you decide to use wood siding, be sure that you select the correct species of wood for the finish that you want to achieve on your house.