
Copper rivets are a wonderful fastener to connect planks to frames. They combine the advantages of through bolting and screws with only one pitfall.
Through bolts provide tremendous clamping pressure without relying on the substrate for resistance. A through bolt is places the forces on the opposing side which has its force disseminated via a washer or backing plate. The nut and bolt pull tightly towards each other and compress everything in between them.. The problem with through bolting is the ends are bulky. The nut protrudes and can offer a place to hook clothing and lines.
Screws on the other hand are very low profile with only the head of the screw protruding. This head can be minimized by either using flat head or counter sinking. Screws go deep into the wood and leave nearly no trace behind. The problem with screws is they rely on the substrate for resistance to extraction. The little threads are all that offer mechanical resistance to their extraction. If the substrate is soft, the screw can pull out. At the same time, the material is under constant strain from the screw being forced into the substrate.
In short, screws are low profile but place strain on the material they are inserted into. Bolts do not place strain on the material and instead place strain on the fastener itself, but are rather bulky.
Rivets are both low profile, place the strain on the fastener, and are not bulky. They function by inserting a copper nail through the material and then mushrooming the end to lock it onto a copper rove, sort of like a copper washer. The only problem rivets have is they are time consuming and technique sensitive to install.
As with any fastener, specialized tools make work much easier. Screws use screw drivers, nuts and bolts use wrenches, and rivets use clamps, hammers, and dies.
The rivet clamp is a great tool for inserting rivets and fitting the rove tightly to the strakes. It uses the mechanical advantage of an inclined plane in the form of a screw to tightly compress everything in the system.
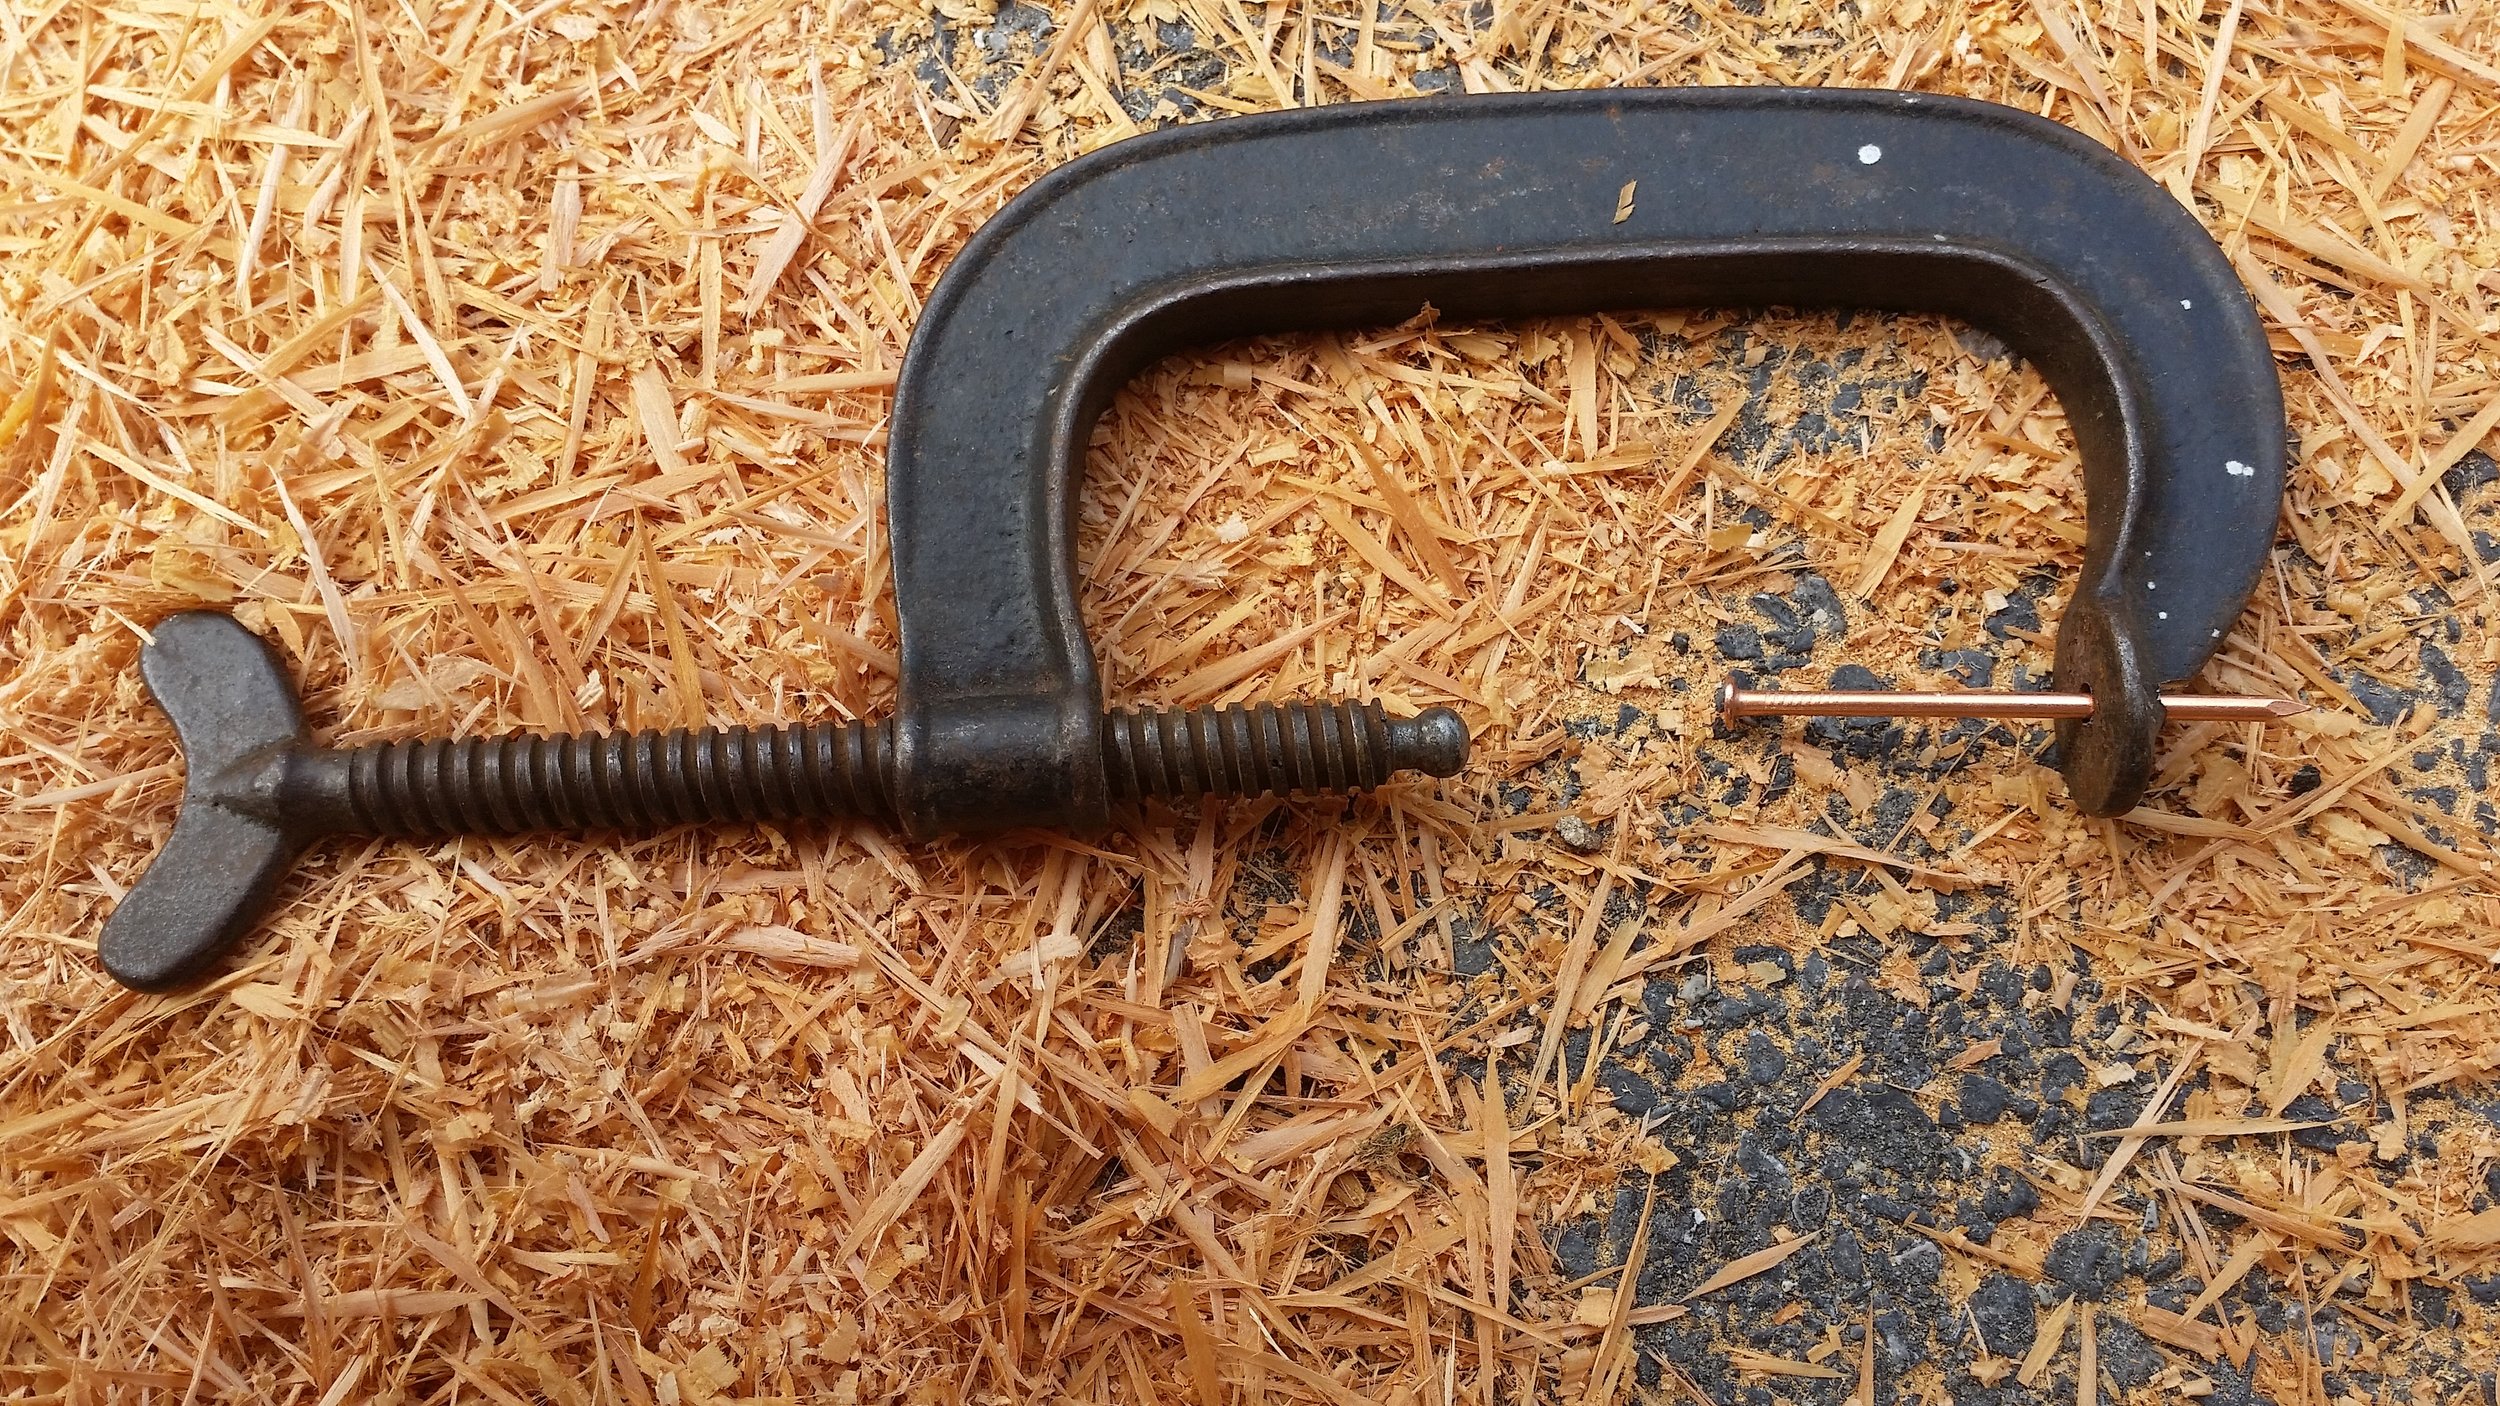
To make a rivet clamp, all you need is a large C-Clamp. Remove the lower pad from the ball and drill a hole through the top of the clamp. The ball at the end of the screw is excellent for compressing the head of the nail into the wood while the other end of the nail exits through the top of the clamp.

Removing the lower pad allows the ball to fit into smaller spaces without distortion. If you are counter sinking the nail heads, the ball will fit down the hole with ease.

Drilling small hole for the nail to pass will keep the rove in place as you clamp the unit down. Drilling a larger hole part way down the clamp will let you insert center punches into the unit to mushroom the head of the rivet while it is still under clamping pressure! When you remove the clamp, the rivet will continue to hold the strakes tightly as the mushroom head will not allow it to expand.
This simple modification will let you insert rivets in a much more systematic way which will increase your speed and advance the progress of your projects.
