Rivet Tool

Copper rivets are a wonderful fastener to connect planks to frames. They combine the advantages of through bolting and screws with only one pitfall.  

Through bolts provide tremendous clamping pressure without relying on the substrate for resistance. A through bolt is places the forces on the opposing side which has its force disseminated via a washer or backing plate. The nut and bolt pull tightly towards each other and compress everything in between them.. The problem with through bolting is the ends are bulky. The nut protrudes and can offer a place to hook clothing and lines.  

Screws on the other hand are very low profile with only the head of the screw protruding. This head can be minimized by either using flat head or counter sinking. Screws go deep into the wood and leave nearly no trace behind. The problem with screws is they rely on the substrate for resistance to extraction. The little threads are all that offer mechanical resistance to their extraction. If the substrate is soft, the screw can pull out. At the same time, the material is under constant strain from the screw being forced into the substrate.  

In short, screws are low profile but place strain on the material they are inserted into. Bolts do not place strain on the material and instead place strain on the fastener itself, but are rather bulky. 

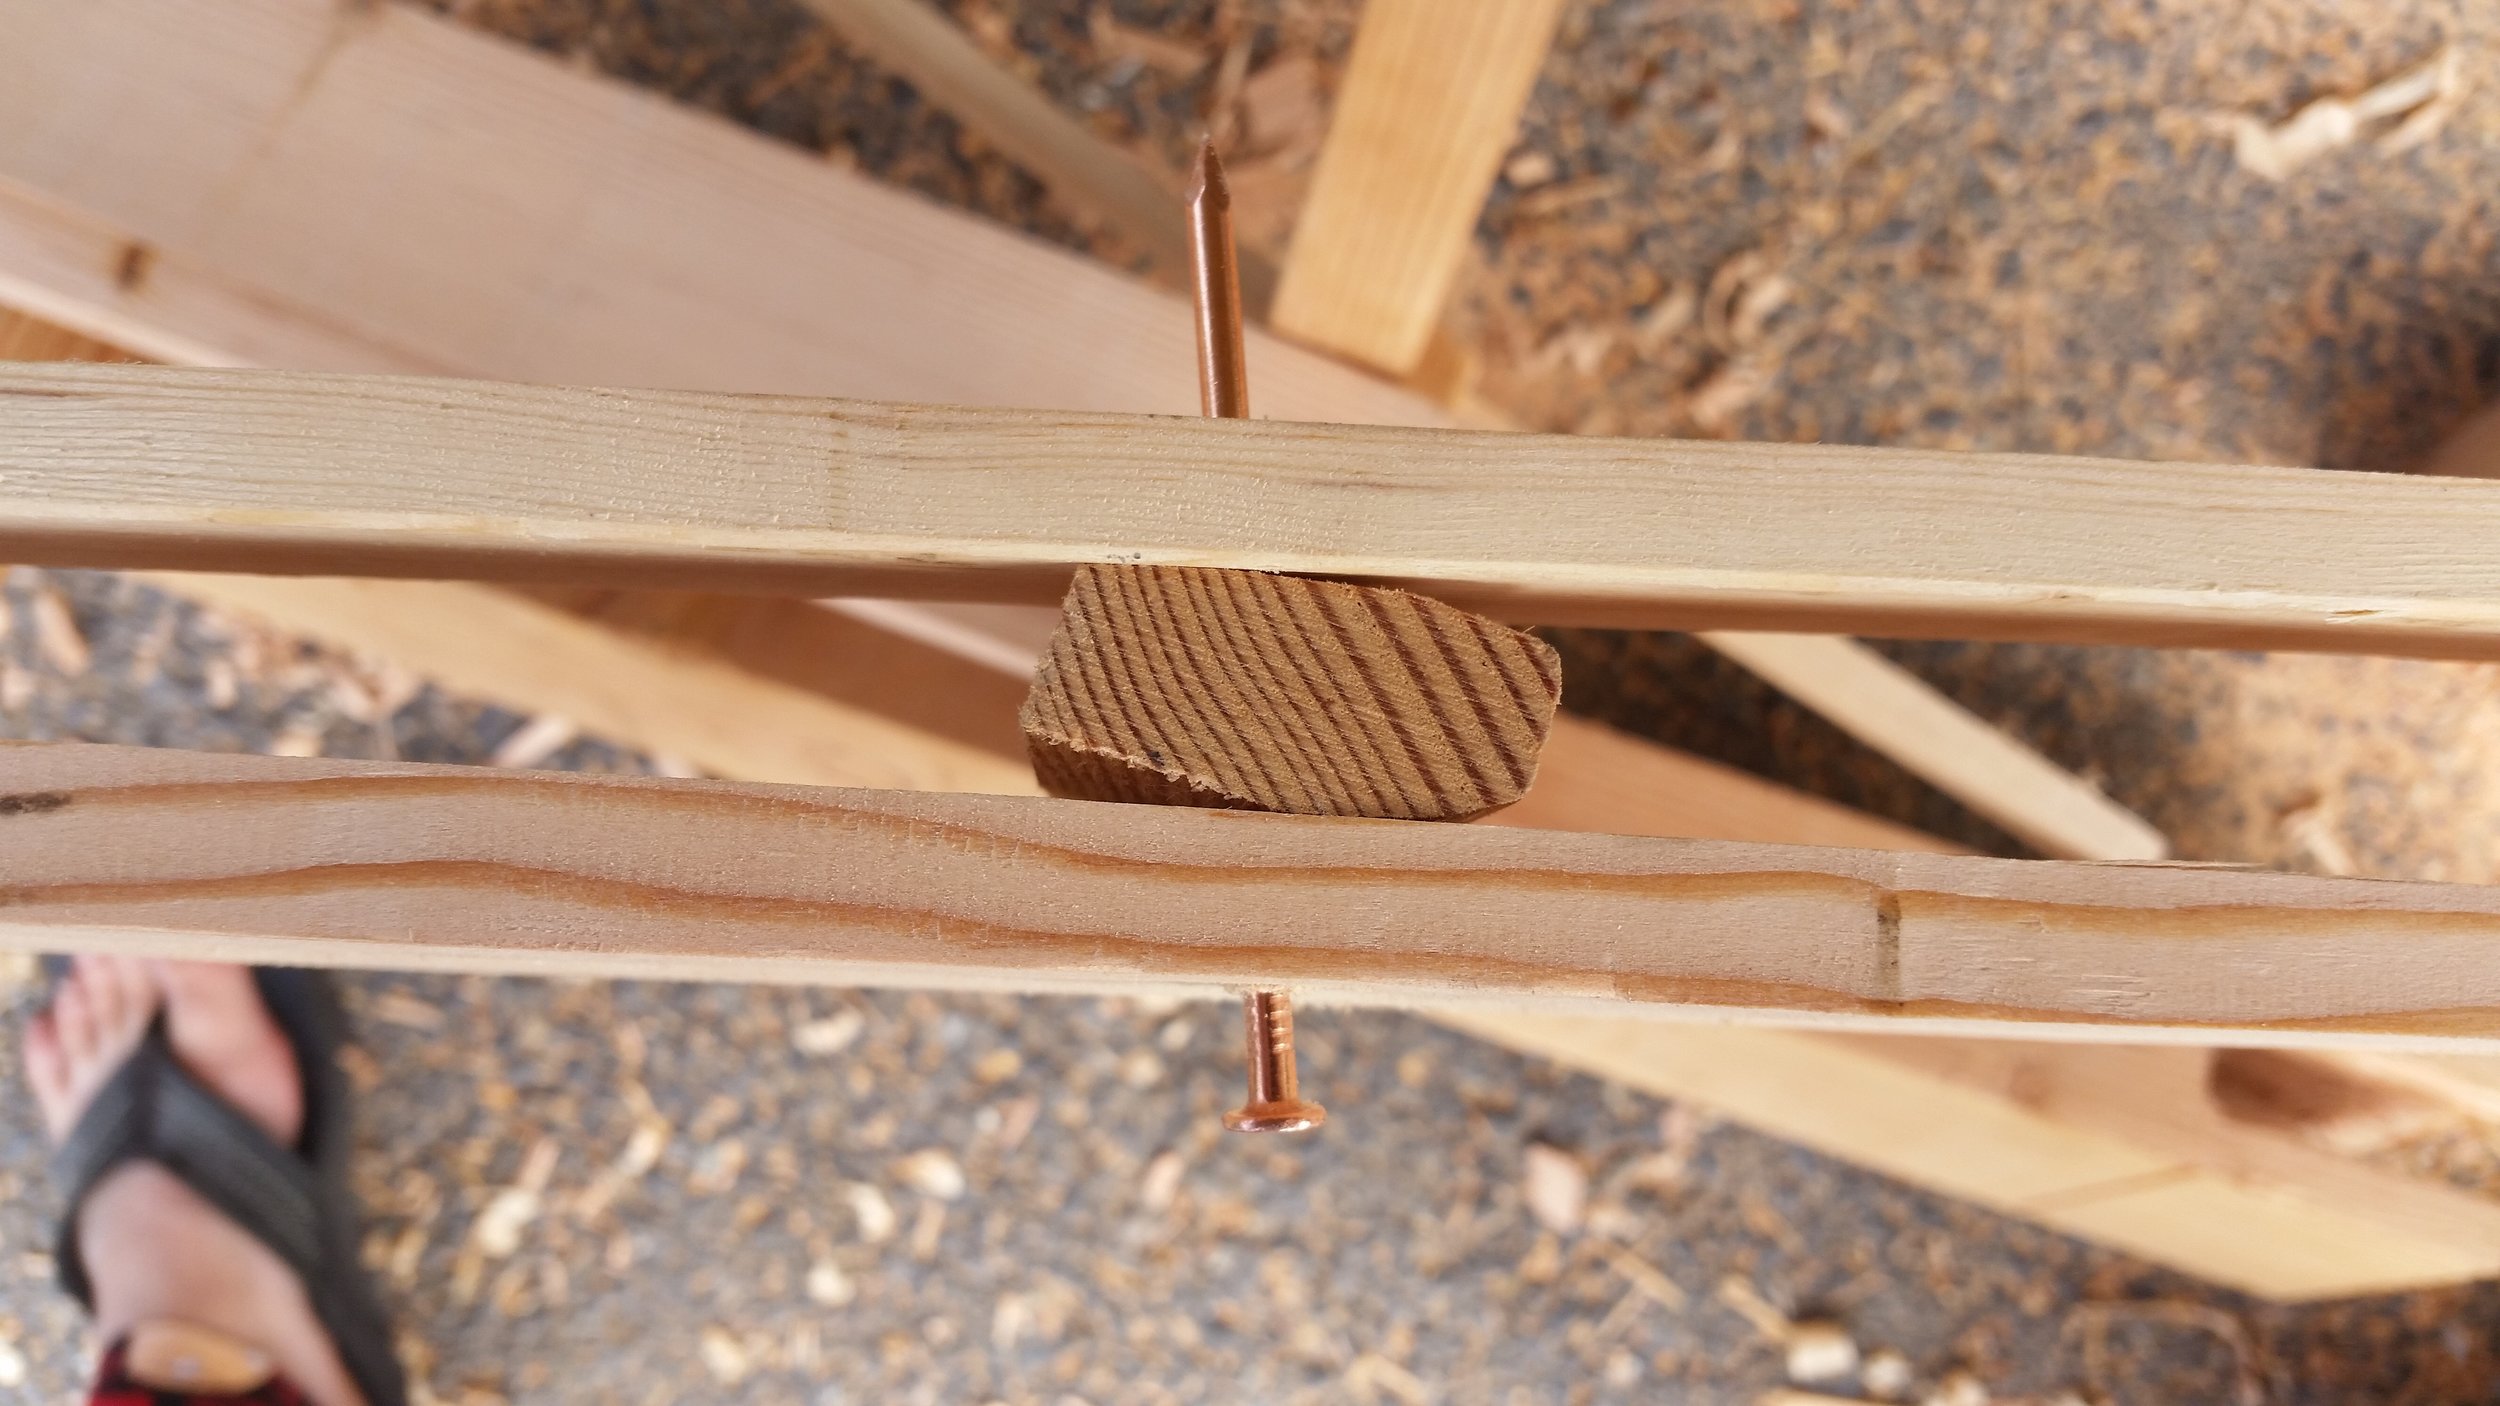
Rivets are both low profile, place the strain on the fastener, and are not bulky. They function by inserting a copper nail through the material and then mushrooming the end to lock it onto a copper rove, sort of like a copper washer. The only problem rivets have is they are time consuming and technique sensitive to install. 

As with any fastener, specialized tools make work much easier. Screws use screw drivers, nuts and bolts use wrenches, and rivets use clamps, hammers, and dies. 

The rivet clamp is a great tool for inserting rivets and fitting the rove tightly to the strakes. It uses the mechanical advantage of an inclined plane in the form of a screw to tightly compress everything in the system. 
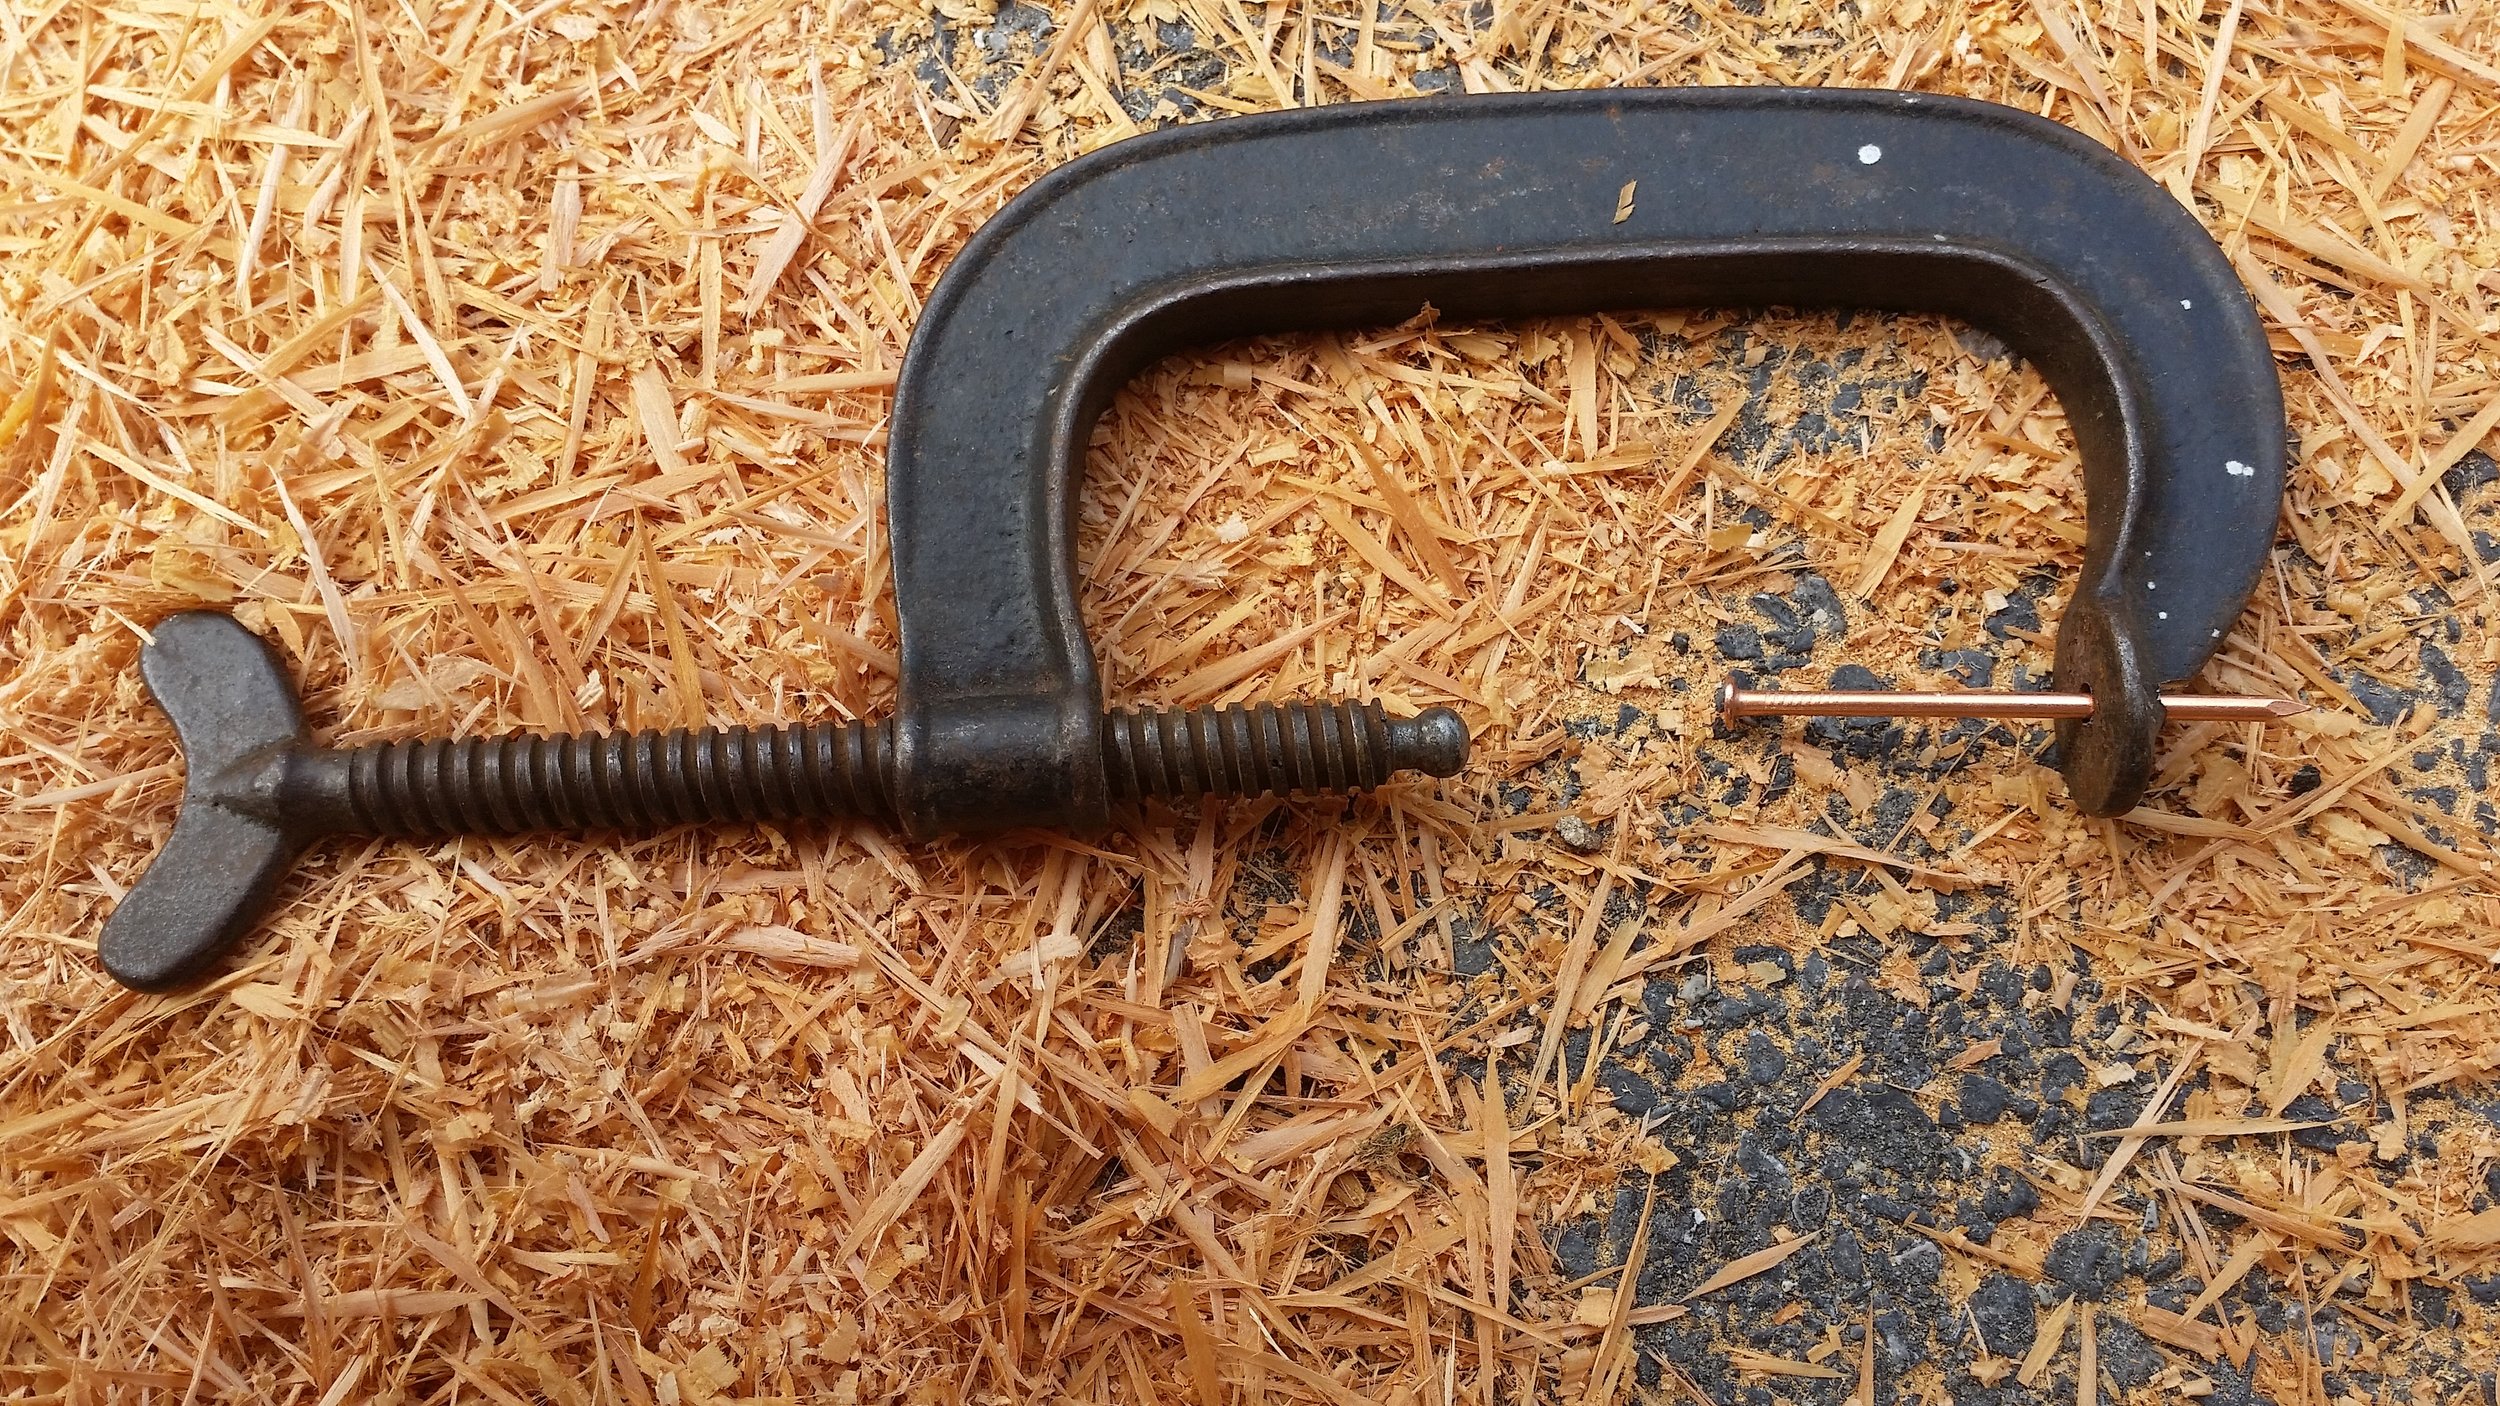
image.jpg

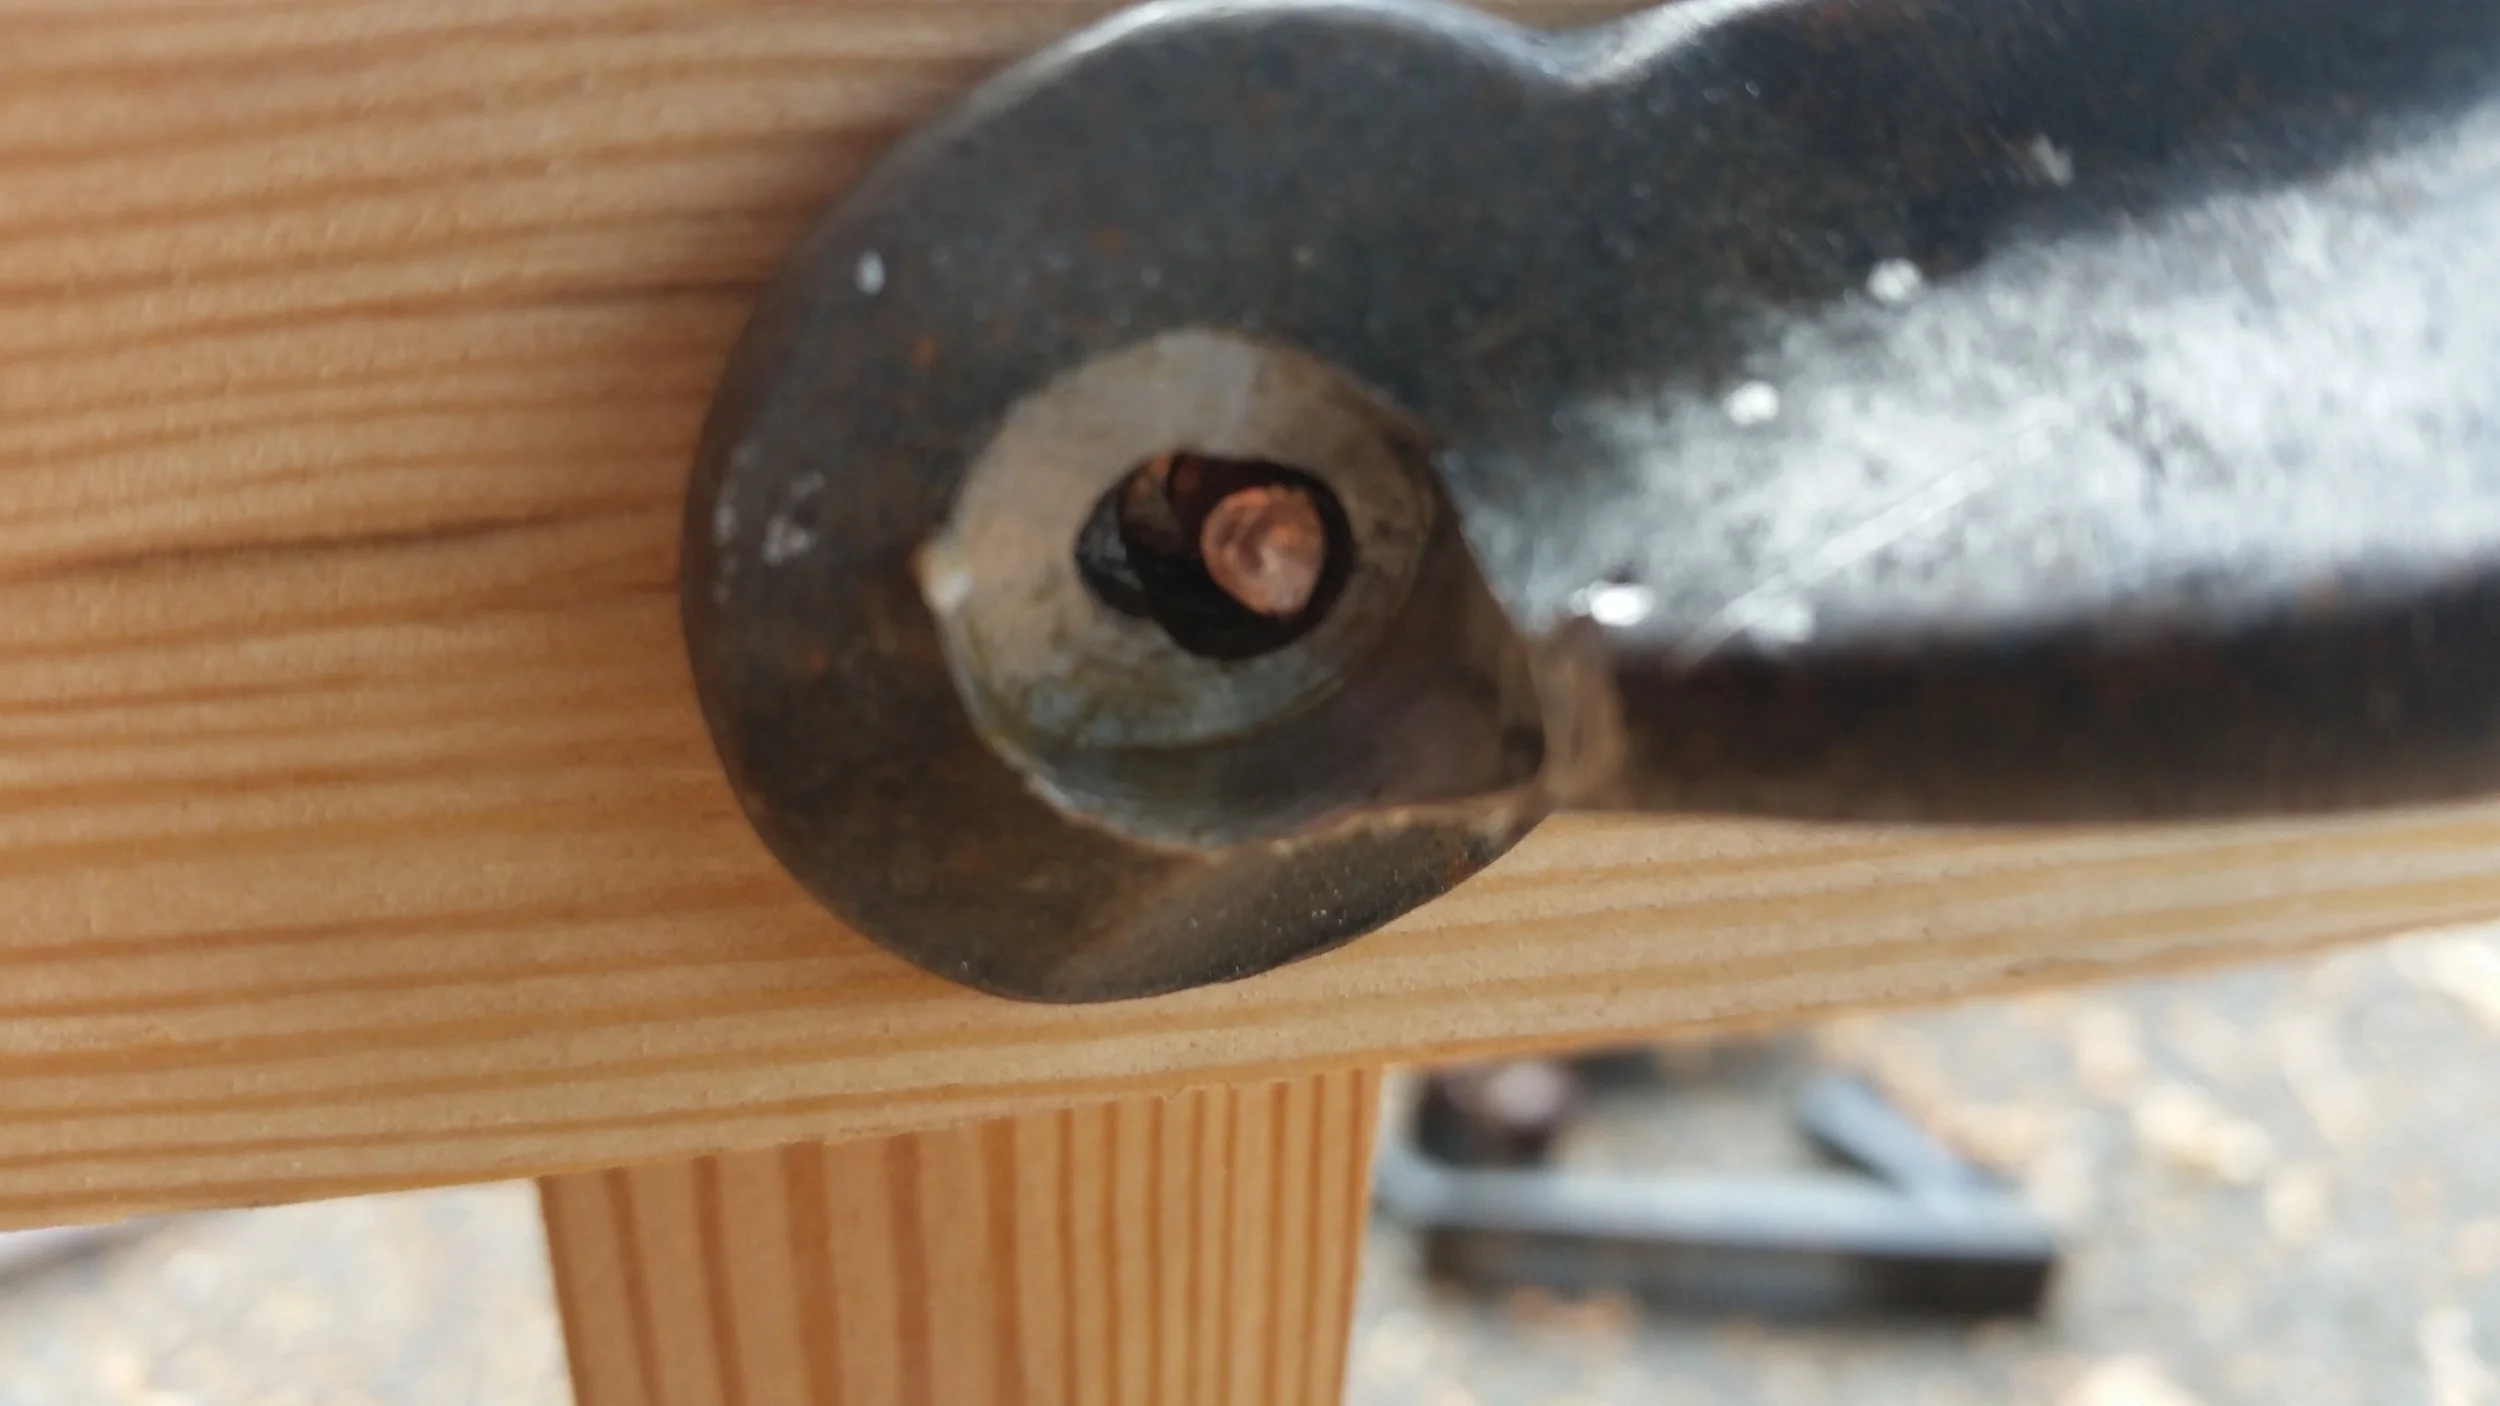
To make a rivet clamp, all you need is a large C-Clamp. Remove the lower pad from the ball and drill a hole through the top of the clamp. The ball at the end of the screw is excellent for compressing the head of the nail into the wood while the other end of the nail exits through the top of the clamp. 


image.jpg

Removing the lower pad allows the ball to fit into smaller spaces without distortion. If you are counter sinking the nail heads, the ball will fit down the hole with ease. 

image.jpg

Drilling small hole for the nail to pass will keep the rove in place as you clamp the unit down. Drilling a larger hole part way down the clamp will let you insert center punches into the unit to mushroom the head of the rivet while it is still under clamping pressure! When you remove the clamp, the rivet will continue to hold the strakes tightly as the mushroom head will not allow it to expand. 

This simple modification will let you insert rivets in a much more systematic way which will increase your speed and advance the progress of your projects.  

Balancing Sails

Balancing the sails may be viewed by some as sailing Nirvana, a perfect state which you know exists but can never quite reach. The truth is, balancing your sails is very simple.

When a sail fills with air, it begins to power up as its shape takes on the form of an airfoil. When the sail is properly trimmed and shaped like an airfoil, it will generate lift which will be transferred to the sailboat via the rigging and in turn move the sailboat through the water.

Perfect trim will have the air flowing evenly and smoothly over the both sides of the sail. This state will produce the maximum amount of power out of the sail. This is why when sailing, you want to trim the sail until the tell tales are streaming evenly on both sides of the sail. 

There are various sails on the boat, located in front and behind of the mast. If the sails are all powered up to their maximum, balance will probably not be attained.  The combined force from the sails will be localized into the "Center of Effort" or CE. This force is going to be counteracted by the "Center of Lateral Resistance" or CLR which is produced by the underwater profile. If the CE is ahead of the CLR, the boat will have lee helm and veer to leeward. If the CE is behind the CLR, the boat will have weather helm and veer to windward. If the CE is directly in line with the CLR, the boat will be balanced!

For purposes of balancing the boat, the rudder will be locked midship and not altered. This will keep the rudder in line with the keel and thus keep drag to a minimum. With the rudder center lined and locked, the CLR will not change. The relationship of CE to CLR can be altered by trimming the sails.

If the boat wants to turn to windward, this means that the CE is behind the CLR. 
If the boat wants to turn to leeward, this means that the CE is ahead of the CLR.

These are the only two options present when the helm is locked, and it no longer seems that complicated when you break it down to just two choices with no gray area.

Your sails will generally develop more power if you sheet them in, and less power if you ease them out. This means that you can generally alter your CE by either sheeting your sails or easing your sails.

If the yacht wants to turn to windward, you need to move the CE forward to meet the CLR and balance the boat. To do this, simply ease the main. Easing the main will reduce its efficiency and cause the CE to move forward as the headsails have not been altered. 

If your yacht wants to turn to leeward, you need to move the CE aft to meet the CLR and balance the boat. To do this, simply ease the headsails. Easing the headsails will reduce their efficiency and cause the CE to move aft as the main has not been altered.

That's it! Doesn't seem so complicated now does it?

If you ease a sail to the point that it starts to luff or develop leach flutter, you should sheet the sail in a bit until it calms down and then sheet in the opposite sail.

For example, if you have lee helm and you ease the headsail until it flutters, sheet it in a bit and then sheet in the main. Easing the headsail will move the CE aft, but flutter will destroy your sail. Sheeting in the main will also move your CE aft, and not cause premature destruction of your headsail. In the end, you can move the CE aft until it meets the CLR and the boat becomes balanced.

After you achieve perfect balance and are sailing along with your rudder center line and causing minimal drag, you may feel inclined to look at your sails once more. You will probably see that your sails are trimmed terribly. Tell tales will probably be twirling on one side of the sail, indicating that the sail is not trimmed to utmost performance. You may feel the urge to go trim the sail until all the tell tales are flying perfectly, but that would upset the balance of the boat by moving the CE either forward or aft. 

You need to remember that sails are an individual component that is tied together into the rest of the boat via the rigging to form a sailboat. The goal is not to have a perfect sail, but instead a perfect boat. If an over trimmed sail is needed to balance the sailboat, then that is what is needed to sail along properly.

Being able to zoom out and see the big picture is an important ability. This will show you that the tell tales don't really matter, and what is important is that the boat sails along through the seas.

Choosing Siding

Siding is the outer layer of the tiny house, and a large variety of materials are available for your choosing. Popular materials available are: Vinyl, Fiber Cement, and Wood.

Vinyl is famous for being maintenance free! The vinyl siding is available in many different colors, and you install the color that you want to use. It never needs painting or coating, as the vinyl is its own color. It is also very light weight, which is a wonderful bonus for a tiny house. The big weakness with vinyl siding deals with impact damage. Since it is made of weak plastics, it dents easily. It also doesn't hold up very well to strong winds.

On a tiny house being towed down the highway will expose the tiny house to hurricane force winds (64 knots or 73.6 mph) and road debris impacts on the siding. If you are never going to move your tiny house, vinyl may be a very simple option for your choice in siding material.

Fiber cement boards are much heavier than vinyl, but they are also much stronger. They hold up to impact and high winds much better, making them a wonderful choice for tiny house siding. Fiber cement does require painting, and this paint needs to be maintained over the years of the life of the tiny house. While this is added maintenance over vinyl, it does give you the ability to change the color of the tiny house over the years.

Lastly, wood siding is a wonderful material with the same benefits of fiber cement, but it is much more expensive. Wood siding can be finished with oils or varnish, letting you keep the look of wood that you can't have with fiber cement. Different woods can be troublesome to maintain painted. Some oily woods will be harder to make paint stick, and these woods will be condemned to paint peeling off the house.

If you decide to use wood siding, be sure that you select the correct species of wood for the finish that you want to achieve on your house.

Connecting the Sheer and Shelf Clamps

On our little dinghy, we are tying the frames together with stringers. The sheer and shelf clamp are being riveted to the frames. Copper rivets offer a lot of resistance to corrosion, offer the same benefits of through bolting, and are less bulky. 

The head of the nail lays flush with the planking on the outside while the head of the rivet is pounded smooth with the inside of the hull. There are no hex heads or nuts to get hooked up on, instead only smooth rivet ends. 

image.jpg

A pilot hole is drilled through the sheer, frame head, and shelf clamp. The strakes need to be in their perfect final location as there will be no moving once the hole is drilled. 

image.jpg

The copper nail is tapped through the wood members until it projects out the other side. This nail will be used to create the final rivet that will connect these stringers. 

image.jpg

The rove was driven over the copper nail using a modified clamp. As pressure is applied to the clamp, the rove is driven all the way down until the strakes compress over the frame head.  

image.jpg

The copper nail is then cut short and the end of the nail is mushroomed. 

image.jpg

At this point, the clamp can be removed as there is no risk that the rove will slide off the nail. With the clamp off and out of the way, the end of the head can be mushroomed to tighten up and finish off the rivet. I like to secure another regular C-Clamp next to the rove and over the head of the nail. This will keep the nail from backing out while I shape the head and will tighten the boards together and produce a very strong connection between the frames and the stringers.

Life Aboard vs. Life Ashore

People often ask us how safe it is to live aboard and to go long distance sailing. While life aboard can have its risks, life on land is not devoid of dangers either. 

20161217_113027.jpg

We woke up on the winter morning of December 17, 2016 and found the boat covered in ice. The deck was a bit slippery, but we were able to walk on the deck by chocking our feet into the toe rail. We held onto the lifelines and grab bars as we worked our way to gangplank. 

20161217_113146.jpg

The gangplank was completely covered in ice, and traction was non-existent. Thankfully, the rat bars offered a way to hold our feet in place and keep us from sliding down the gangplank onto the pier. While this entire journey was not the most graceful nor quick, it was also never risky to our safety.

20161217_113138.jpg

Walking down the pier, our neighbors wooden yawl had gorgeous icicles hanging from his mizzen boom. The ice covered everything and made the boats look like a magical wonderland! I decided to go visit my parents this morning, so I made my way to the car and found life ashore to have a completely different outlook to the winter wonderland.

Cars in the city were spun around and smashed into light poles and walls, but city drivers swerve around the city streets like madmen. The fact that they may have spun out on a patch of ice was of little surprise to me. I continued to make my way towards the country, where my parents live, when I came upon a massive disaster on the highway!

In the early hours of the morning, a fuel tanker slid on ice and went over the barrier wall, exploding into a blaze of fire that engulfed the highway. Approaching traffic slammed on their brakes as they approached the inferno, but they slid on ice and began crashing into each other. By the early morning, the cars and trucks had been turned into scrambled eggs as they kept compacting into each other.

When people question how safe living aboard or cruising is, I must ask, how safe is it to live on land and commute on crowded highways traveling very fast and close together. If a driver error were to occur, the consequences could be dire! This mornings collision involved more than 50 automobiles and caused at least 2 deaths!

Sailing in the exact opposite, everything happens very slowly and you always keep plenty of space between you and the next yacht. When we are in the bay, we set the proximity alarm on our AIS receiver to 0.25 nautical miles. In the ocean, we increase the alarm range to 2 nautical miles! If someone were to come within that distance, we begin to worry as we are getting "too close for comfort". Yes, on a sailboat traveling 6 knots, 0.25 miles is too close for comfort, whereas on a highway, cars traveling over 65mph are only a few feet apart!

When landlubbers seem concerned about the safety of sailing, I wonder what they think about the safety of driving.