Islander 36 Conversion: Lower Shrouds

The lower shrouds on the Islander 36 are each 17 feet long and will attach to the mast via T-Ball fittings and to the chainplates via deadeyes.


upload.jpg
upload.jpg

To begin the process of fabricating the lowers, measurements needed to be taken. The lowers are not under much stress or load, so the minimal amount of bury will be sufficient for these stays. Since we are using 6mm New England Ropes STS-HSR, we need to bury 17 inches.

The second mark is at the 27 inch position, allowing us to have 10 inches available for the eye splice, letting us insert a variety of thimble sizes while keeping the angle of the throat to a minimum. 

With these positions marked on the rope, a mobius brummel eye splice was performed in the ends of each stay, producing four identical stays that will be installed to replace the forward and aft lower shrouds.

Differences in Rigging: Turnbuckles vs. Deadeyes

To calculate how long your stay will be, you need to know what length is occupied by the tensioning system. Are you doing deadeyes, or deadeyes with turnbuckles? What's the difference?

If you are going to use deadeyes only, you will need a toggle which is sized appropriately to the chainplate clevis pin hole. The lower thimble of the deadeye needs to be small enough to fit between the jaws of the toggle. The top thimble needs to be large enough to serve as a turning block for the lashings. For stays under more load, a larger thimble is needed as it will allow more lashings to lay next to each other without overlapping any of them. For stays under less load, smaller thimbles can be used as less mechanical advantage will be needed to tension the stays.

When you use turnbuckles, they become the main choice for tensioning the stays. The deadeyes and lashings are simply to absorb the constructional stretch and creep over the lifetime of the stay. Turnbuckles only have a few inches of adjustment, where deadeyes and lashings can absorb feet of stretch. Since the deadeye doesn't need to form a block and tackle system to tension the stays, the thimbles can be significantly smaller. In these cases, the thimbles are sized based on the rope used to make the deadeye rather than calculating the number of passes the lashing will need to make to create the desired mechanical advantage.

The turnbuckle attaches to the chainplate via a toggle jaw on the lower screw, and to the lower thimble of the deadeye via a toggle jaw on the upper screw. While turnbuckles are expensive, they do save the cost of purchasing an additional toggle. 

The last difference between the two systems is the length added to the lower end of the stay. A deadeye will stretch out to around 12 inches in length, and the lashings should be between 18 to 24 inches in length. This will give you plenty of leeway for additional stretch or creep in the stay over the years without the risk of the stay and deadeye becoming two-blocked. If the deadeye were to become two-blocked, the splice would need to be opened up and relocated further up the stay.

A turnbuckle will add additional distance to the lower components of the stay, meaning that the stay should be cut even shorter. A 1/2 inch turnbuckle will be around 15 inches long when fully unscrewed, add to that a 12 inch long deadeye and 18 inches of lashings, and you now have 45 inches of the lower section composed of tensioning equipment. 

In our example the stay would need to be cut 45 inches shorter for a setup of deadeyes and turnbuckles, or only 30 inches shorter for a setup of just deadeyes.

If you are unsure about deadeyes and would like to try them out but want to keep the door open to convert to turnbuckles in the future, cutting the stays to the length needed for a deadeye and turnbuckle, that way turnbuckles can be easily retrofitted should the desire arise.

One last point about positioning the eye splice in the lower portion of the stay is to consider damage from chafe. If your sheets will rub on the shrouds, consider positioning the end of the stay just higher than the area of chafe. This may result in a very long lashing which will still work fine and not cause the standing rigging to suffer.

The reason for setting the lashing in a high chafe region instead of the stay is the ease of replacement. The stay is going to chafe if a sheet is constantly rubbing on it, this is unavoidable. By positioning the eye splice higher than the area of chafe, the lashing will become the sacrificial piece that can be replaced when it becomes severely chafed. Lashings are much cheaper and easier to replace than a stay that has been spliced to exact size constraints. 

If the chafe were to occur on the lower portion of the stay, the whole stay would need to be replaced. If the lashing were to become severely chafed, just the inexpensive lashing needs to be replaced.

Basically, deadeyes alone will have a slightly longer stay, where deadeyes and turnbuckles will have a shorter stay. The only modifications to this rule would be to protect the stay from chafing damage, where it might be set even shorter to remove the lower portion of the stay from risk of chafing damage.

Islander 36 Conversion: Backstay Fabrication

The backstay was the first stay that I fabricated for the Islander 36. The owner wanted to reuse his older turnbuckles but the cost to replace the swaged top to a toggle and replace the corroded lower toggle with a new one was astronomical! Each component cost around $250, and we need 16, adding a little more than $4,000 to the cost of re-rigging. As you can imagine the decision was made to not repair the old turnbuckles and instead go with deadeyes for the shrouds.

The backstay currently has a new Hayn turnbuckle which we shall be reusing. Since we can retain the turnbuckle for the backstay, we won't need to create a backstay adjuster for minor adjustments before going sailing.

The backstay is responsible for controlling headstay tension while sailing. As a result, the tension in the backstay is often adjusted. Having to rig up the deadeye tensioning system every time you wanted to add tension or ease it a bit would be quite tedious. Retaining the turnbuckle will allow the owner to quickly increase or decrease tension in the backstay with only a few simple tools. 

Since the majority of the work will be performed by the turnbuckle, we don't need an extensive pulley system for the lashings. The lashings will connect the backstay to the deadeye which is attached to the turnbuckle. To add tension, simply loosen the turnbuckle all the way, tighten the lashings by hand and tie them off, then tighten the turnbuckle. If the turnbuckle becomes two-blocked, simply repeat the process. 

Thanks to the mechanical advantage of the inclined plane in a turnbuckle (the screws), tension can be added to the backstay without relying on a complex pulley system.

The deadeye was made using a dyneema grommet with a flat seizing knot tied in the middle. This will hold the thimbles in place for the life of the deadeye and provide a proper turning block for the lashings. 

The backstay was cut to length and then spliced together using mobius brummel eye splices. The length was cut before the splices were put in, as the stay will shrink during the splicing process. As the weave is opened up to bury the tail, the stay will contract. Once the stay is loaded, this contraction will be removed in the form of constructional stretchIf you splice one end of the stay and then mark and measure the other end, you will end up with a stay that is a few inches longer than expected. By measuring everything first, you can properly estimate the final length of the stay after all the constructional stretch and initial creep is removed.

The 12 strands were selected and removed from the tail at regular intervals. I needed to bury 20 inches of tail, but decided to bury 36 inches, as the extra bury is extra security. Should a splice in the backstay fail, the mast will come crashing forward! These extra inches are simply added security for the stays structural integrity.

The additional bury allows for a full 20 inches of bury at the ropes original size and weave. The last 16 inches were thinned at regular intervals producing a very sleek and smooth taper. If the tail were to end in a blunt cut, the splice would hold with plenty of strength but the stay would fail prematurely. The sharp transition from buried tail to no buried tail would become a source of stress on the stays fibers which would become the point of future failure. By tapering the stay slowly and gradually, this source of stress is eliminated and will prevent any premature failure of the stay. 

Once these pieces of the tail are pulled out of the weave and cut off, this part of the tail can be milked back into the stay. With the thimble in place, the stay is now completed and ready to be installed on the yacht as the new backstay.

Keeping the Bilge Dry

A dry bilge may sound like a mythical creature that will never be encountered by mere mortals. With some careful planning, any bilge can be kept dry!

To keep a bilge dry, you need to keep water from getting in, and get the present water out. A sealed deck-hull junction will prevent water from coming in from above, as well as properly bedded deck hardware that does not leak; but what about the shaft? Shafts pass through a massive hole in the hull called a shaft log. To seal out water, the packing gland will press against the sides of the shaft, keeping water from dripping into your bilge.

The moment you begin to spin your propellers, friction will create heat which can cause serious problems in the packing gland. To negate this issue, the stuffing box is adjusted to allow a slow and steady drip of 1 to 2 drops per minute. This steady flow of water will lubricate the packing gland and cool the stuffing box. This dripping water will slowly fill the bilge, defeating one of the methods of keeping a bilge dry (keep water from getting in).

Here enters the second part of the equation, getting the water back out. Most stuffing boxes will drip water into the bilge, letting it accumulate until there is enough water for the bilge pump to extract. To keep the bilge dry, all you need to do is manage where the water goes from the stuffing box. 

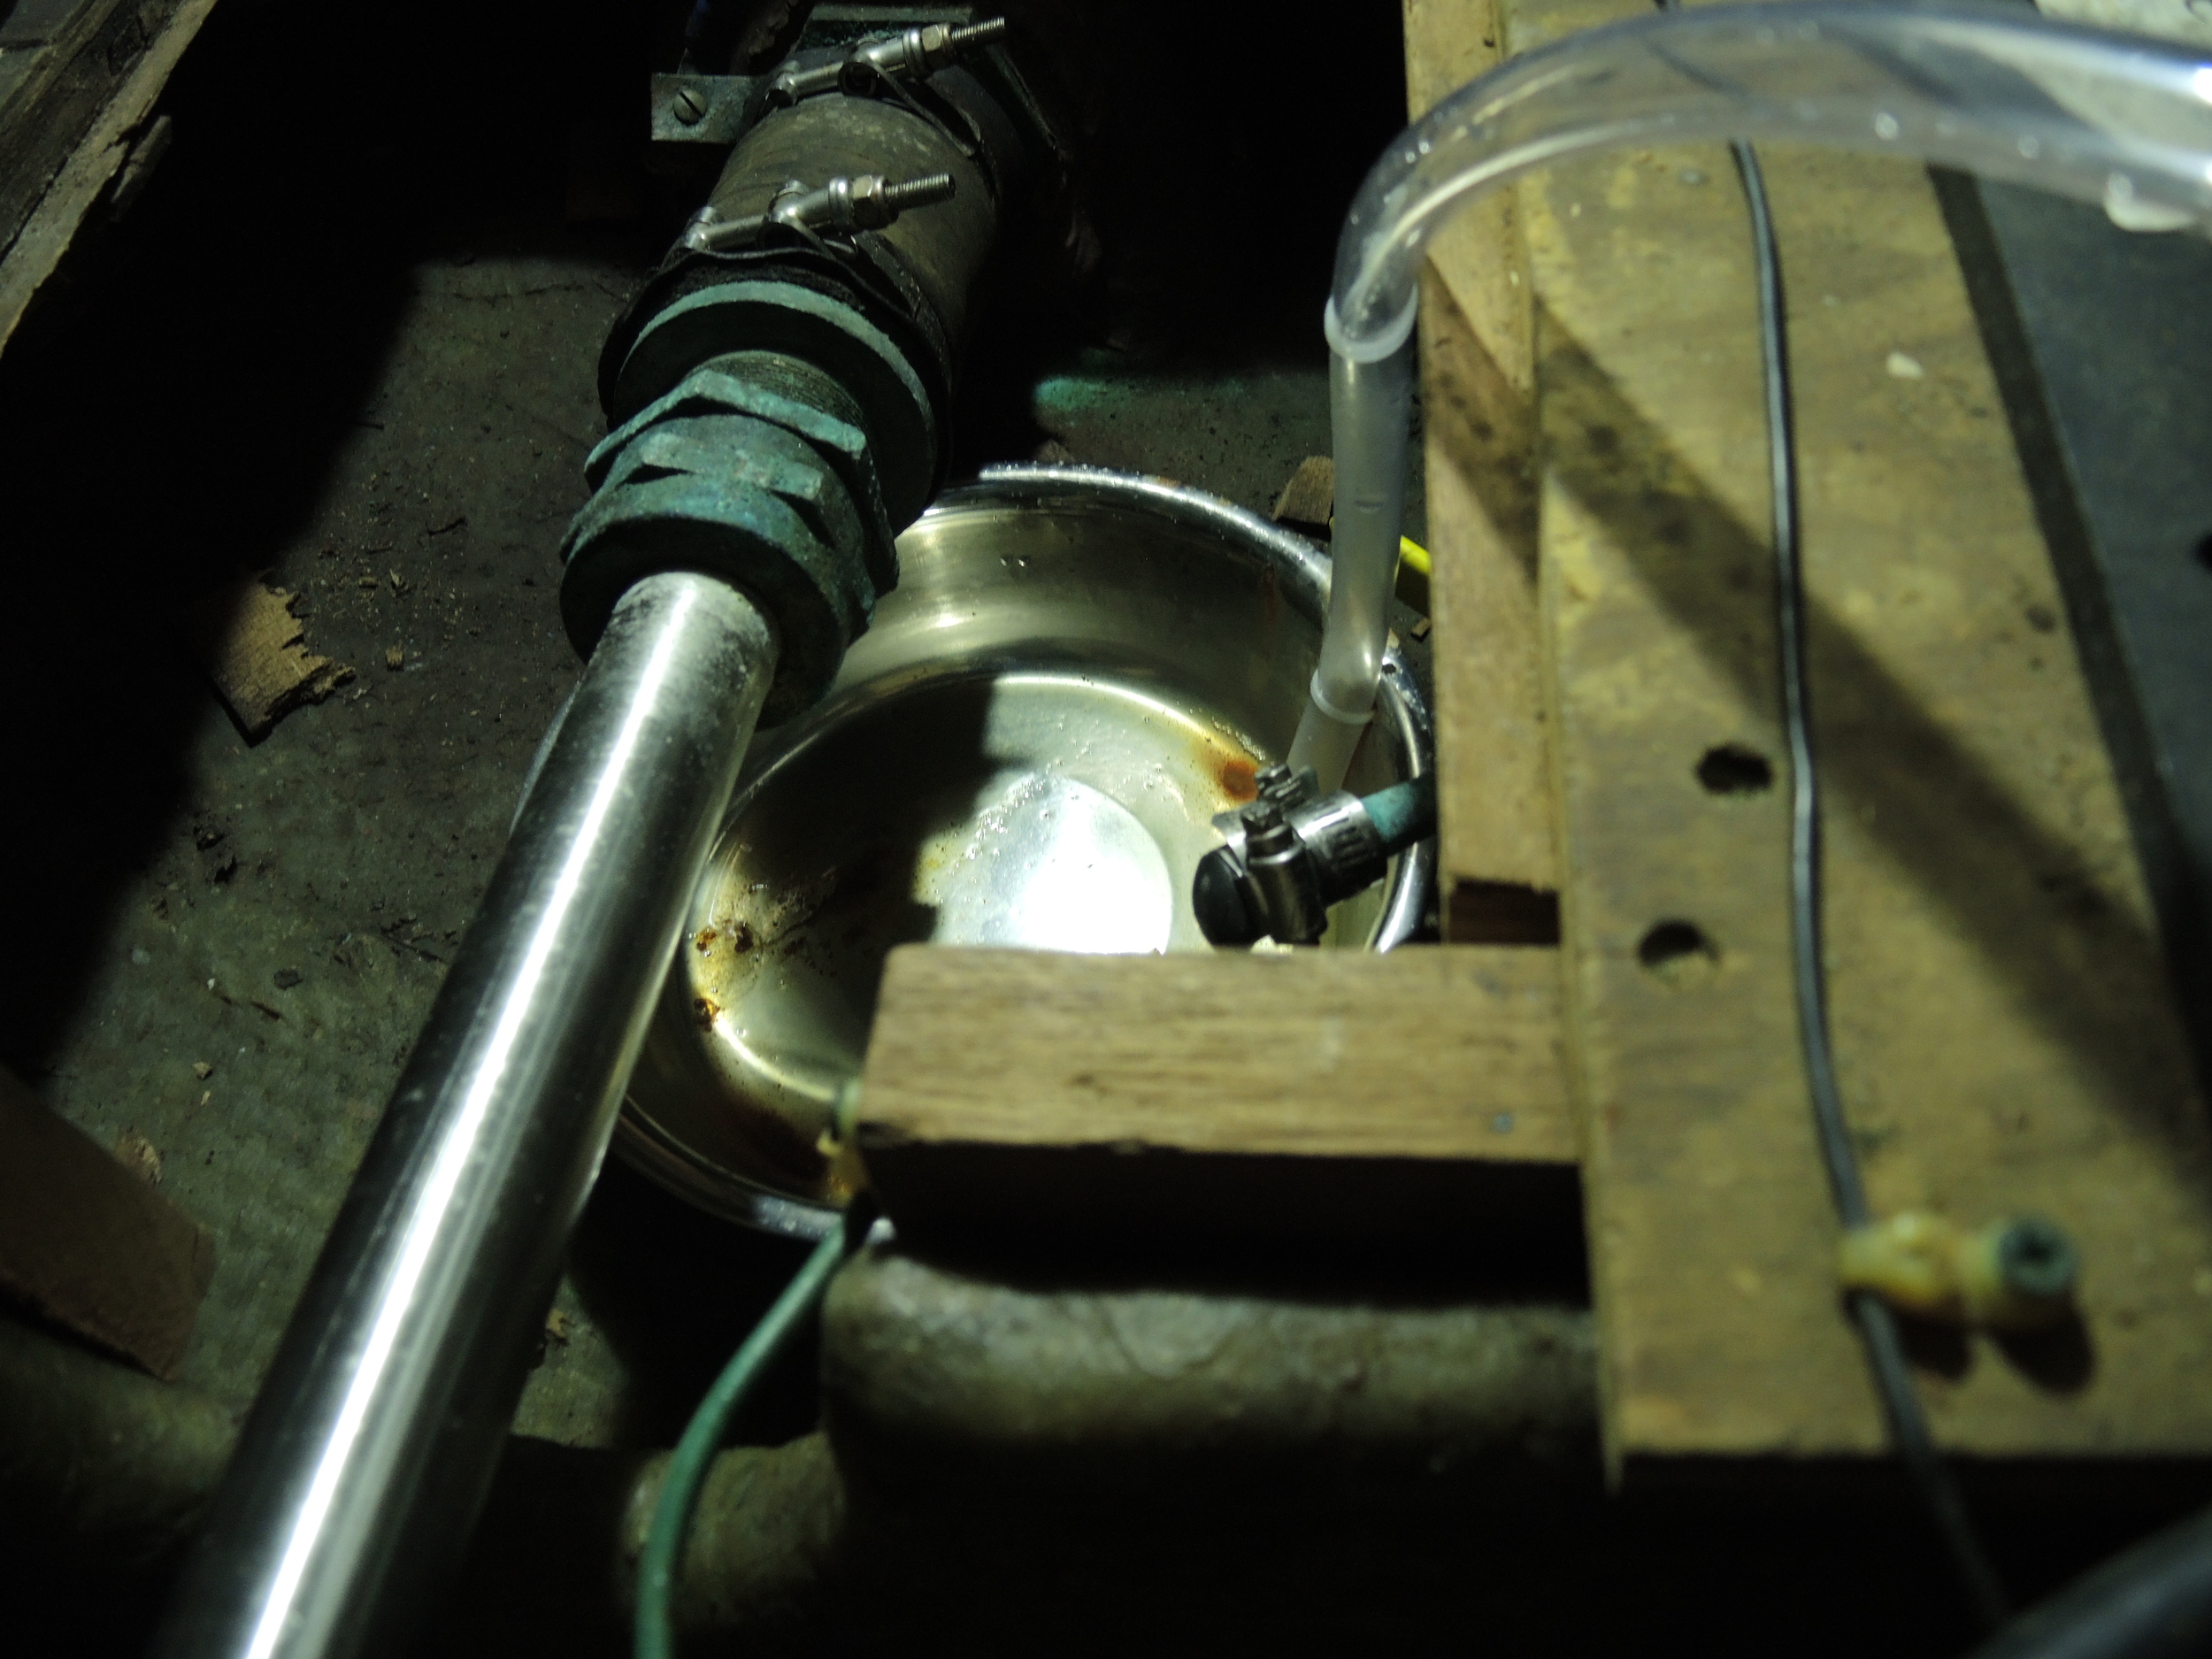
Instead of dripping into the bilge, set a pan or other collector under the stuffing box to accumulate the water without getting the bilge wet. This power boat used dog food dishes set under the stuffing boxes to collect the drips. A small hole was drilled in the top of the dish to secure a zip tie which holds a small hose in position inside the pan.

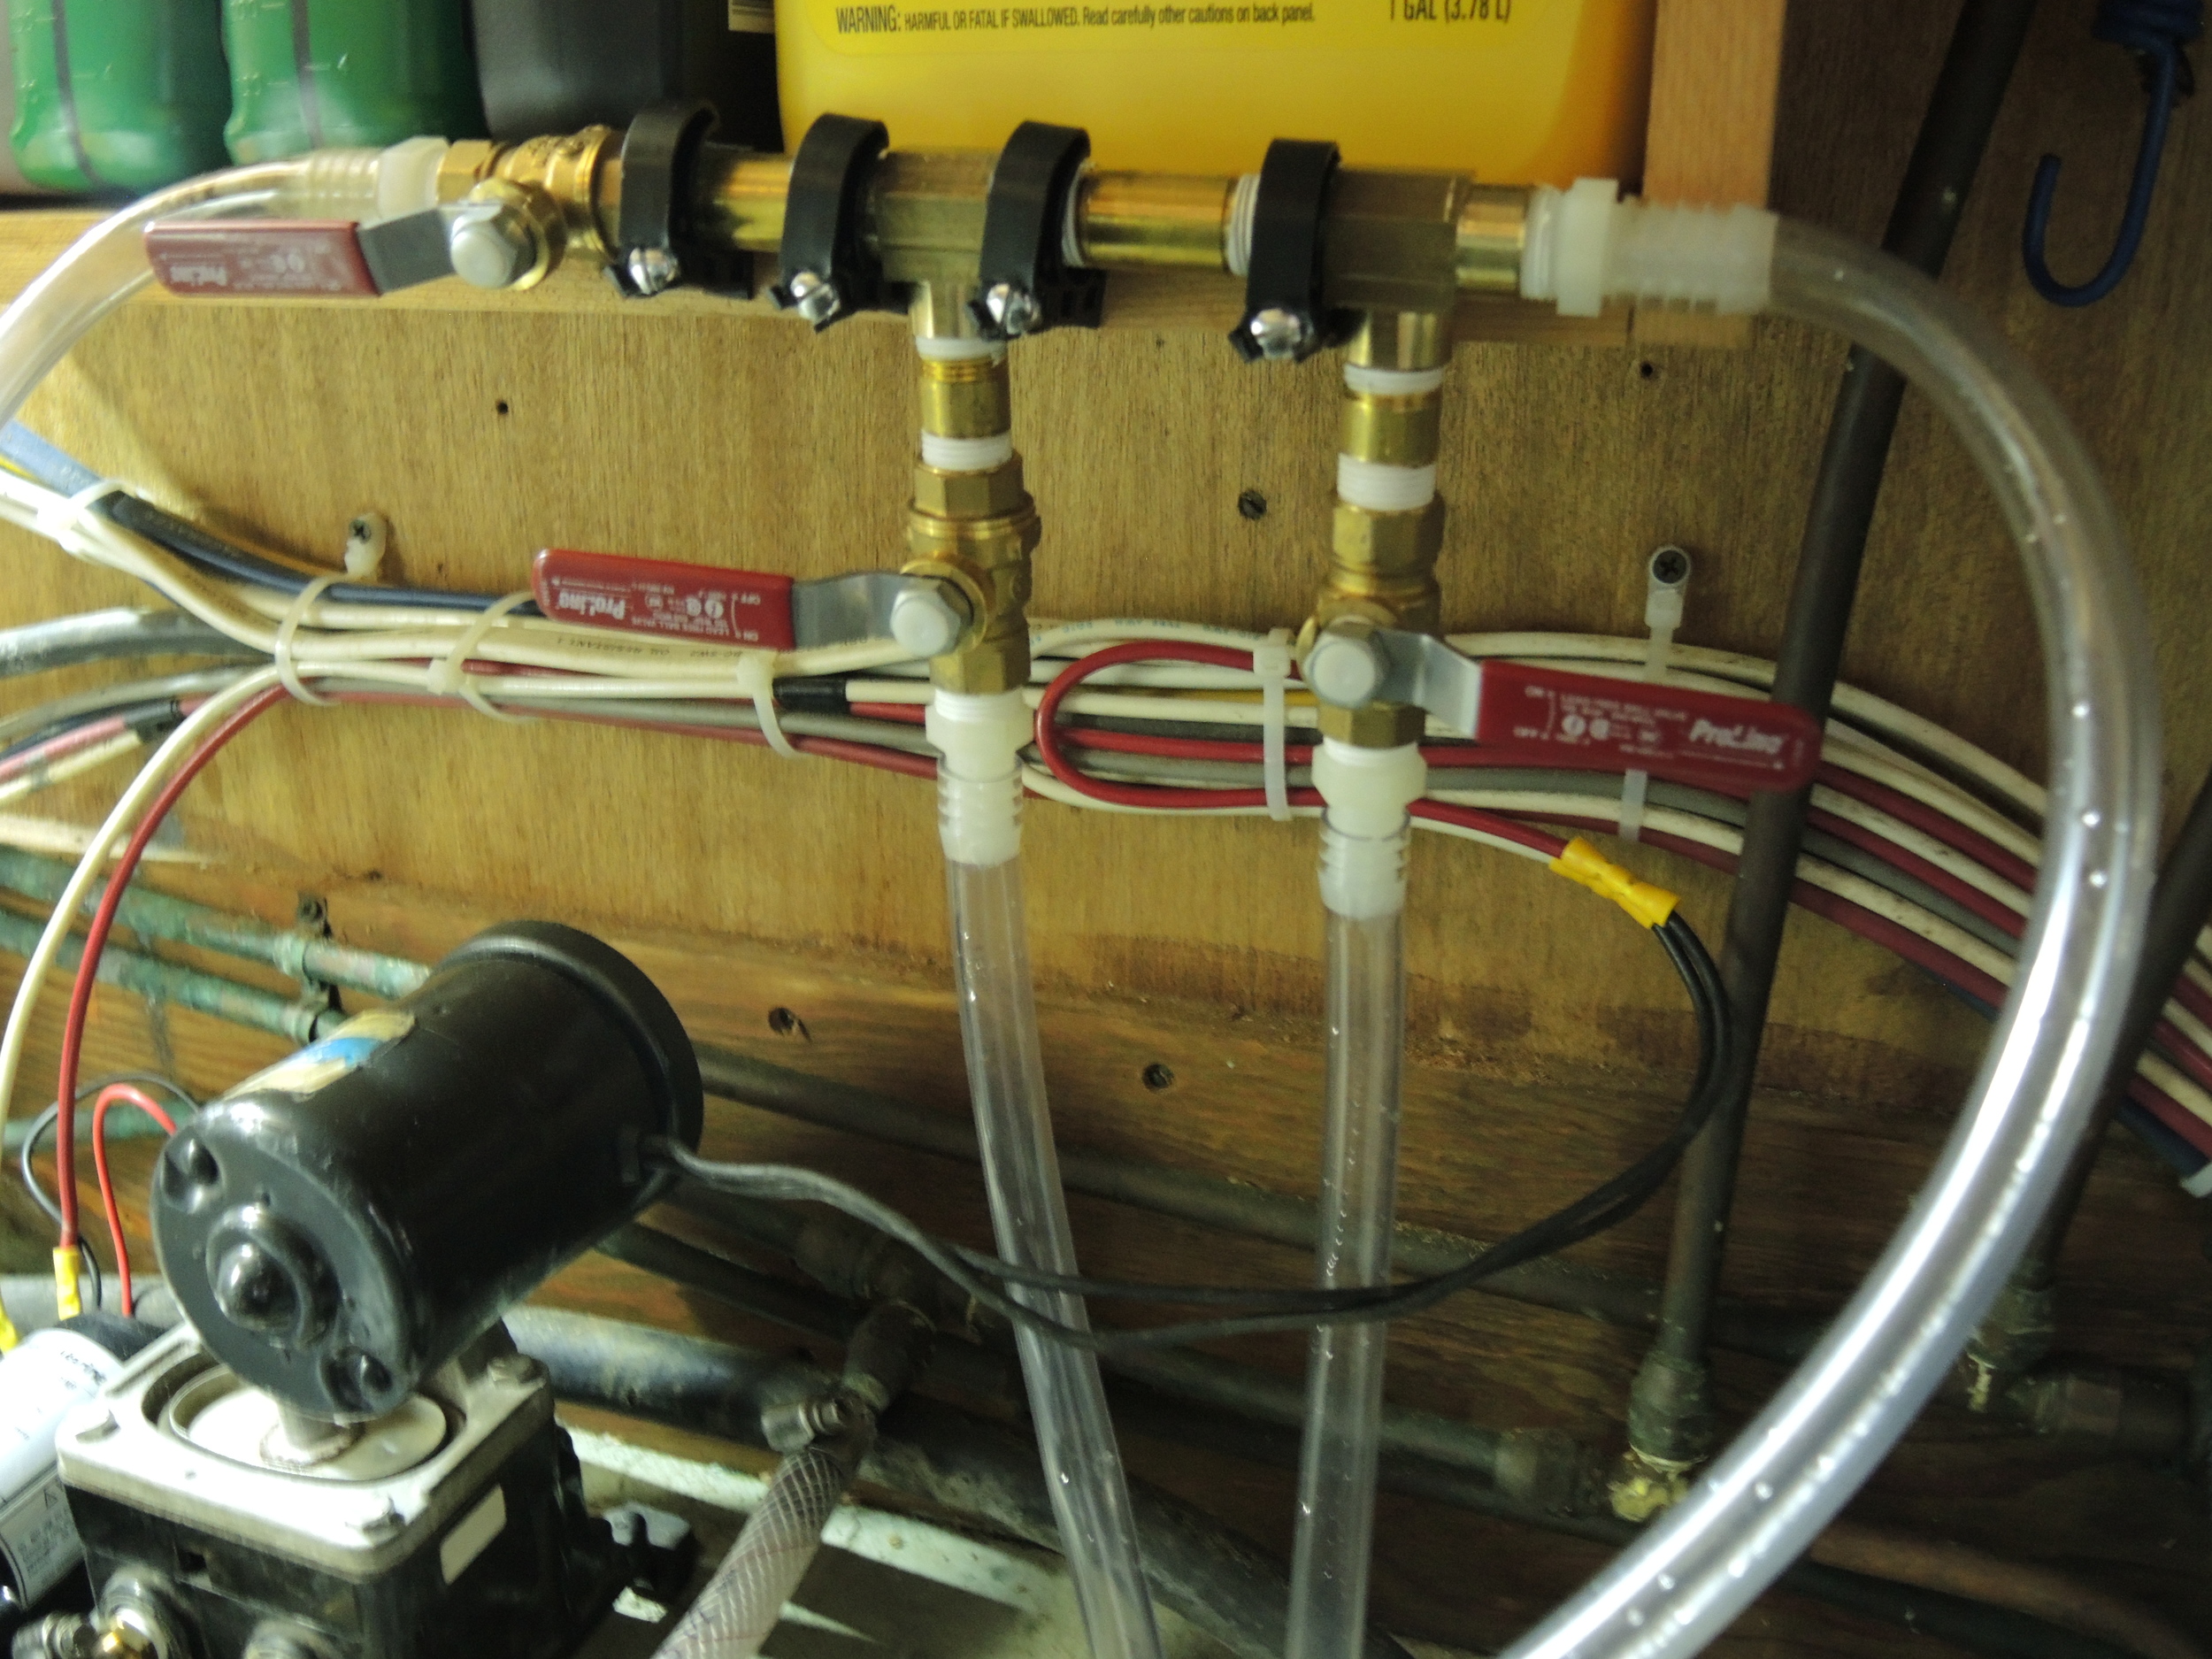
The hoses are led to a system of valves which act as a manifold. This system leads to a diaphragm pump which draws the water out of the shaft log pans in the stern and from the air conditioner in the bow.  By turning on the pump and selectively opening the valves, each pan can be drained dry, thereby keeping the bilge dry as well. 

Soft Shackle Knot

Soft shackles are a very handy tool on a sailboat; they can securely attach something and hold incredible loads while weighing next to nothing and posing no risk of damaging the boat. Best of all, they require no tools to install or remove!

A soft shackle can be used anywhere a regular shackle would be used. The difference is a regular shackle is made of metal and can scratch your topsides or pound into your deck. A soft shackle is made of dyneema and is very soft and flexible, making it safe to use anywhere that you wouldn't want damaged by a regular shackle.

One of the most important parts of a soft shackle is the bulky knot at the end. This knot will be the weak point in the soft shackle, as stress will accumulate near it and the sharp bends of the knot will further weaken the dyneema. Several different knots have been suggested for this purpose, with the goal of minimizing stresses. 

The ideal soft shackle knot is bulky and does not twist under load. To avoid twisting, the tails of the soft shackle need to both share the load of the knot. A symmetrical knot would be ideal in this situation as it will then share the loads evenly between the two tails of the soft shackle. Minimizing the sharpness of the bends of the knot would also help prevent stress points in the knot which would lead to premature failure of the soft shackle.

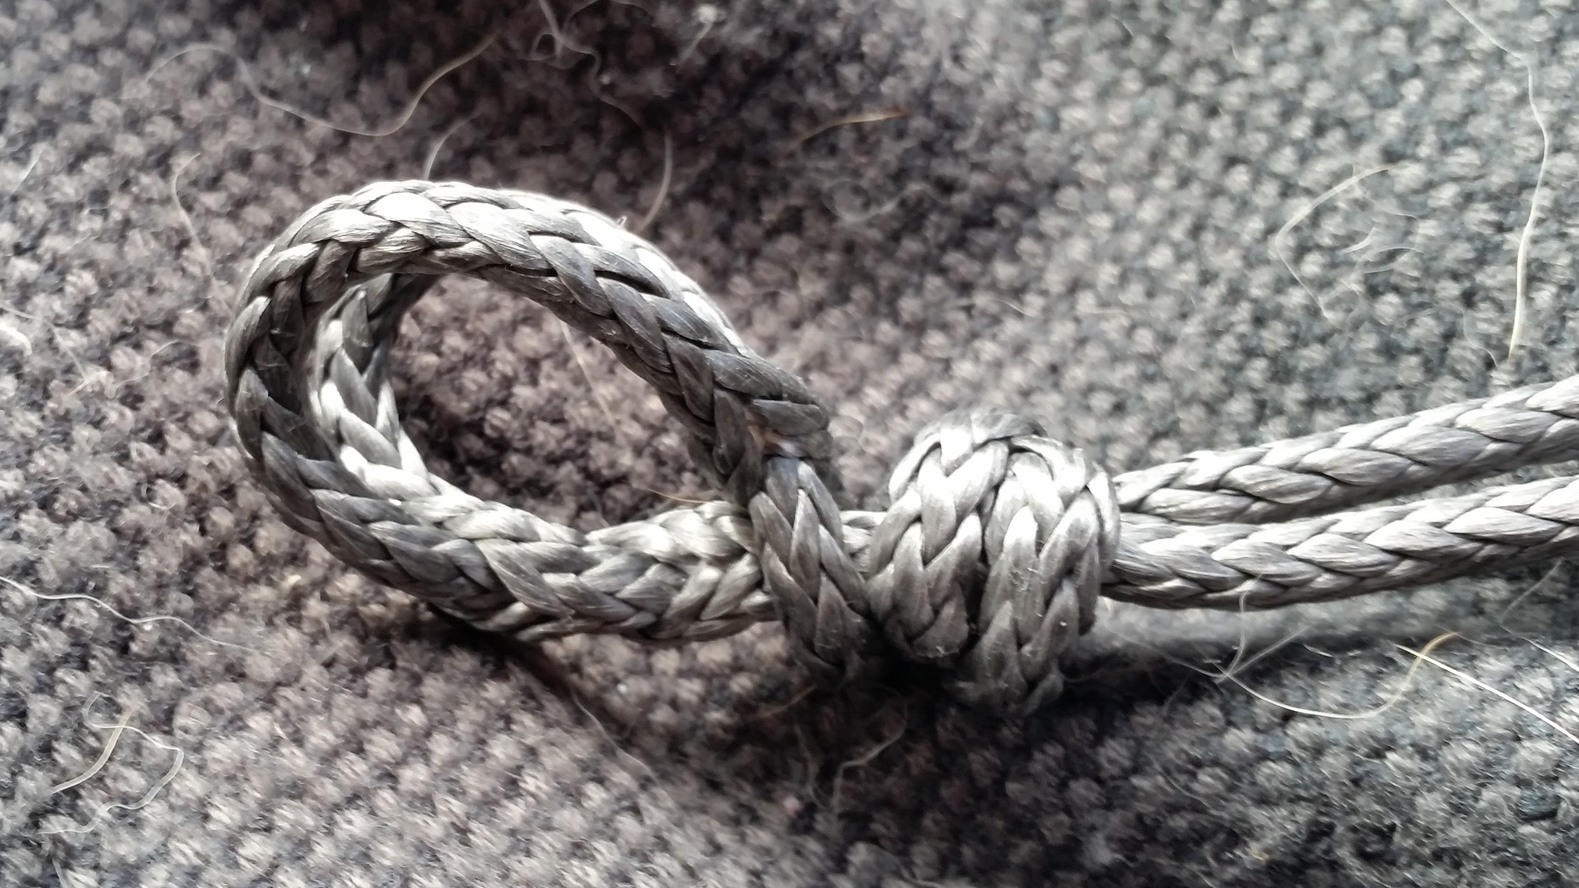
The Lovers Knot is a good candidate for this purpose, as it is a bulky, symmetrical knot with no very sharp bends. 

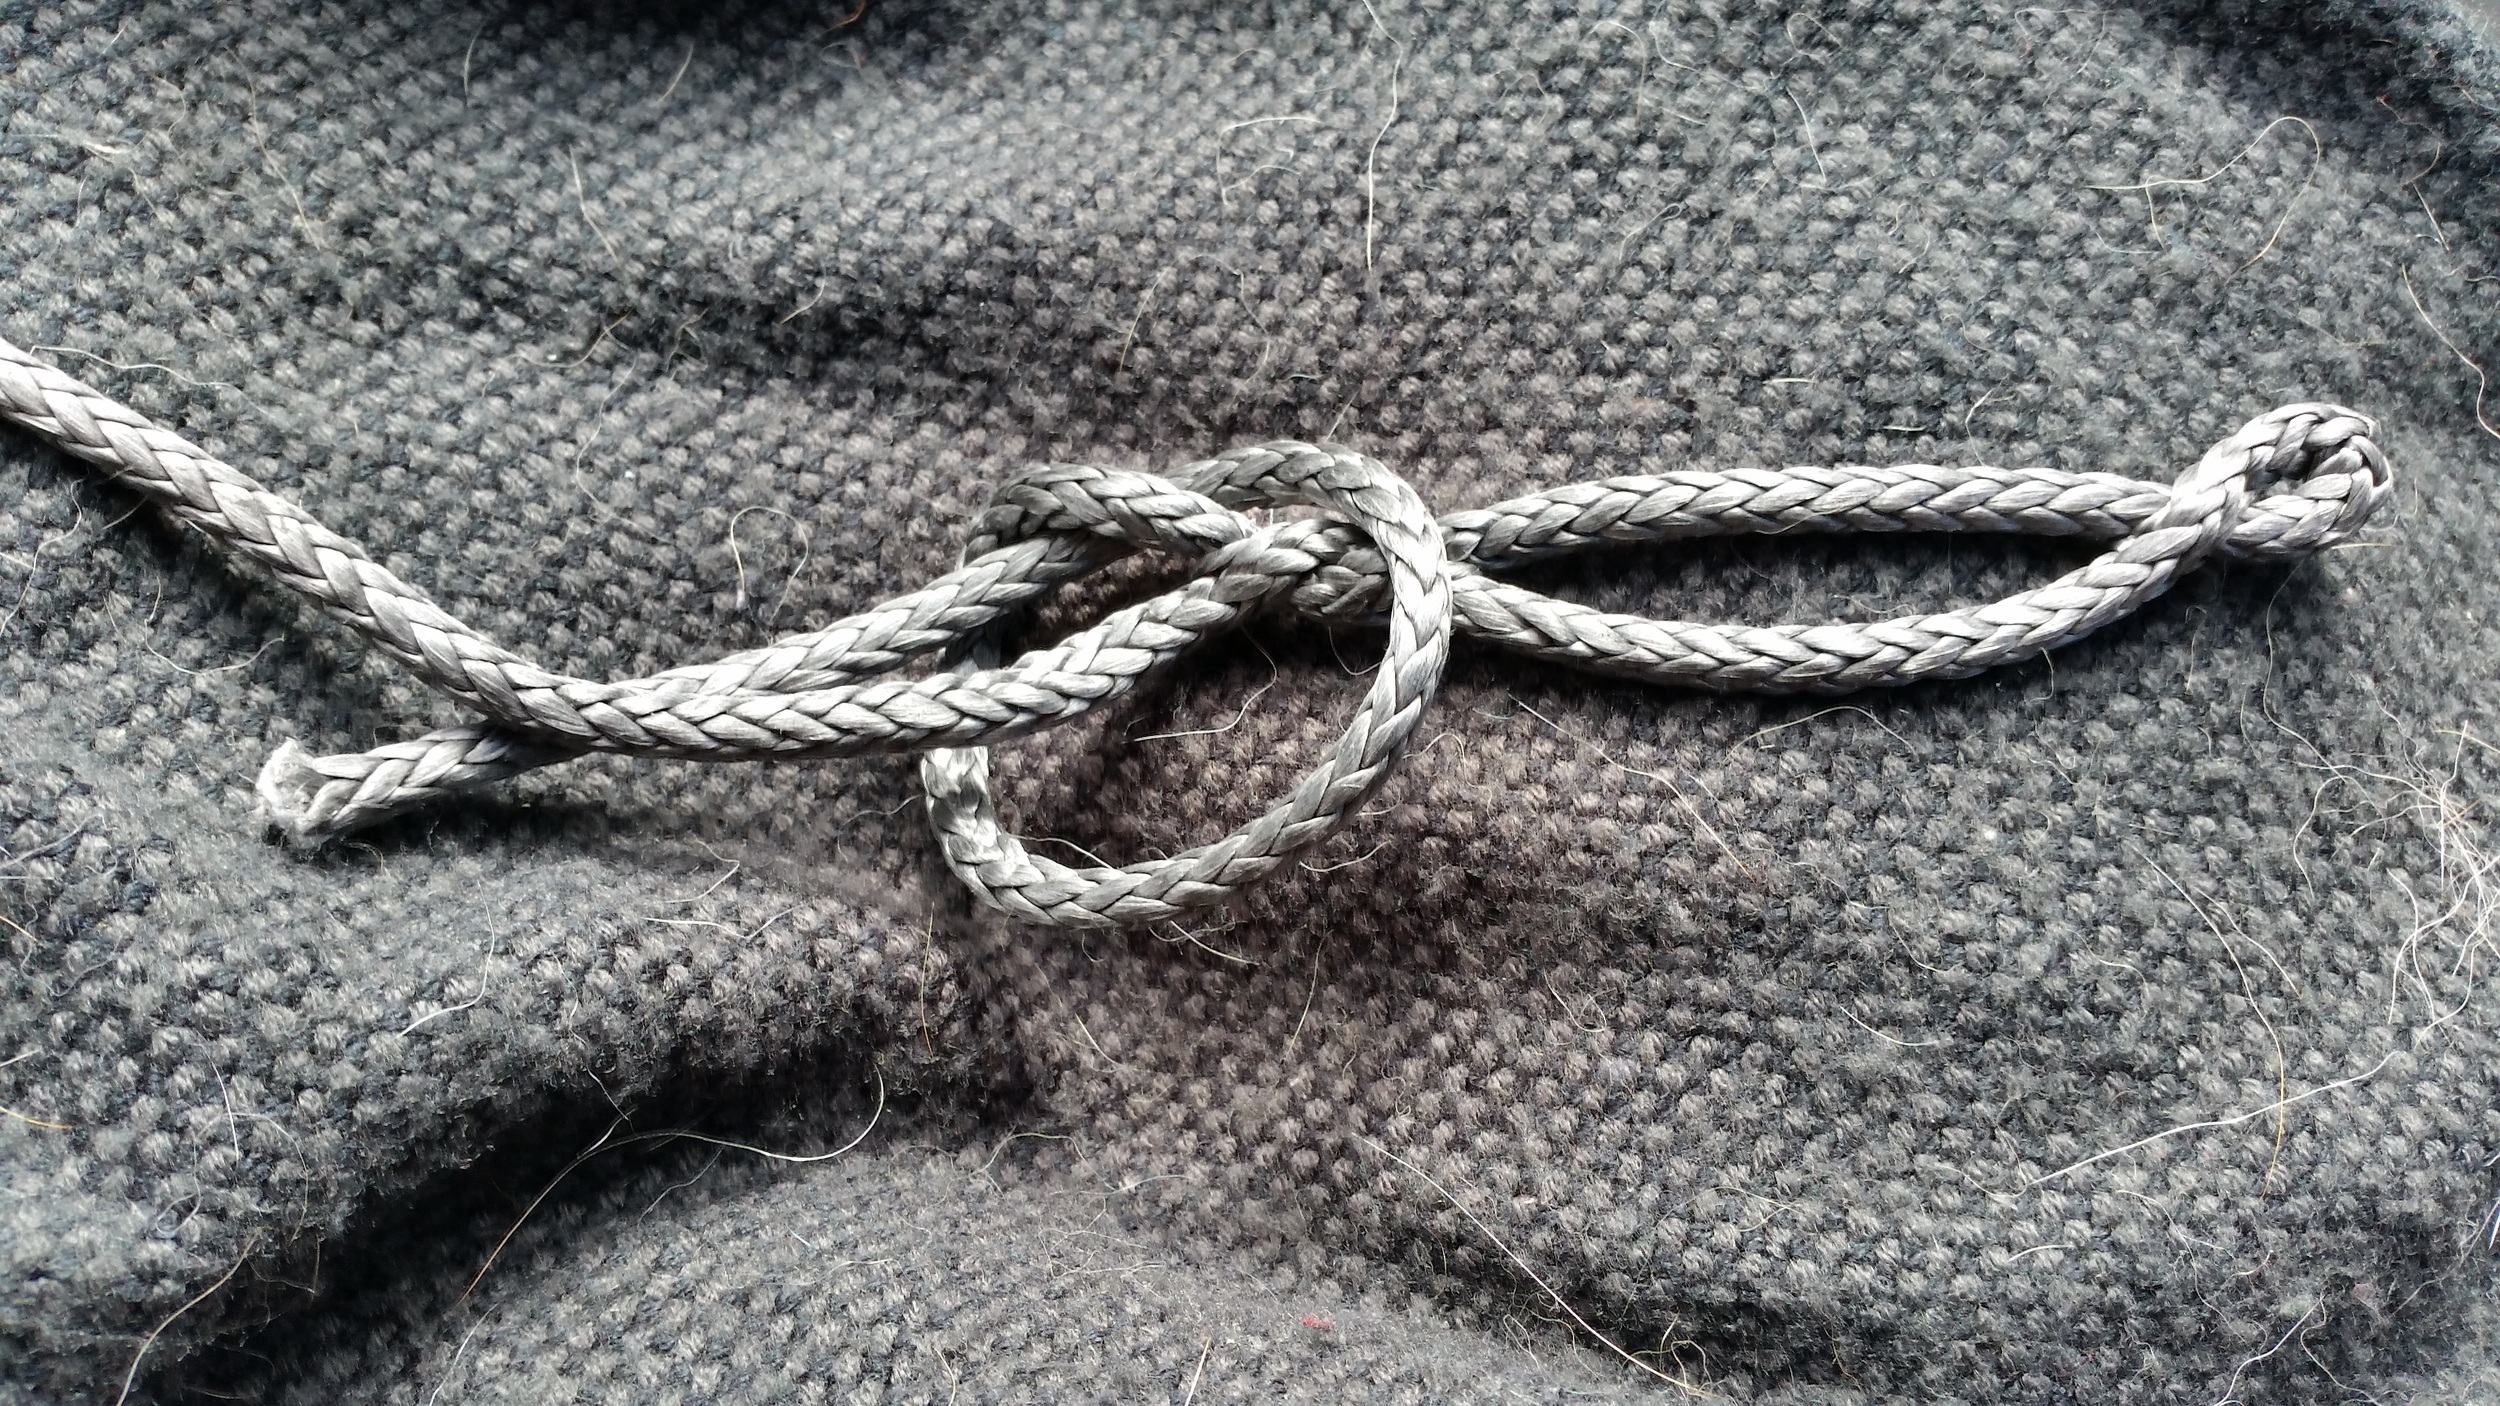
Lovers Knot before tightening

Lovers Knot before tightening

Once the soft shackle is ready to tie, stretch out the two tails parallel to each other.

Take the top tail and pass it under the lower tail, around the front of the soft shackle, and then under the top tail. This will form a half hitch with the top tail.

Then take the lower tail and pass it over the upper tail, behind the soft shackle, through the loop formed by the first tail, and over the lower leg, forming another half hitch.

You want to end up with two interlocking half hitches with the tails exiting through the same section of the knot.

As you tighten the knot down, be sure to pull evenly on both tails, this will ensure that the knot is balanced and even. Be sure to position the knot very closely to the mobious splice, which will ensure that the tails are not going to move or be at slightly different lengths which could lead to more stress on the overloaded tail.

Once the knot is fully tightened, it will work well to secure the soft shackle and allow the unit hold itself together under incredible loads.