
Dress Like a Sailor

Source: http://fashionew.com/wp-content/uploads/2015/08/Sailor-fashion-style-clothes-wearing-on-luxury-yacht-trip-1.jpg

Source: http://fashionew.com/wp-content/uploads/2015/08/Sailor-fashion-style-clothes-wearing-on-luxury-yacht-trip-1.jpg

When you picture someone sailing along, you might think they dress like this:

The truth is, these clothes don't work out too well when sailing. Imagine working hard to raise the anchor or raise the sails and breaking a sweat. 

This is what we wear when we go sailing: pajama pants, t-shirt, life jacket with harness and tether. Wearing a lot of clothes means more laundry to do, so less clothing means less laundry! The pajama pants offer sun protection without the need for applying so much sunscreen and are light weight to keep you cool. 

These clothes are comfortable and easy to move around in, making it easier to do all the necessary labors on a sailboat. I try to stay away from white pants because, as you can see, my knees get filthy. When I raise the anchor, mud from the sea floor comes up and falls on the deck. When we are raising anchor in rough conditions, I will need to kneel to avoid falling overboard. Kneeling on a muddy deck will promptly and permanently stain your pants. If you chose to wear nice white shorts, they would quickly be ruined. Instead, wearing pajama pants that are inexpensive and comfortable, we don't have to worry about keeping them getting messed up while working the boat. 

Best of all, light weight pajama pants take up very little space, meaning they can be washed in a small washing machine! And in true sailors attire, wearing the same pajama pants for a few days in a row will greatly cut down on the amount of laundry we need to do. When sailing on long trips, Maddie and I will typically wear the same clothes for a few days before changing them for new ones. While this may sound disgusting to land lubbers who imagine us wearing these clothes for four days straight, that is not the case. We wear them during the day while working the boat; as soon as we finish for the day, we shower and put on clean clothes. When morning comes, we don our old clothes once again after letting them air out all night! 

Wearing any jewelry is also risky, as it can slip off and fall overboard. Maddie and I take off our rings and watches when sailing, keeping them in a safe place inside the cabin. If time is a concern, a mounted clock can tell you everything your watch could have without any risk of falling into the great blue sea. 

One last thing to note is footwear for sailors. You always hear of people wearing special boat shoes, but the truth is barefoot is best! Yes you can stub your toe on deck gear, but once you learn your deck layout, you will be able to navigate it in the dark. Any shoe will get wet and take time to dry, and will begin to smell in the process. Bare feet will dry quickly and will stay smell free for the entire trip if you never wear any shoes. When we reach port, the hardest part is getting used to wearing shoes again because going barefoot is the best!

Turnbuckle or Deadeye

When you re-rig your yacht with synthetic standing rigging, you need to ask yourself if you want to keep your turnbuckles or not?

This question is ultimately up to the owner to decide. Each has their pros and cons, and you need to be willing to accept the limitations of each.

Turnbuckles are the standard method for tensioning standing rigging. Turnbuckles hold two screws, one has Left Handed threads, the other Right Handed threads. As you turn the turnbuckle, the threads will simultaneously pull in or push out. When they pull in, they will make the stay shorter and add tension in the process.

The reason turnbuckles work so well is thanks to the mechanical advantage they offer. Turnbuckles use a few simple machines to achieve their purposes, first is the inclined plane. The threads on the screw are actually an inclined plane, and as you turn the turnbuckle, you are moving along that incline. If your turnbuckle screws are 20 threads per inch, that means that 20 rotations will advance the screw 1 inch.

The turnbuckle also gets to take advantage of leverage in the form of a wrench or rod that can be used to manipulate the turnbuckle. The leverage gained by the rod multiplies the mechanical advantage of the incline plane in the screws, allowing the turnbuckle to tension the standing rigging to extraordinary levels!

Lastly, turnbuckles are compact. All this mechanical advantage is packed into a small machine which lives just above the chainplate. They are quick and easy to use and hold securely. As you can imagine, such a strong and powerful machine would have an equally qualified price to match, and they do. Turnbuckles are on the expensive side, and have a recommended service life of 10 years. After 10 years, they should be replaced, and the cost of doing so can be rather impacting. The minimum number of turnbuckles on a single spreader sloop rig is 8:

  1. Headstay
  2. Backstay
  3. Port Cap Shroud
  4. Starboard Cap Shroud
  5. Port Forward Lower Shroud
  6. Port Aft Lower Shroud
  7. Starboard Forward Lower Shroud
  8. Starboard Aft Lower Shroud

Additional stays from a second spreader, split backstay, or cutter rig will add turnbuckles and cost to the equation. When I re-rigged Wisdom, we had 11 stays to replace. The total cost for the materials (including extra line for spare stays) was $4,400. 11 turnbuckles would have added $1,100 to the cost, making the process of re-rigging much more expensive!

What could go wrong with a simple turnbuckle? A few things actually. Turnbuckles are typically made of stainless steel and bronze. The bronze components will last a very long time and show little damage from corrosion and stress. The stainless steel components will suffer from corrosion, both external and crevice. Crevice corrosion will lead to catastrophic failures with very little warning. While most of the turnbuckle can be inspected with ease, the section of threads inside the turnbuckle will prove very difficult to inspect. Yearly disassembly and inspection is recommended to evaluate for crevice corrosion, which then necessitates a yearly re-tune of the standing rigging. 

Turnbuckles offer a quick and easy way to tune your rigging with a few simple tools and a basic knowledge of rig tuning. Their only trade-offs are their ability to corrode and price.

The alternative to turnbuckles are deadeyes. Deadeyes use lashings to form a block and tackle setup at the bottom of the stay to achieve the necessary tension needed to tune the rigging. Deadeyes consume 4 feet of dyneema, making them rather economical by comparison. For example, a small deadeye made of 3mm dyneema would cost $6.40, while a large deadeye made of 9mm dyneema would cost $24.20; significantly cheaper than a turnbuckle.

As always, there is a trade-off. Deadeyes are much more time consuming and complicated to adjust when compared to turnbuckles. A small boat with turnbuckle rigging can be tuned in around 20 minutes, and under an hour for a mid-sized yacht. Deadeyes take nearly 20 minutes per stay and require advanced knowledge of knots and pulley systems.

While deadeyes may seem complicated and time consuming to adjust, they are not that bad. Standing rigging doesn't need to be adjusted all the time. I recommend a spring time tune up, which is a one time thing for the year, and not such an ordeal when lumped in with all the other spring time commissioning rituals.

Being how deadeyes are made of synthetic fibers, they will not suffer from corrosion of any kind. They are also very easy to inspect visually as any damage that occurs would occur on the surface of the rope and will be easily seen upon closer investigation. Pretty much, slight fuzziness is to be expected as the outer fibers degrade from UV exposure while the inner fibers remain unharmed; serious chafe will cause serious wear on the deadeye. If the chafe is severe, the dyneema grommet can always be replaced.

Deadeyes offer an inexpensive method to tension your standing rigging without any concerns of corrosion, but at the cost of more time consumed in tuning of the rigging. Turnbuckles offer quick and easy rigging adjustments but at a higher cost and with the risk of corrosion leading to failure.

Climbing a mast in the heat

Safety must be the top priority when climbing the mast. On hot and sunny days, extra care must be taken while up there as the sun will fiercely beat down on you, causing all sorts of heat related problems. Climbing the mast is strenuous on its own, adding intense heat and sun to the mixture only compounds the difficulty.

One of the problems that can happen while aloft is passing out from heat exhaustion. If you pass out and are climbing the mast alone, you might be hanging there for quite some time which could pose a great threat to your life. Preparation is the key to safely climbing the mast in the heat of the day.

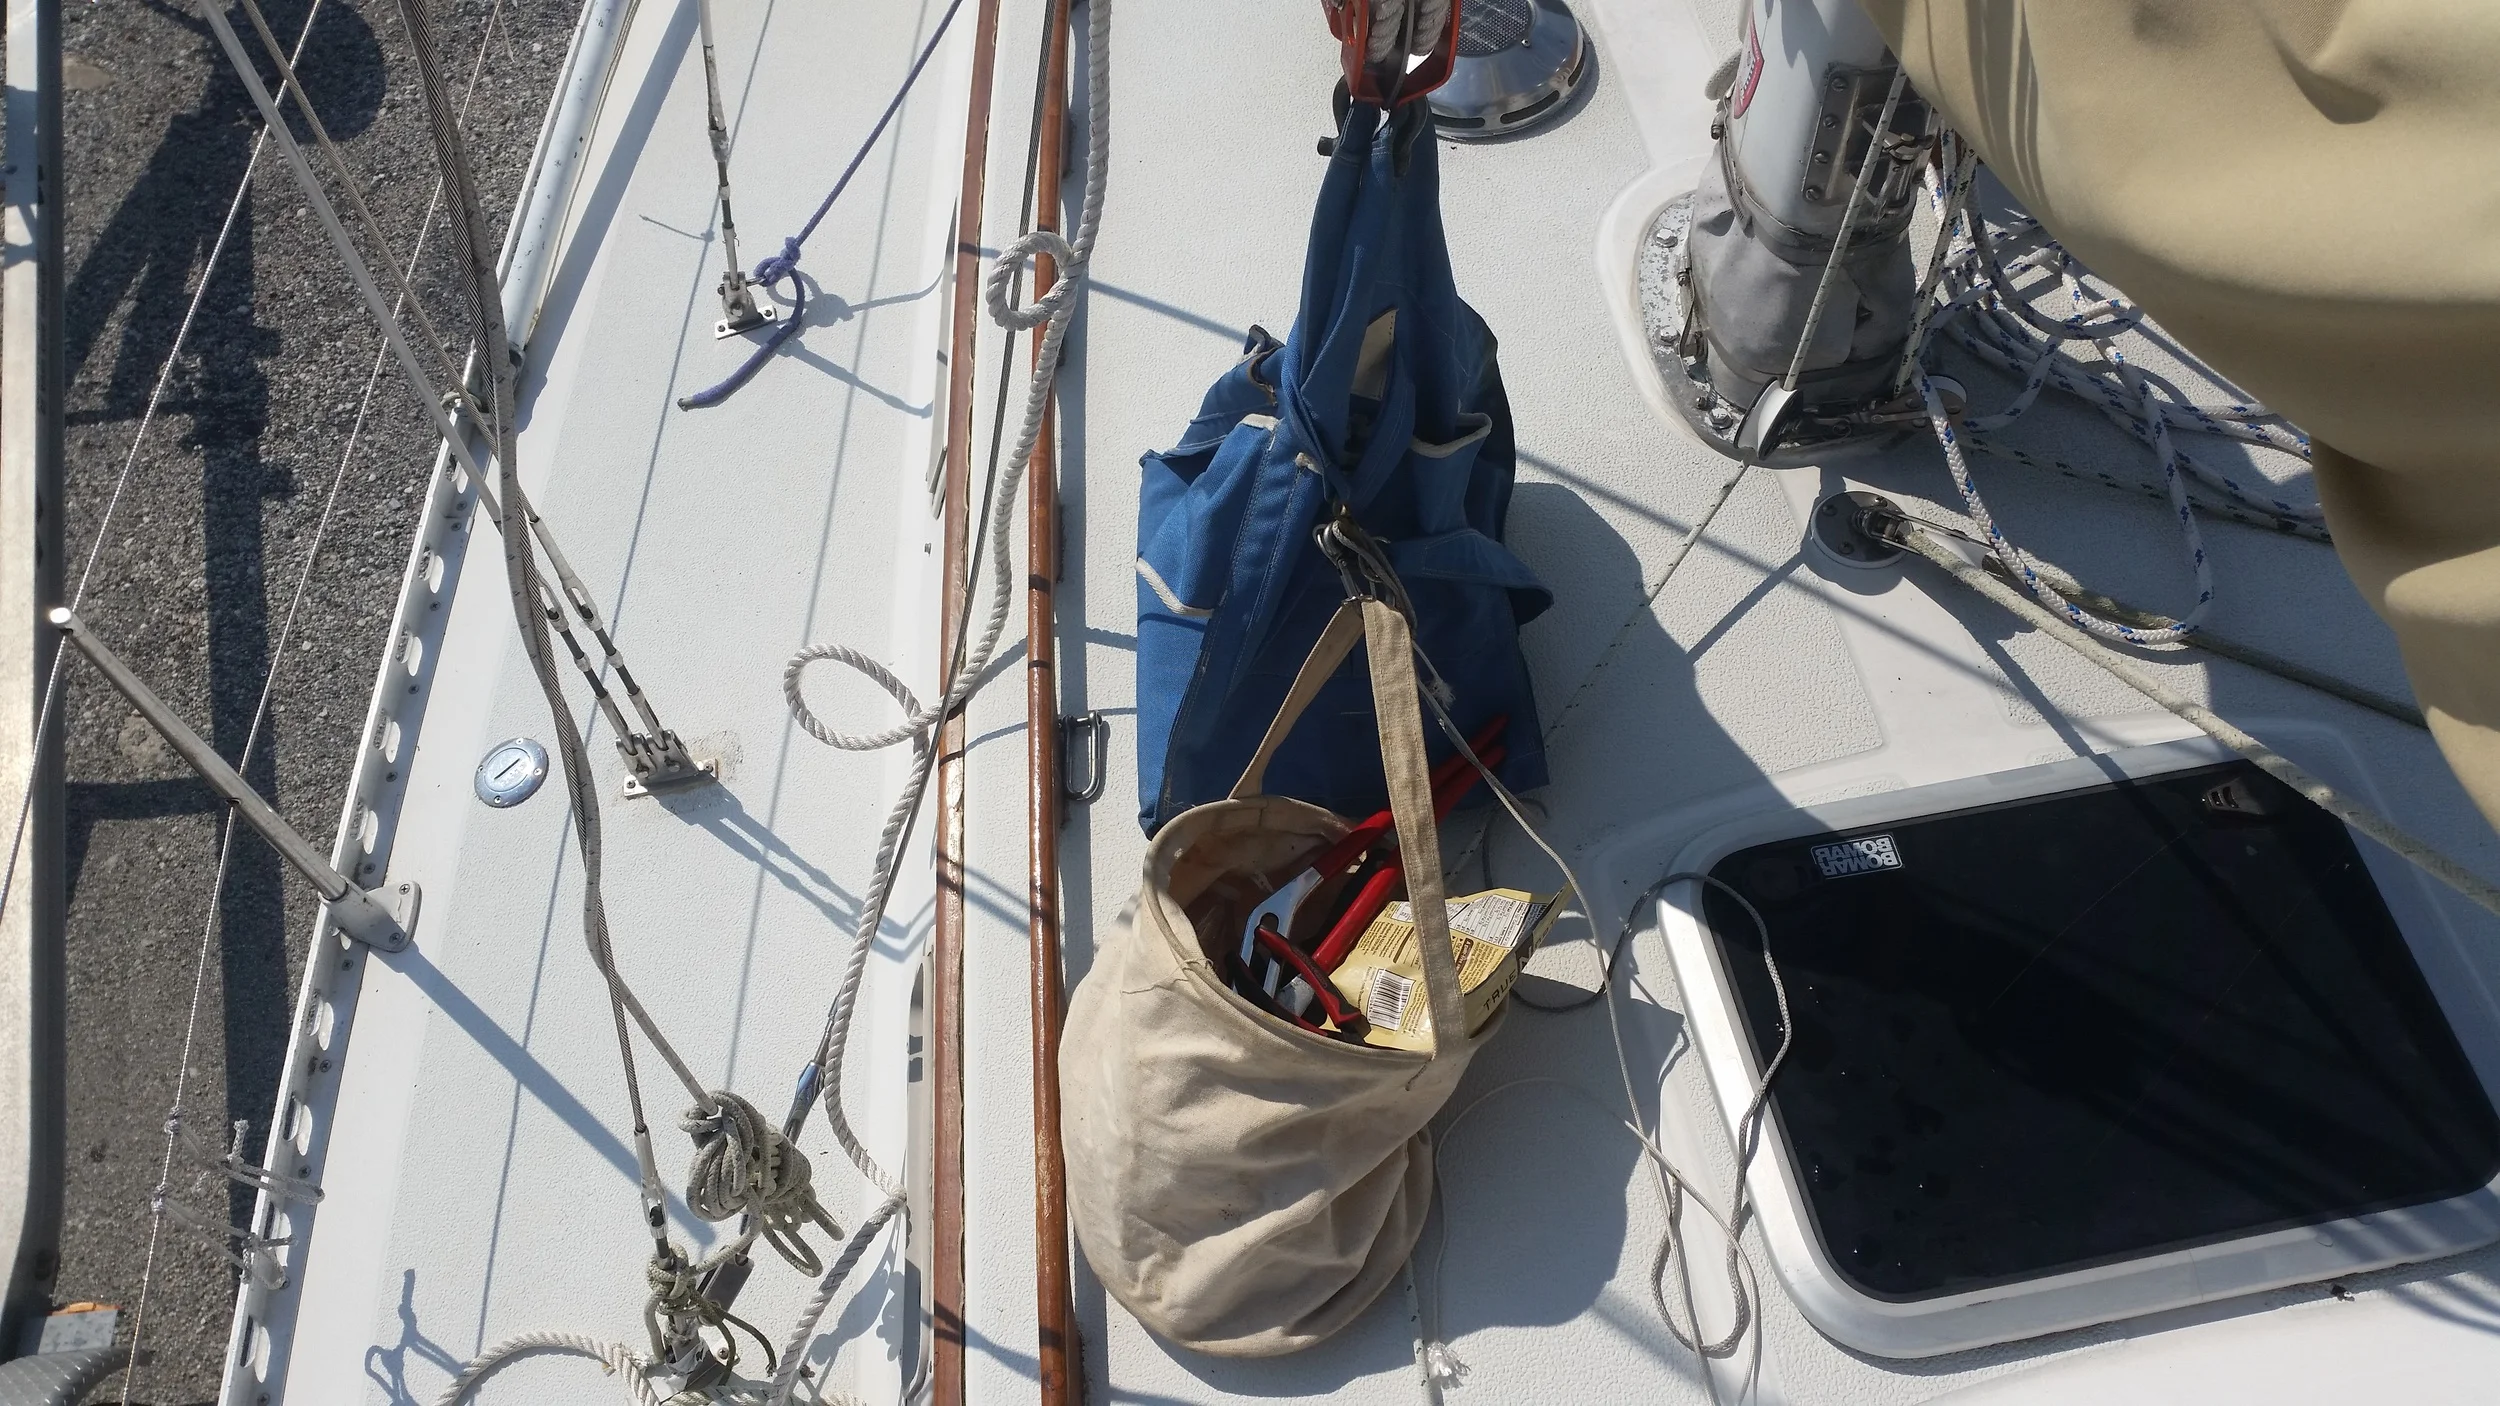
When you go up the mast, your entire world becomes restricted to what you have with you. If you are hungry and there is food in the galley, you have no food! You need to plan ahead and take everything you might need with you in your canvas bag: tools, lines, food, water, and anything else you might need.

Food is important to carry up with you as your blood sugar can drop from all of the effort involved in climbing. I like to carry honey nut snacks, as they give me a boost of sugars as well as protein to help fight off hunger. They are also bite size and won't get your hands dirty. This means that you can easily reach into the bag, grab a few, and eat them while you work aloft.

Staying hydrated is very important while up the mast. I carry 1L of water per hour I plan to be aloft, as well as an additional 250mL bottle, just in case I end up staying up there for longer than I intend. If I plan to be up there for an hour, I'll carry 5 bottles of water, and typically consume them all before I get back on the deck.

Another crucial component in the equation is clothing. You need to dress in clothes that will both keep you cool and protect you from the sun. I wear cotton shirts and pajama pants when going up. The light fabric keeps me cool while the long sleeves and pants keep the sun off of my limbs. They also protect me from the heat of the spars that have been roasting all day in the sun! A straw hat will keep the sun off your head and still allow air to flow through, keeping your head cooler than if you were exposed to the sun. Lastly, wear some good sunglasses; everything is white and the sun will be glaring into your eyes while you try to work. 

If you have to be hot, sweaty, and baking in the sun, at least be as comfortable as you can with plenty of water, snacks, and shades.

Going Up!

Mast climbing should be carefully performed with an utmost emphasis on safety! Each component of your gear should be looked over with scrutiny to make sure everything is in perfect working order. If anything is questionable, don't hang your life on it.

While climbing the mast on the Islander 36 that I am converting to synthetic standing rigging, I noticed that the main halyard is not properly spliced. Instead, the halyard is looped back and stitched together with whipping twine. I was not about to hang my entire life on a questionable halyard termination, so instead I eliminated the weak link from the equation. 

I removed the shackle from the halyard and tied the whole halyard through the gantline block with a secure bowline. This will ensure that the strength of the connection is as strong as a good condition New England Ropes Sta-Set rope, rather than as strong as a whipping twine.

Once back on the deck, the halyard was untied and the shackle replaced into the halyard. This way, nothing was altered on the clients yacht and my personal safety was never hanging by a whipping twine. 

Going up a mast carries inherent risks, most due to falling. By carefully inspecting every part of your gear before you climb, you can make the climb and controlled descent as safe as possible. Be sure to inspect everything each time, as your own gear will break down over time and catching any weak links early is critical to your longevity.

Un-cluttering the Deck

We currently have 5 sails on the deck: Drifter, Jib, Staysail, Mainsail, Trysail; and we can't take them off the deck of the boat. We keep the sails flaked and/ or bagged on the deck to keep them out of the way, but we can't escape the fact that all of these sails are always on the deck.

Maddie has told me that we can't have any more sails on the boat if they are all going to live on the deck. While the sails are put away, they still take up our limited deck space, and she wants as much space as possible for living and relaxing.

The solution is simple: The working sails can stay on the deck but the light air sails need to be stored in a locker. The storm trysail will remain on the mast, as it needs to be ready to hoist at a moments notice should a squall develop quickly.

The reason all of these sails needed to remain on the deck is the way the sheets are tied to the clew. I used a larks head knot, which offers a very secure attachment to the clew while keeping bulk to a minimum. This means the sheets won't foul on the rigging as we tack and the sails have to slide through the forward stays slot. The problem is a larks head knot can not be untied without removing the sheets from the deck. I would have to pull the sheets out of their leads and coil them up to store the sail off the deck. To set the sail up, I would also have to run the sheets through all their leads and back to the cockpit. This seems like a lot of effort in my opinion, so the drifter lives in a bag with the sheets permanently run to it. 

The solution to our clutter problem is simple, change the knot we use to attach the sheets from a larks head to a bowline. A bowline is a very strong and secure knot which is a standard for sheet attachment with a little bulk that can get caught on the rigging. Being how we have synthetic standing rigging, we won't let a fouled sheet stay fouled for long because it could saw into the rigging as the sail flogs around in a blow. 

With bowlines, we can easily untie the sheets from the clew and store the sails that are not in use in a locker. The sheets can be left tied to the lifelines forward of the shrouds and ready to attach to the clew of the sail we want to raise. This also helps make it easier to reef the jib, as we just need to lower the sail, tie the sheets to the new clew, and re-hoist the sail.

The sheets are out of the way attached to the lifelines with the excess coiled up on the lifelines by the cockpit.