Chart Symbols: Wrecks

A very important notation on navigational charts are wrecks and other hazards. These are represented by a variety of symbols which demonstrate the variety of wrecks that you can encounter on the water. 

The dotted line is to delineate an area where a hazard exists. It would behoove you to not sail over these marked areas. Some dotted and shaded areas will have a depth mark on them, these are somewhat safer to navigate over as the depth shows the depth of safe water over the hazard.

This symbol surrounded by dotted lines indicates a wreckage which may show part of the wreck through the surface of the water. PA stands for "Position Approximate" which means they don't know exactly where the wreck is. In general, this is a good warning to stay away because the wrecked vessel could be just under the water and cause serious damage to your yacht. 

Another symbol for a wreckage looks like a boat coming out of the water. This symbol refers to a partially submerged wreck where part of it can be seen above the water. 

Asterisks are used to denote rocks that are awash. Rocks marked by a plus sign (+) signify a rock of an unknown depth.

In general, dotted lines signify places that you should avoid while navigating. If a depth number is marked in association with the obstruction, and you will have enough water between your keel and the obstacle, you may traverse over this area. While it might be safe to pass over, the ocean is huge and there is plenty of water around the obstruction, so why not play it safe and go around the potential hazard?

Pumping Out Rainwater

Our dinghy, Tooth, doesn't have a garboard plug so he has to live floating in the water. If Tooth were out of the water, the weight of the rainwater would blow the hull open. Instead of dealing with a disastrous dinghy repair every time it rains, we leave Tooth in the water where he can fill and simply sink into the water a bit further until I can pump him out. 

When you live on the rainy East Coast of the United States, this almost daily routine quickly becomes a tedious chore when you have to pump out the rainwater with a hand pump or hand bailer. When you walk down the pier heading to your boat after a long days work, the last thing you want to do is deal with this.

The dinghy is sitting a few inches deeper as it has filled up with rainwater during the downpour that occurred earlier today. Since I was not in the mood to pump Tooth out, I set up my handy electric bilge pump. 

The electric pump is a self contained battery powered pump that takes all the effort out of the job. I simply hook the hose over the side of the dinghy which holds the pump in position and turn it on. The pump will suck the water out and slowly get the job done without me breaking a sweat!

As the dinghy begins to empty, the pump will start to draw in air. To remedy this, I simply push down on the gunwale with my feet to tip the dinghy and collect the water in a smaller area with more height. This keeps the pump submerged and continues to suck the water right out of the dinghy. 

After a while, Tooth is floating on his unloaded waterline once again with no major effort on my behalf. To get the last bit of water out of the hull, I will tip the hull and scoop it up with a hand bailer. After using the pump, you will only need to do about 2 to 3 insignificant scoops to get the last bit of water out of the hull.

Dyneema Grommets Looped Together to Form a Chain

I was recently asked if the grommets could be tied in an interlocking fashion as to create a chain of dyneema links using my method of making a dyneema grommet.
The answer to this question is an obvious yes, each grommet simply needs to be spliced together with the previous grommet inside the loop.  

upload.jpg

I had actually made a set of three links while I was still practicing the art of making grommets to use as deadeyes. I made three links to quickly and easily evaluate the interaction between two pieces of dyneema under a load. 

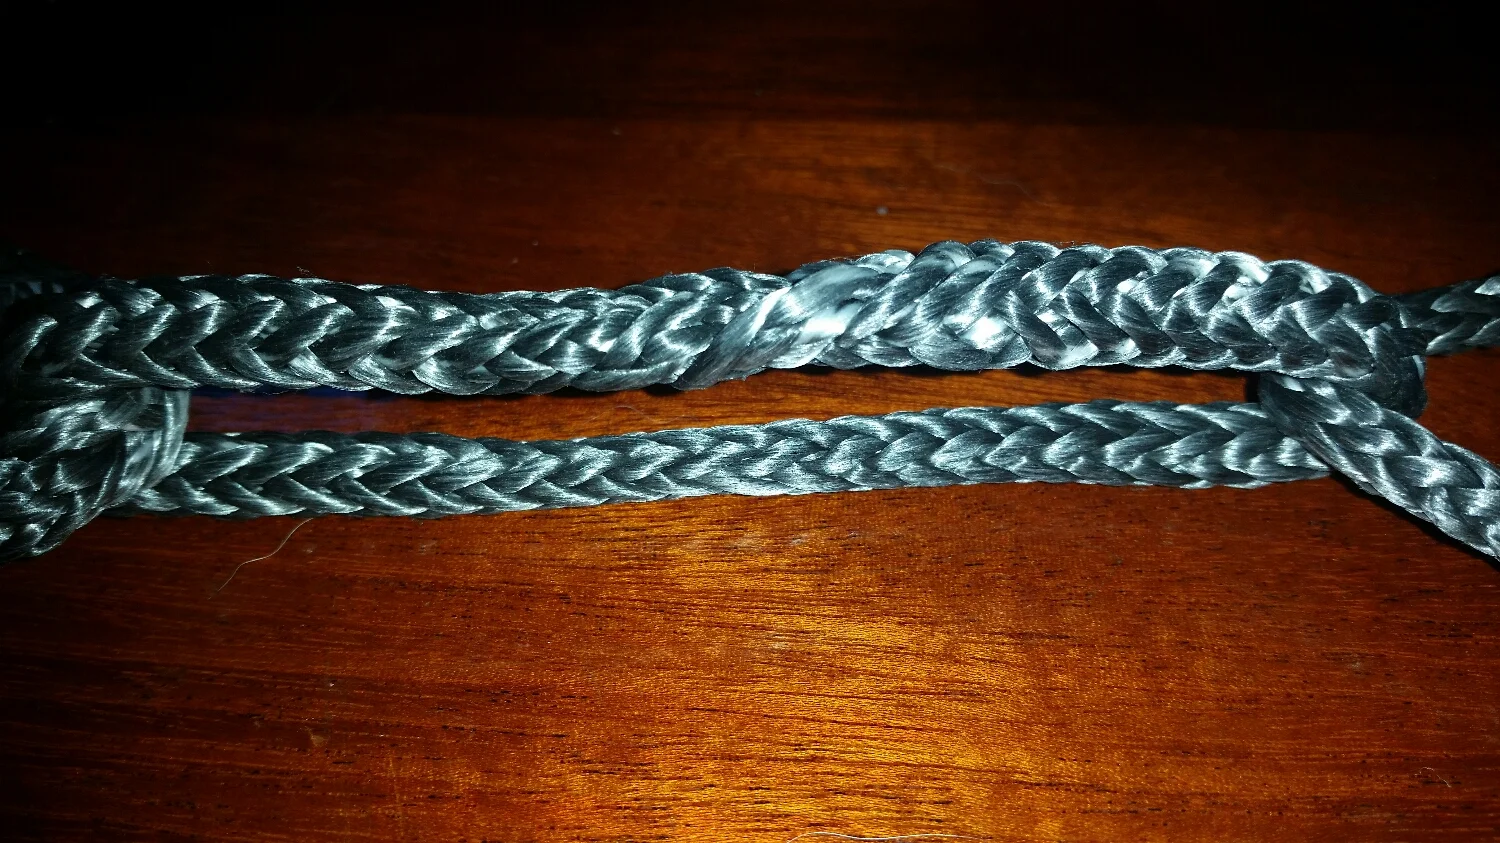
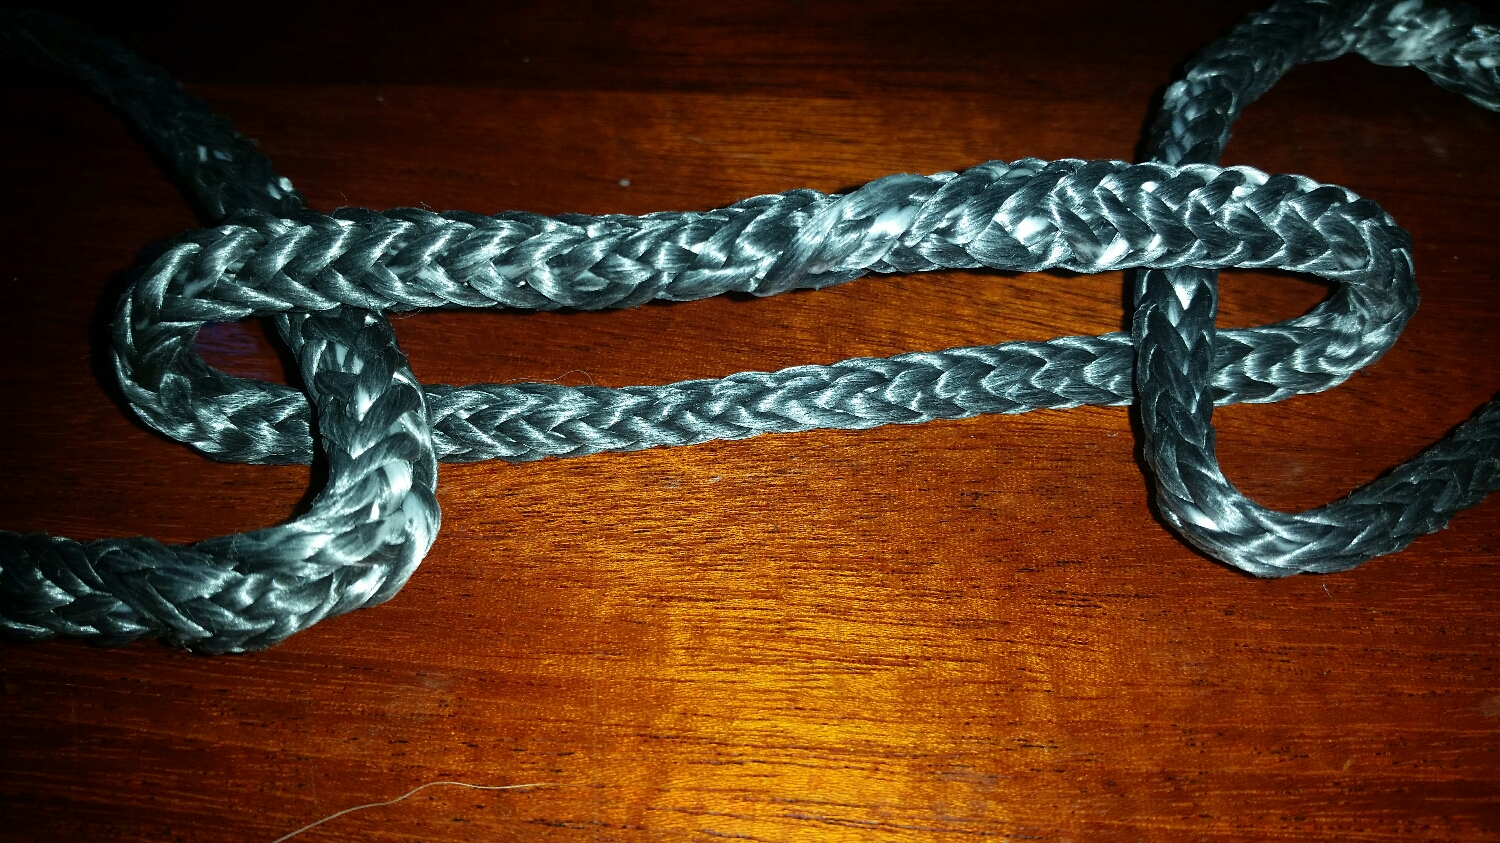
The three links provided me with a wealth of information about how dyneema interacts with loads placed upon it and how it interacts with other dyneema rope under a similar load. It also helped me evaluate the best position to locate the splice on the loop. The top link has the splice in the bottom at the connection to the middle link. The middle link has the splice in the middle. The bottom link has the splice located inside the thimble.

This information led to my decision on using thimbles in my deadeyes and to position the splice in the middle of the deadeye. The top link was hooked over a pipe on a scaffold where the middle link connected the system to the bottom link which had a weight hanging from it. I didn't take any pictures of this test because I didn't have a website or any plans on doing rigging commercially at that time. I was merely designing and testing methods to re-rig my own yacht which led me to produce the current system that I have and use.

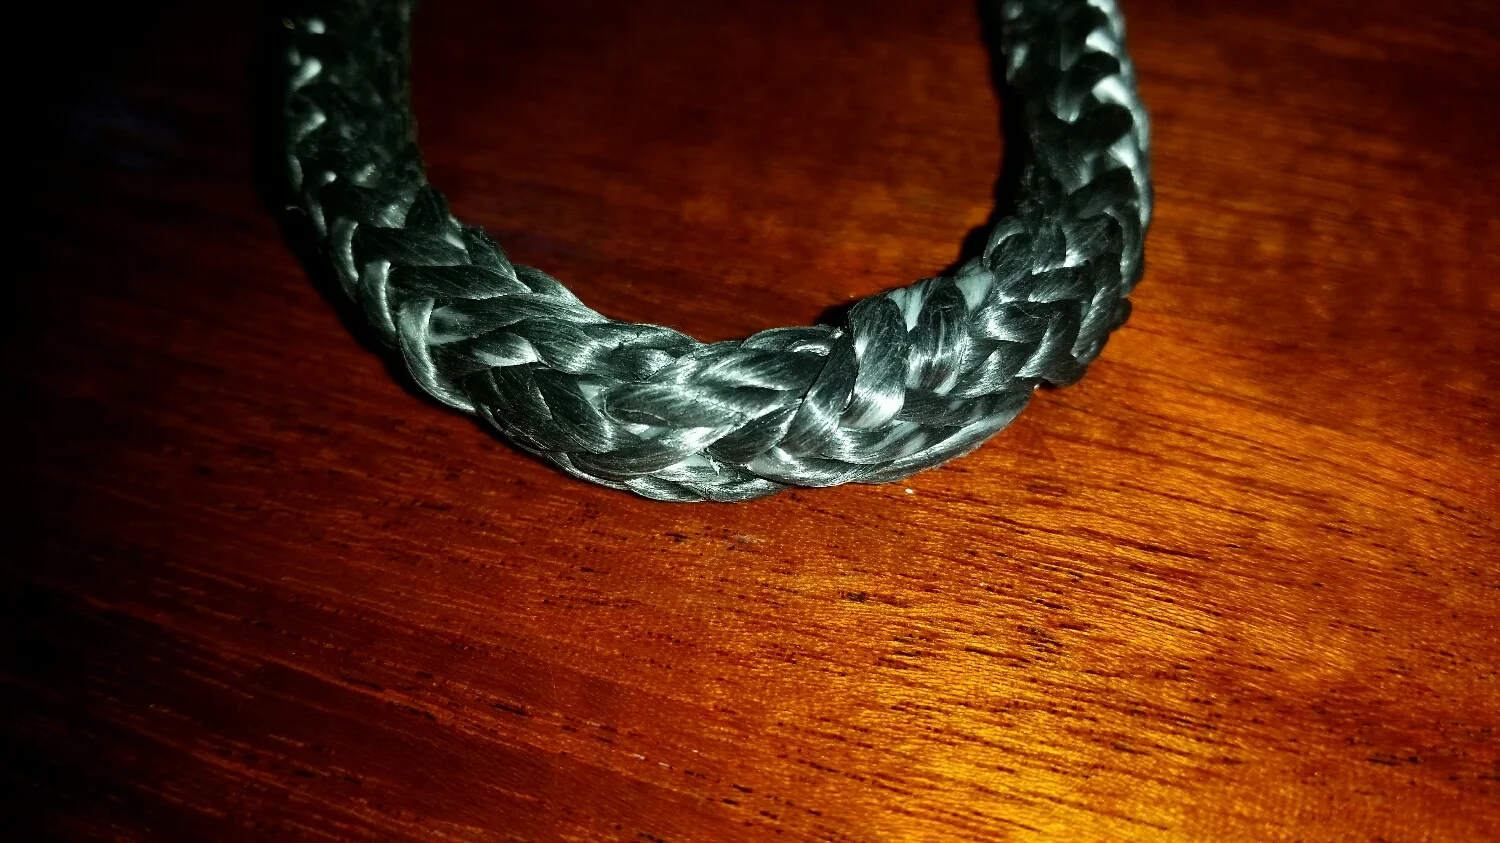
The results of the test can still be seen in the loops though. The top link (left link in the photos) was hooked over the scaffold and still retains the bend that it picked up while under the load. The bottom link had a thimble in the bottom portion to hold the weight. The middle link was left untouched to evaluate how the different connections interact.

The top link that was hooked over the pipe was fine, indicating to me that if the object I am attaching to is large enough, the grommet can simply loop over it without any other form of connector.

upload.jpg

The junction of the top link to the middle link also tested the durability of the splice when under direct contact by other ropes. The splice held up fine, even though the middle link formed a tight radius bend over the splice.

upload.jpg

The middle link was the most interesting to observe. It has tight radius bends at either end and the splice located in the middle of the link. The splice side and the bury side both shared the loads equally and evenly. The splice was also easier to inspect which became my preferred position to locate the splice for the deadeyes. The ends of the middle link did suffer from being bent over the tight radius turns of the other links, which could lead to reduced longevity of the grommet. The deadeyes for the standing rigging should not be subjected to such tight radius turns as it could lead to premature failure of the dyneema.

upload.jpg

The connection of the middle link to the bottom link is different from the connection at the other side of the middle link, where a splice was involved. This connection was simply two pieces of dyneema bending over each other. They seemed to hold up well, but did form a rather tight radius bend, which is not the best for longevity of the dyneema.

upload.jpg

The end of the bottom link was subjected to loads with a thimble placed in it. The splice was also located at the bottom, inside the thimble. The splice held find under load and with a large radius turn, as guided by the thimble used. This seemed to be the preferred way to connect the standing rigging to the deadeyes, as the thimbles will force the grommet to retain a properly radiused turn while under tremendous loads. The splice located at the bottom worked well but was difficult to inspect.

upload.jpg

After being loaded, the links retained the shapes they became during the test. The top and bottom links had ends that were forced to maintain large radius bends due to the scaffold pipe on the top link and the thimble on the bottom link. The ends that were not guided formed much tighter radius turns, as they folded over each other. While the bend was rather tight, the loads were maintained even on the links, and none of them showed any signs of problems. The splices also functioned well in all three locations: In the connection, in the middle, in the thimble; and the location for them to be in the middle on my deadeyes was purely for inspection purposes.

Based on this experiment, I decided to manufacture the deadeyes with thimbles on their ends and the splices located in the middle of the grommet. The thimbles provide a properly radiused bend even when under the immense load of working standing rigging.

Summer Cruise: A Reflection

Our summer trip of 2015 was originally planned as a 2 week trip, and we slowly added days to the trip until we arrived at our final 1 month cruise. 

The original plan was to sail to Charleston, SC; and as you can see, we didn't make it. I planned on us traveling 80 miles per day, getting out of the bay in 4 to 5 days and making our way offshore between the coast and the west wall of the Gulf Stream, crossing the Gulf Stream near Cape Hatteras, and then crossing over again to make landfall in Charleston. We both knew this was a bit of an overreach, but we figured that if we did make it to Charleston and had time to continue South, we would stop there and explore the city. 

I arrived at this overzealous plan from talking to other sailors, who turned out to be power boaters. They told me that they can make it from Baltimore to Norfolk in 2 days comfortably. I figured I would tack on a few days to that estimate since we would be sailing and I assumed they motored a fair bit. Talking to a friend who lives on a trawler, he does the bay in 2 days; first day from Baltimore to Solomons Island, second day from Solomons Island to Norfolk. It took us a week to get to Solomons Island! Turns out the old saying is true:

Whats the difference between a power boater and sail boater?

A power boater uses his engine 100% of the time,
a sail boater uses his engine 90% of the time.

When we finally set out on our trip, we were planning to head as far south as we could, take each day as it comes and enjoy the trip with no set plan for our destination. The illusion of "Heading to Charleston" became "Heading South". If we did make it to Charleston, then we would stop there and return North when we decided it was time. 

This mindset of "Heading South" kept us out of trouble. When we were in a storm just north of Cape Hatteras, we slowed down rather than riding the storm winds south, deeper into the storm on the cape.

If our destination had to be Charleston and we had no time limit, we would have hove to for a few days and waited for that storm system to pass by before approaching the cape. If we were in a rush, and jumped into that weather system, we certainly would not have had a wonderful time!

Patience is the most important item on a sailboat. When you rush is when you get in trouble. We pulled into St. Mary's River to wait out a strong thunderstorm that was passing by rather than riding the winds straight down the bay. We could have made excellent time that day, but it would have been a rough day of sailing. Instead, we waited for the bad weather to pass and enjoyed a relaxing afternoon on the beach! We set sail the next day and continued with more easy sailing in the wake of the storm that was now gone.

Not having a strict schedule also made the whole trip so enjoyable. When we fouled our prop near Deltaville, we simply got towed into port (because I was afraid to jump into the murky water with the recent shark attacks) and enjoyed our time there. If we were in a rush, this would have been a horrible setback and a huge stress on the trips schedule. Instead, we enjoyed our time in Deltaville, exploring the small town and the local museum, relaxing in the pool and riding bikes on the small streets. We actually stayed an extra day because we enjoyed the place so much! Had we been in a rush, we would have missed out on this wonderful gem as the stress of a schedule would have altered our view of the situation.

While we didn't move very far each day, we also never stressed about it. We enjoyed the scenery and wildlife as it came by the boat. We were visited by dolphins, dragon flies, small birds, pelicans, and pesky flies (we could do without the flies). If we were power boaters, like most of my sailing friends are, we would have been worried about how much fuel we have, fuel costs, and schedules. Instead, we have an electric motor with a small battery bank. We never had to buy fuel, and instead used what would have been fuel money on meals and excursions. 

We also had a similar attitude towards the equipment on board. When the batteries would be depleted, we simply turned things off. When the fridge would consume too many amps and run the batteries down, we simply turned it off and limited opening it to try and keep as much cold in it as possible.

Our only method of charging the batteries while underway was via the electric motor regenerating power. Regeneration started at 5kn, which was very easy for us to achieve; so we always got a little bit of electricity from this process. Serious regeneration didn't occur until 7kn and would replenish our battery bank at a rate of around 6% per hour. If we left the fridge on all night, it would consume around 10% of the battery bank, and the morning winds would carry us along at 7kn for a few hours, allowing us to gain back all that was consumed during the night and give us a bit more for the day. On other days, we would maintain this speed all day and charge the batteries up to the point where we didn't have to worry about how much electricity the fridge was consuming. 

The problem was that we tended to have a few days of wind followed by a few days of no wind. When we had wind, we would charge up our batteries and keep them charged. But the days of no wind took their toll on our battery system, depleting it down to the point where we would have to turn off the fridge and wait for windy days.

The windless days were also cloudless days, and with plenty of sun beating down on our boat. That is why we have decided to install solar panels on our transom to give us charge during those windless days and to keep the fridge running. 

The fridge was a major stress during the trip. Do we have enough power to run it? Is the food going to spoil? When can we turn it on again to keep the food cool enough? Luckily we had a good attitude about it and didn't let it get us down. The fridge and freezer were packed with food, but we also had enough canned and dried food to feed us comfortably for weeks. If all the food in the fridge went bad and had to be thrown out, we were not going to starve. Having a non-electrically dependent back up plan kept us from worrying about the fridge situation too much. Once again, we took each day as it came. 

We did change our planning process for future trips though. We decided not to use the fridge on future trips and eliminate that source of stress completely, unless we have solar panels that can feed it; and we will do canned and fresh foods that do not need refrigerating. If we make a big meal and need to store leftovers and have plenty of battery power stored, we will turn on the fridge to keep the leftovers. Otherwise, we will feed it to Morty, our dog and happy recipient of anything we were also eating. 

Anchoring was another issue we had on the trip. The southern part of the bay has much stronger currents than the northern part. I used to drop the hook anywhere and we would always point into the wind and waves. As we moved further south, the boat would lay to the current. This meant that we would spend half the tidal cycle riding over our rode and taking all the seas on the stern. The long overhanging stern kept us dry, but the slapping noise kept us both awake. 

Another thing that kept Maddie awake was me! I would wake up multiple times a night panicking! I could feel the boat pitching and rolling as the sails flogged as the wind howled! I would stumble my way to a port hole, only to find that we were laying peacefully on still water or tied up in a marina. Never were the sails up or was it blowing like stink! Poor Maddie got tired of talking me out of it, only to have me refuse what she was saying until I saw it for myself; she learned to shove me out of bed and let me go take a look so I would pipe down faster and let her get back to sleep. This happened every night of the trip when we were anchored or tied up in a marina. When we were hove to, I didn't wake up in a panic because I was getting up every hour or so to do a watch. The night that we were far enough offshore, I also slept peacefully, even though the sails were set hove to and we were rolling with the ocean swell. I guess I just feel best when out at sea!

What really drove Maddie through the roof was when we got back and immediately had to house sit for a friend. We were in a large house, sleeping in a large bed inside a large room, and I still woke up in a panic about the sails flogging and no one is at the helm! When I looked out the bedroom window and saw trees, I really started to panic yelling at her that we ran aground! Then she turned on the light and I saw that we were not on the boat, we were not sailing, and we were in a house!

Oddly, once I took the sails off the stays and bagged them up, all these night panics ceased. It's almost as if the act of bagging the sails gave me closure, knowing that the trip had come to an end and we were in our home port again.

The wildlife we saw was amazing! When you have no engine noise, you don't scare away the timid creatures. We would quietly pass through areas without disturbing a thing and get to observe what was living there! This also gave us the opportunity to watch them for a period of time. If we were moving faster, we might have missed such sights, but moving along at sailing speed, we had plenty of time to watch ospreys hunt and return to their nest, pelicans fishing, and dolphins jumping. 

While we didn't cover as much distance as we had originally hoped to, we did enjoy every moment of the places we visited! The electric motor helped a lot on this journey as well. It was as reliable as the sails, always there and always willing to move you! It allowed us to creep into or out of anchorages without disturbing anything, as well as providing us with our electrical charging systems needs while underway. While it has its limitations with battery charging (you need to sail fast), it was already there and installed, and I didn't have to shell out more money before our trip for solar or wind systems. 

On our trip, we were able to capture wonderful photographs of light houses, sunsets and wildlife! This cemented our love for cruising and got us both looking at far away destinations to sail to in the future.

Double Braid Backsplice

Back splices work exceptionally well at preventing the end of a rope from unraveling. It secures the end of the rope into itself and makes sure that none of the strands can work their way loose and fray. A back splice is simply a splice where the end of the line is doubled back on the line itself, tucking its ends back into the line.

An alternative way to finish the end of the line is to whip it, but whipping is not as strong as a back splice. If the end of the line will be subjected to a lot of abuse, whippings can become chafed and break, leaving the tail free and able to unravel. In these situations, a back splice is much more secure and will hold up over the years, even with the frequent abuse.

For this example, I will be putting back splices in the ends of our jib sheets. We will be working with New England Ropes VPC, but the methods are the same with any double braid line.

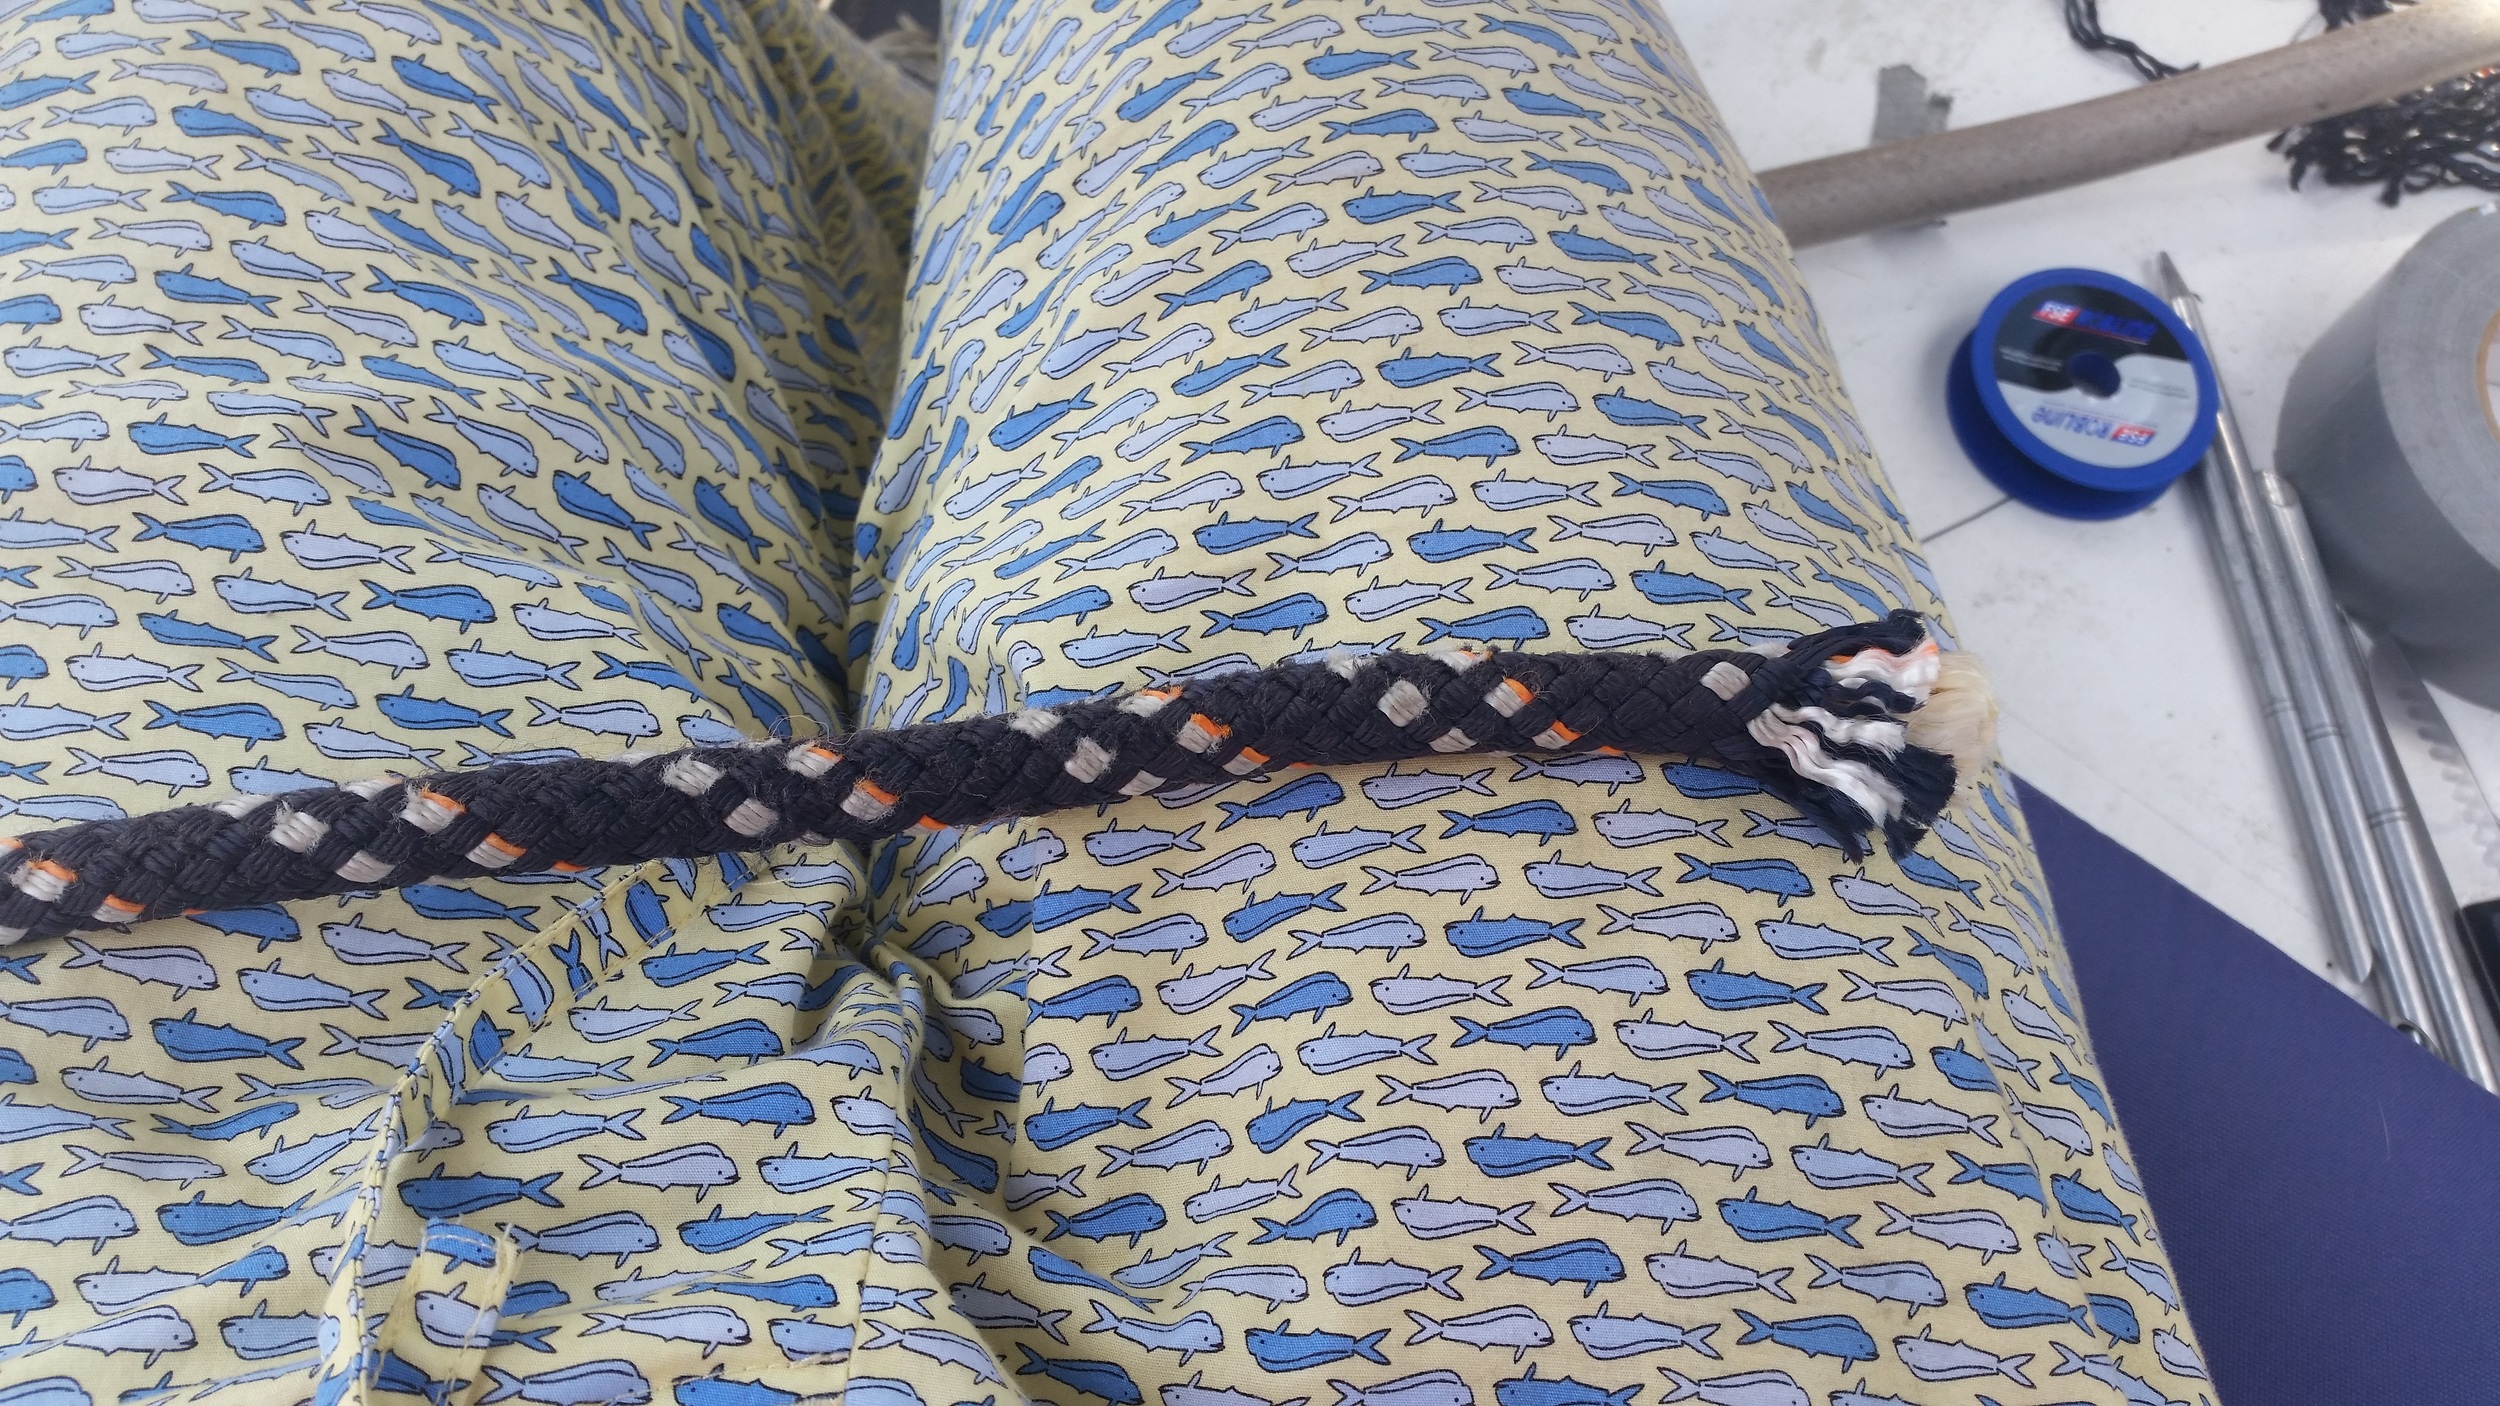
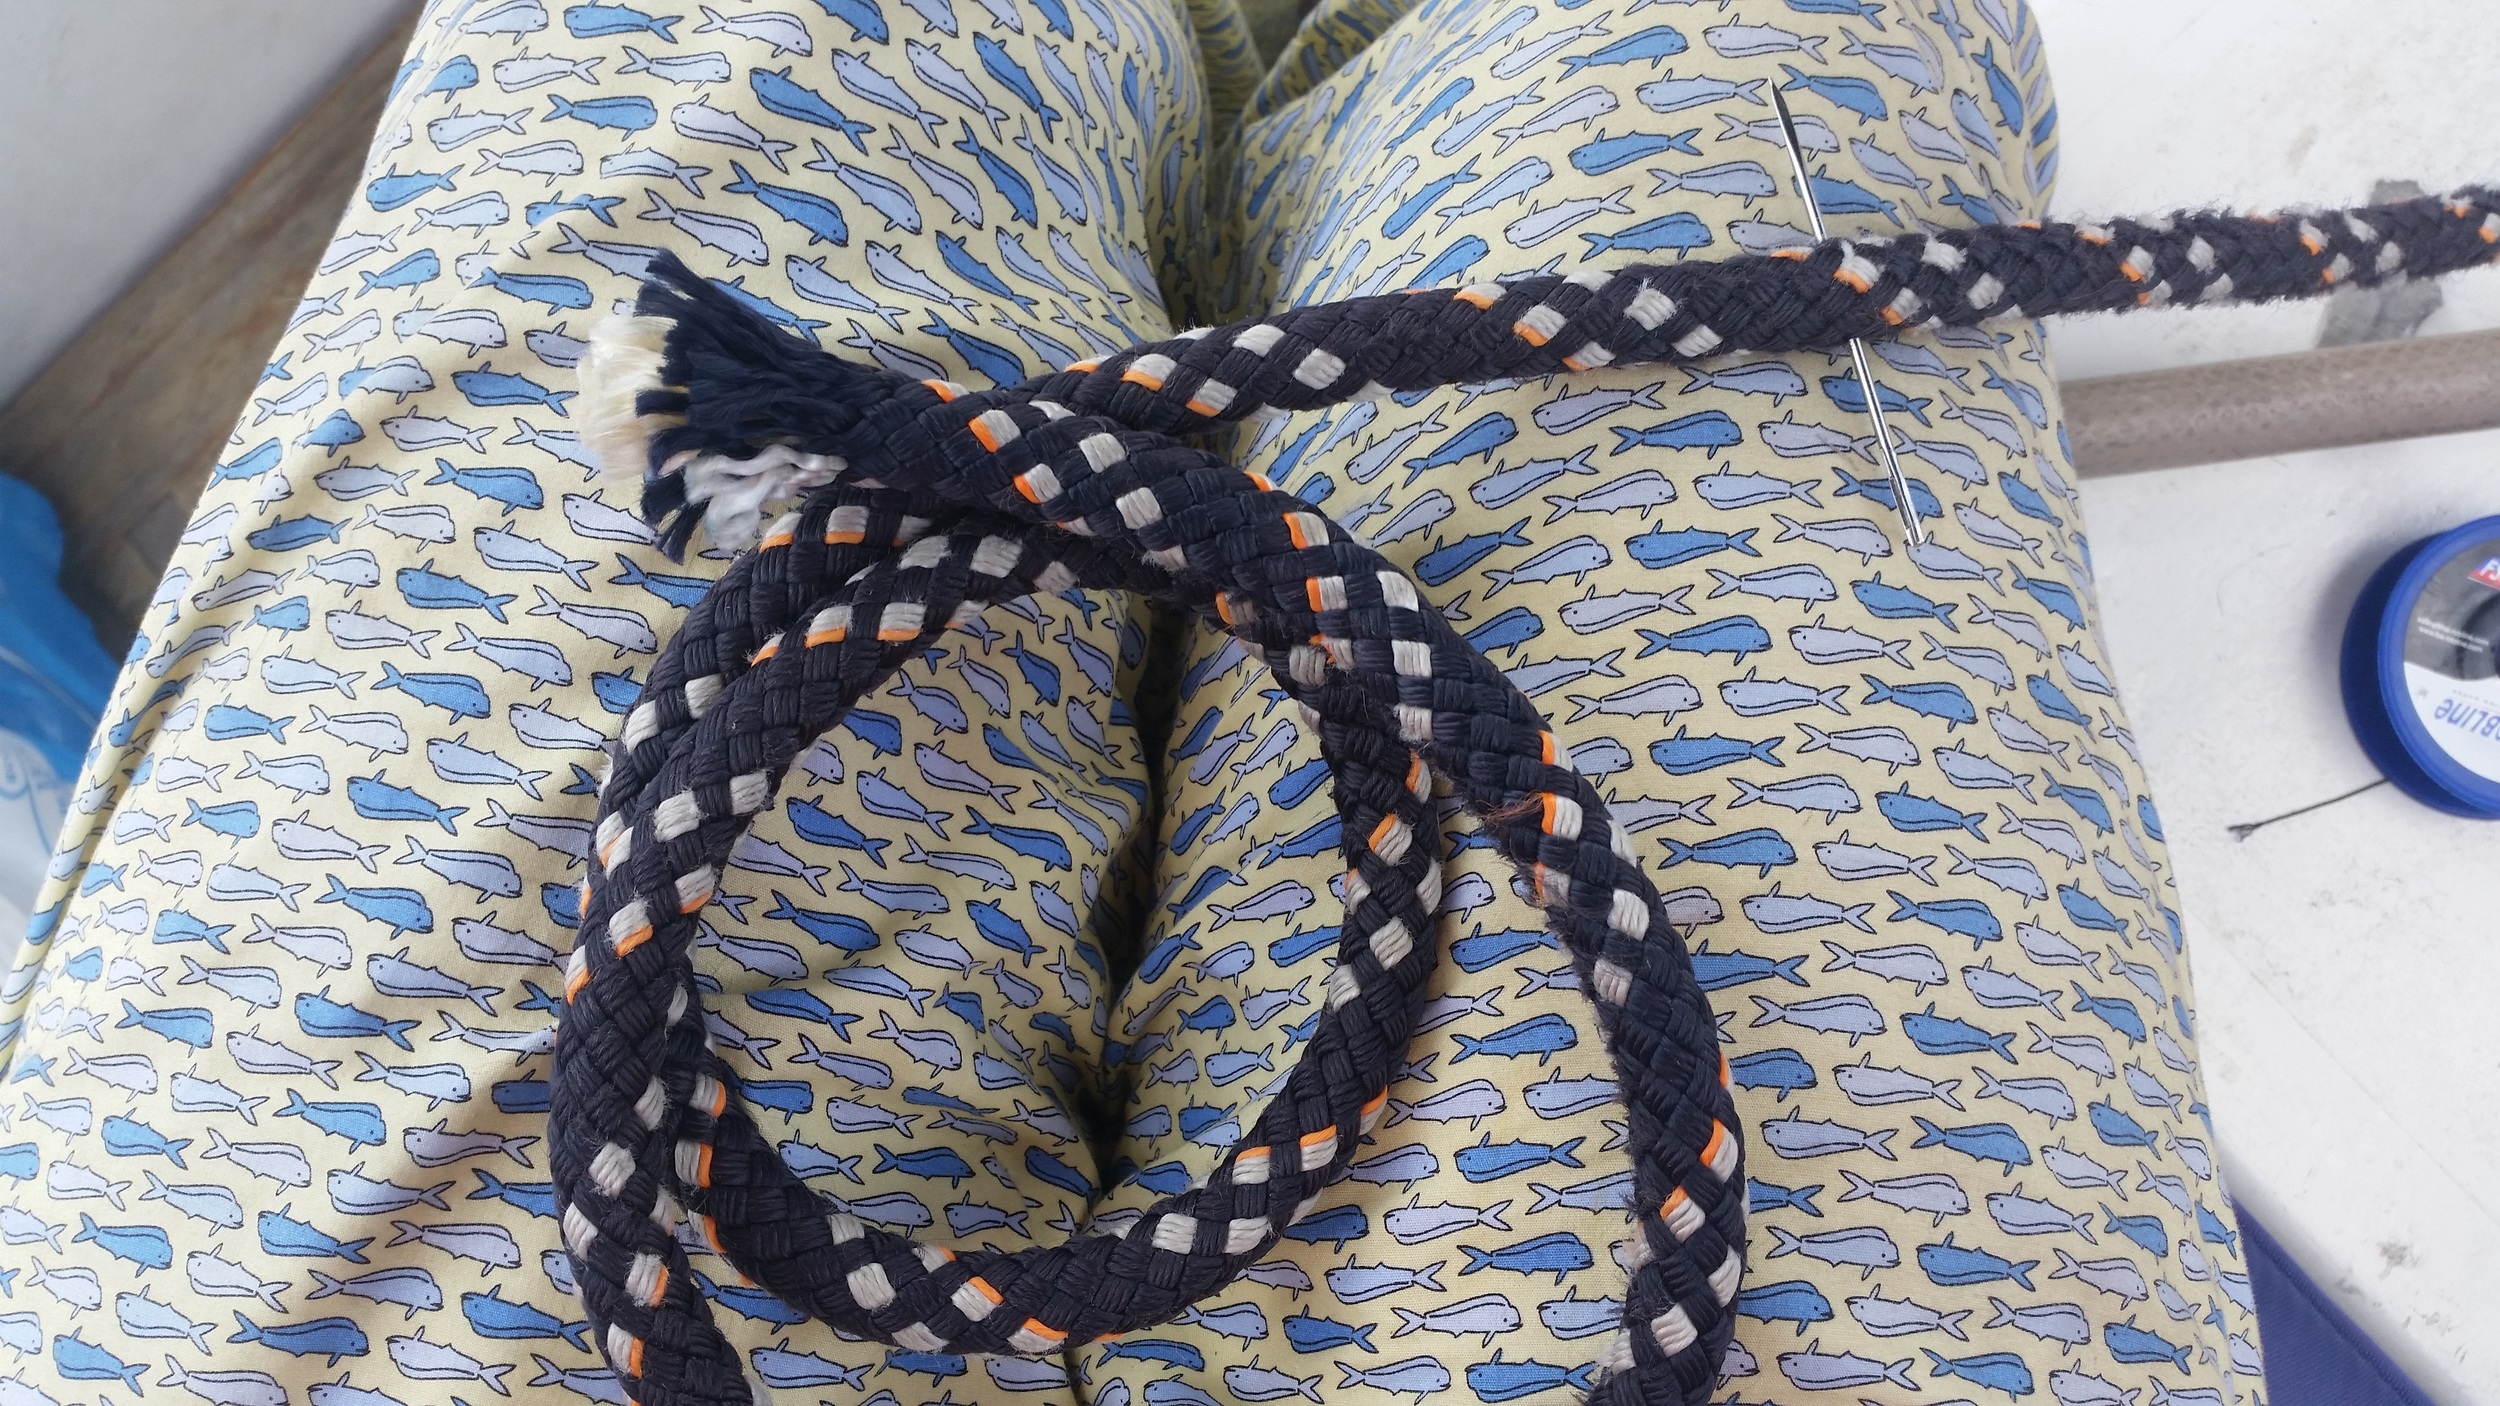
The first step is to place a pin through the cover and core several feet back into the line. This will prevent the core from sliding too far out of the cover and will make your life easier later on in the process.

Next, open the threads of the cover to expose the core further back and pull the core out of the cover.

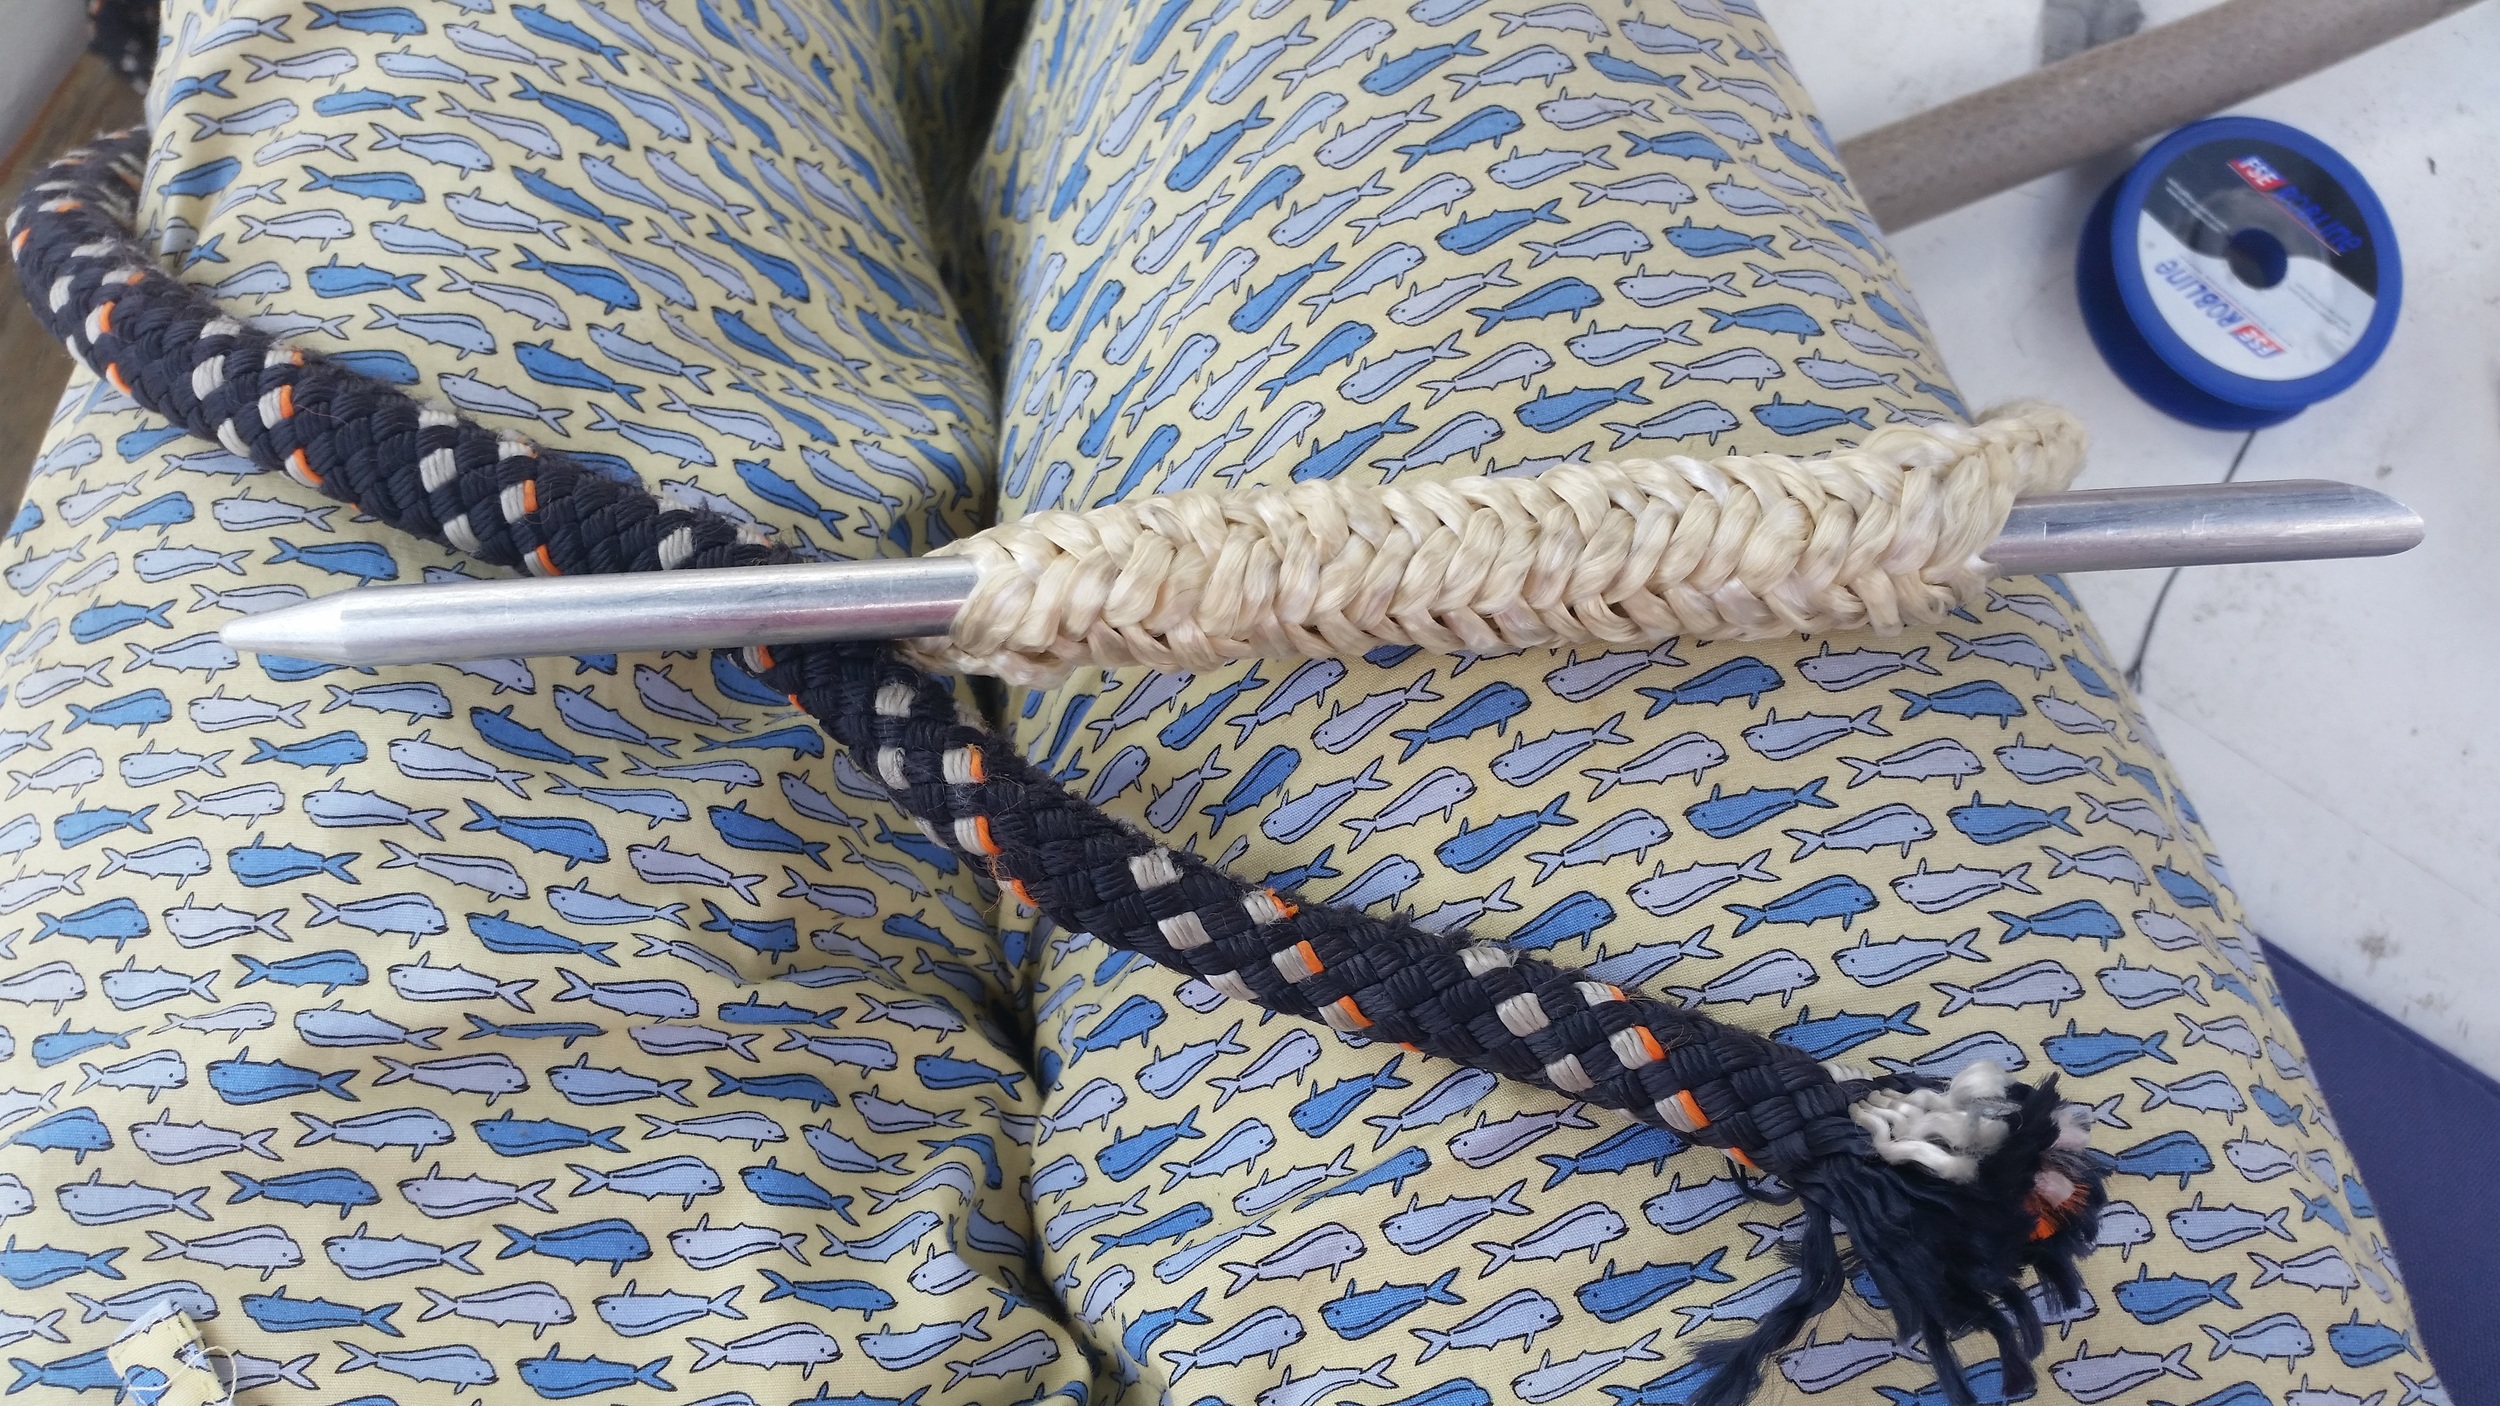
Pass a fid through the core in the opposite direction of the line. The fid should enter the core a few inches back from the end of the line and exit just before the core re-enters the cover.

Feed the end of the cover back through the core. This will create a loop where the cover turns back on the core and runs in the opposite direction to the rest of the line.

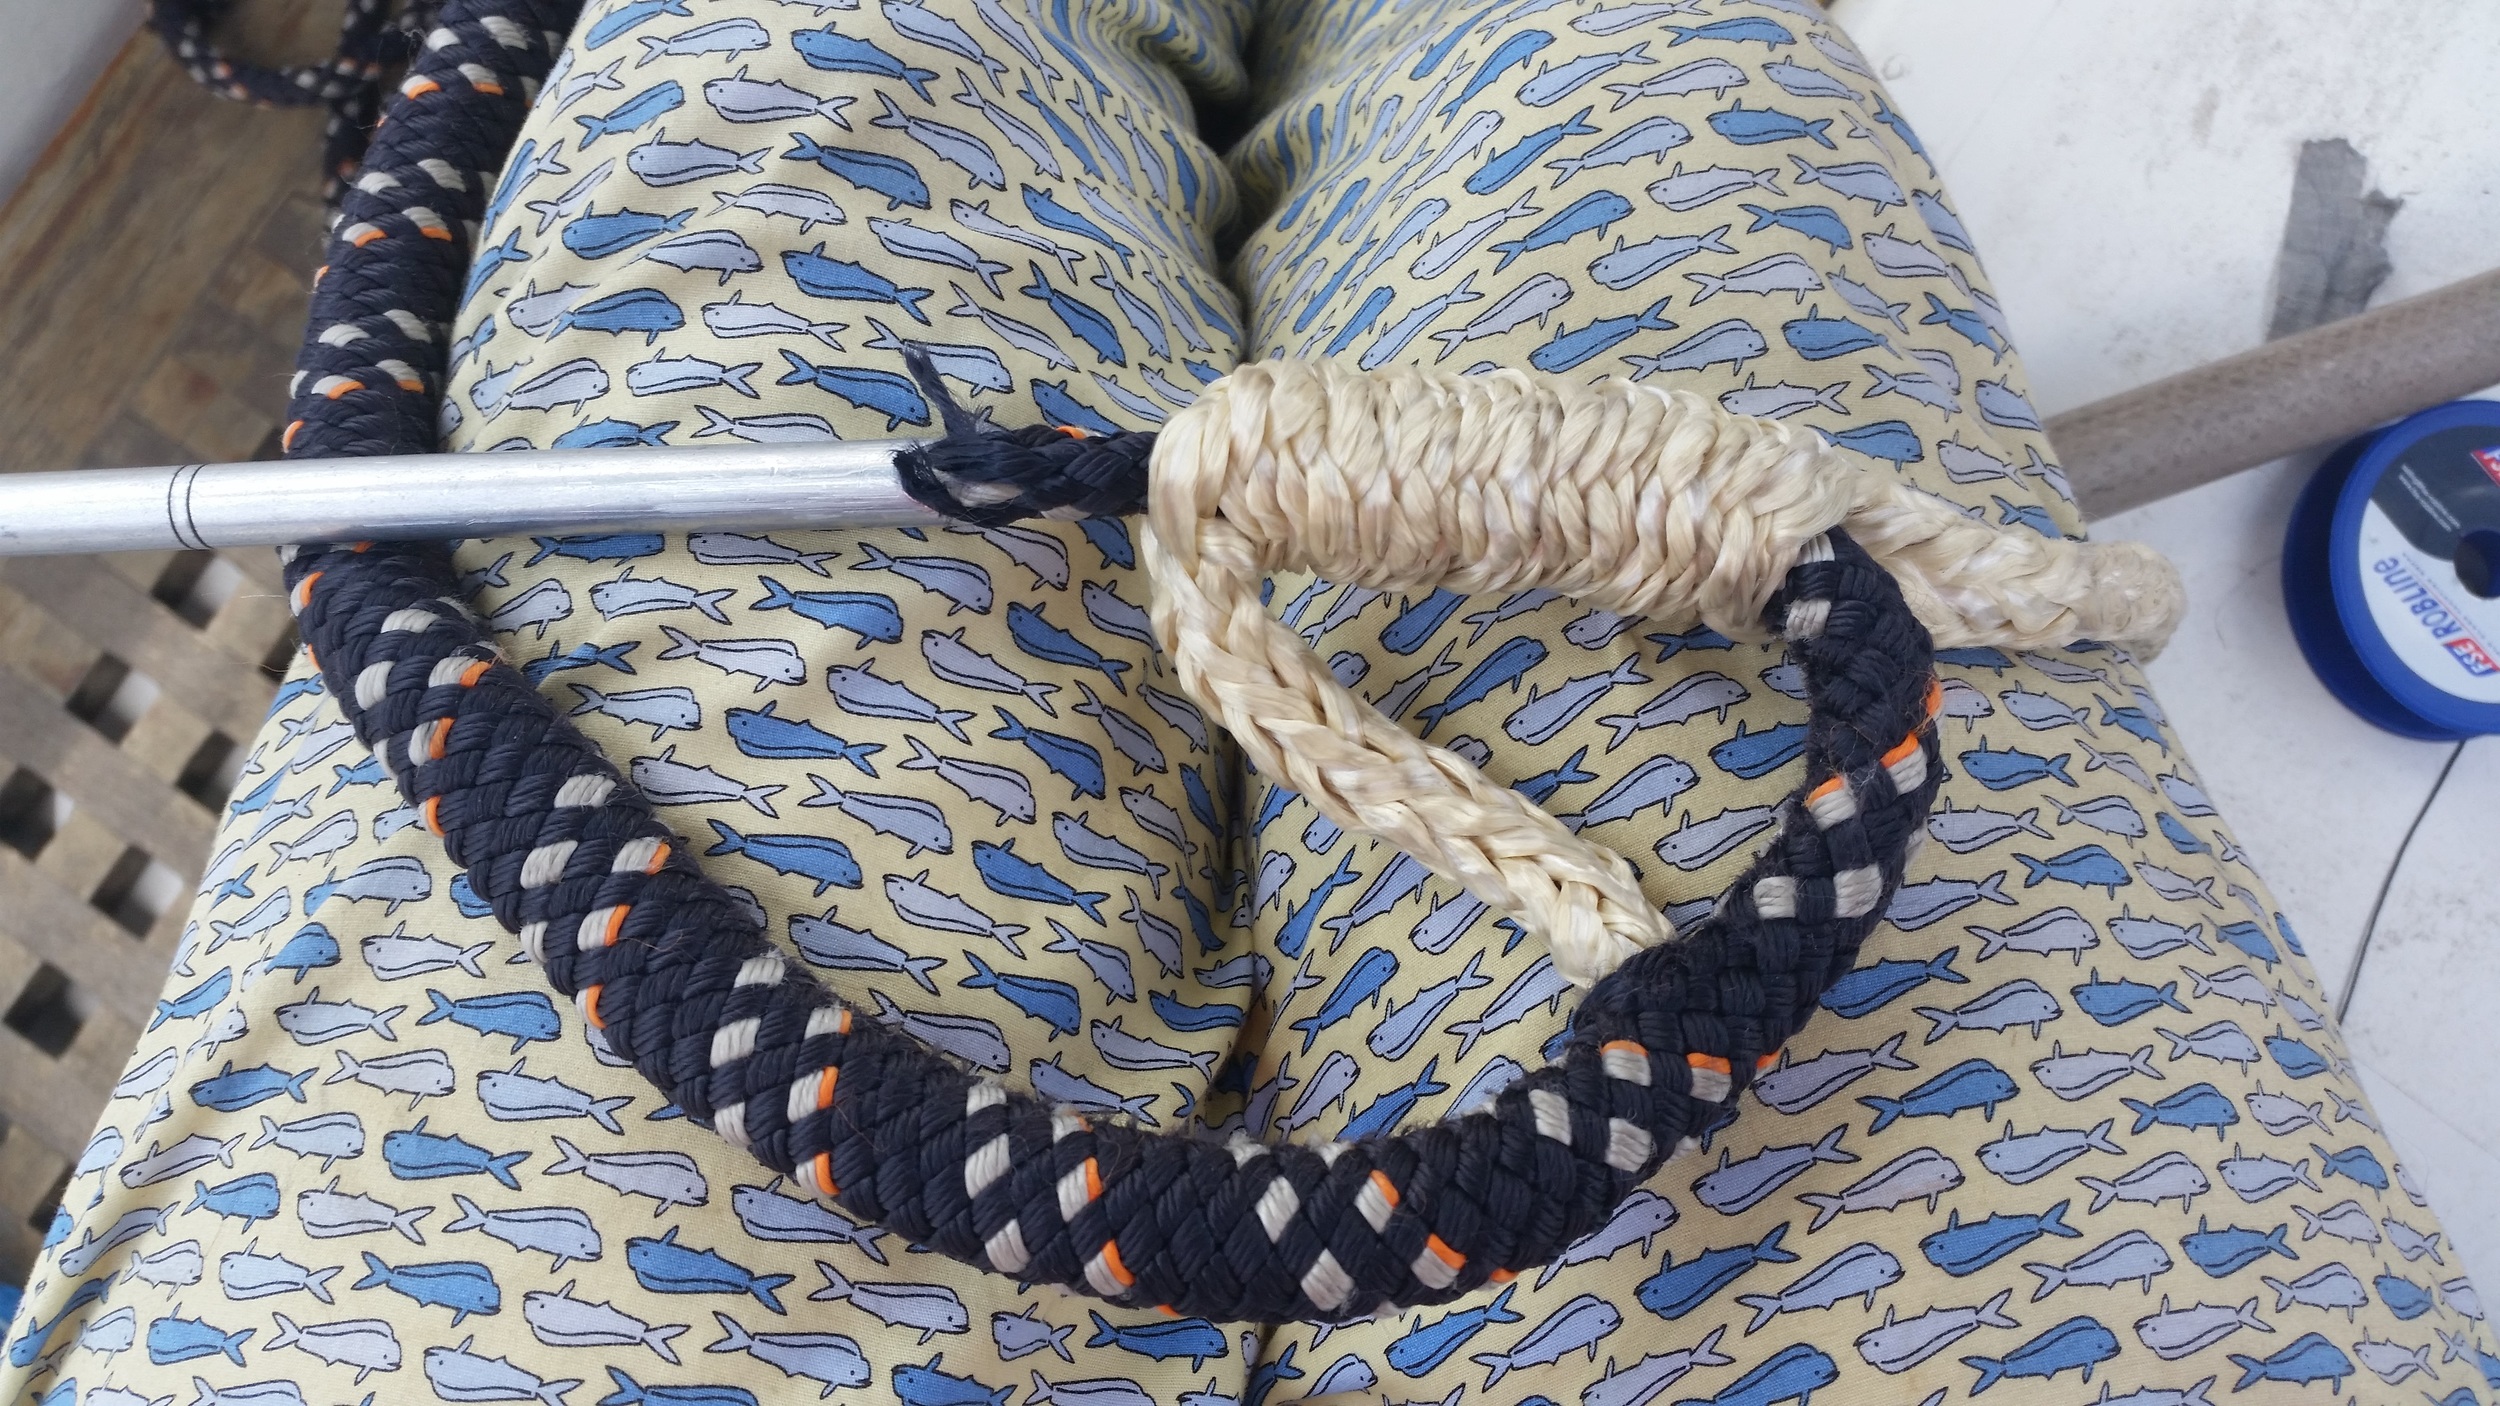
Pull the cover through the core and well out the other side, allowing the core to bunch up over the cover. Then taper the cover by selectively cutting the threads. VPC is covered in groups of four threads that are woven together. By selecting and removing three of the four threads of each grouping, the cover can be neatly reduced in a systematic and organized manner. This allows you to reduce the bulk of the cover and produce a consistent taper that will still maintain itself neatly woven.

With the cover tapered, milk it back into the core. As you work it back into the core, the cover will disappear into the core and the transition from cover entering the core to pure core should be seamless.

Cover follows the blue arrows. Core follows the orange arrows. They move in opposite directions forming a loop with one another.

Cover follows the blue arrows. Core follows the orange arrows. They move in opposite directions forming a loop with one another.

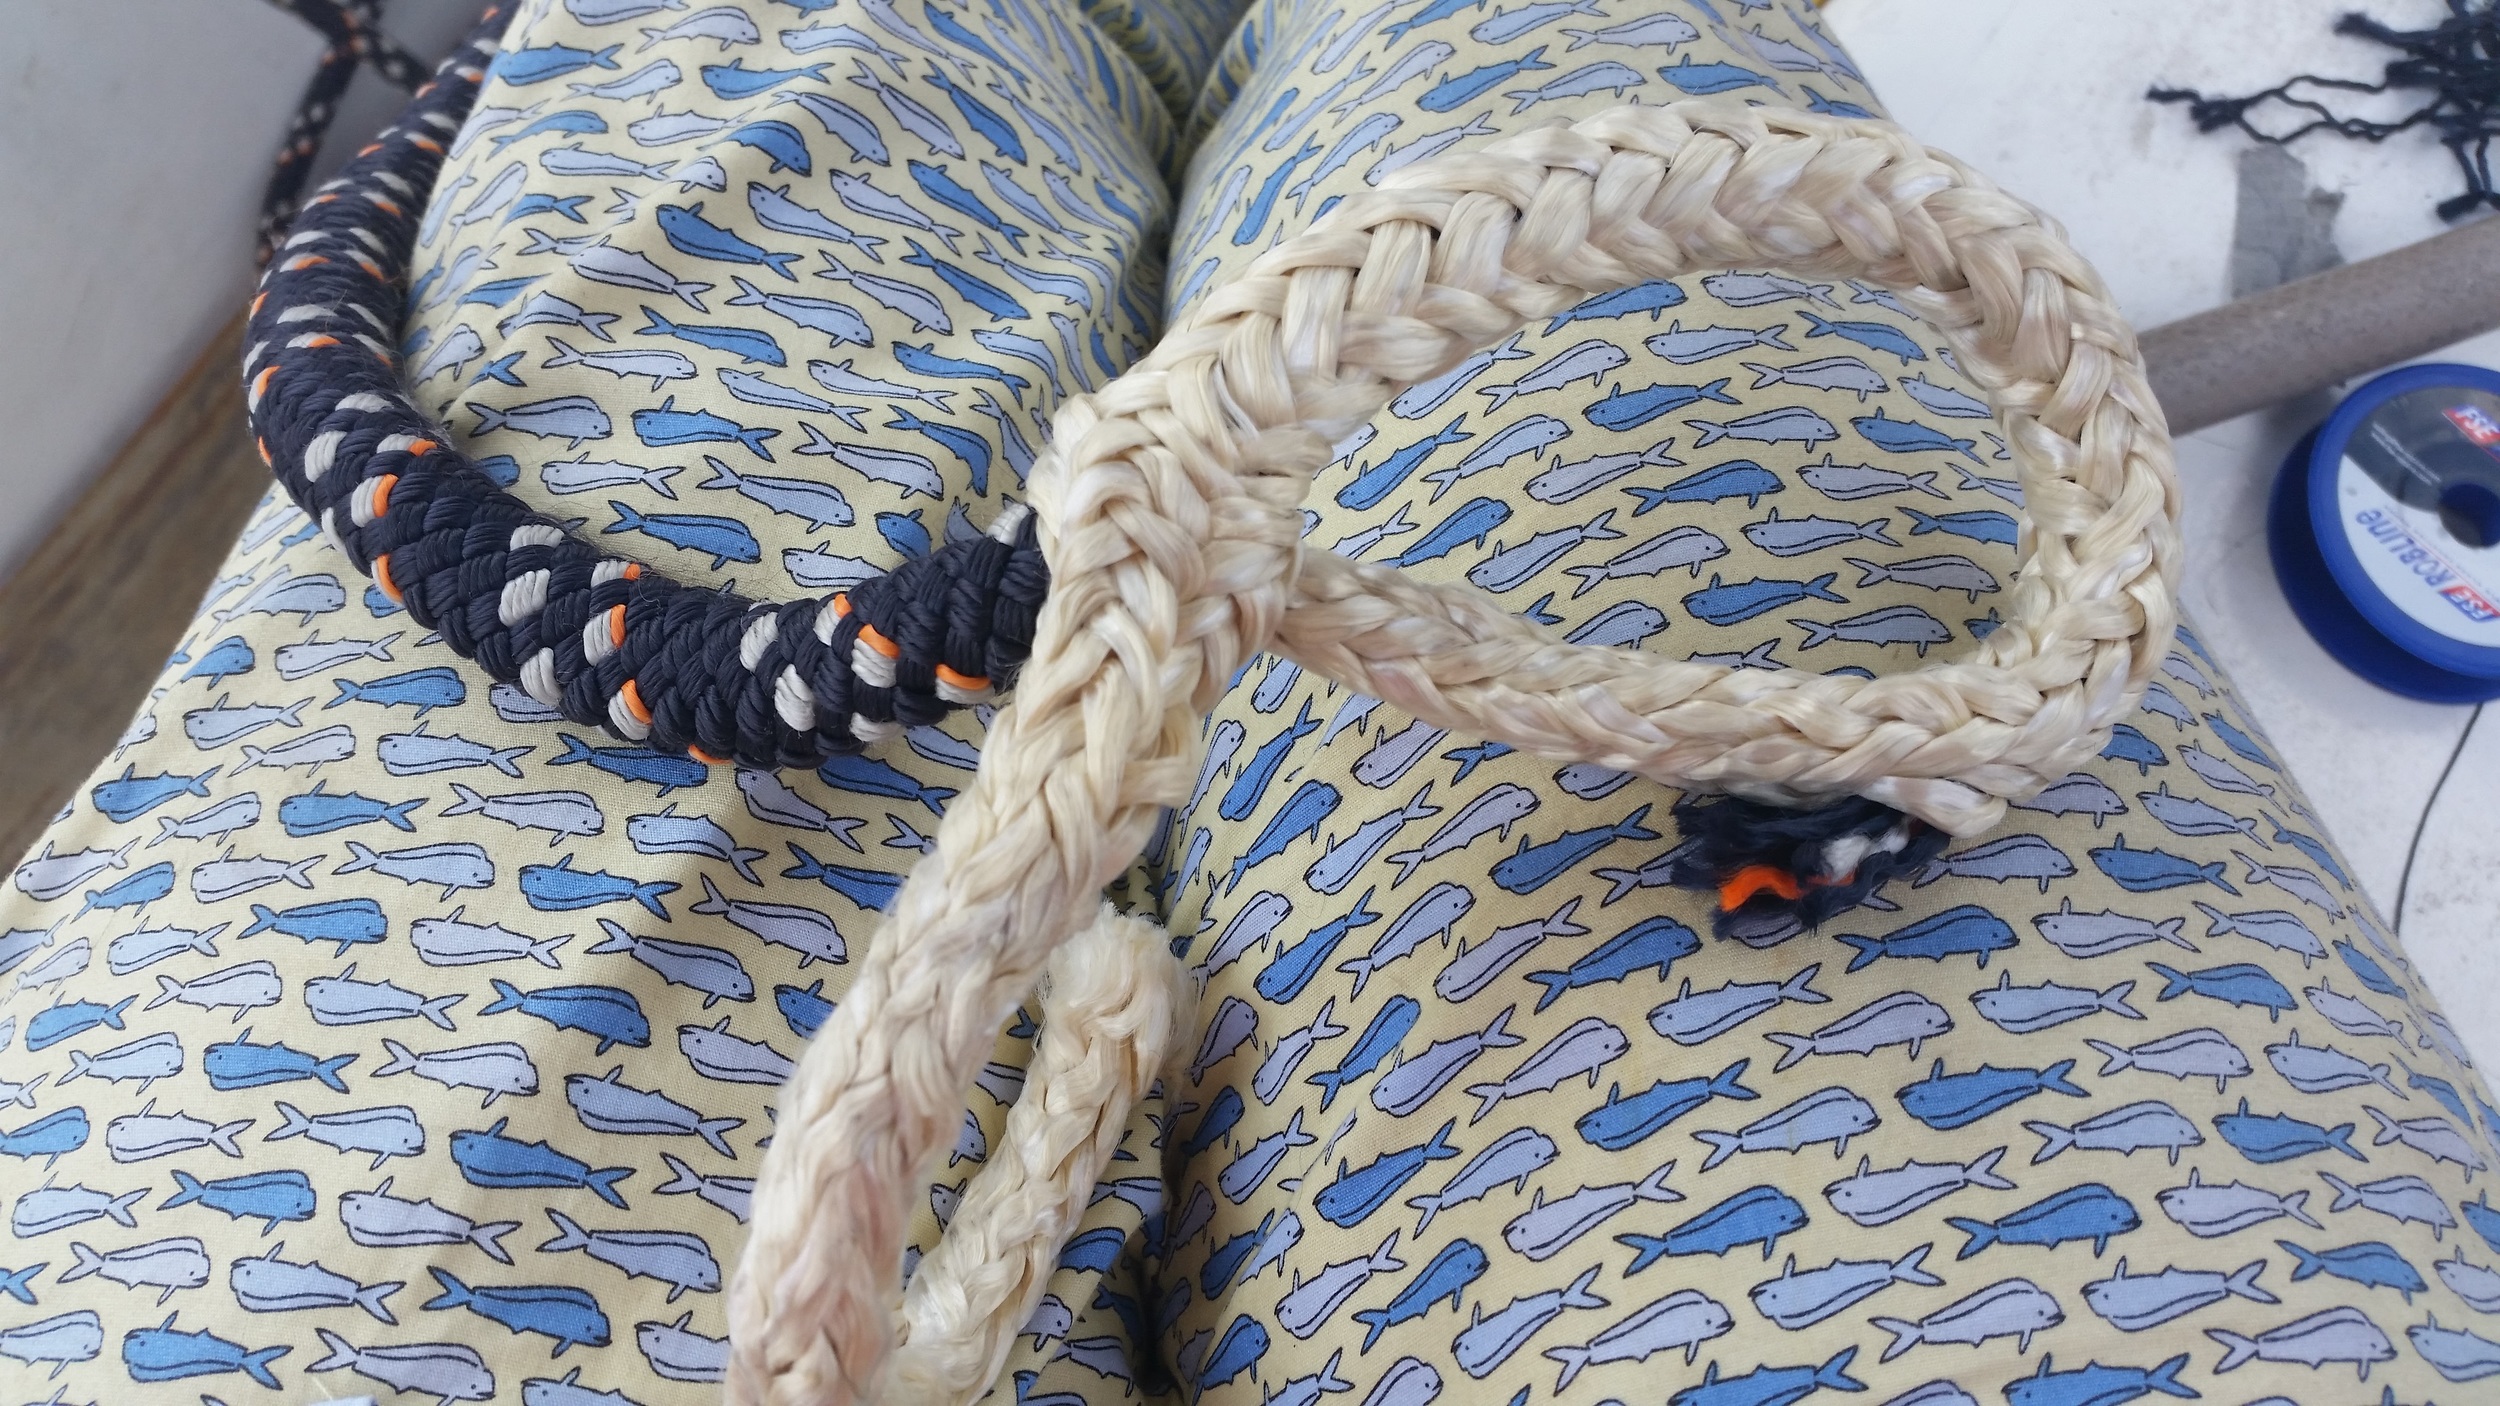
The core splits out of the cover and goes to the left, doubling back and exiting to the right. The cover splits off the core and goes to the right entering the core as it passes by. The core and cover are going in opposite directions and form a loop with a tail. The tail should be longer than the amount of cover buried in the core, otherwise the back splice won't work out in the end.

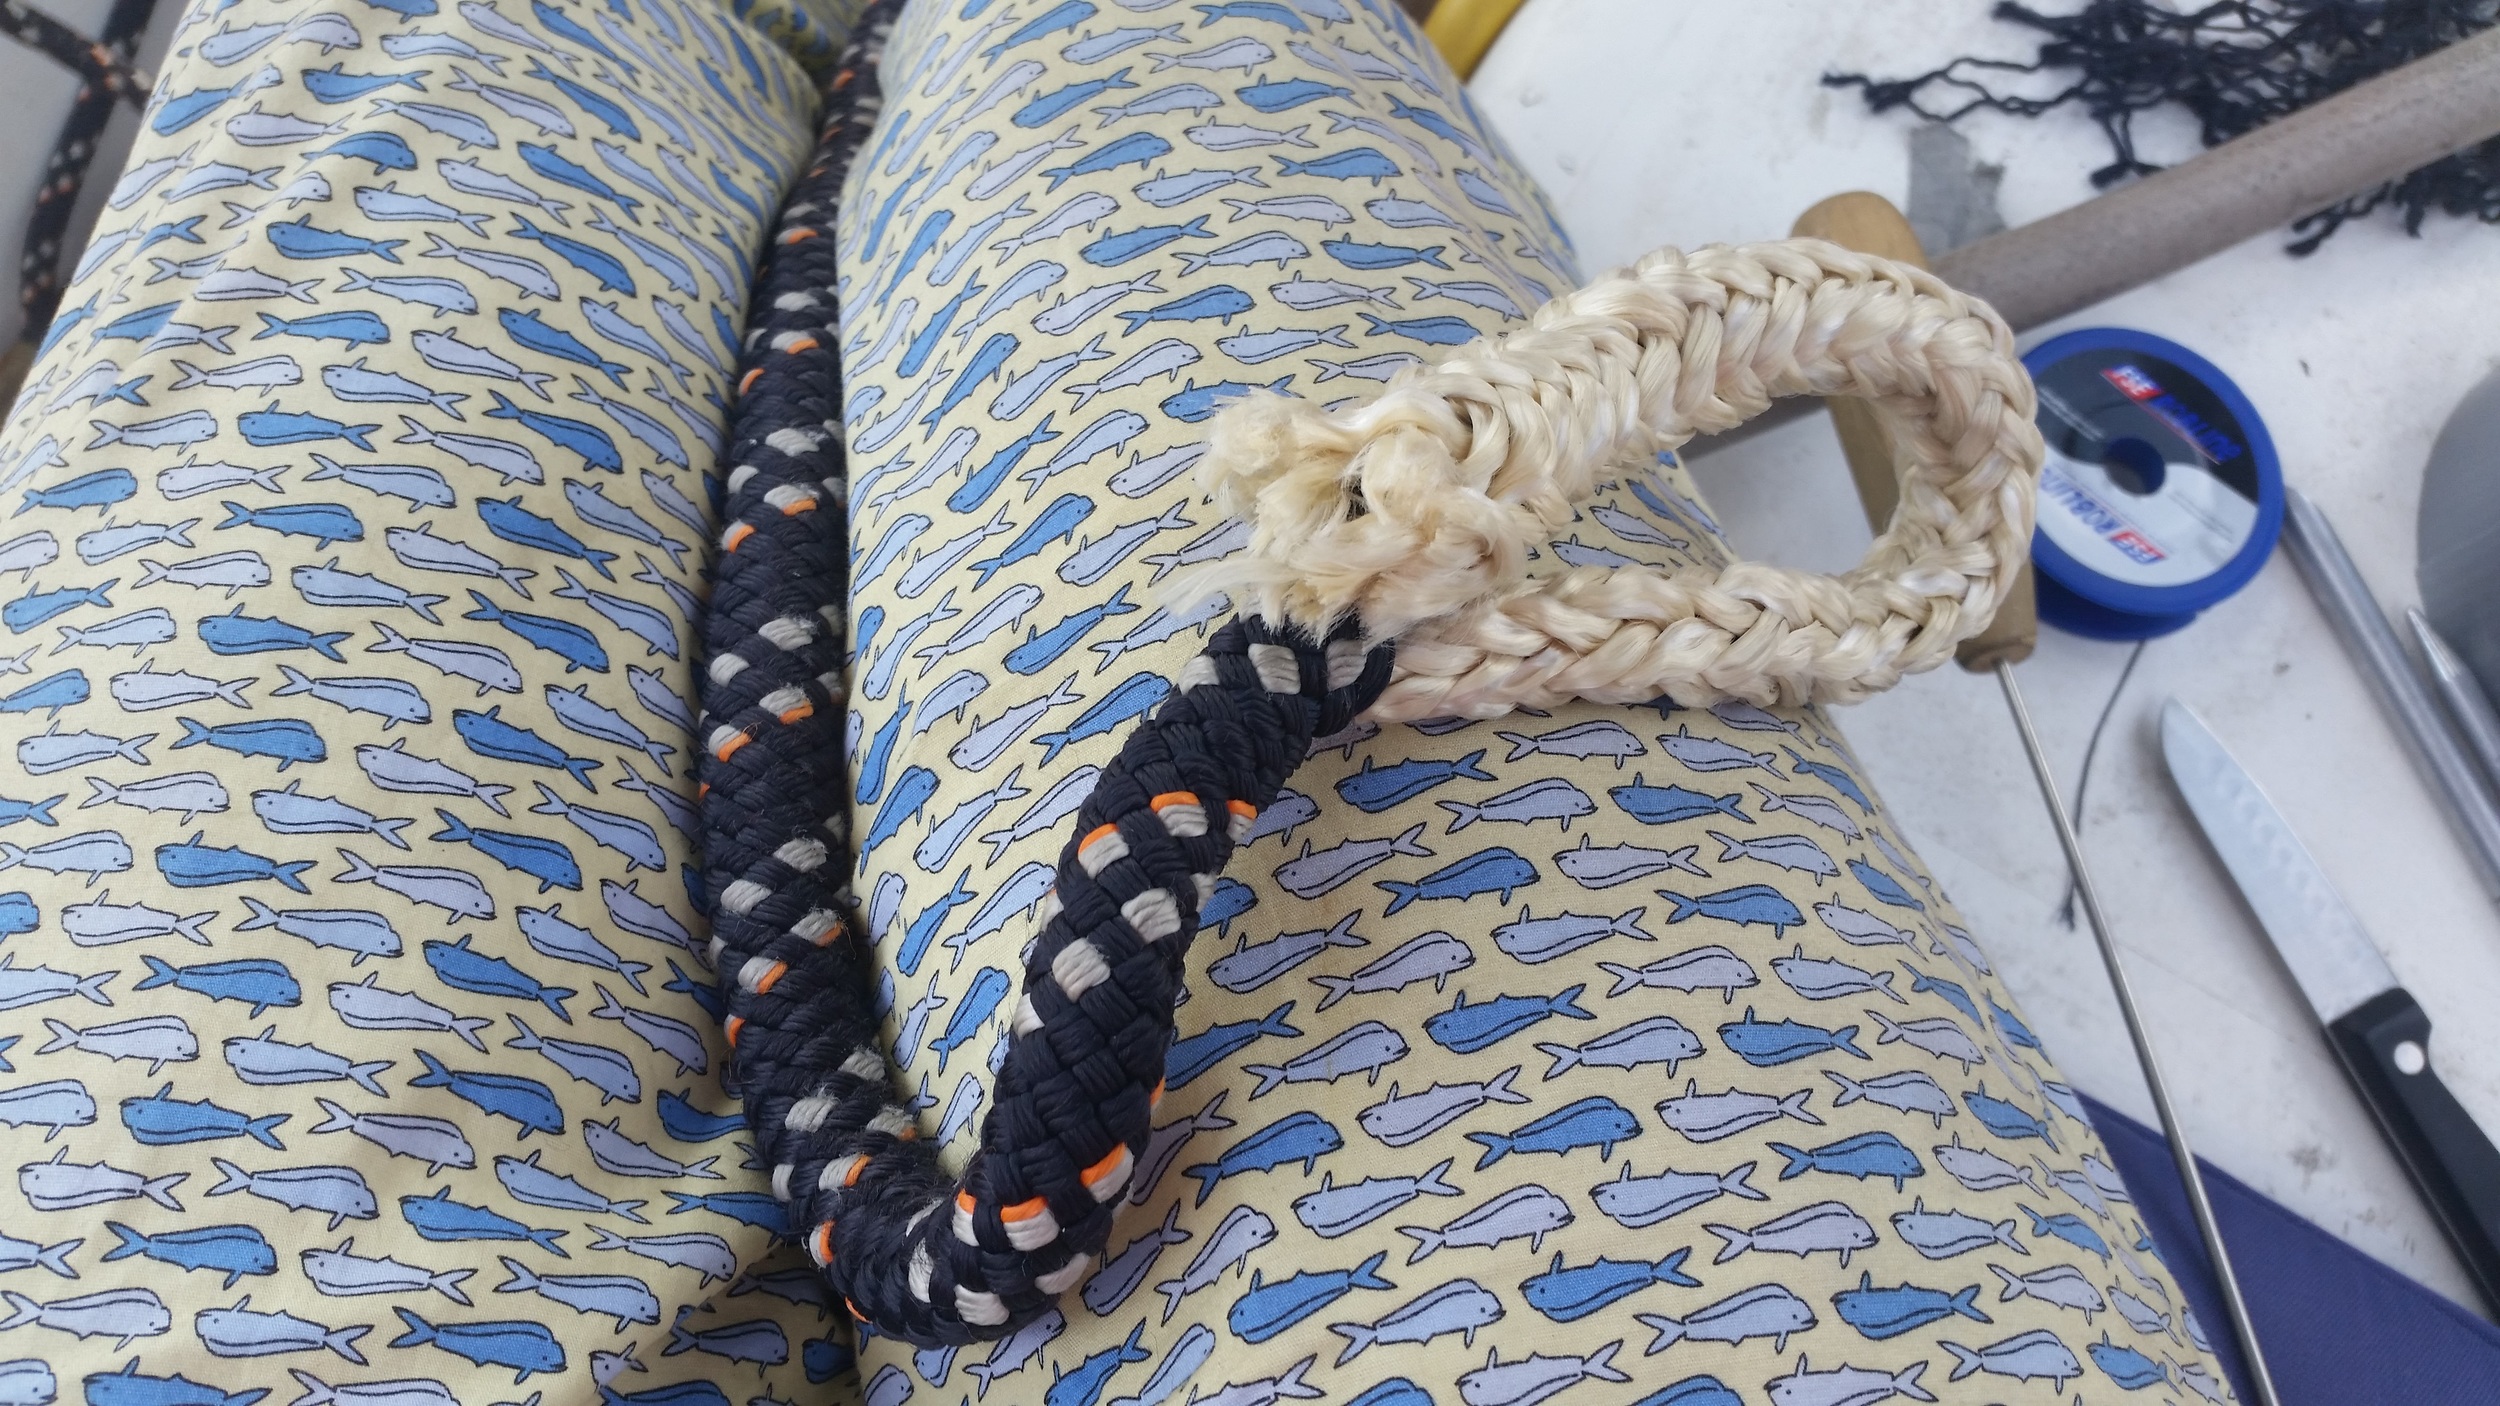
The excess core is removed, leaving what looks like an eye splice. The cover will be very loose over the core leading all the way back up to the pin that is holding the two in a static position relative to each other.

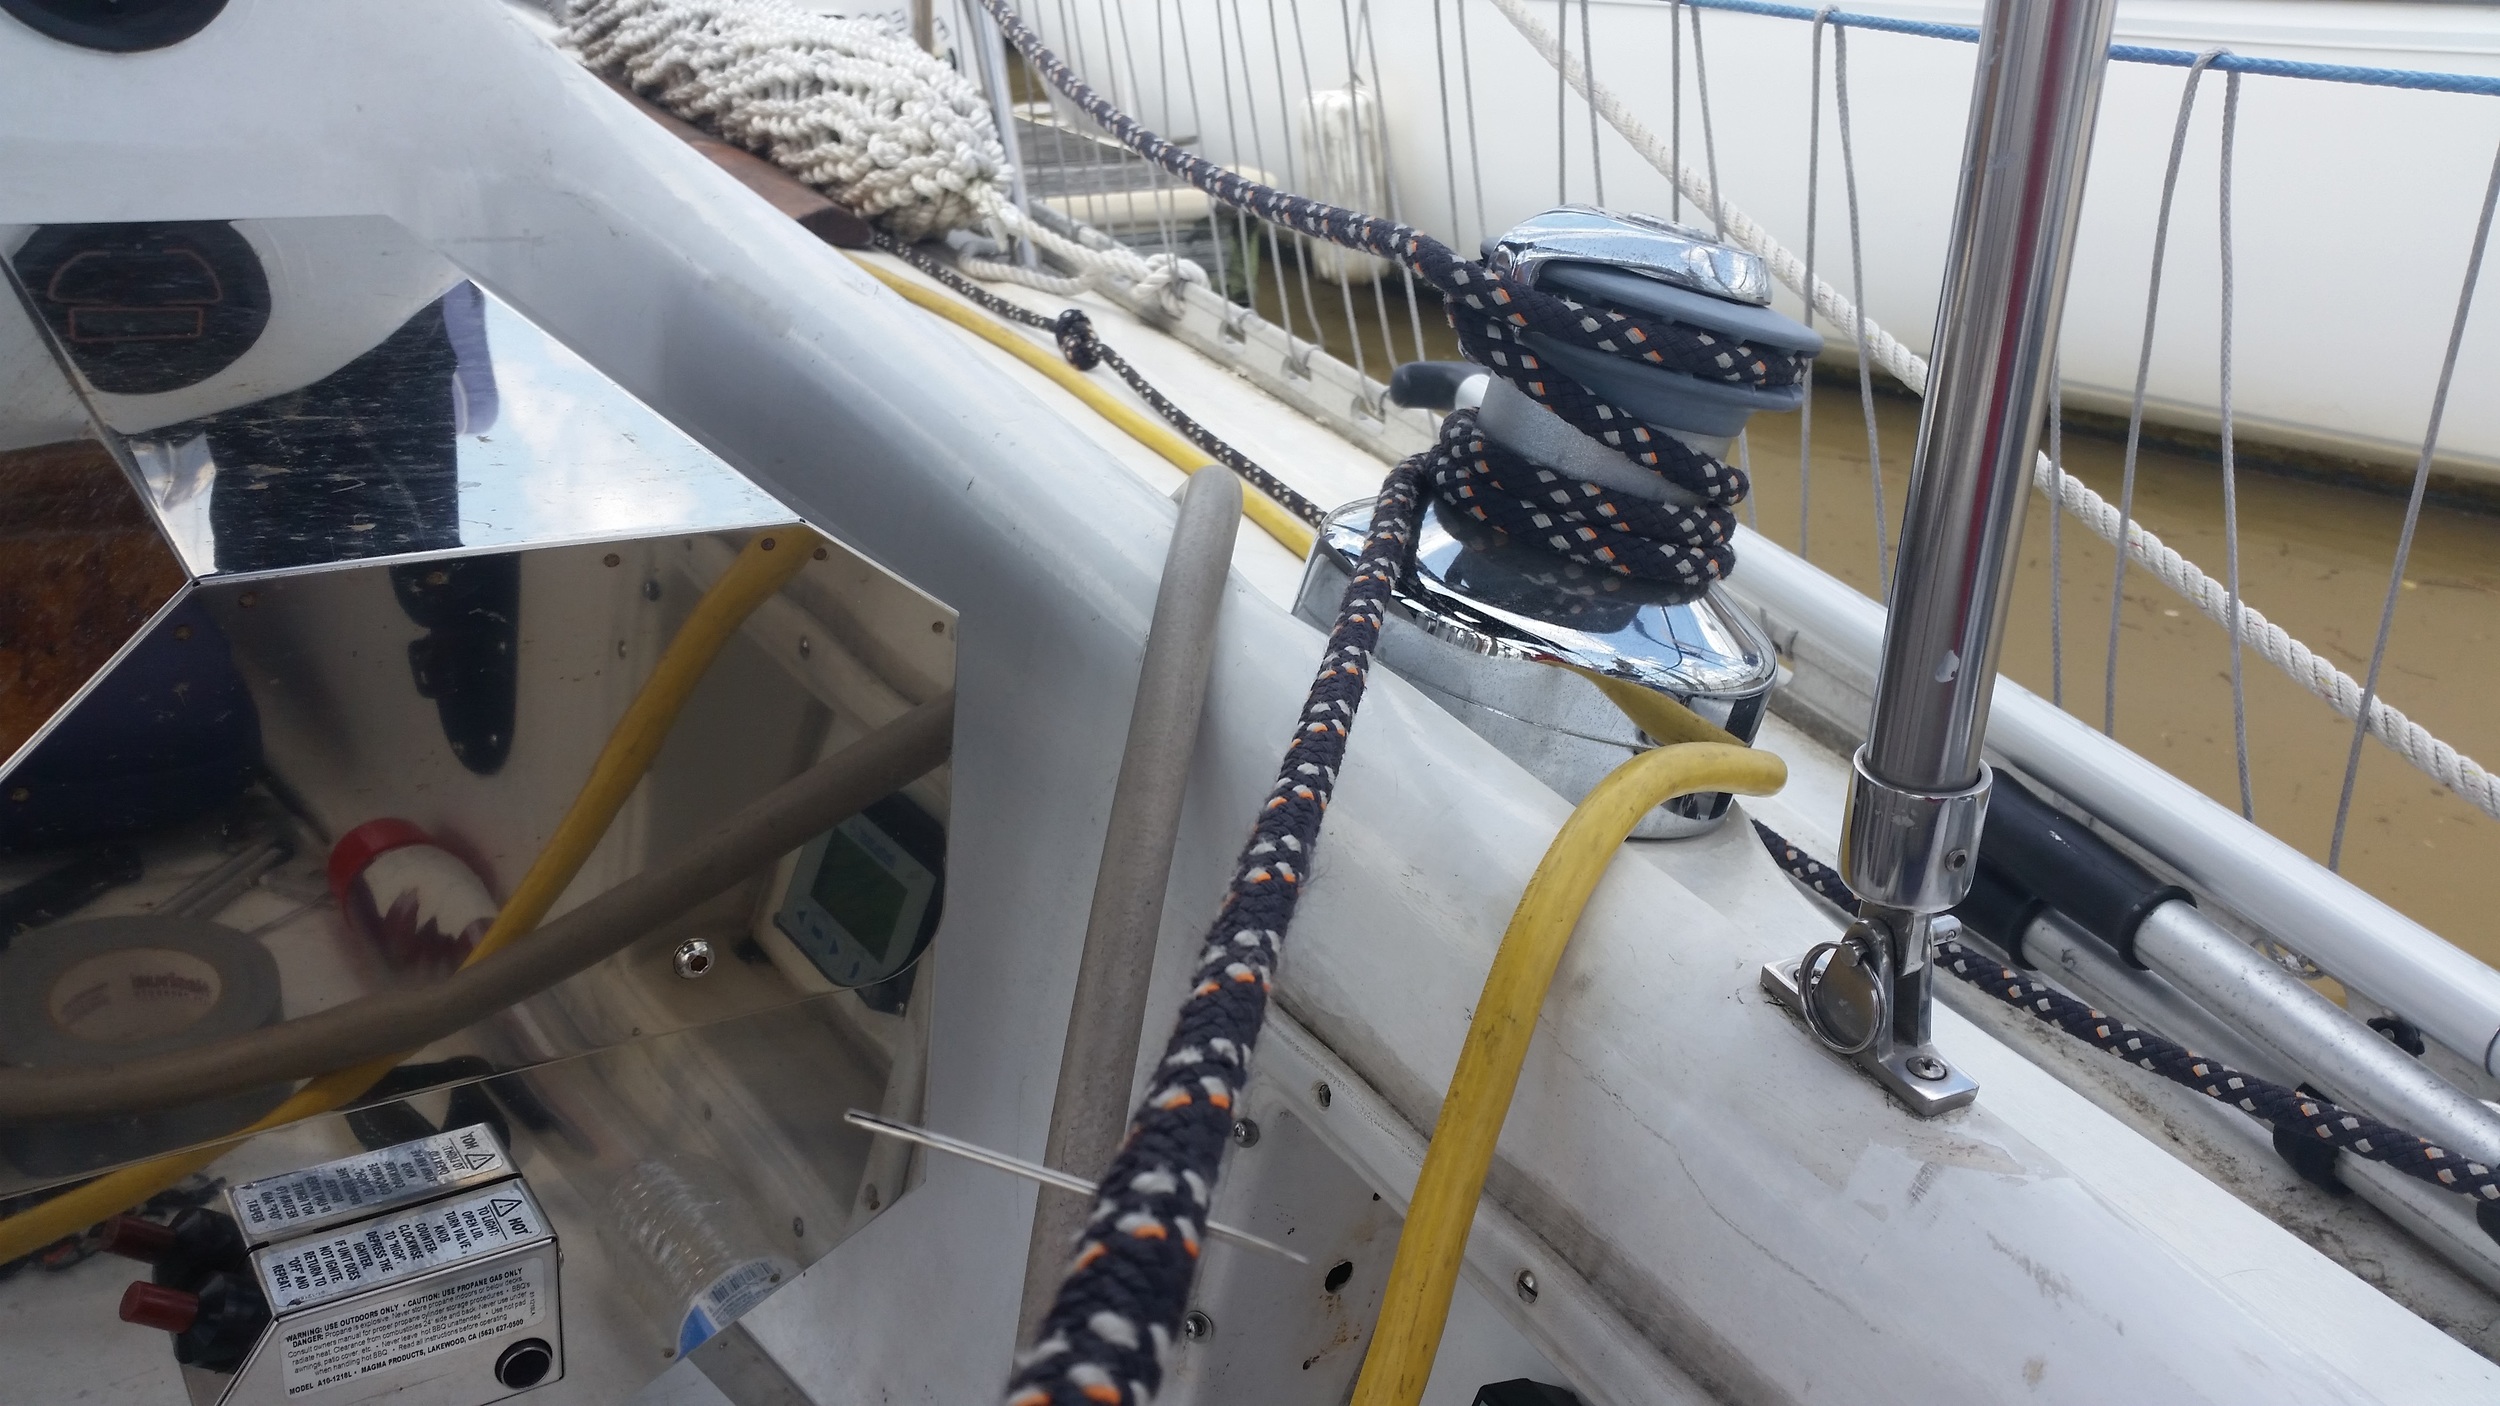
Secure the line to a strong anchor. I use one of the secondary winches in the cockpit, winding the line around the drum so that I can pull against it with a great amount of force to milk the cover over the core and complete the back splice.

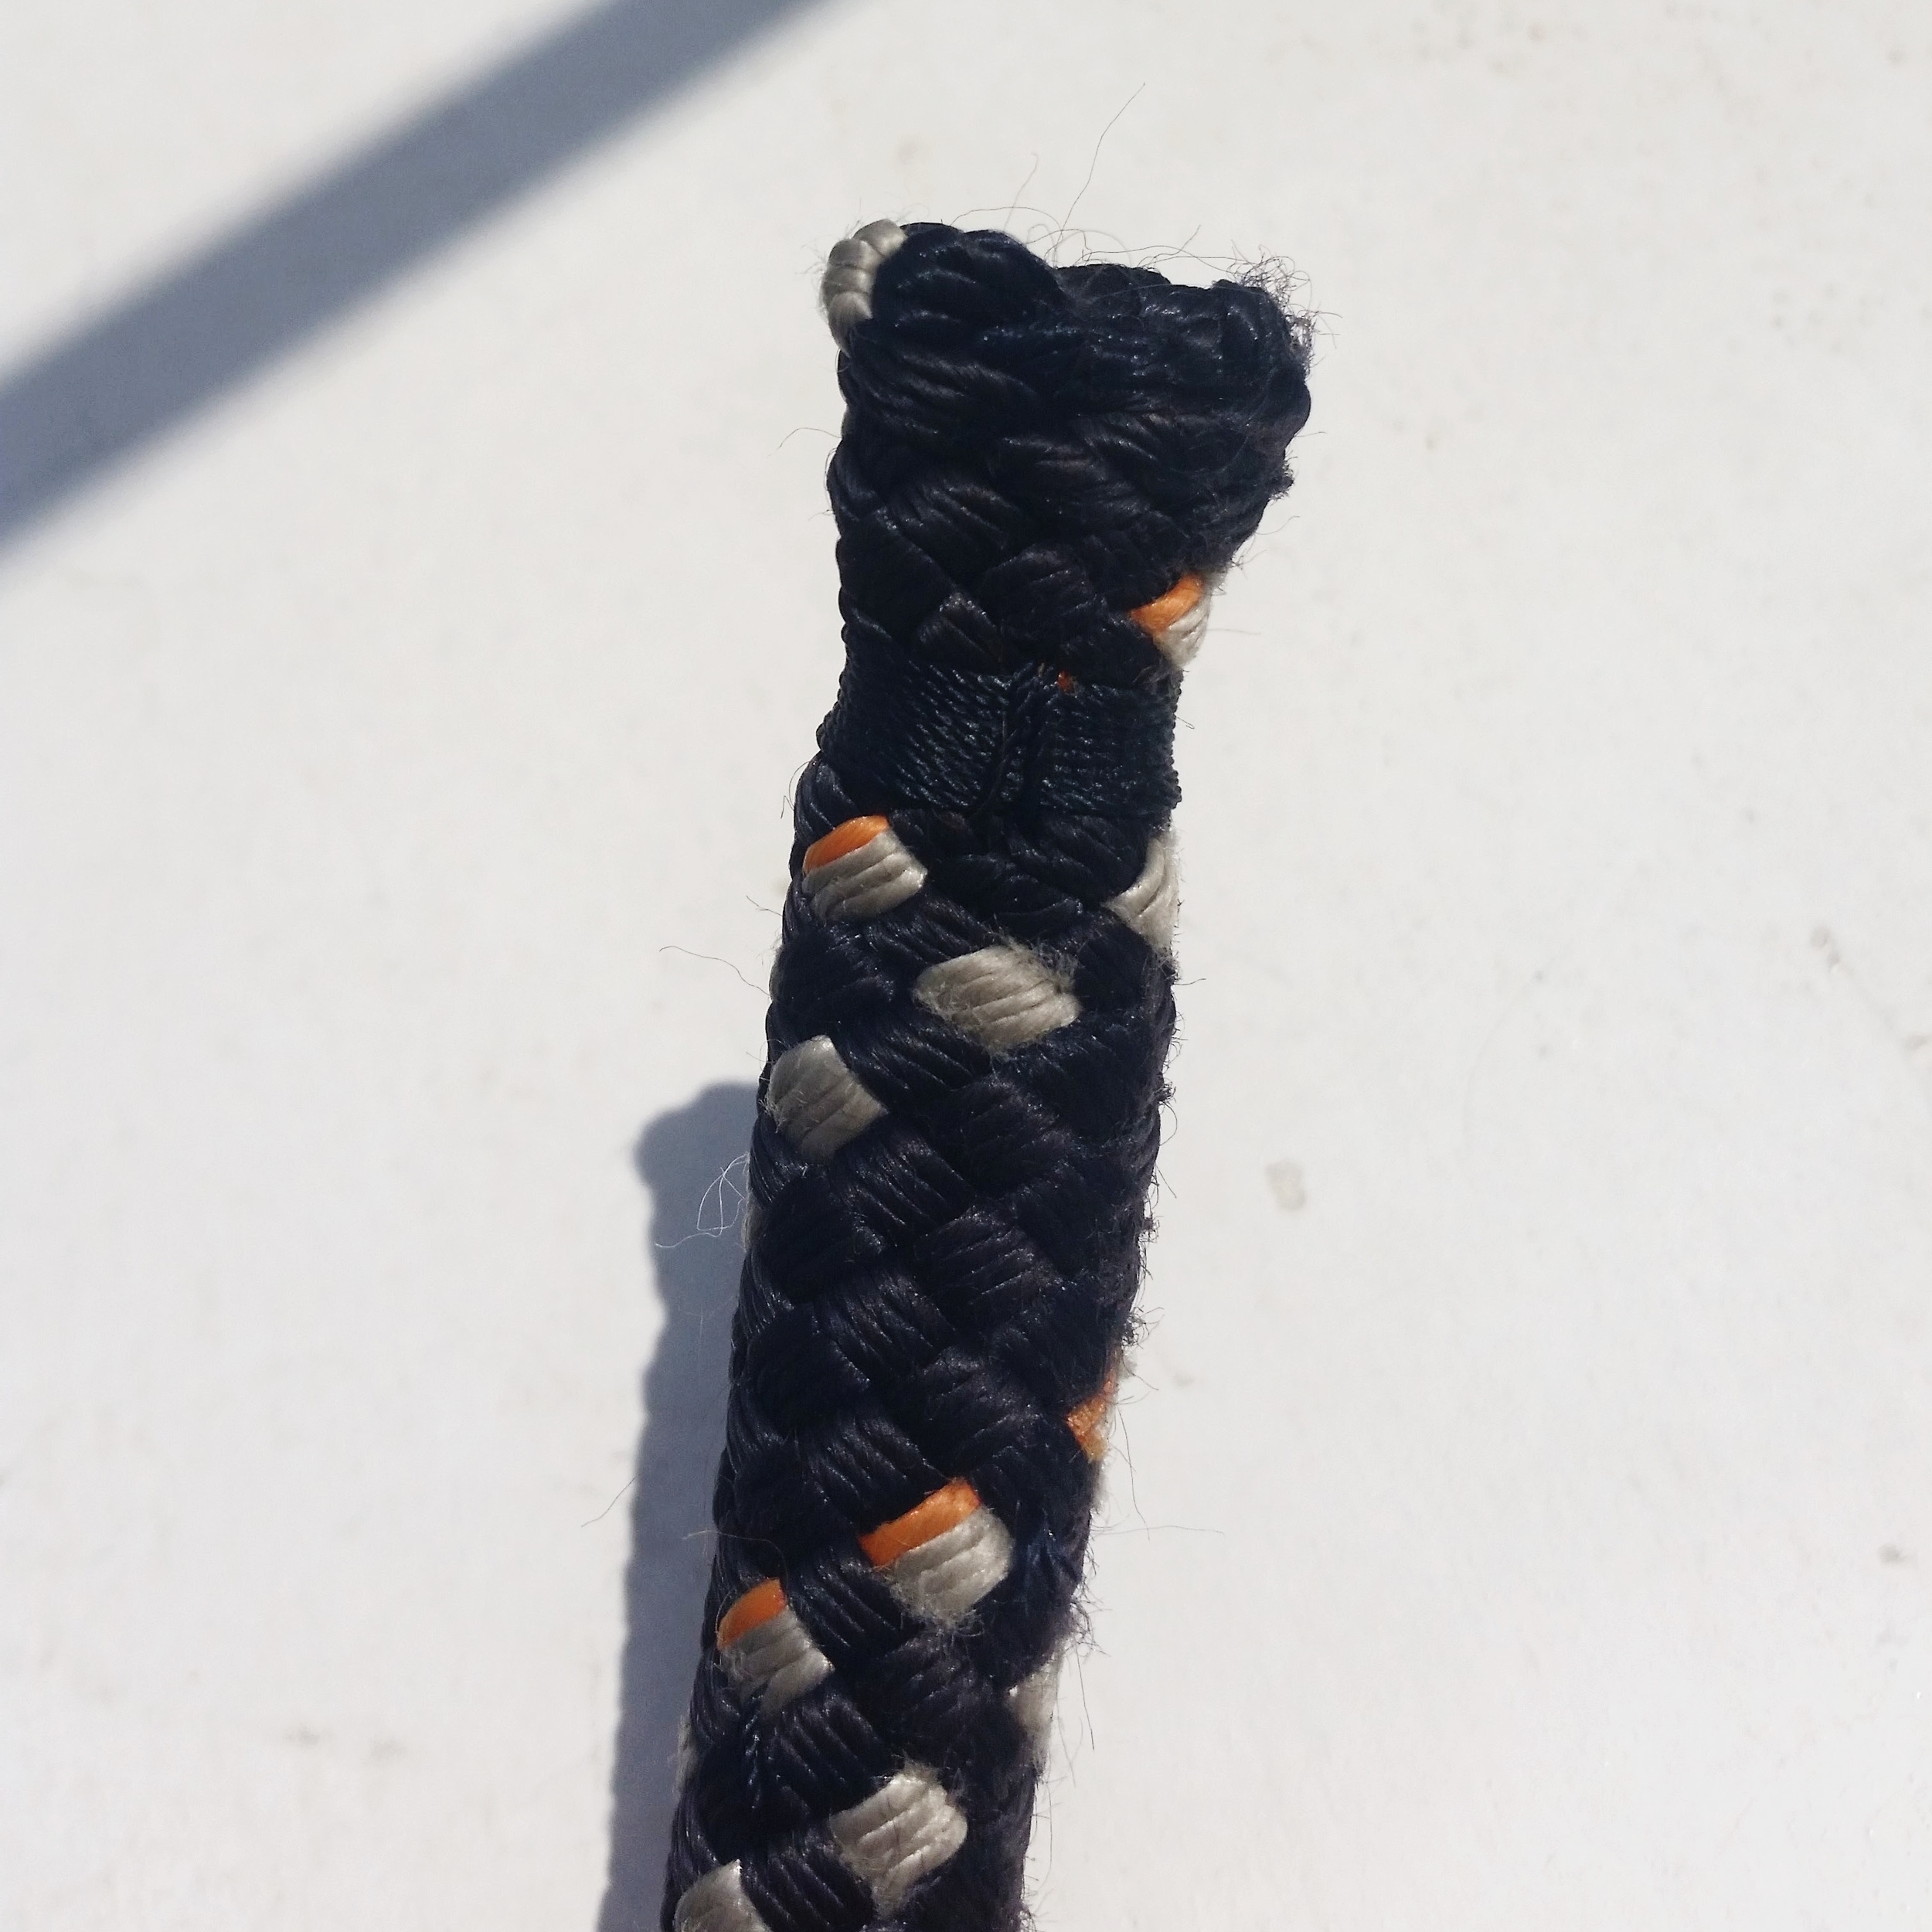
Pulling hard on the cover and milking the cover over the core will allow the core to slip back into the line. The cover that is now inside the line will be pulled by the core back into the line, making the end of the rope double back on itself.

Whipping the end will ensure that nothing works itself loose. It was stated earlier that back splicing is better than whipping, yet back splicing uses whipping! The whipping in a back splice is not as critical to hold the line together. If the whipping chafed away and fell out, the splice would still hold and keep the end of the line together until a new whipping could be installed. A line that was only whipped would begin to unravel as soon as the whipping had come out.