
I was recently asked if the grommets could be tied in an interlocking fashion as to create a chain of dyneema links using my method of making a dyneema grommet.
The answer to this question is an obvious yes, each grommet simply needs to be spliced together with the previous grommet inside the loop.

I had actually made a set of three links while I was still practicing the art of making grommets to use as deadeyes. I made three links to quickly and easily evaluate the interaction between two pieces of dyneema under a load.
The three links provided me with a wealth of information about how dyneema interacts with loads placed upon it and how it interacts with other dyneema rope under a similar load. It also helped me evaluate the best position to locate the splice on the loop. The top link has the splice in the bottom at the connection to the middle link. The middle link has the splice in the middle. The bottom link has the splice located inside the thimble.
This information led to my decision on using thimbles in my deadeyes and to position the splice in the middle of the deadeye. The top link was hooked over a pipe on a scaffold where the middle link connected the system to the bottom link which had a weight hanging from it. I didn't take any pictures of this test because I didn't have a website or any plans on doing rigging commercially at that time. I was merely designing and testing methods to re-rig my own yacht which led me to produce the current system that I have and use.
The results of the test can still be seen in the loops though. The top link (left link in the photos) was hooked over the scaffold and still retains the bend that it picked up while under the load. The bottom link had a thimble in the bottom portion to hold the weight. The middle link was left untouched to evaluate how the different connections interact.
The top link that was hooked over the pipe was fine, indicating to me that if the object I am attaching to is large enough, the grommet can simply loop over it without any other form of connector.

The junction of the top link to the middle link also tested the durability of the splice when under direct contact by other ropes. The splice held up fine, even though the middle link formed a tight radius bend over the splice.
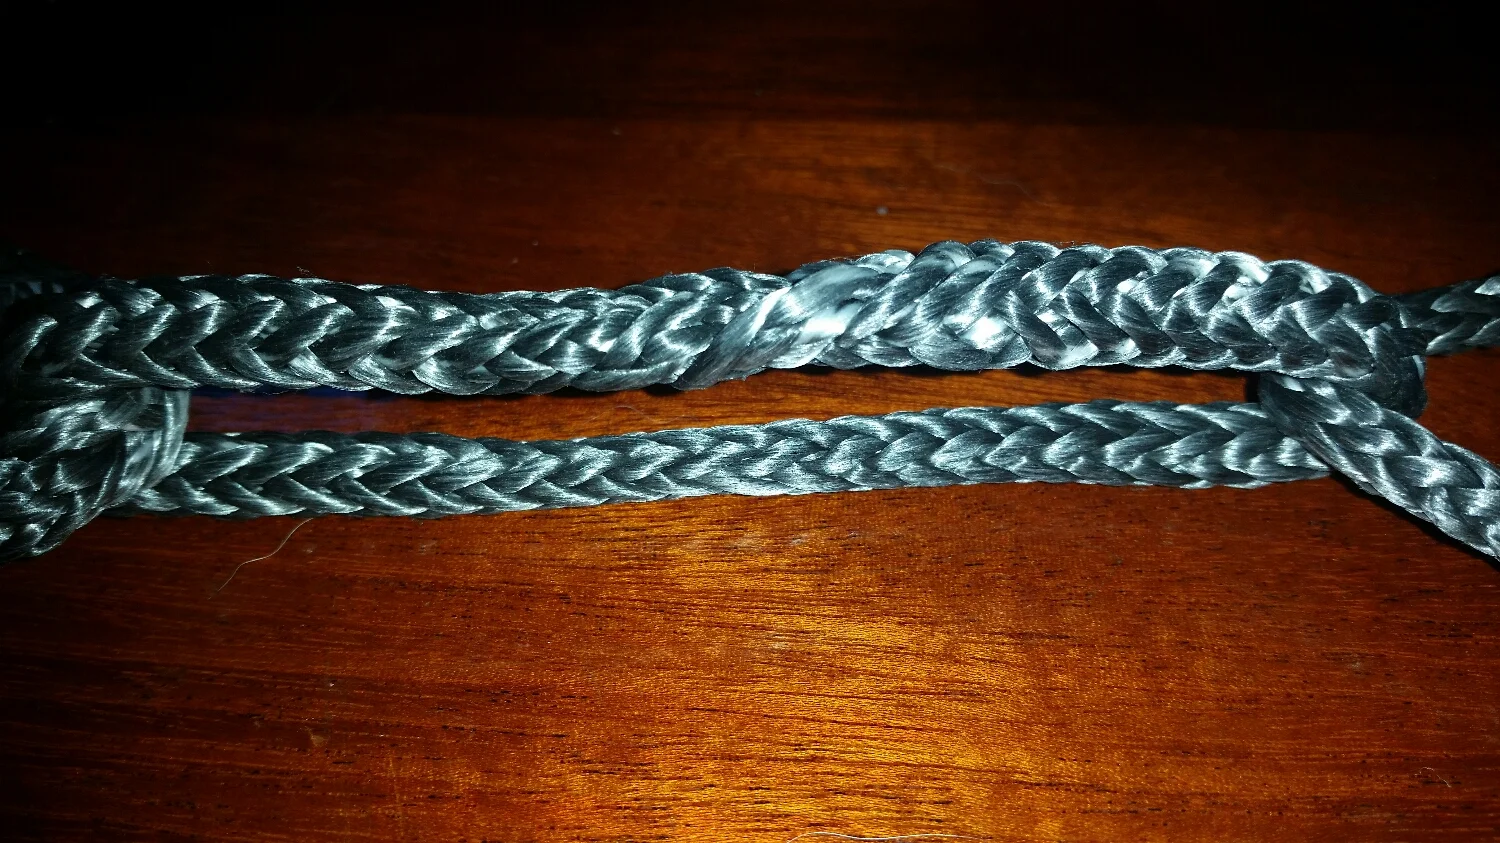
The middle link was the most interesting to observe. It has tight radius bends at either end and the splice located in the middle of the link. The splice side and the bury side both shared the loads equally and evenly. The splice was also easier to inspect which became my preferred position to locate the splice for the deadeyes. The ends of the middle link did suffer from being bent over the tight radius turns of the other links, which could lead to reduced longevity of the grommet. The deadeyes for the standing rigging should not be subjected to such tight radius turns as it could lead to premature failure of the dyneema.

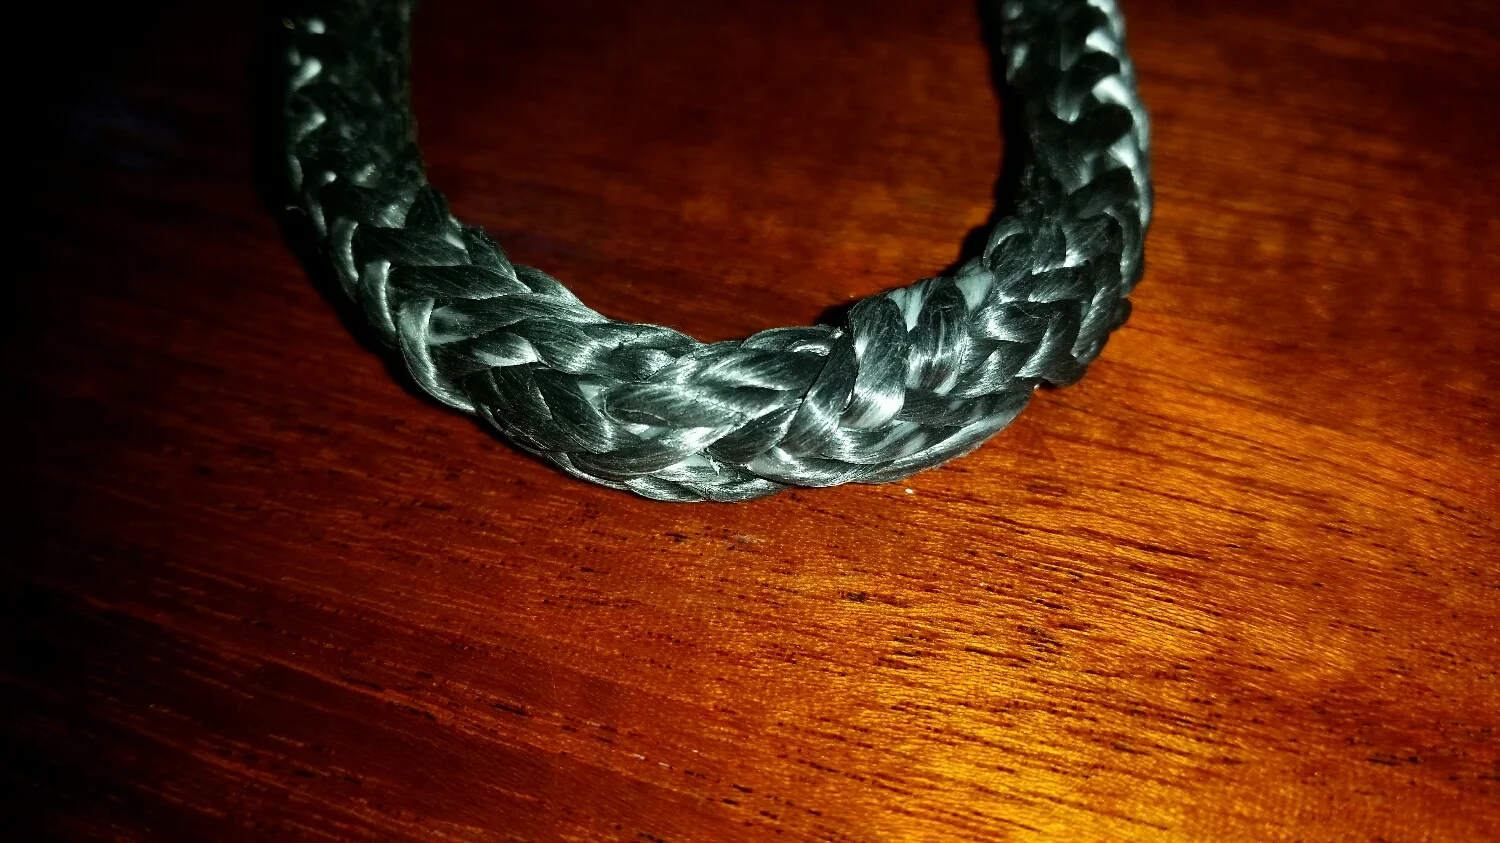
The connection of the middle link to the bottom link is different from the connection at the other side of the middle link, where a splice was involved. This connection was simply two pieces of dyneema bending over each other. They seemed to hold up well, but did form a rather tight radius bend, which is not the best for longevity of the dyneema.
The end of the bottom link was subjected to loads with a thimble placed in it. The splice was also located at the bottom, inside the thimble. The splice held find under load and with a large radius turn, as guided by the thimble used. This seemed to be the preferred way to connect the standing rigging to the deadeyes, as the thimbles will force the grommet to retain a properly radiused turn while under tremendous loads. The splice located at the bottom worked well but was difficult to inspect.
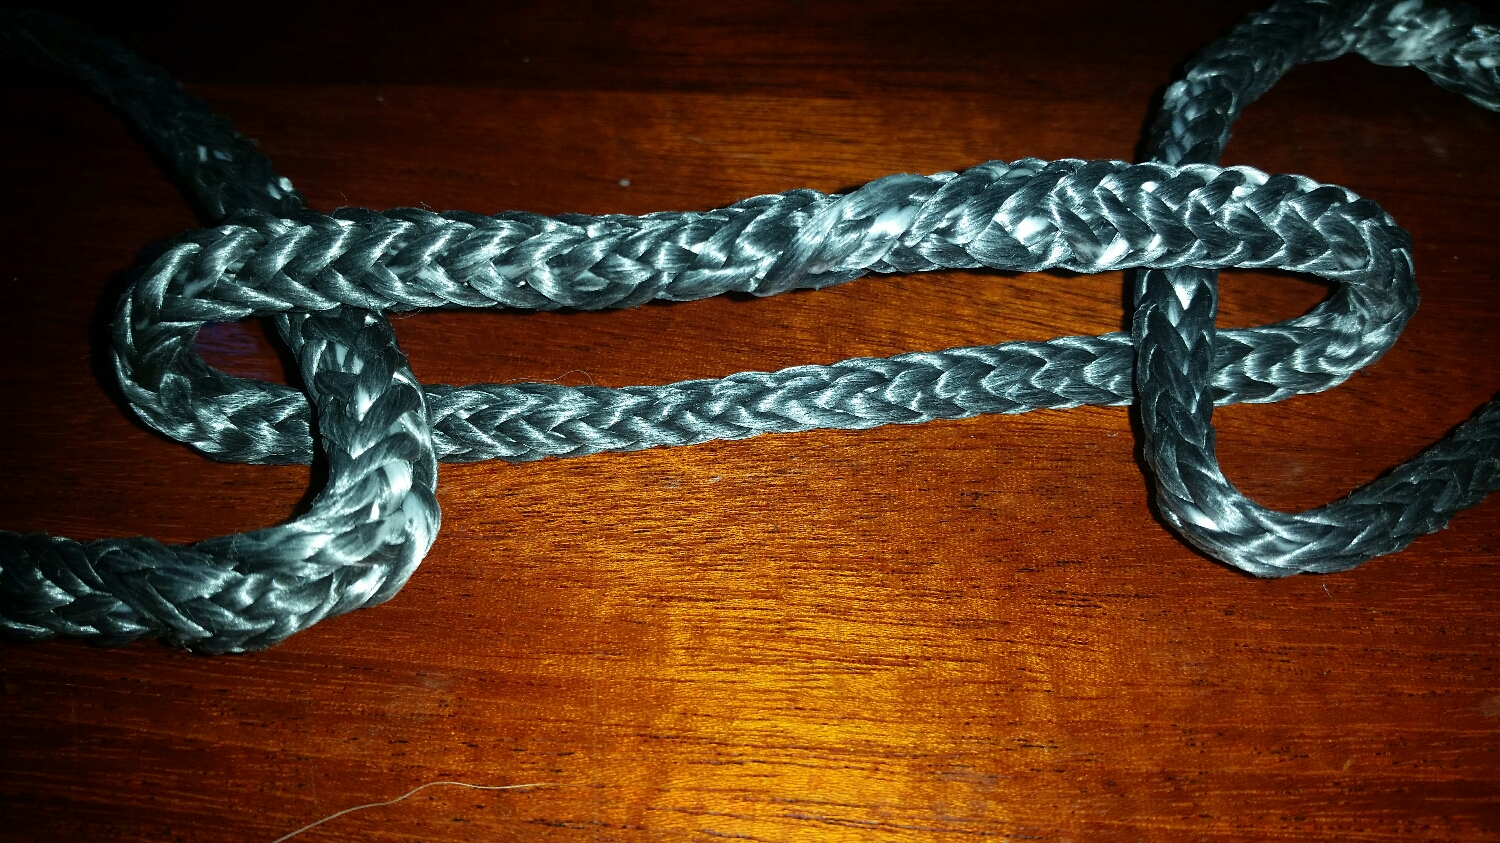
After being loaded, the links retained the shapes they became during the test. The top and bottom links had ends that were forced to maintain large radius bends due to the scaffold pipe on the top link and the thimble on the bottom link. The ends that were not guided formed much tighter radius turns, as they folded over each other. While the bend was rather tight, the loads were maintained even on the links, and none of them showed any signs of problems. The splices also functioned well in all three locations: In the connection, in the middle, in the thimble; and the location for them to be in the middle on my deadeyes was purely for inspection purposes.
Based on this experiment, I decided to manufacture the deadeyes with thimbles on their ends and the splices located in the middle of the grommet. The thimbles provide a properly radiused bend even when under the immense load of working standing rigging.
