Taking Out Constructional Stretch

After any splice in dyneema, the outer braid will be more open. Upon loading, the fibers will settle back into place and the line will stretch. This is not creep, it is "constructional stretch". It is important to get this constructional stretch out before setting up the stays as it will ensure that the final length is closest to the desired length.

To get constructional stretch out, I like to tie an end to a fixed object and then pull really hard on the line, snapping it tight and letting it go, then snapping it tight again. This will take out most of the stretch. The last bit of stretch can be taken out during tensioning with the deadeyes.

I'm in the process of making new check stays for Wisdom. I connected two off-cuts that were rather long with a very long end to end splice. My next step will be to take the long lines and measure them on the mast to set the eye splices in the desired locations. The problem is the constructional stretch is an unknown factor on these lines. It is very difficult to get the length of the stays perfect with such a large unknown in their length. For this reason, I am going above and beyond with removing the stretch from the stays. 

Pulling hard on the line will remove most of the constructional stretch, but if you want to get all the stretch out of the line, this additional method will be necessary. While this method will remove the stretch and minimize the amount of creep you have to deal with, it is not necessary to do with all your stays. I only did this method on the headstay and the cap shrouds as I didn't want to worry much about them stretching on me once set.

20160412_195322.jpg

To tension the stays, you first need to attach the stay to a very secure object. I use a silver maple tree that has a very extensive root system as my anchor point. Tie the stay to the tree with a small dyneema line, being sure to do various wraps around the anchor point. The small line is not as strong as the large line you are tensioning, so multiple wraps are needed to share the load.

If you are using a tree, be sure to set a sacrificial board on the backside of the tree. This will spread the load and keep the tree alive. Thousands of pounds pulling into the bark would be very damaging to a tree.

Next attach the other end to something rather strong and heavy. I like to use my pickup truck, it weighs just over 7,000 lbs and has a very sturdy tow-ball on the back of it.

The line is laying on the ground and properly secured to the tree and the truck, now we just need to apply some tension to the line. I put the truck in gear and begin driving down the hill away from the tree at a very slow speed (less than 2mph) until the line gets tight and stops the truck. 

At this point, I put the truck back in park and check the splices.

20160414_142356.jpg

Even under this amount of tension, the outer braid can be bunched up and not relaxed yet. This is when you can work the line out and push the fibers into their appropriate positions. I let the truck hang on the line for a few hours and then put it in gear and creep forward a few more inches, then let it hang on the line for a few more hours again.

Since these stays need as much creep and stretch removed from them, I let the truck hang on the line for a few days. This will get all the stretch out of the end to end splices and give me a very accurate length to measure my stays with. 

If you noticed, I'm also tensioning the deadeyes at the same time. I know the system has been exposed to enough tension when the thimbles close and their ends come together.

If you need to get the stretch out of your new synthetic stays and don't have access to very large hydraulic equipment, just know that there are always more simplistic ways to achieve your goals.

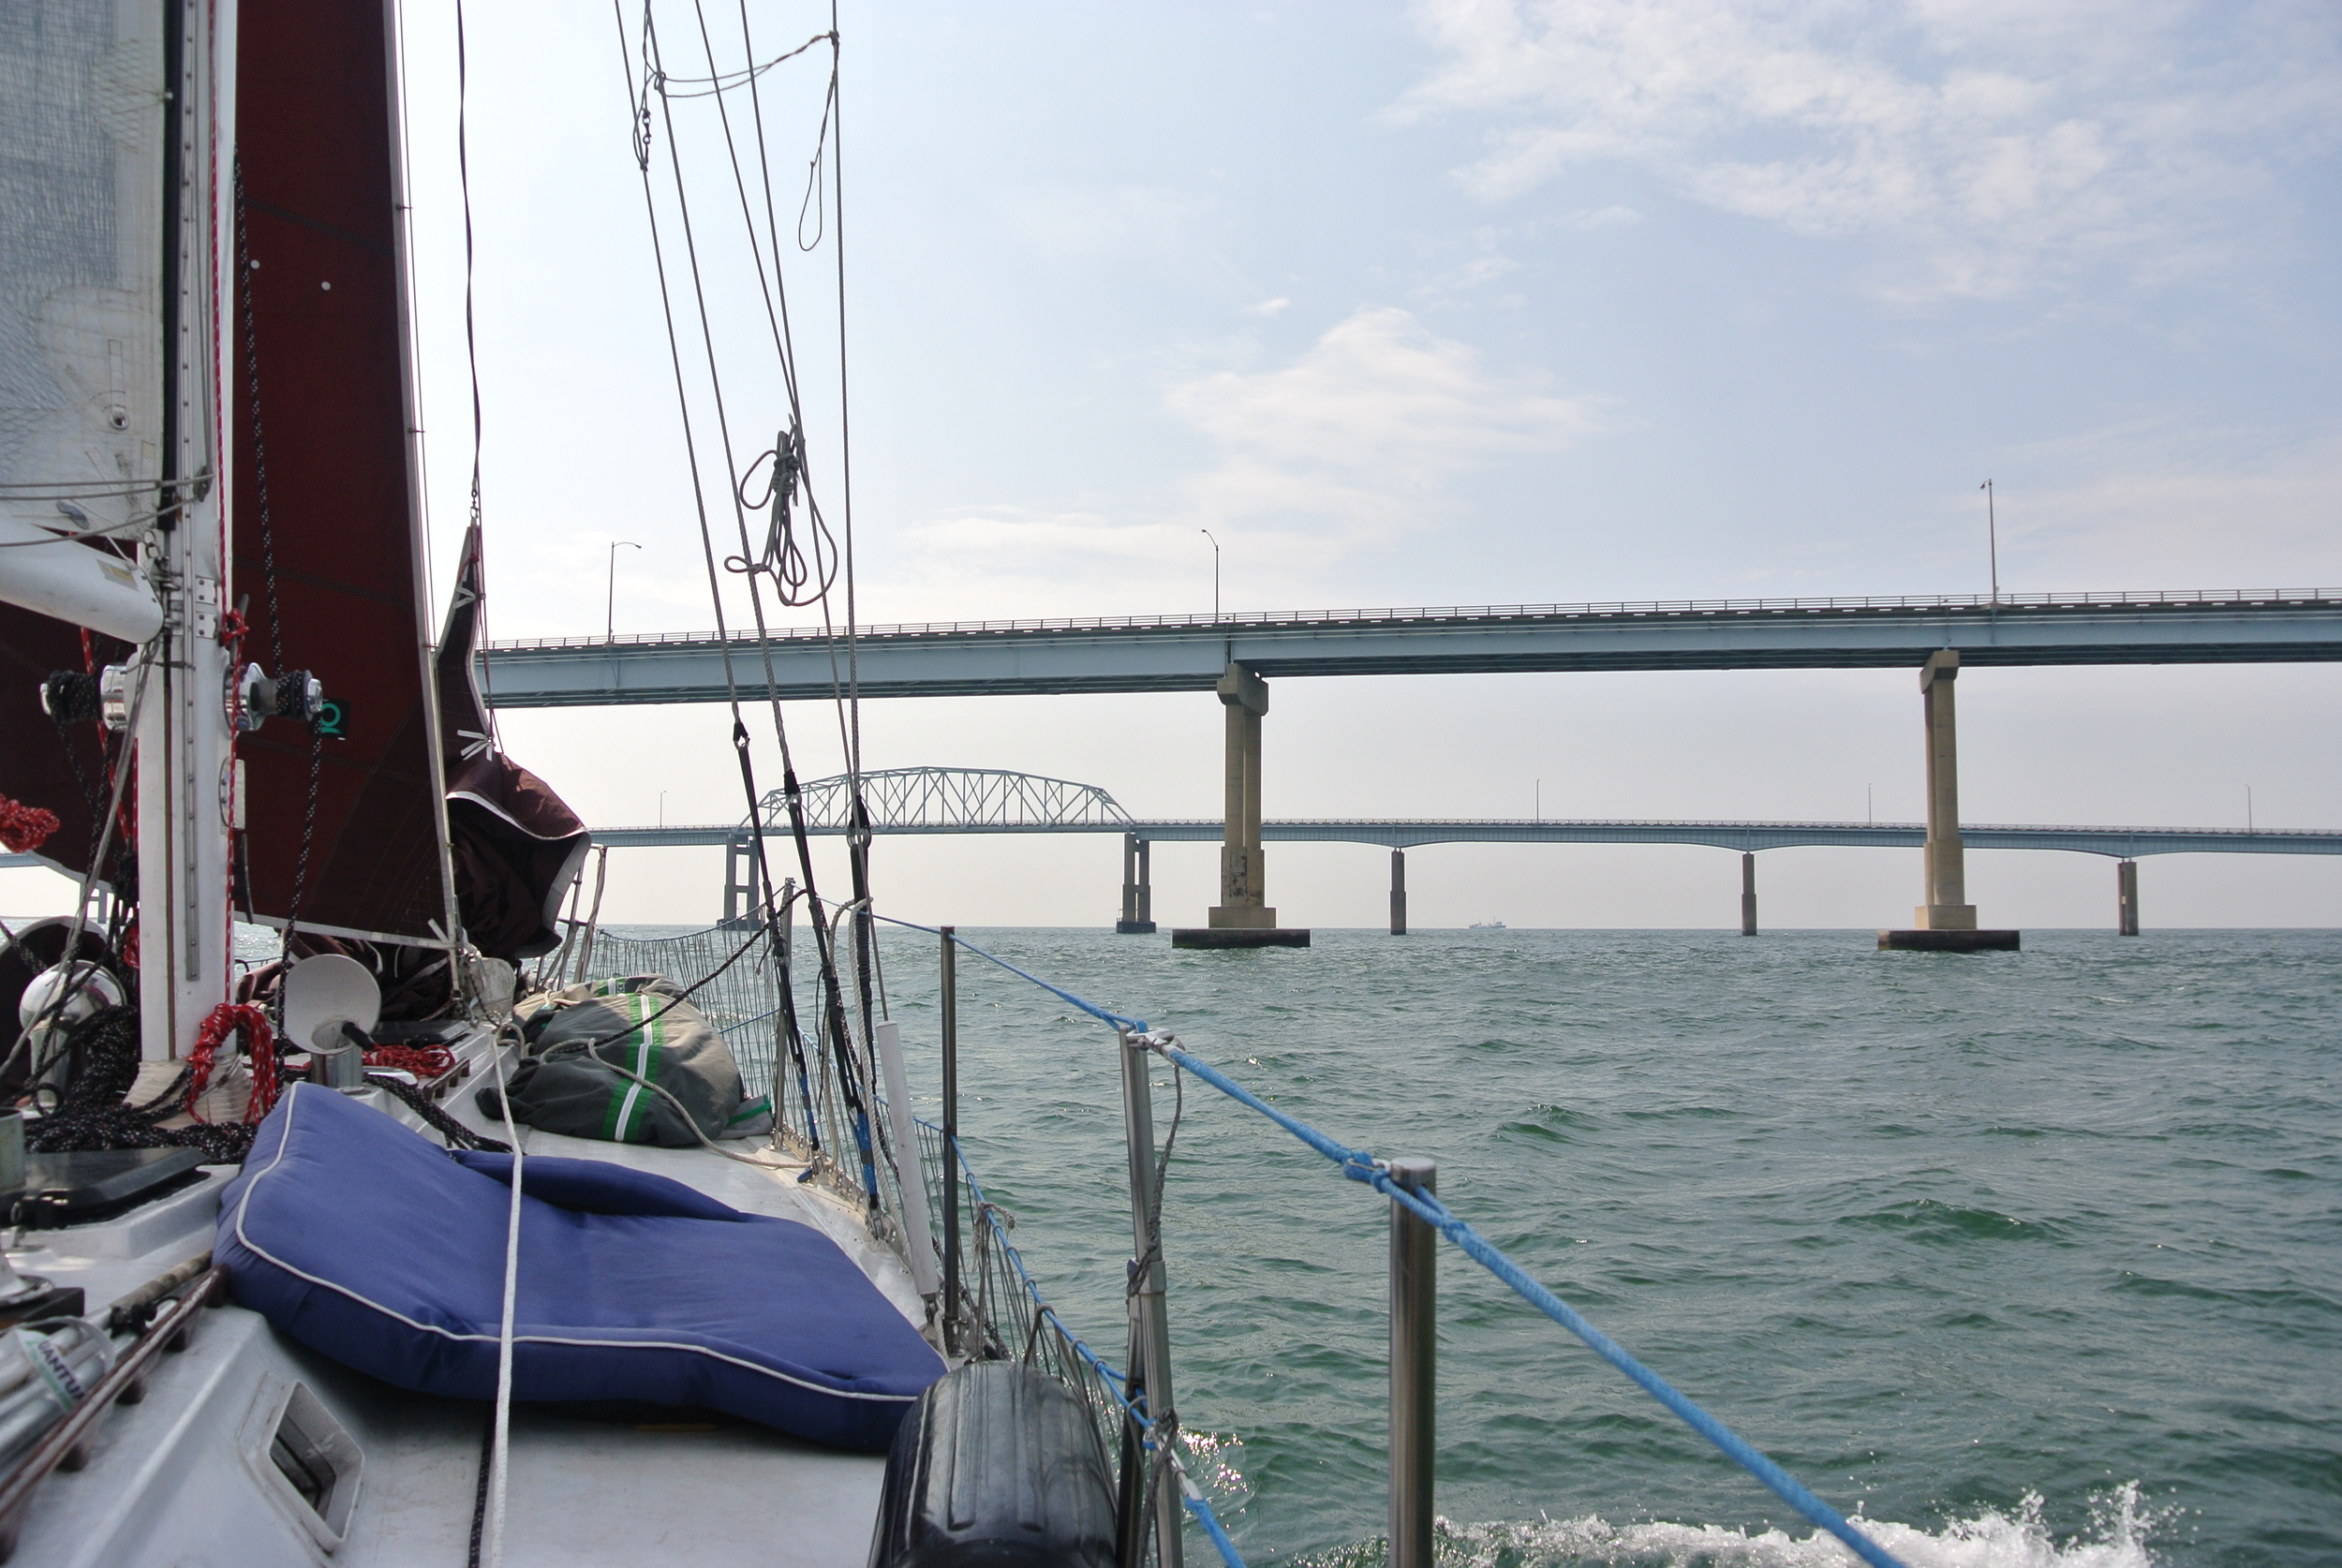
 

Sailing Through Narrow Passes

When you think of sailing, you probably imagine open waters all the way to the horizon! While that is where we all like to sail off to, sometimes you need to sail through some rather cramped passes to get out to these open waters.

Two common narrow passes that will present themselves are bridges and channels. Both of these offer restricted amounts of water to move through, while bridges also offer disturbances to the wind.

I am going to focus on sailing through a bridge pass because it is easier to visualize and also trickier than sailing through channel. Channels have steady winds and underwater walls (usually) marked by buoys, while bridges have squirrely winds and the walls are marked by large visible pilings. Due to the added complexity of a bridge pass, I will focus on them as all this information is easily transferred to the channel pass.

The difficulties of sailing through a bridge pass are:

Narrow waterway
Not enough room to tack
Shifting winds
Boat traffic

Obviously, the pass is going to be narrow. While some large bridges have a horizontal span of 1000 feet, this may still feel tight. Single bridges are not a serious problem, all you need to do is clear the pilings and you are free and clear of the obstruction. Divided highway bridges pose more difficulty to sail through.

Bridge 3.jpg

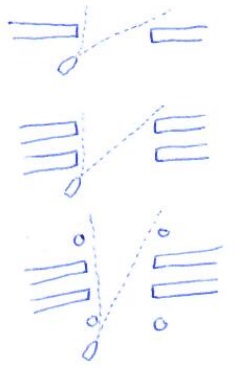
The single bridge offers a wide opening and not much length to the pass, pretty much any tack will be able to get you through this pass.

The double bridge still offers the same width of opening, but the length of the pass has been increased, restricting the angle that you can sail through the pass on.

The double bridge with abutments pose additional challenges. The width is the same as in the other two examples, but the length of the pass has been drastically increased. If you were to sail at the same angle as a single or double bridge, you would end up colliding with the pilings or abutments. This greatly reduces the angle you can safely sail through the pass.

Large bridges tend to have these concrete abutments along the pass to protect the bridge pilings from collision. This means that large bridges with long passes will have added length in the form of collision abutments.

As you can imagine, most of these large bridges with protective abutments are also highly trafficked areas, so the narrow sailing angle is further reduced by cargo ship traffic (which has right of way over a sailboat under sail due to their reduced maneuverability and restriction by draft). 

 Some real life examples are the Francis Scott Key Bridge and the Chesapeake Bay Bridge in Annapolis. Both of these are busy passes that feel rather tight at times.

Scott Key 1100 feet wide

Scott Key 1100 feet wide

Bay Bridge 1500 feet wide

Bay Bridge 1500 feet wide

As you can see, the passes are 1100 and 1500 feet wide, but due to abutment and double roadways, they can feel much tighter and pose a considerable challenge.

Naturally, the easiest way to sail through these bridges is on a run. This provides a straight course right down the middle of the bridge, clearing all obstructions with ease! If the prevailing winds have you on a run as you go through the bridge, that means that you will have to tack through them on your way back.

The next best wind direction is for the wind to be blowing with the bridge, allowing you to sail through it on a beam reach. This will also allow for a straight passage through the bridge in both directions. When sailing through the pass, stay to the windward side of the pass, this way if you have to fall off, you will have plenty of seaway to leeward. If you are cutting it close on the leeward side, any change in the wind can lead you into a collision with the obstructions.

Lastly, the hardest way to navigate a bridge pass is when beating into it. You need to perfectly time your tacks so that your course will set you through the pass, clearing all the obstructions on a single tack. If you are on a port tack, you need to enter on the left leeward corner, cross the entire pass, and exit on the right windward corner.

Bridge 4.jpg

This is an ideal course to take while traversing the pass. If you tack right on your mark, you might drift to leeward a little bit, forcing you to carry out two additional tacks to get through the pass.

Bridge 5.jpg

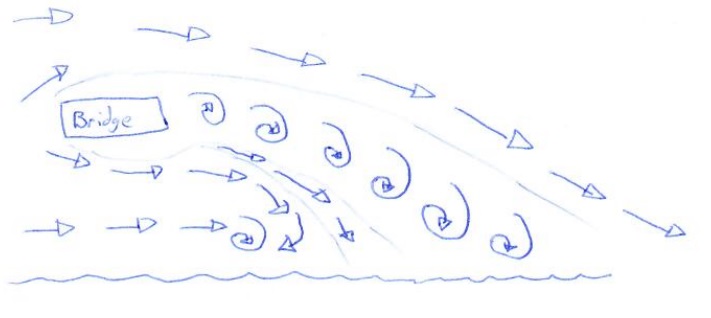
The other difficulty posed by a windward bridge is the wind shadow cast by structure.. Wind shadows can be massive! They extend twice as high as the structure creating the block, and 20x as long as the structure is high. This means that a bridge 200 feet tall can cast a wind shadow 4000 feet away!

As you approach the bridge, you will feel the wind die down, change direction, and then go back to normal. When running through a bridge, accidental jibes can happen out of no where. When beating through a bridge, it is best to overshoot your tack that way you wont be forced to carry out more tacks to compensate for a navigational error caused by the wind shifts.

When you have a double roadway, the winds become even more complicated. The air in between the two bridges can be very confusing and trying to pinch your way through can be very tricky!

Dealing with ship traffic only adds to the complexity. Large commercial vessels have right of way over a sailboat under sail when navigating within the channel. This means that you have to line yourself up to cross through the narrow pass and time it perfectly so you are out of the way of the commercial ship traffic. While you may see them, they probably can't see you! If they do see you, they also assume that  you will get out of their way to avoid a collision. This can lead to aborted attempts to cross the bridge pass which can be a frustrating.

If you begin to get frustrated trying to get through the bridge pass, just remember this:

The winds will change.

If you spend several hours trying to get through a pass because the winds are not favorable, they will probably change to a more favorable direction. This means that you can either struggle for a few hours until the winds change or heave-to, have some lunch, and try again later!

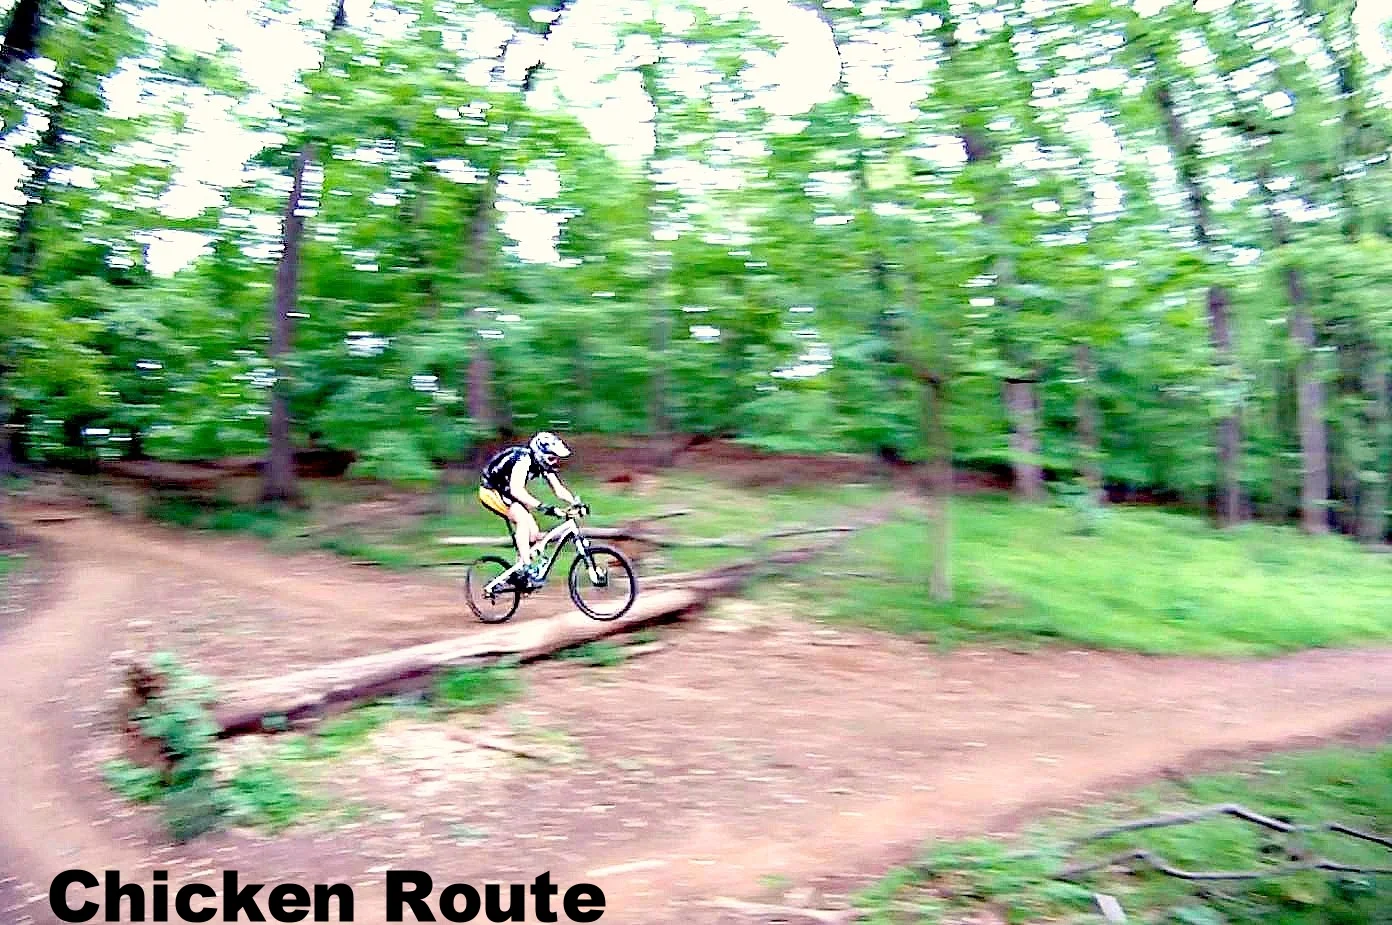
Just remember to always have an exit route. In mountain biking, we call it a "chicken route". As you approach an obstacle, if you get scared you can change direction and go around it instead of over it. We call it a "chicken route" because you chickened out and bailed on the obstacle. In sailing, the "chicken route" is simply a quick exit that will get you out of a tight situation.

If you are tacking through a bridge pass and find yourself on a collision course with a piling, try to pinch. If you stall out, try to tack. If that doesn't work and you find yourself stalled out and drifting towards a piling, jibe around and run right out of there to try again. This is your chicken route!

You must always maintain a clear exit that you can safely and quickly take to get out of a tight situation. As long as you always maintain a chicken route, you will find yourself feeling more secure in your maneuvers, no matter the conditions.

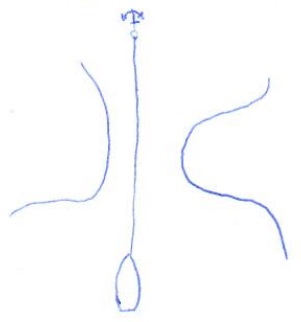
Lastly, if you are trying to cross a narrow pass and there is no boat traffic, you can always kedge across. To do this, you need to row an anchor and warp line to the other side of the pass. Dump the anchor over and let it set, then row back to the boat and begin taking in the line. The anchor will offer a secure point to pull the boat towards, pulling you right through the narrow pass. Obviously, any form of traffic will pose a hazard as the warp line can foul a prop. Once on the other side, raise the anchor and sail on! 

The limitations to this method involve the length of warp line you have on hand. If the pass is longer than your line, you will have to use multiple anchors and multiple warp lines. This method is very time consuming and slow, which accounts for why it is rarely done. This method would shine if you need to get through a very narrow pass with wind or current coming directly at you. It would not be possible to sail through something like this, so the kedge anchor will reign supreme! 

If there is no current or wind, towing the sailboat with the dinghy or sculling the yacht through the pass would also prove to be easier than setting a kedge anchor. At the end of the day, you must ask yourself "How badly do I want to get over there?"

If it's not worth the effort, maybe sail off to an easier place to enter. On the other hand if the creek is that hard to get into, it will be you might be the only one in there!

Cutting the Studs

Assembling the subfloor went rather quickly because all the wood was cut at the same time. There wasn't much measuring to do, so assembly quickly proceeded the cutting. The walls on the other hand have many more studs at various lengths.

In order to keep construction moving along quickly, I decided to cut all the studs for the entire structure before beginning the assembly process. The assembled walls will not fit under my parents car port, so once the first wall goes up, the trailer will be exposed to the elements. This means that I need to work fast to get it water-resistant as soon as the first wall goes up.

By cutting all the studs to length and organizing them in the trailer by wall, assembly should progress very quickly. The downside to this concept is that I will spend a few days cutting lumber and not seeing any progress happen.

When friends ask to see a picture of the construction, it looks like a trailer with a pile of lumber on it. Not really what they were expecting when they ask to see a picture of the tiny house under construction.

An important trick that I have done which avoids any confusion with the cut lumber and off-cuts of lumber is I write the measured length of the stud on the end grain. Before I cut a piece of wood, I make sure there is no writing on it. This will also make assembly go faster. I will not need to measure anything as the plans tell me what length of board goes where, and the number on the end grain is the length identifying that board.

This actually saved me from re-cutting a long piece of wood into something smaller. I grabbed a rather long piece of wood thinking it was a long off-cut, and before I cut it smaller, I noticed it said 69.5 on the end, signifying that I don't want to cut that board! When assembly time had come, I would have been very frustrated trying to find this missing cut piece; thus slowing down the assembly process.

Companionway Slats

Sailboat companionways are an interesting doorway to land lubbers. They sometimes create some confusion, but I can assure you that every part of them serves a purpose.

The sliding hood is very important. Without it, the companionway would need to be much taller and it would be hard to fit that on a smaller sailboat. It also serves to keep water and spray out of the companionway and cabin. If a storm quickly approaches, simply sliding the hood will greatly reduce the amount of water that will ingress the cabin. It also allows good ventilation of the cabin by removing the slats and closing the hood.

The slats are the next point of contention. Doors would be much easier, and do not need to be stowed when the companionway is open, why must we have these boards? The boards serve many purposes:

They are stronger than doors
They protect against water entry to the cabin
They can be removed in stages
They work

Doors are convenient, but if a wave hits them, they will burst open and allow the force of the wave into the cabin. Boards will help resist this force! 

Doors are either open or closed, they can't be anything in between. Slats offer many options. Have all the slats in and the companionway is shut. Take the top one out and you can get air flow through the cabin while keeping rain out. Take out all the slats and it's an open door. Leave the bottom slat in and you have insurance against wave ingress into the cabin. If a wave boards your yacht and the companionway is open, all of that water is going into the cabin. Leave the bottom slat in and you have greatly reduced the amount of flooding below. 

The bevels on slats help keep out water. When a wave smashes into them, they will squeeze down on each other and close the gaps, yet they can be removed with one hand. You can't do that with a door!

In time, you will find that you don't have to remove all the slats to get through the companionway. We usually only take out the top one and step over the lot of them. This makes for quick and easy entry and exists while still having the protection offered by the slats.

It may seem cumbersome at first, but with practice, companionway slats will become second nature and you'll be able to do it in the dark! 

If you are in the market for a new yacht or are building one yourself, try to find one with some taper to the companionway opening. Parallel sides will cause the boards to get stuck and bind as you try to put them in or take them out. Some degree of taper will reduce this problem and make the process of inserting and removing the slats very easy. If you are already the proud owner of a yacht and you have parallel sides on your companionway, try keeping the sides of the slats lubricated with soap. This will help them to slide more easily without binding as often. 

As always, practice makes perfect! Do resist the temptation to switch from slats to doors. There is a reason they have been the standard form of closure on sailboats for many years, it's because they work!

Checking Off The List

This past winter, I was feeling kind of down due to the never ending project of making the rope fenders. I felt like everyday was wasted on making fenders and keeping the boat warm. 

I outlined a list of projects that I want to tackle instead of the rope fenders, and this year has been off to a great start! 

The list included:

Wedging the mast partners [Completed]
Make a sail bag for the jib (Josh)
New check stays with baggy wrinkles to avoid chafing the main again
Install solar panels on the transom [In Progress]
New house battery bank (our batteries are close to 10 years old and very dead) [Completed]
Build a wooden tender to Wisdom that fits on the deck
Install a Monitor windvane on the transom

As soon as the fenders were finished, I started knocking out the projects on the list rather quickly. As always on a boat, there will be an endless supply of new projects to do as well. 

Repair chafe on main halyard
Build a tiny house

The tiny house will be a studio for Maddie built on a trailer platform. This project will happen around the same time I build the wooden dinghy, since they will be using the same tools and materials. 

I was feeling some serious winter blues a few months ago, but now that the weather has changed (and I finally finished the rope fenders) I feel great with the projects getting completed!