Solar vs. Wind vs. Hydro

In the realm of alternative energy production, there are three main players: Solar, Wind, and Hydro.

Each of these systems has its advantages and disadvantages, making none of them a magic bullet on their own. When used in combination, they will overlap and cover for each others downfalls.

To be happy with any of these, you must understand what they can do and what they can't do. If you want it to do something that it can not, you will be very displeased. Learning how to work within the limitations will lead to a very pleasant cruising life.

Solar works by converting the suns radiant energy into electricity. It works completely silently without any moving parts! While this sounds incredible, it does have its limitations. Solar panels need direct sunlight to work their best. If a shadow is cast over a small portion of the panel, its energy production will drop drastically. They also do absolutely nothing during the night hours, as well as on cloudy days.

While cloudy days and darkness will limit your ability to keep your batteries topped off, solar generators can help alleviate this issue by helping to bridge the gap until the sun returns and you can resume producing power. A comprehensive evaluation of different solar generators, as well as a look into "what is a solar generator" can be found by following this link:  http://www.allthingsboat.com/best-solar-generator-reviews/

Source: http://d19vj6yy87fjj8.cloudfront.net/wp-content/uploads/2009/08/wind_generator_cruising_boat.jpg

Source: http://d19vj6yy87fjj8.cloudfront.net/wp-content/uploads/2009/08/wind_generator_cruising_boat.jpg

Wind works by converting fast moving wind into electricity. These devices have many moving parts and are anything but silent. The quiet ones sound like a wispy whistle howling through the air while the loud ones sound like a helicopter. They do wonders for night cruisers, as they can produce loads of electricity on an overnight passage to keep the electronic autopilot energized. The problems with wind generators is they require fast moving apparent wind to operate; this means you will not generate any electricity in a protected anchorage or while sailing downwind. If you only have a wind generator and stay an extended period of time in a quiet creek, you can expect your batteries to run down after a few days. While sailing downwind on long crossings, you may find that the light apparent wind will not be enough to produce the necessary amounts of electricity your vessel demands.

Source: http://www.wattandsea.com/sites/default/files/Hydro-cruising-5-617x292.jpg

Source: http://www.wattandsea.com/sites/default/files/Hydro-cruising-5-617x292.jpg

Hydro is a relatively new player on the scene, it works via a similar concept to the wind generator, but the blades run through water instead of air. These units will produce massive amounts of power under the right circumstances. Hydrogenerators require a lot of boat speed to produce their power, so sailing downwind in the trades will produce plenty of power, even with the light apparent breeze; while ghosting along on a quiet day will not produce much power.

As you can see, none of them work perfectly all the time. If you have all three, you will always be able to rely on at least one of them to produce enough power to meet your needs.

The electric motor we installed from Electric Yachts also works as a hydrogenerator. As we sail quickly, the water rushing past the propeller causes the prop to spin, which in turn spins the motor. In these situations, the electric motor functions as a massive generator, cranking out the amps! 

When we did our summer trip in 2015, we only had a Hydrogenerator (the electric motor) and it did supply us with our needs for electricity when sailing quickly. The problem was we were not always moving fast enough to generate enough to meet our needs. A few consecutive days of light airs would cause our batteries to run down. We are now in the process of installing solar panels to help fill in some of the gaps. 

If you ever feel like charging your batteries through alternative methods, consider the pros and cons of each system. If you can accept each system for how it works and live happily with the energy produced within its constraints, you will be able to maintain your battery bank while supplying your electrical needs without the use of fossil fuels!

Window Shopping

20160403_184336.jpg

The subfloor for the tiny house is complete and attached to the trailer base. The next phase will be to build the frames for the walls. In order to do this, we need to know which windows and where they will be placed. 

Every time I ask Maddie what she wants, I hear something completely different! This has been very frustrating to be since it mean's I can't continue building. The general premise of what she wants is the door located between the tires and the tongue, and many windows!

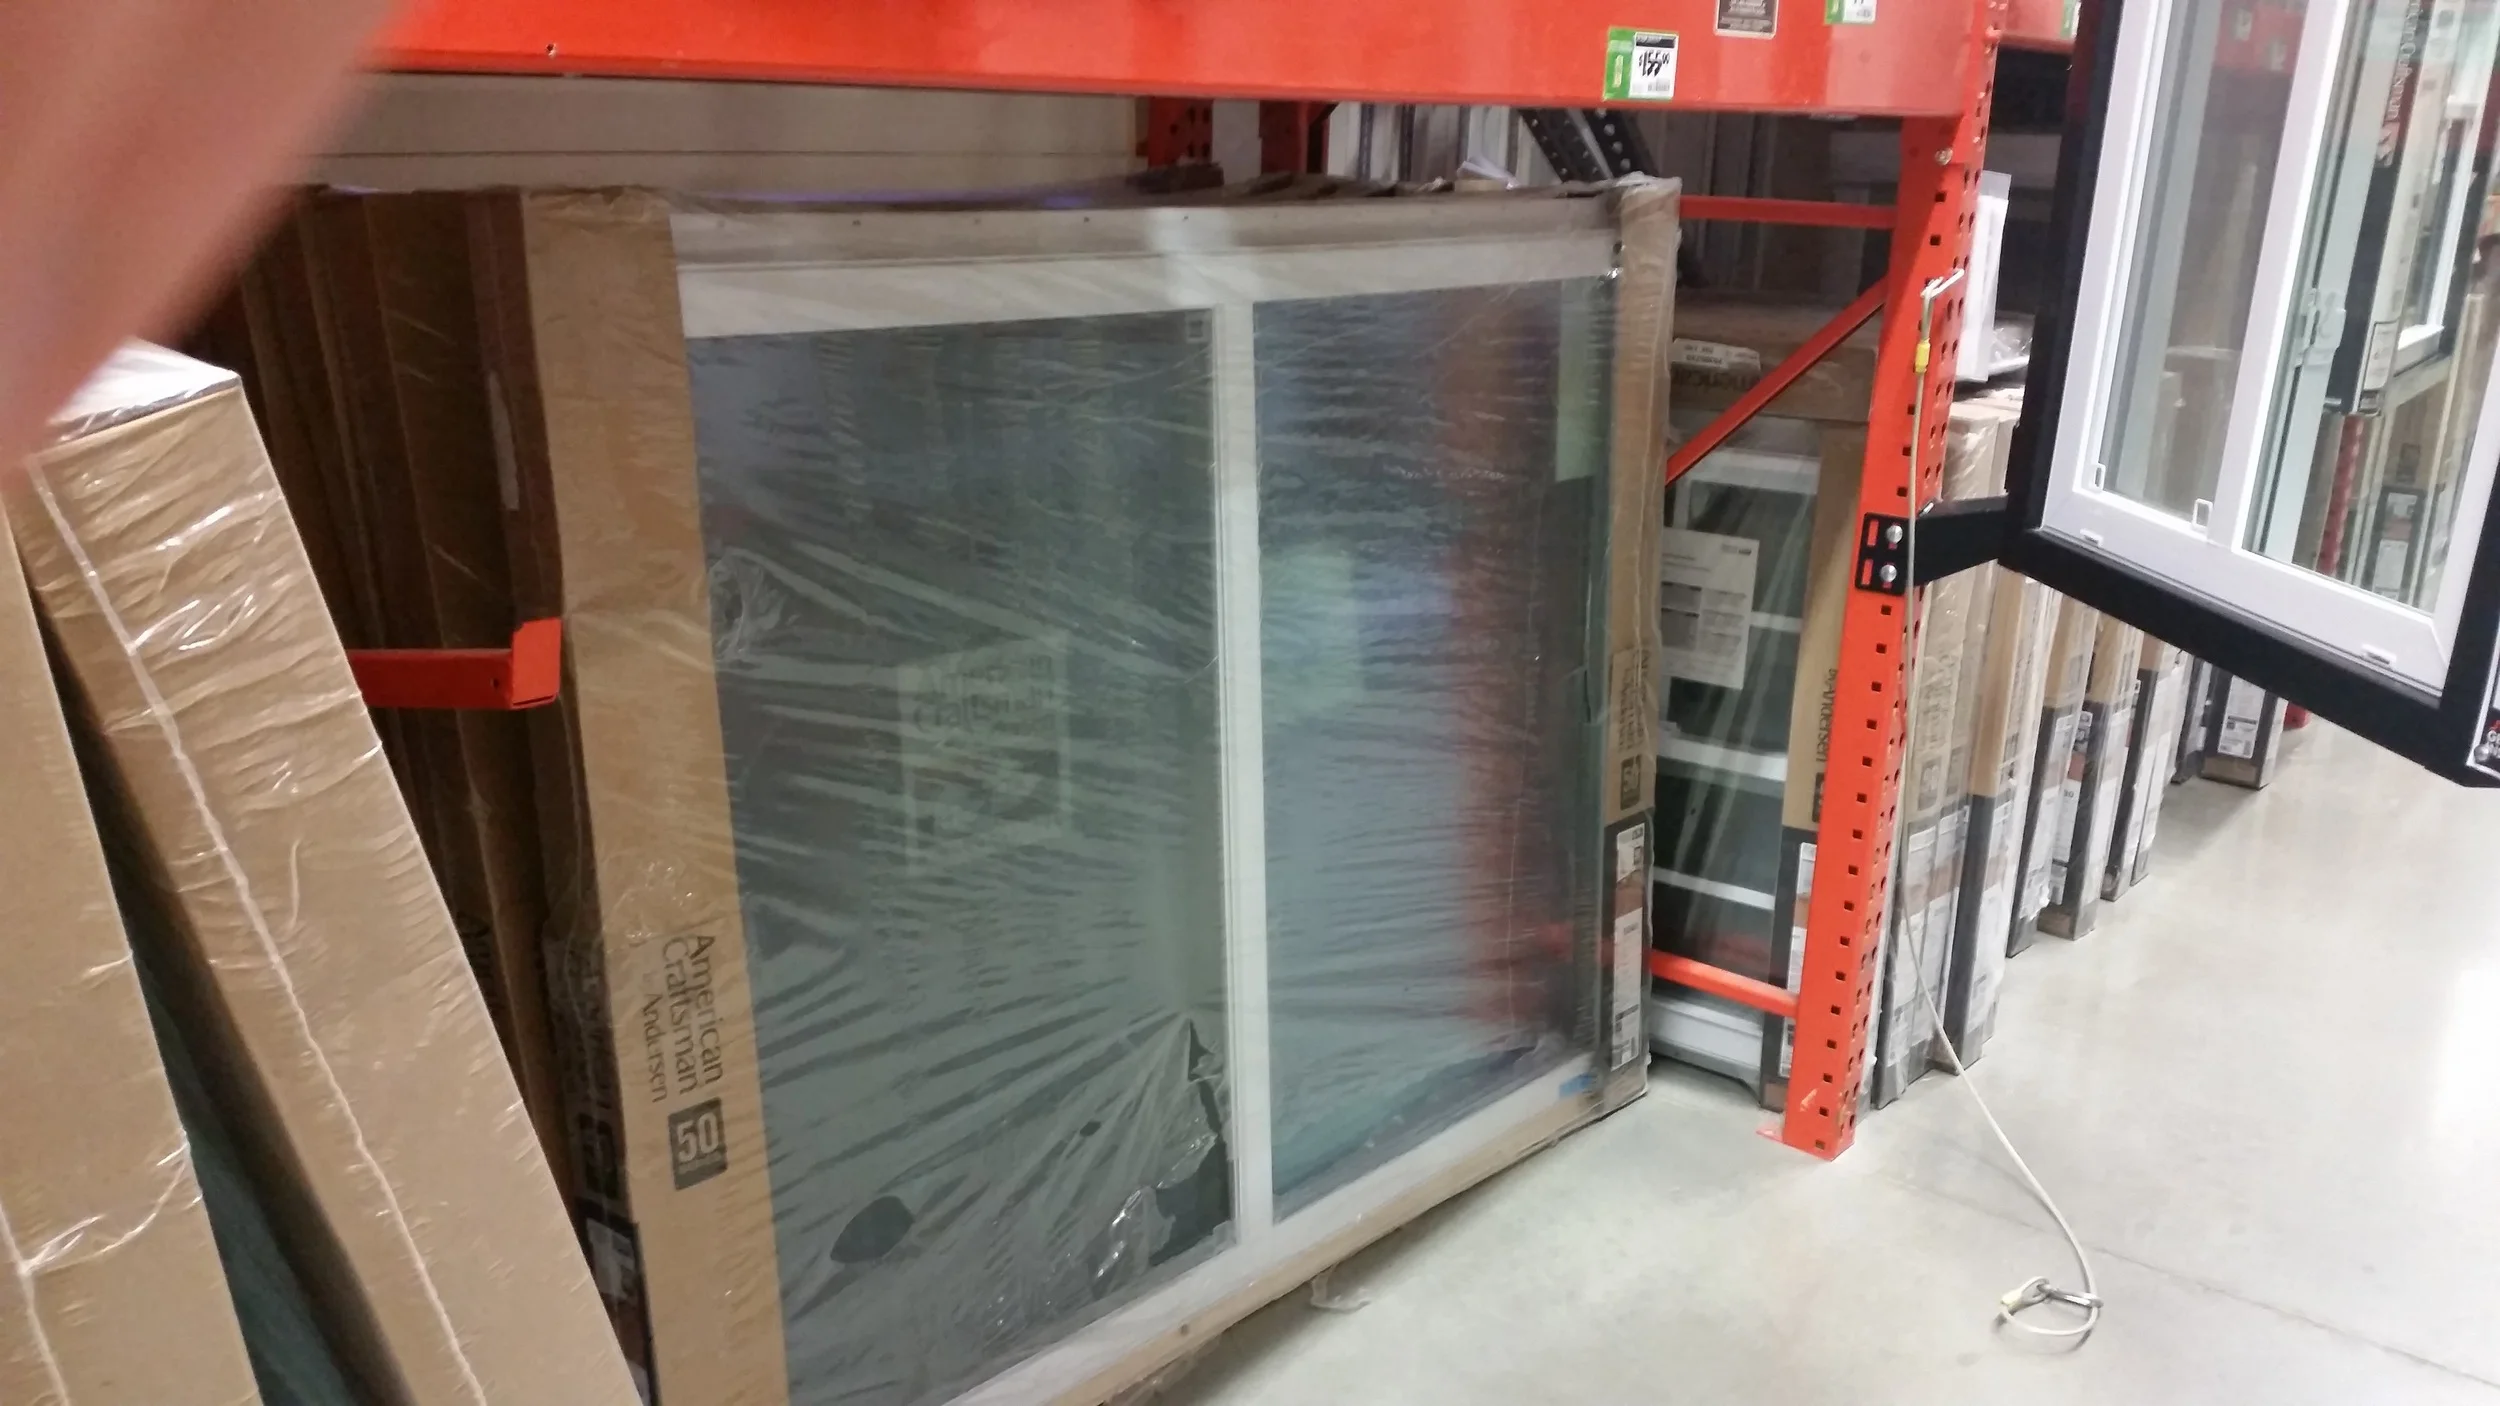
How big and where these windows will go is an ever changing story, so I decided it would be best to head to Home Depot and have Maddie pick out the windows she likes and evaluate the prices.

We were pleasantly surprised by the prices of the large sliding windows. Small single hung windows were over $200 per window and wouldn't let in that much light. I expected the price of the larger windows to be proportionally higher as well. We were very excited to see that huge sliding windows were only around $155 and would let in tons of light!

Once again, we began deciding on how many and where the windows would be placed. The final (as of this moment) decision is two massive windows on the sides, a smaller massive window on the back, and three small windows up in the lofted bed. No windows in the bathroom or kitchen.

Maddie has some time to change her mind yet. I told her the decision is not final until I cut the wood. Once I cut though, no more changes are allowed! 


Wedging the Mast Deck Partner

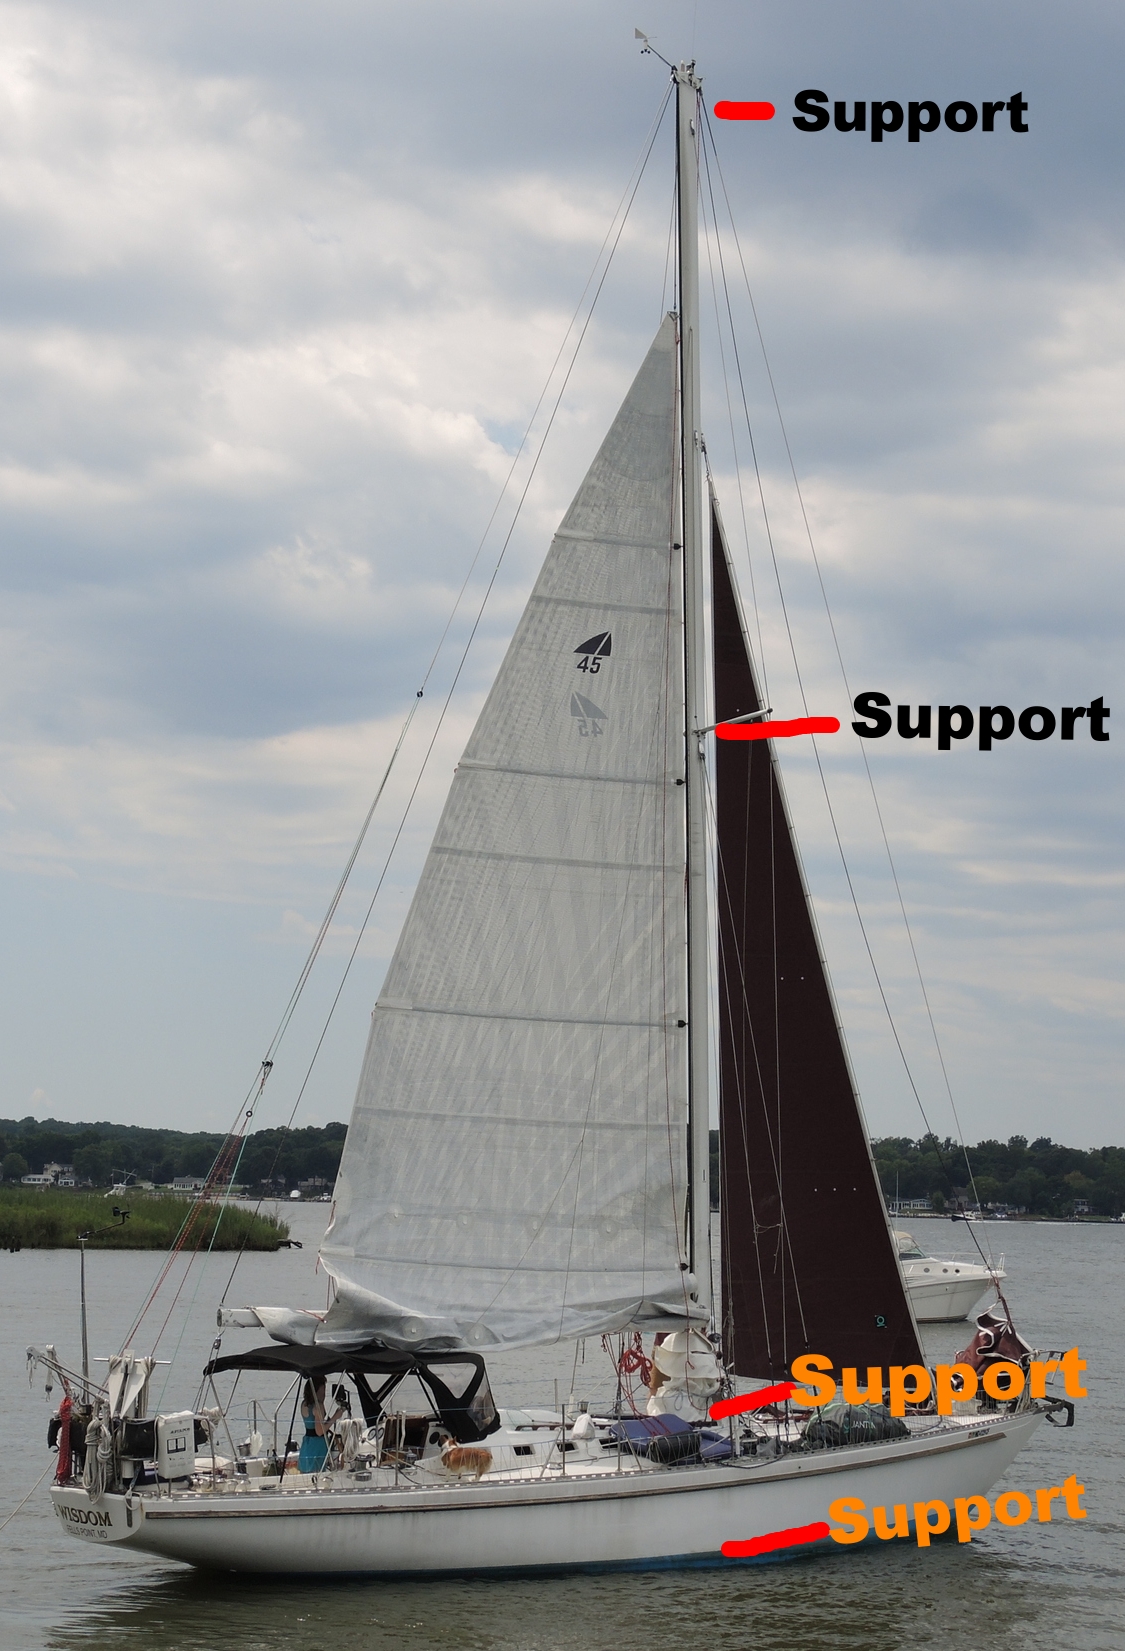
The mast may appear stiff and rigid, but it is best to think of it as a wet noodle! In order to get a wet noodle to stand up straight, you need to support it at different points along its length. 

Even though the stays pull down, it is best to think of them as "support points".

The top of the mast is "supported" by the cap shrouds.
The middle of the mast is "supported" by the spreaders and the lowers.
The bottom of the mast is "supported" by the mast step.

The more support points a mast has, the less strength the mast needs on its own; which translates into the ability to use a much lighter and thinner mast. The longer the span between support points, the stronger the mast needs to be. This is the reasoning behind double spreader rigs (2 support points in the middle) over single spreader rigs (1 support point in the middle). As you go adding more and more spreaders, you go adding more and more support (and complexity)! This allows the rig to be taller without adding much more weight.

One advantage of a keel stepped mast over a deck stepped mast is the keel stepped mast gets one more support point: the deck. As the mast passes through the hole in the deck, it is firmly connected to the deck structure; providing an additional support point and making the whole rig considerably stronger.

A keel stepped single spreader rig is as supported as a deck stepped double spreader rig, but without all the added complexity of intermediate stays. Less complexity directly relates to less to go wrong when underway.

Traditionally, the mast firmly connects to the deck is via wooden mast wedges. Nowadays, all sorts of contraptions exist to take the place of wood. I have seen starboard wedges, goo that solidifies (spartite), and countless of other inventions. While advancements in technology are great, it's important to understand why wood was used in the first place.

Wood wedges will hold in place and not slip out due to the high amounts of friction present in the space available. The cellular structure of the wood will crush if the load is too great, protecting the mast. The wood will greatly increase the pressure pushing on the mast to ensure that it is very snug!

Starboard wedges are made of polyethylene, the same stuff used to make dyneema. It is very strong and will not rot. This sounds like an excellent quality to have in a mast wedge! They are also rather hard and if they do dent or bend from an extreme load (the mast crushing down on them) they will not bounce back once the pressure is released. Wood will crush down like plastic wedges will, but it will also swell back up with the addition of moisture.

Spartite will offer a complete seal around the mast, preventing water from intruding (something wood can't offer) but it provides no pressure to the mast. It is also a nightmare to pull the mast! The spartite will not let go and can turn a complicated situation into a desperate situation. Mind you that the yacht owner is paying the crane by the hour to unstep the mast. If it takes a lot of more time due to the spartite, the owner will have to pay the crane for that additional time.

While wood doesn't provide leak protection, this can be remedied with a mast boot. 

When wedging, regardless of the wedge material, it is important to take various precautions. The sides of the mast are actually much weaker than the rounded sections. If you place a narrow wedge in the middle of the side of the mast side and drive it home into the deck, you can very easily buckle the side of the mast! Avoid this issue by using broad wedges on the side with much less tension as you drive them in with a mallet.

On the curved sections (front and back) of the mast, narrow wedges are preferred as they can be tightly packed to provide maximum support the mast/deck partner junction. 

When you are done, it should look like a nice ring of wooden wedges running around the mast as it goes through the deck.

When you cut your wedges, it is best to make the bottom too thin and slowly taper up to too wide. This way the wedge will slide into place and gradually apply pressure to a large section of the mast. If the taper is too great, the wedge will not be able to go in far enough and the support will act more as a pressure point instead of a pressure area.

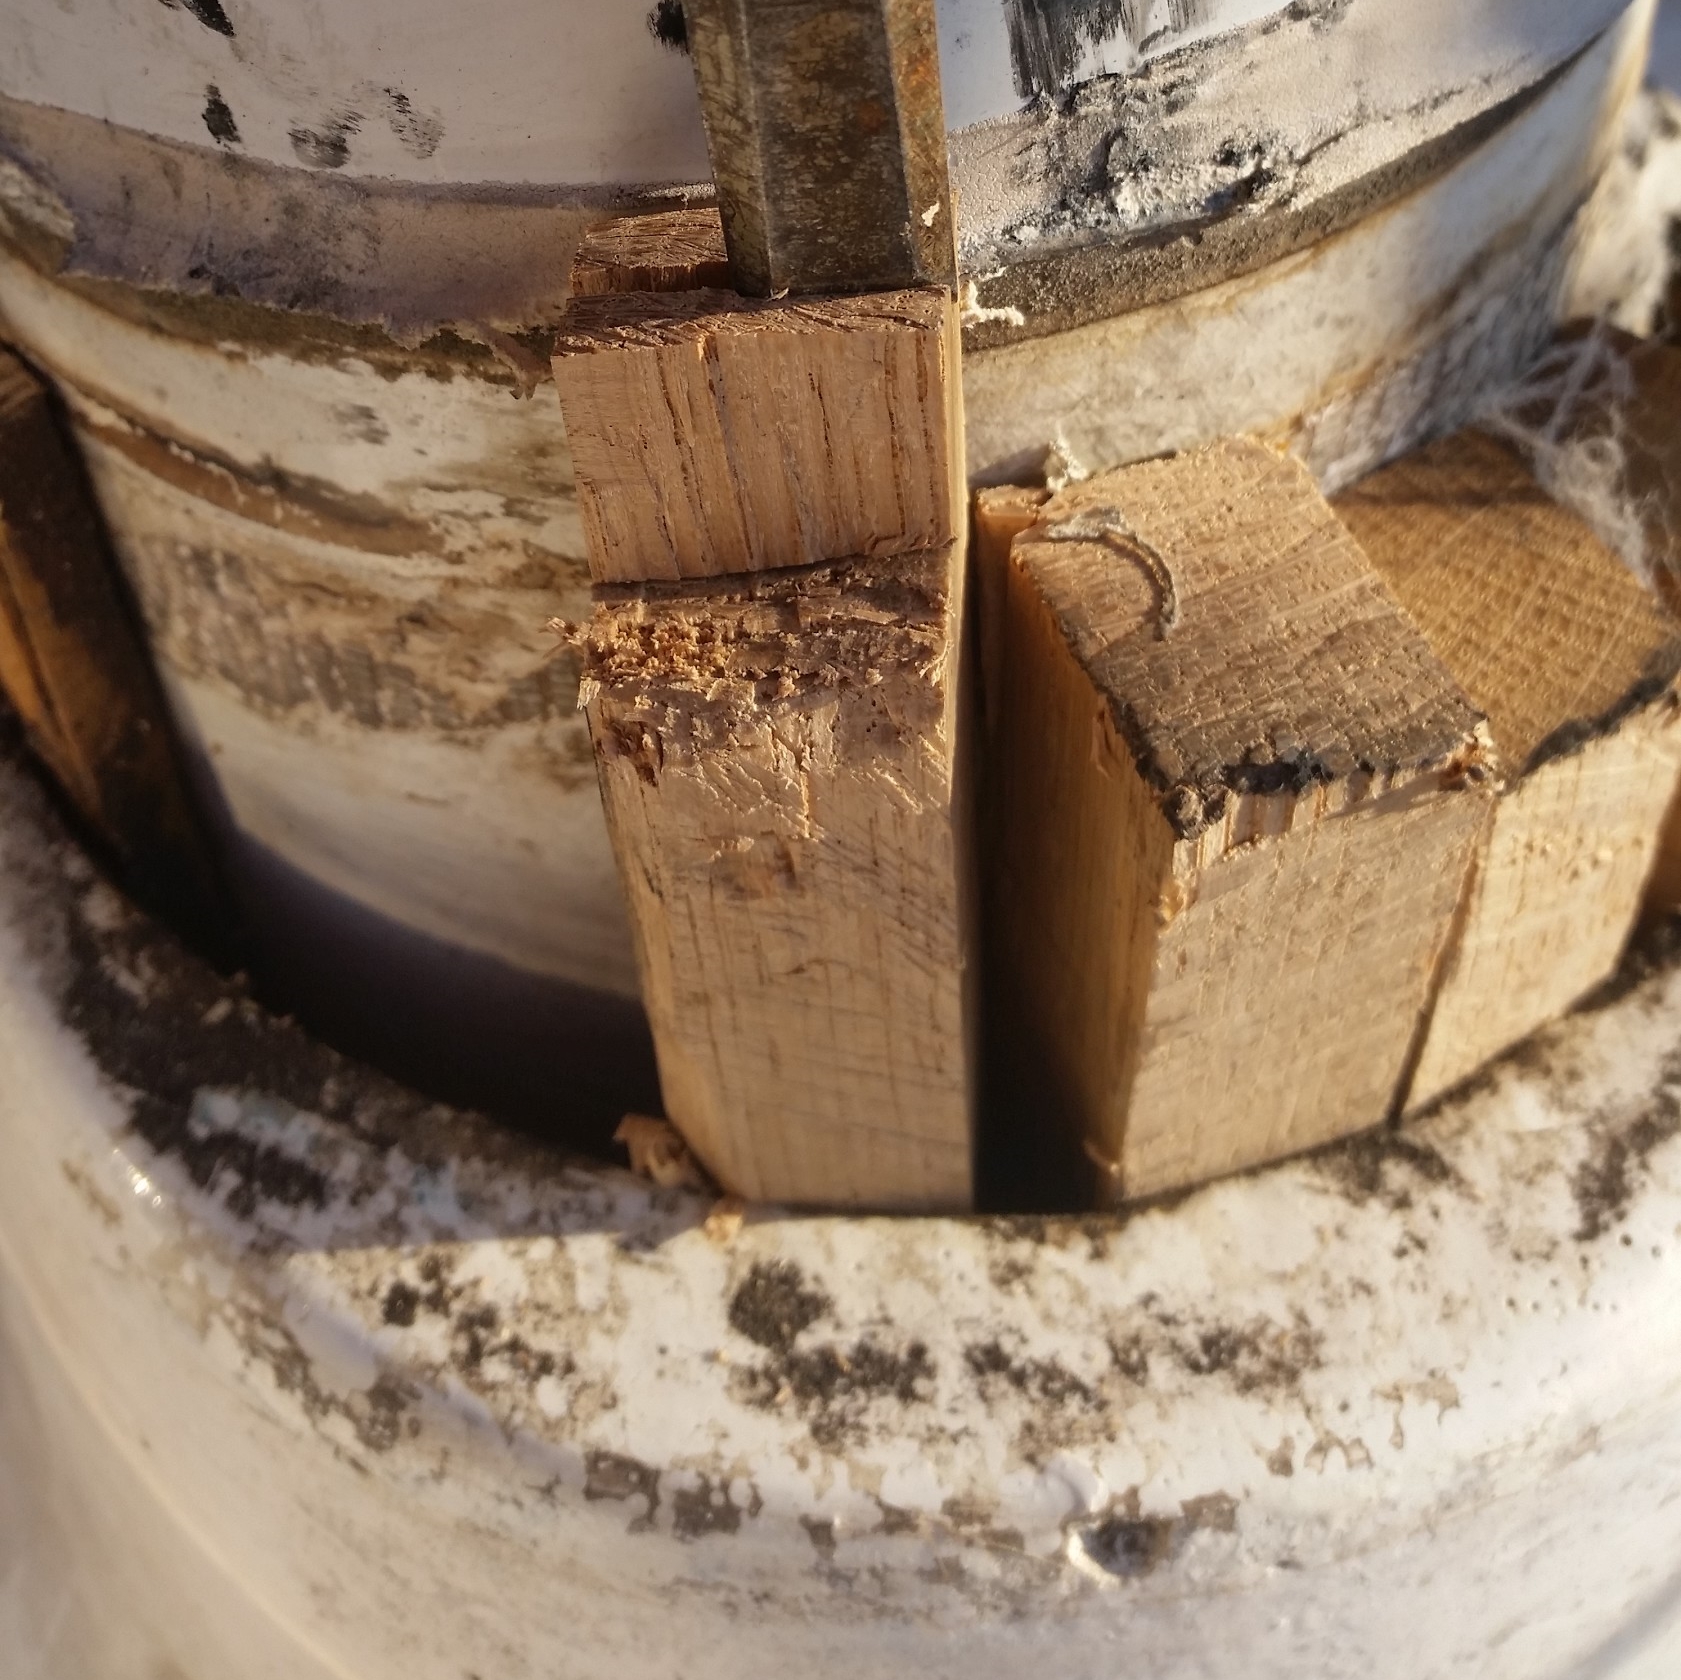
If a wedge gets stuck before you can drive it home, try to remove it and plane the side a bit to allow it to pass all the way. If you can't get it out, try chiseling some off a corner to loosen it. If that doesn't work, you can go inside and tap the wedge out from the bottom. If you got the wedge close to home but it got stuck a bit early and you can't get it out, you can cut the top off to make it line up with the other wedges so it will fit under the boot. Just be sure the neighboring wedges are perfect to avoid too much pressure in one area.

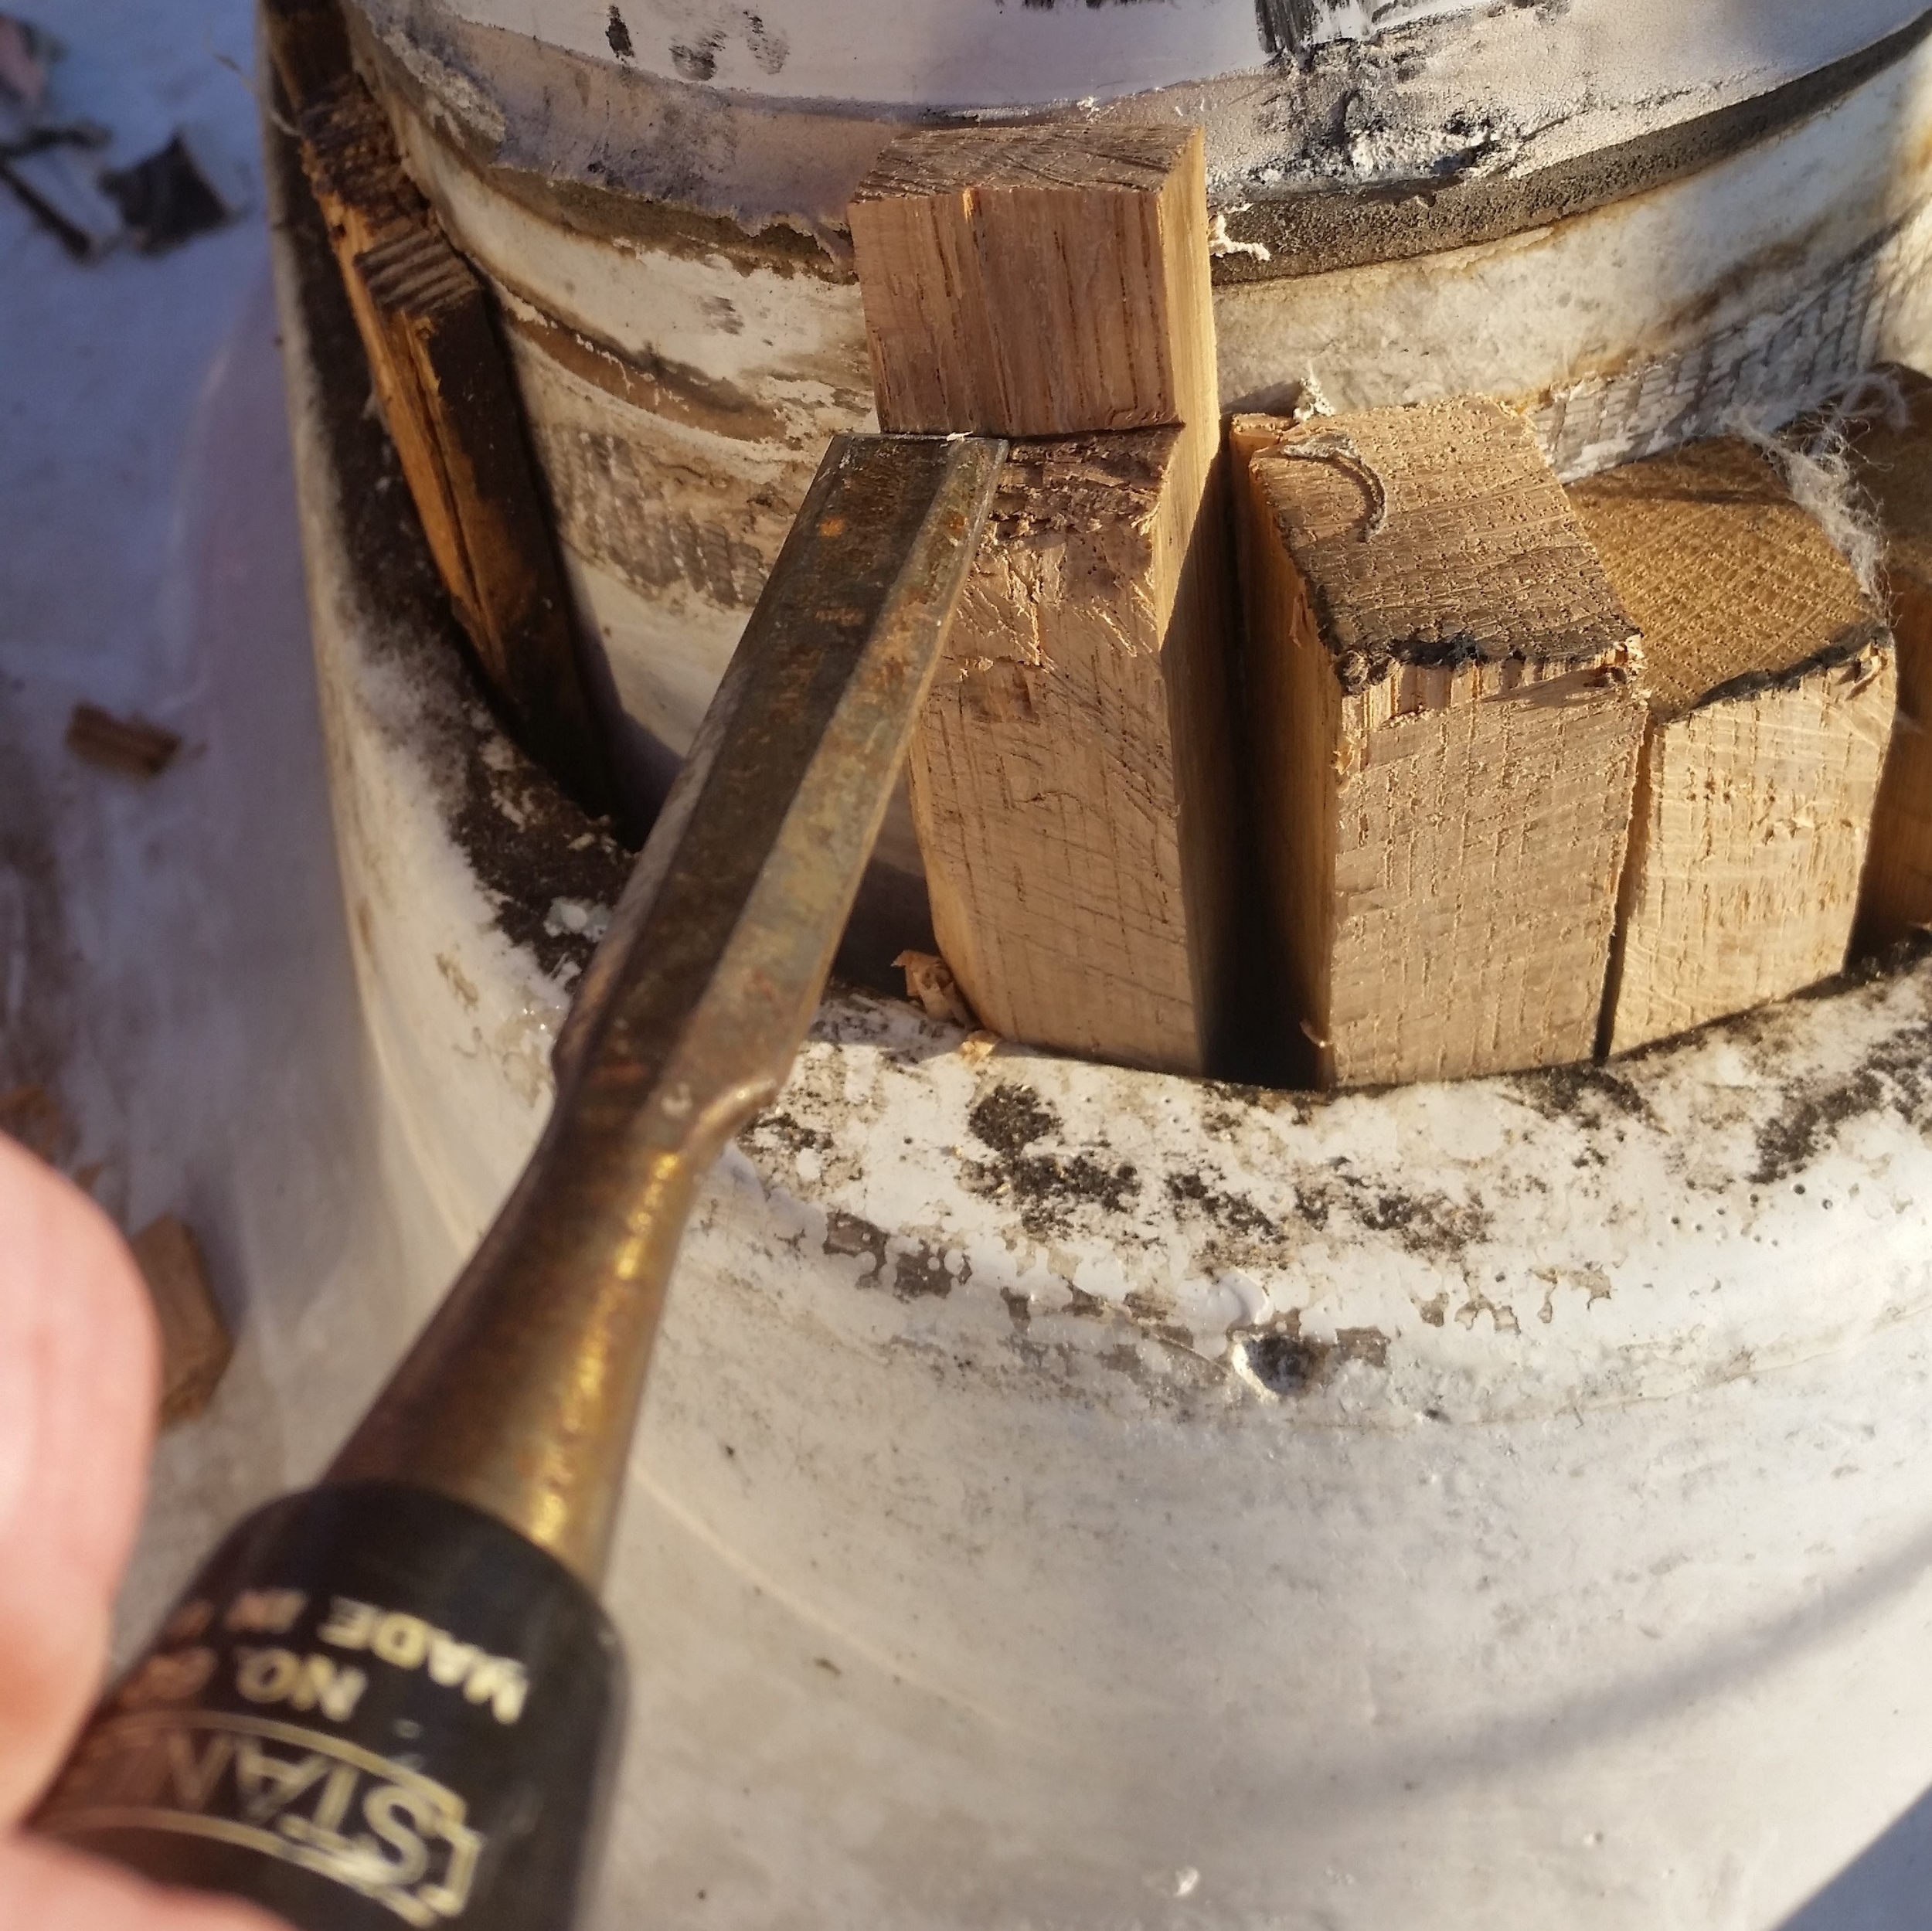
I would caution away from using a saw to cut the top off a wedge in place, instead use a mallet and chisel. I score the bottom side of the wood, then chop down from the top, splitting the wood along its grain. The split will stop as soon as it reaches the score line. I repeat this process over and over until the top is trimmed off.

The last point to consider is what wood to use for wedges? As you may know, not all woods are created equal. The mast/deck partner is going to live under a boot, exposed to condensation a moisture from leaks, along with poor airflow. This adds up to a dark, moist area with stagnate air which is a breeding ground for rot! This is why it is very important to use a rot resistant wood, such as white oak.

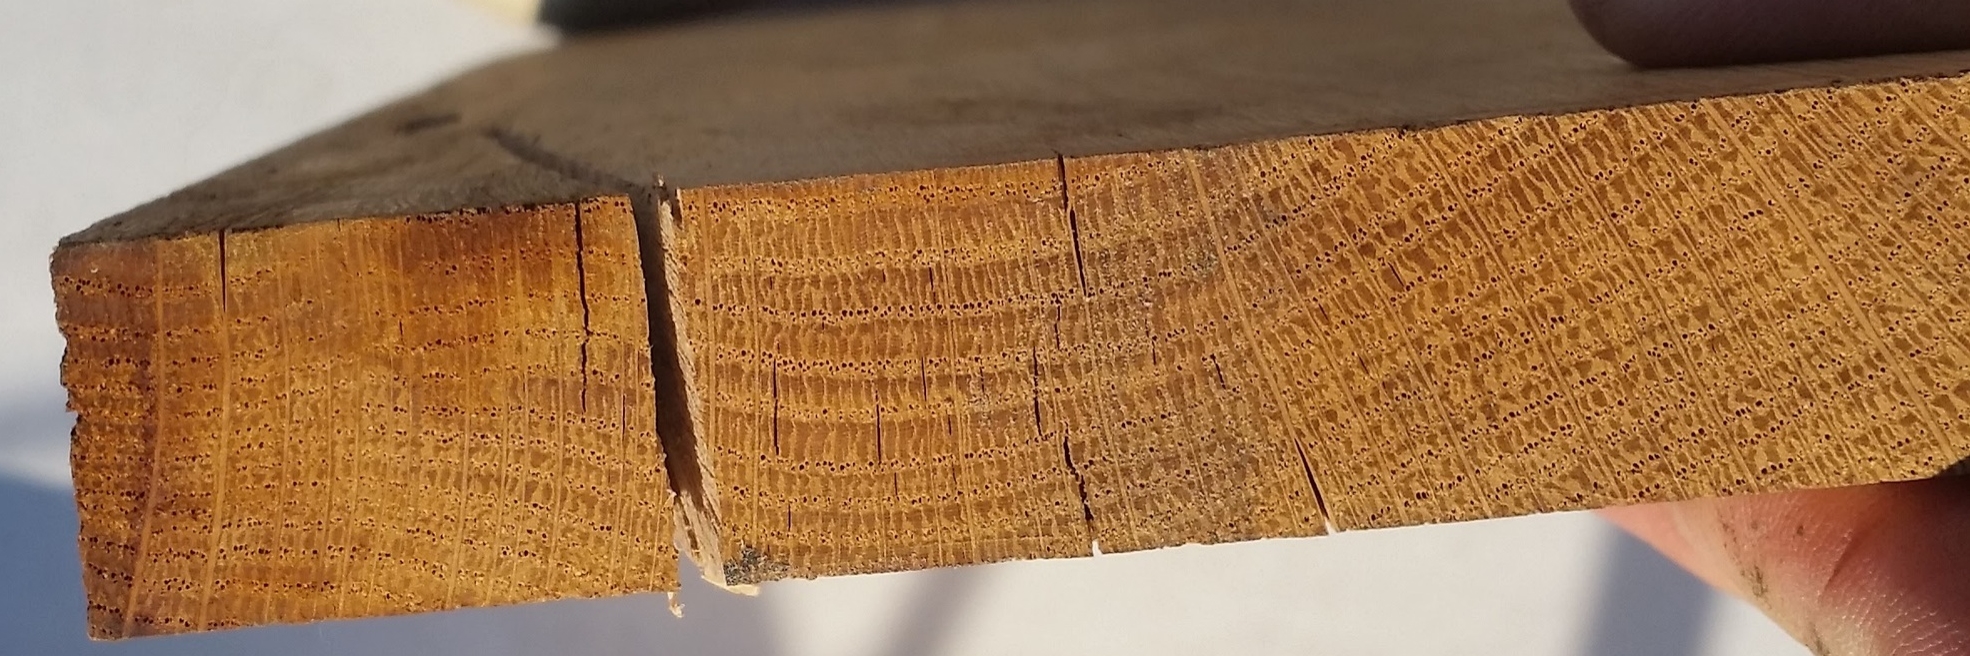
When you buy your piece of lumber, make sure that it is white oak and not red oak. Red oak will rot away in a few weeks in this environment, where white oak will last a long time! Also try to get a rift saw plank, that way your wedges will have their rings oriented so that they run parallel to the mast. This way the pressure from the mast will simply compress the wood instead of splitting the wedges. 

I replaced my wedges because I noticed that the mast was shimming around at the deck. When we would ride up a wave, it would scoot back. When we would come down the wave, it would scoot forward. This instantly became a top priority for my winter projects list. 

The old wedges were long leaf pine, which is also rot resistant (I even reused some of the wedges), but you can see there simply were not enough of them in there to support the mast. Two of the wedges had fallen through the deck partner and were sitting down by the step. Two other wedges were completely loose, held in place by tape. You shouldn't use tape to hold them in, you should use pressure.

After wedging the whole mast, you can see how it is important to look under the boot to see what is really going on in there rather than assuming that it is all in order. Next time you inspect your deck partner, you will know what to look for to evaluate if it needs a little sprucing up or not.

An Argument Against Gloves and Headset Communicators

Every once in a while, you will see a couple pull into an anchorage wearing gloves and head set walkie talkies. This is our cue to get out the boat hooks and prepare to fend off!

Sailing gloves are marketed towards people who don't sail often and need protection from rope burn. They say that sailing gloves will protect your hands if you don't have the callouses developed from frequent line handling. In the winter, my callouses go away, and once it warms up, they come right back. If you handle the lines properly, you will not have pain on your fresh hands until the callouses return.

You never want to let a line slide through your hand. Callouses will not protect you from the burn that will develop as your skin is chafed away! Instead, let the lines pass through your hands in a controlled manner and no gloves or pain are needed. I hold the line and pay it out using two hands, never letting the line slide.

The second thing that I consider the red flag are the headset walkie talkies. These are wonderful devices that allow you to communicate effectively even if wind and dodgers are in the way! This does not replace going through the plan with each other before the maneuver is executed. Maddie and I always go over the whole plan before coming into an anchorage or jibing to make sure we are both on the same page even though we do this time and time again! 

These people with the headset walkie talkies will pull into an anchorage and talk back and forth while they are in action. Neither of them are on the same page, and the ease of communication simply ensures that they both hear those words that would typically be whispered into thin air. This leads to arguments that everyone can hear in the whole anchorage.

We have found that these people are not willing to accept help and would rather do it themselves. This is why we simply get the boat hooks out to fend off if they come too close. 

Since they don't sail often (hence the gloves) they don't know what parts of their gear are broken, and all these surprises escalate the situations that are clearly discussed between them. 

If you feel the need to wear sailing gloves and walkie talkies when you go out sailing, consider that people have been sailing for thousands of years without them. Instead of more gadgets to fail and need repairs, consider learning how to properly handle lines and to discuss everything before you execute a maneuver. This way simple hand signals will suffice and no one else in the anchorage will be expecting an entertaining show when you arrive. 

Reef Clew Line Setup

When setting up your reef lines, you have many choices. 

Single Line Reefing
Double Line Reefing
Slab Reefing

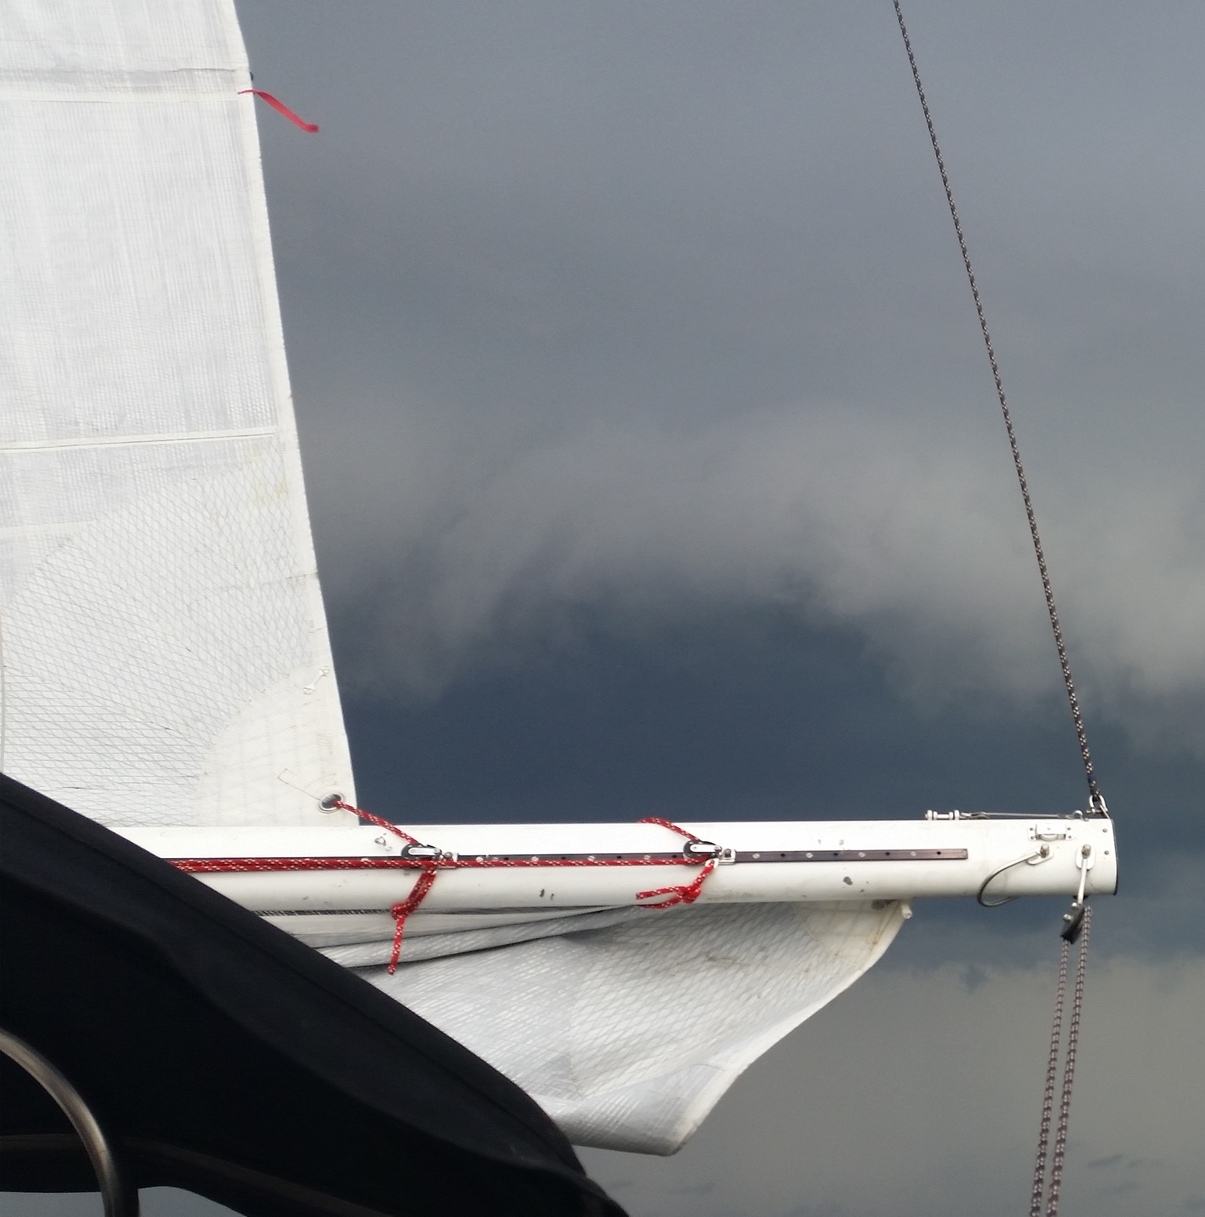
I want to discuss the clew lines which are run in a similar fashion through the sails in all of these different systems. The standard way of running the clew lines involves running the clew line from a fixed point on the boom, up through the sail's clew cringle, and down the other side of the sail. This will pull the sail down to the boom when reefing, but it will also bunch up under the cringle and get pulled into the cringle by the reef line. This can pull a chunk of sail through the cringle with the line and make a nice hole in the leech. To fix this problem, the clew line can be run a different way and avoid the whole problem all together.

Standard reef line setup

Standard reef line setup

Alternate reef line setup

Alternate reef line setup

The alternate way to run the clew reef line is to pass it up between the boom and sail (putting the line on the same side as the cheek block), through the cringle, over the leech and back down the same side to the cheek block. This will cause the sail to be pushed to the side of the boom as the reef is being drawn in. Since the sail is out of the way, it will not bunch up and get pulled through the cringle. While this sounds wonderful, it will cause more wear on the leech of the sail, leading to chafe issues which are easily remedied with chafe patches.

The sail will be dumped to the side of the boom, avoiding any risk of it getting caught in the cringle and torn. It is helpful to have lazy jacks to collect the sail as it gets tossed to the side.