Unpredictable March

The weather throughout the year for the North East can be simplified as this:

January: Cold
February: Icy
March: Unpredictable
April: Beginning to warm up
May: Warming up
June: Warm
July: Hot
August: Hot and Humid
September: Cooling down
October: Wonderful
November: Cooler
December: Cold

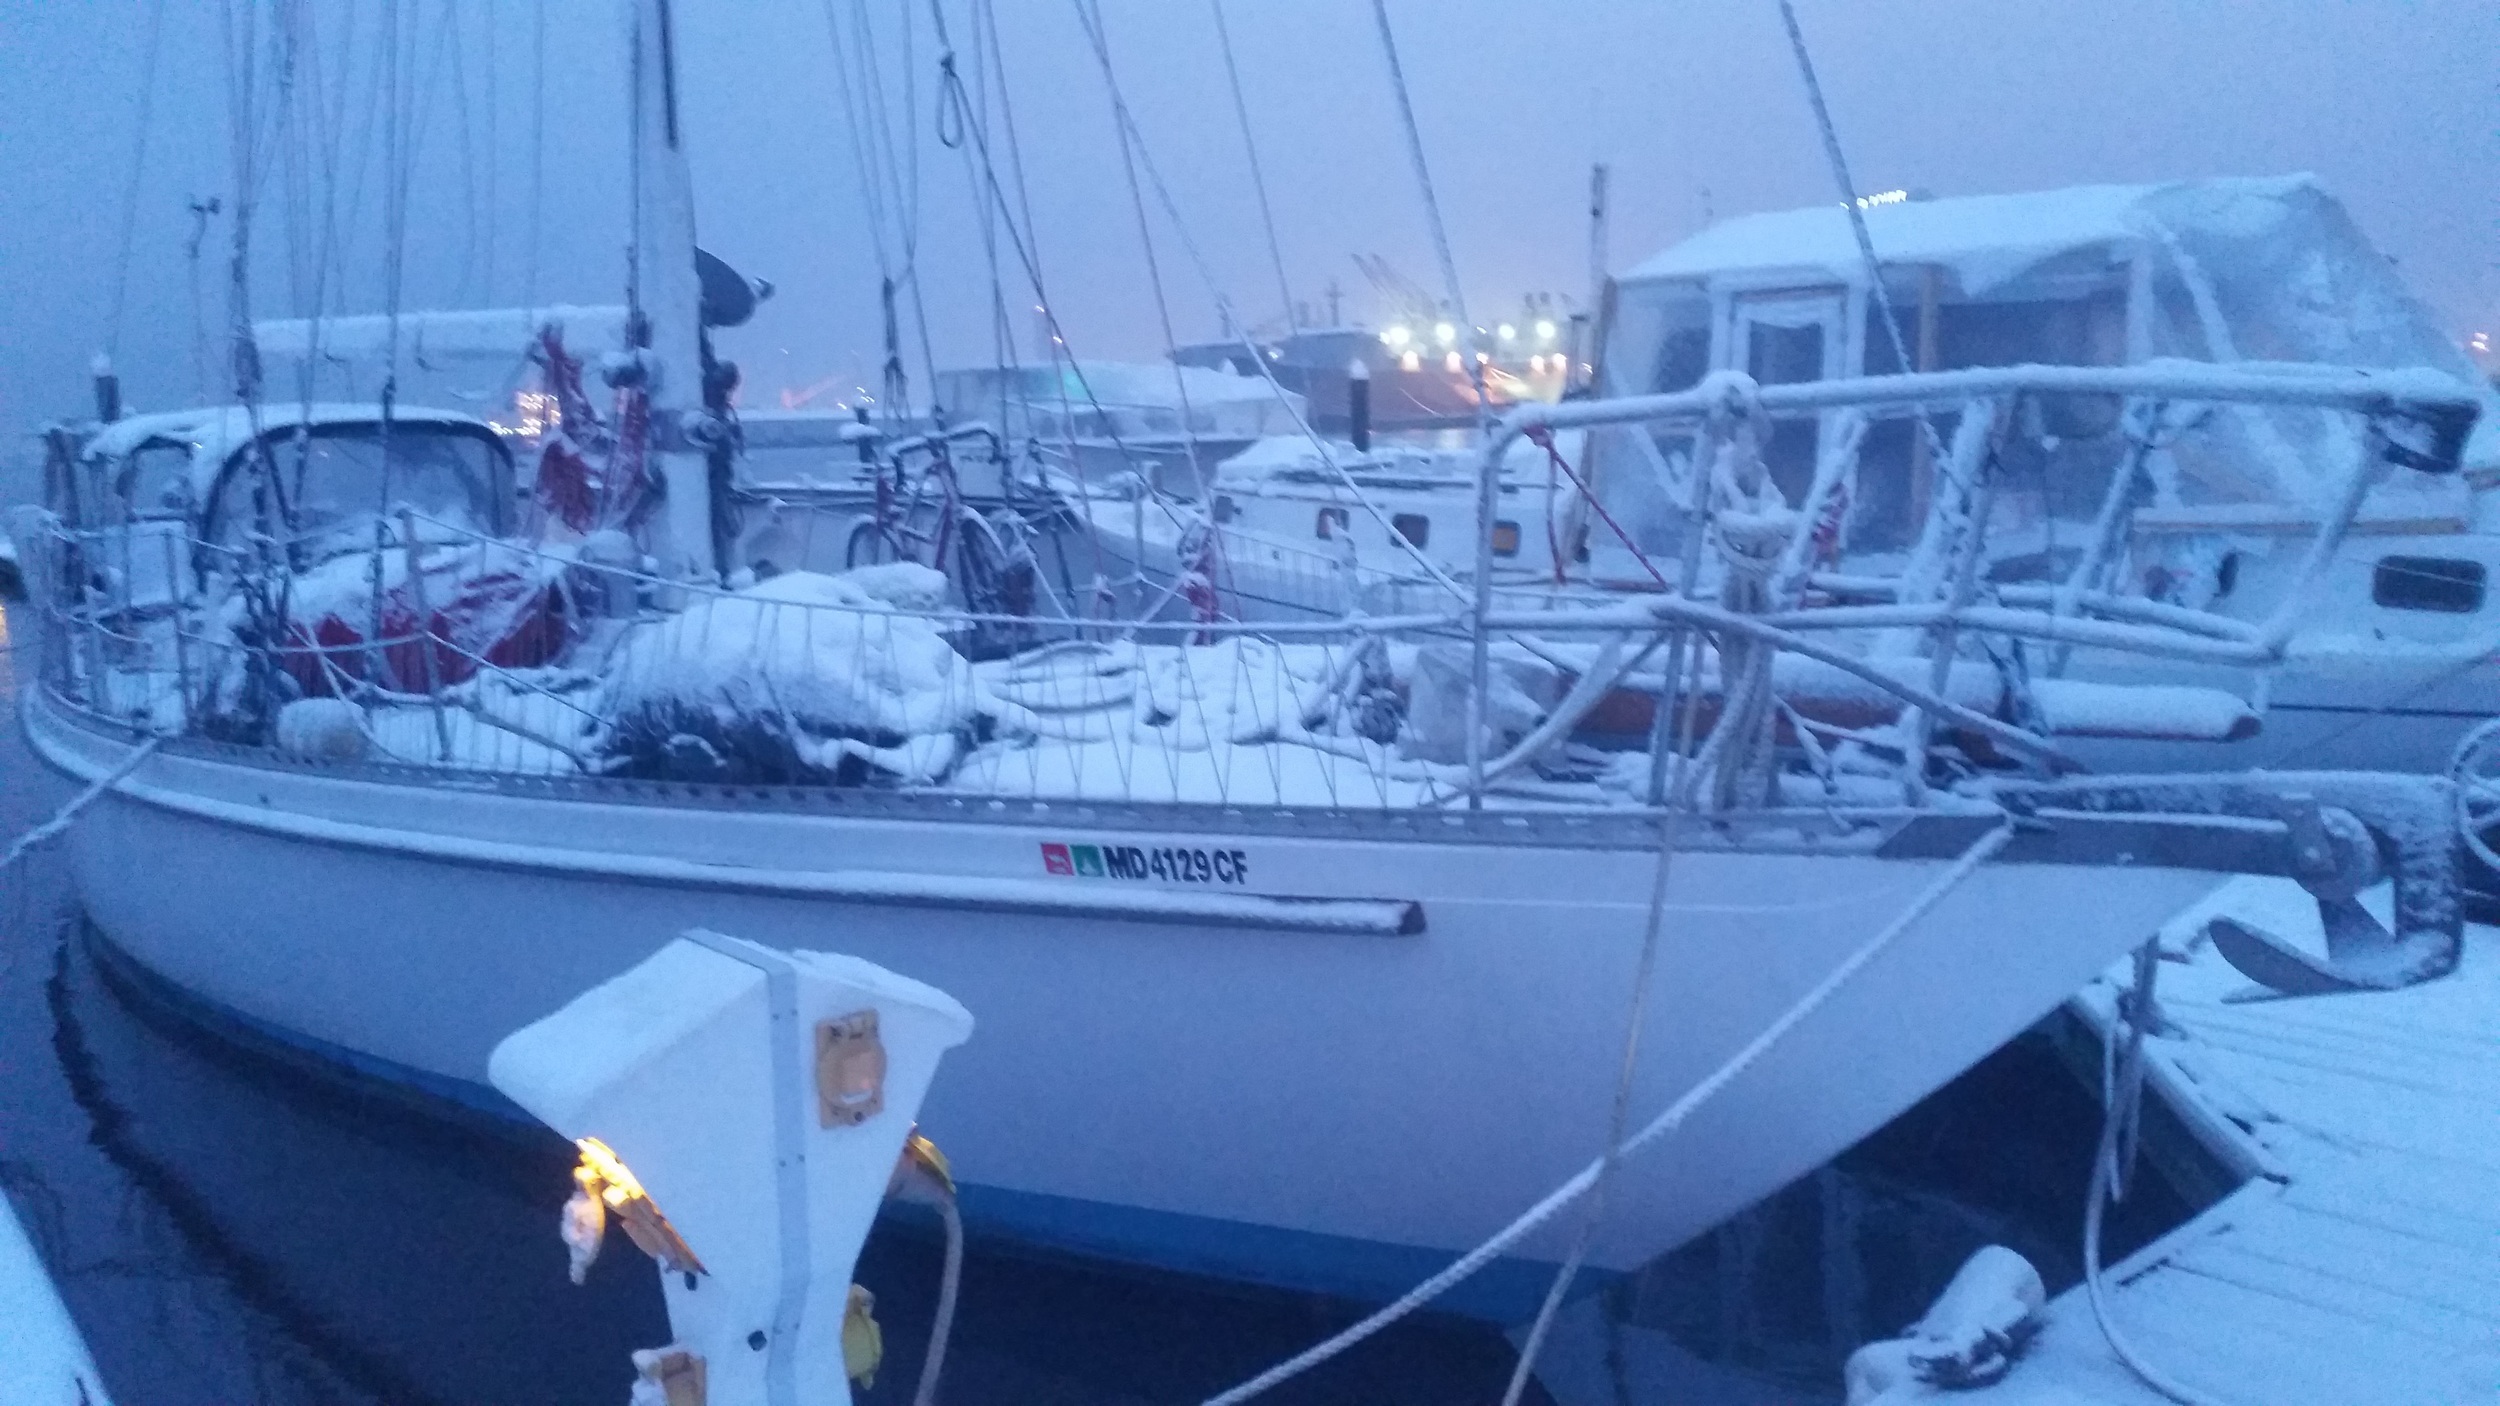
March is certainly unpredictable! Some days are warm and sunny, followed by snow storms. It's a great time to look at the sky to get an inclining as to what is coming. Wispy clouds will begin to fill the sky to warn of the changing weather that is coming. It seems that every few days, a different front will roll through, bringing a drastic weather change with it. Some days will begin with temperatures (Fahrenheit) in the 50s, go up to the 80s, and then back down to the 20s. Strong winds also accompany these strong temperature fluctuations, making it critical to be prepared and well versed in storm sailing before heading out. 

What might start out as a windless morning with small isolated puffs of wind can easily turn into a full gale in a matter of hours. If you are trying to ease someone into the joys of sailing, a day like that may scar a beginner, making them fear that storms will come out of no where! On the flip side, the strong wind will rocket you towards your destination if you feel comfortable sailing during those conditions. 

While March may seem crazy and unpredictable, it is a sign that warmer weather is around the corner and the beginning of a much more comfortable sailing season!

Reading the Wind

Sailing uses the energy from the wind to propel the yacht through the water. In order to navigate towards our destinations, we need to know which direction the wind is coming from so we can plot our appropriate course.

There are various different ways to tell wind direction, some use fancy gadgets, others do not. The most common gadgets to detect wind directions are:

Electronic Masthead Wind Sensors
Windex

The other end of the spectrum does not involved fancy gadgets or instruments:

A wet finger
Wind on your face
Tuft of yarn or line
Reading the sails
Reading the waves

Lets begin with the fancy gadgets, as they are usually marketed as "Must Haves". Electronic Masthead Wind Sensors are simply a wind vane connected to a potentiometer. As the wind vane turns to point into the wind, its position is converted into an electrical signal which is then displayed on a gauge in the cockpit. These gauges can be as simple as a needle pointing the wind direction over an illustration of the vessel, or a digital screen that calculates true wind and apparent wind direction. These instruments will take all the guess work out of sailing, telling you exactly where the wind is coming from in relation to your boat. Sailing to windward is a matter of looking at the screen to see where the wind is coming from and setting your course to the appropriate wind angle for your boat.

The alternative to an electronic instrument is a device known as a Windex. This highly sensitive device works via the same principle as the wind point, but without the added complexity of electronics. Many boats actually use both, the wind point mounted on the front of the mast, and the Windex mounted on the back of the mast. This provides a wonderful mechanical backup in the event that your electronic unit were to fail. Windex has a wind vane with high visibility paint on the boxes and the wind vane. This allows you to see where the wind is coming from without any guesswork. 

Both of these instruments work wonderfully, but they have their pitfalls. Electronic sensors will be exposed to the elements and will eventually fail. This is why the combination of wind point and Windex is so popular. Windex has the pitfall that you have to look at the masthead to read it. If you have a stiff neck, looking up can be quite the chore; if you have a bimini, you will need a window cut in it to allow visualization of the masthead from the helm.

Worst case scenario, you are in a storm and the masthead sensors get blown off. Now there is nothing to tell you where the wind is blowing from! Truth be told, sailing is much older than masthead sensors. This brings us to the "other ways" to figure out the wind direction.

One of the easiest ways to tell wind direction is to wet your finger and hold it up! The side of your finger that faces the wind will dry faster and feel cold compared to the rest of your finger. The cold side faces the wind.

The next way to figure out which way the wind is coming from is to stand up and turn around. As you turn around, you will be able to feel the wind hitting your face and you will know when you are face into the wind. When you find the wind hitting your face head on, you will have a rough idea of where the wind is blowing from. To fine tune your wind reading, you will need to rely on your ears. If the wind is hitting you more from the left side, your left ear will hear more wind noise than your right ear. Turning your head to the left a bit until the wind noise between your ears evens out will fine tune the wind detection. When you hear the same amount of wind noise in your left and right ears, you know for certain that you are facing directly into the wind. While this sounds simple enough, it doesn't work if you are behind a dodger or a lee cloth. If you find yourself behind a wind block, you will have to move to a clear area where you can feel unobstructed wind on your face.

While the first two options listed involve using your body as the sensor, this next one does not. It involves tying a small strand of yarn to various places on the boat. Common places are the shrouds, lifelines, and the backstay. The yarn will stream in the wind and point out the winds direction. This option is very inexpensive, which is why some people will place them everywhere! Instead of yarn, I use bits of line tied to the lifelines. I tie them with a larkshead knot in places where I typically need a bit of line to tie up random things on deck. They are very small and don't stand out as much as a brightly colored bit of yarn, making them less noticeable from passing yachts; but I know where to look for them so I can read the wind from them.

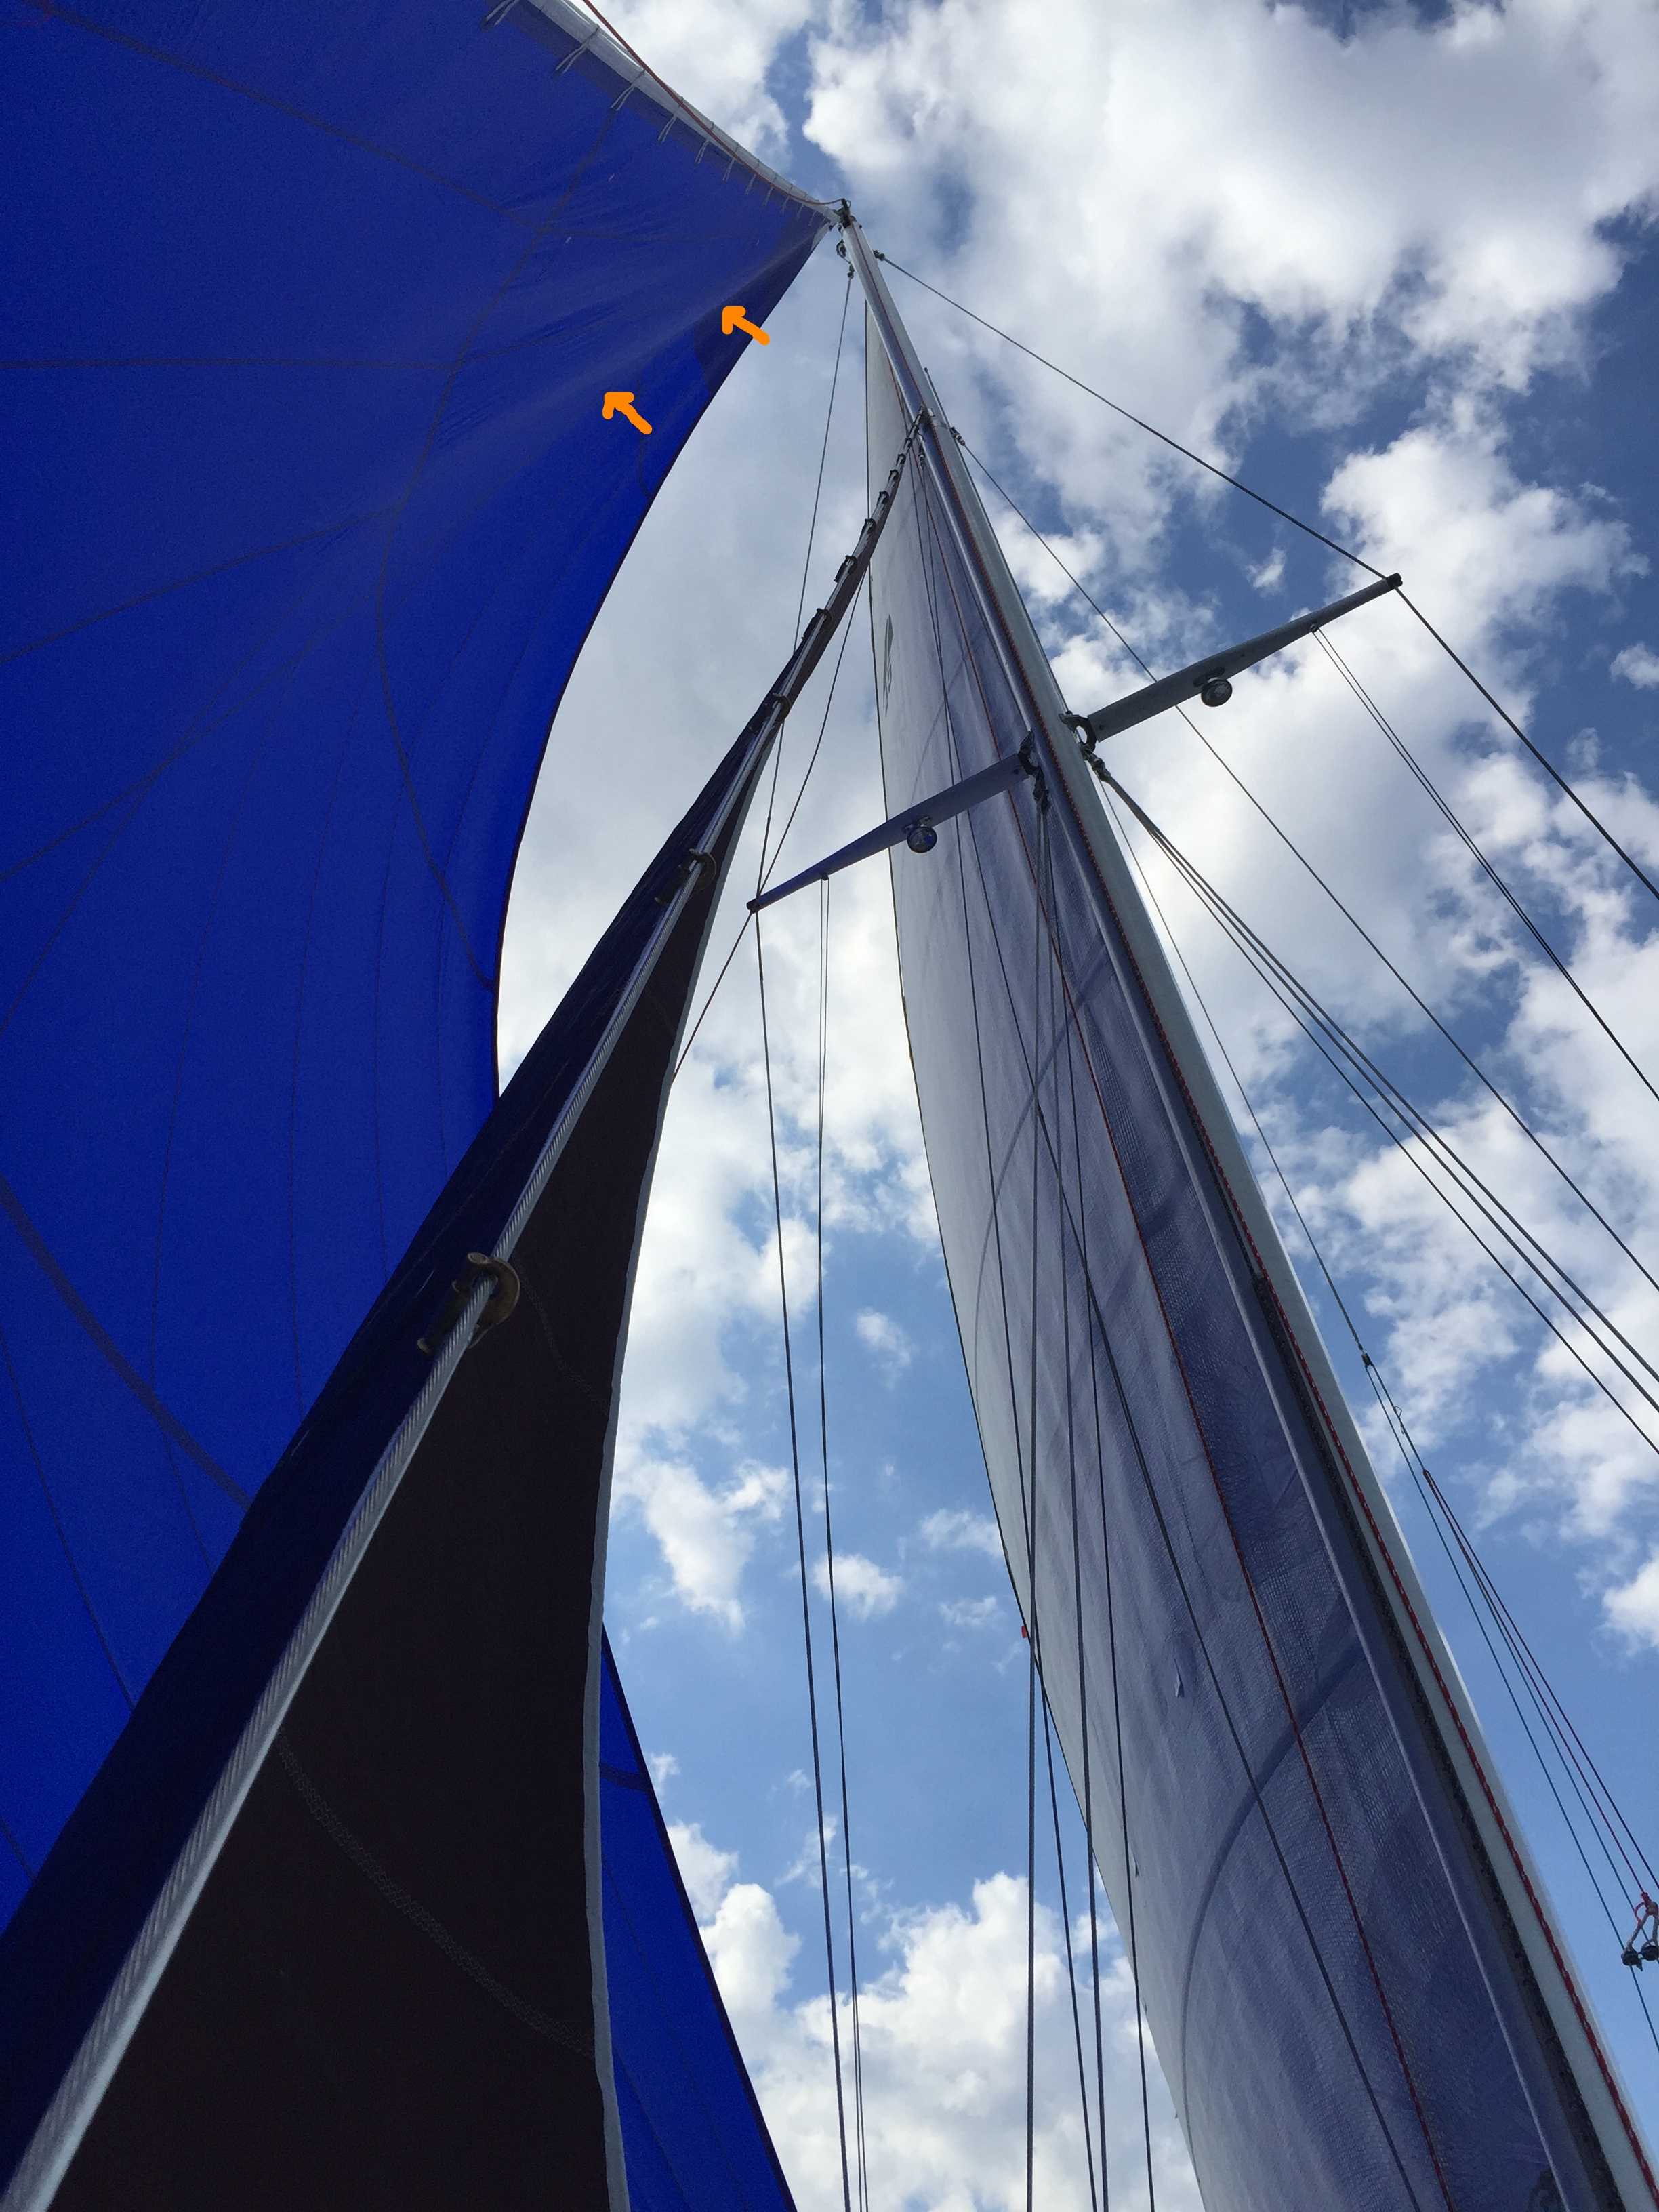
The first three methods will help you figure out where the wind is coming from so you can start moving, the next method will help while you are already sailing along (without looking at the tell tales). The sails use the wind and also reveal how the wind is blowing. When pinching too hard, the luff will curl towards the boat. This will create a large area on the luff which is bulging in rather than out. If you are sheeted in all the way, that would mean that you are aiming as far upwind as possible (and honestly should fall off the wind a bit).

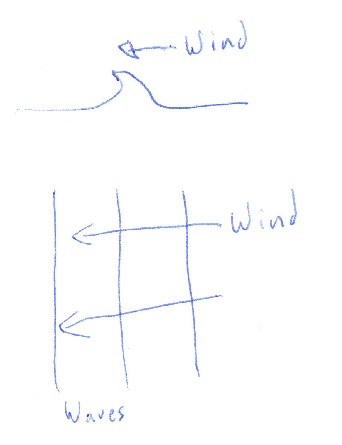
Lastly, (and my favorite way) is to read the waves. Waves are (usually) created by the wind and roll in a form perpendicular to the winds direction. This means that the waves will come at the boat 90* to the wind. 

When the waves come at you from the side (beam on) this means you are on a beam reach and the wind is coming from the beam.

When beating, the waves will be coming from the front quarter, and this would indicate the wind is coming from that same direction. I don't typically read the waves when beating because the sail will begin to luff if I point too high.

Safe sailing

Safe sailing

Sailing by the lee

Sailing by the lee

When running, this will work wonderfully and I rely on this trick more than I do my wind instruments! The waves will be coming at your stern with a slight angle. If they are perpendicular to your sides, you are on a dead run. If they are coming at your boat on the same side as your boom, you are sailing by the lee (and should rectify this immediately). If they are coming in from the side opposite to the boom, you are on a broad reach. 

When sailing Wing on Wing, I make sure that the waves are perfectly perpendicular to the boat. If they change their angle slightly, I will alter course to keep the wind directly on the stern. The waves will give instant and accurate information, other methods may have a slight delay in the information delivery. 

Lastly, the final reason I prefer to read the waves is it also gives you an indication of wind strength and direction off in the distance. Boat mounted wind sensors will only give you information about the wind that your boat is currently experiencing and no information about the surrounding wind. On windy days, this is not such a big deal, as there is plenty of wind to go around and keep you moving. On calm days though, reading the waves will tell you where there is wind and which way it is blowing.

On a calm day, the water will look like glass with isolated areas of ripples. These areas are where wind is present and the ripples run perpendicular to the wind. You can sail through calm areas by using these wind puffs. When you reach one, it will propel your vessel ahead. Once you leave this wind puff, you will be coasting along until you run out of momentum. By aiming to the next closest wind puff, you can actually "jump" from windy spot to windy spot. 

On the opposite end of the spectrum, the waves will alert you to approaching storms. When whitecaps appear in the distance, they indicate strong wind approaching (and the need to reef your sails now). Strong storm fronts will also bring a change in wind direction and keeping an eye on the waves will tell you how to position your sails for the blast of wind that will be coming.

While none of these systems work perfectly, when used in conjunction they can help you figure out how the wind is blowing and aid your navigational decisions in plotting your desired course. Taking all the information you have available will help you sail better and safer in any wind condition.

Rope Fenders are Finished!

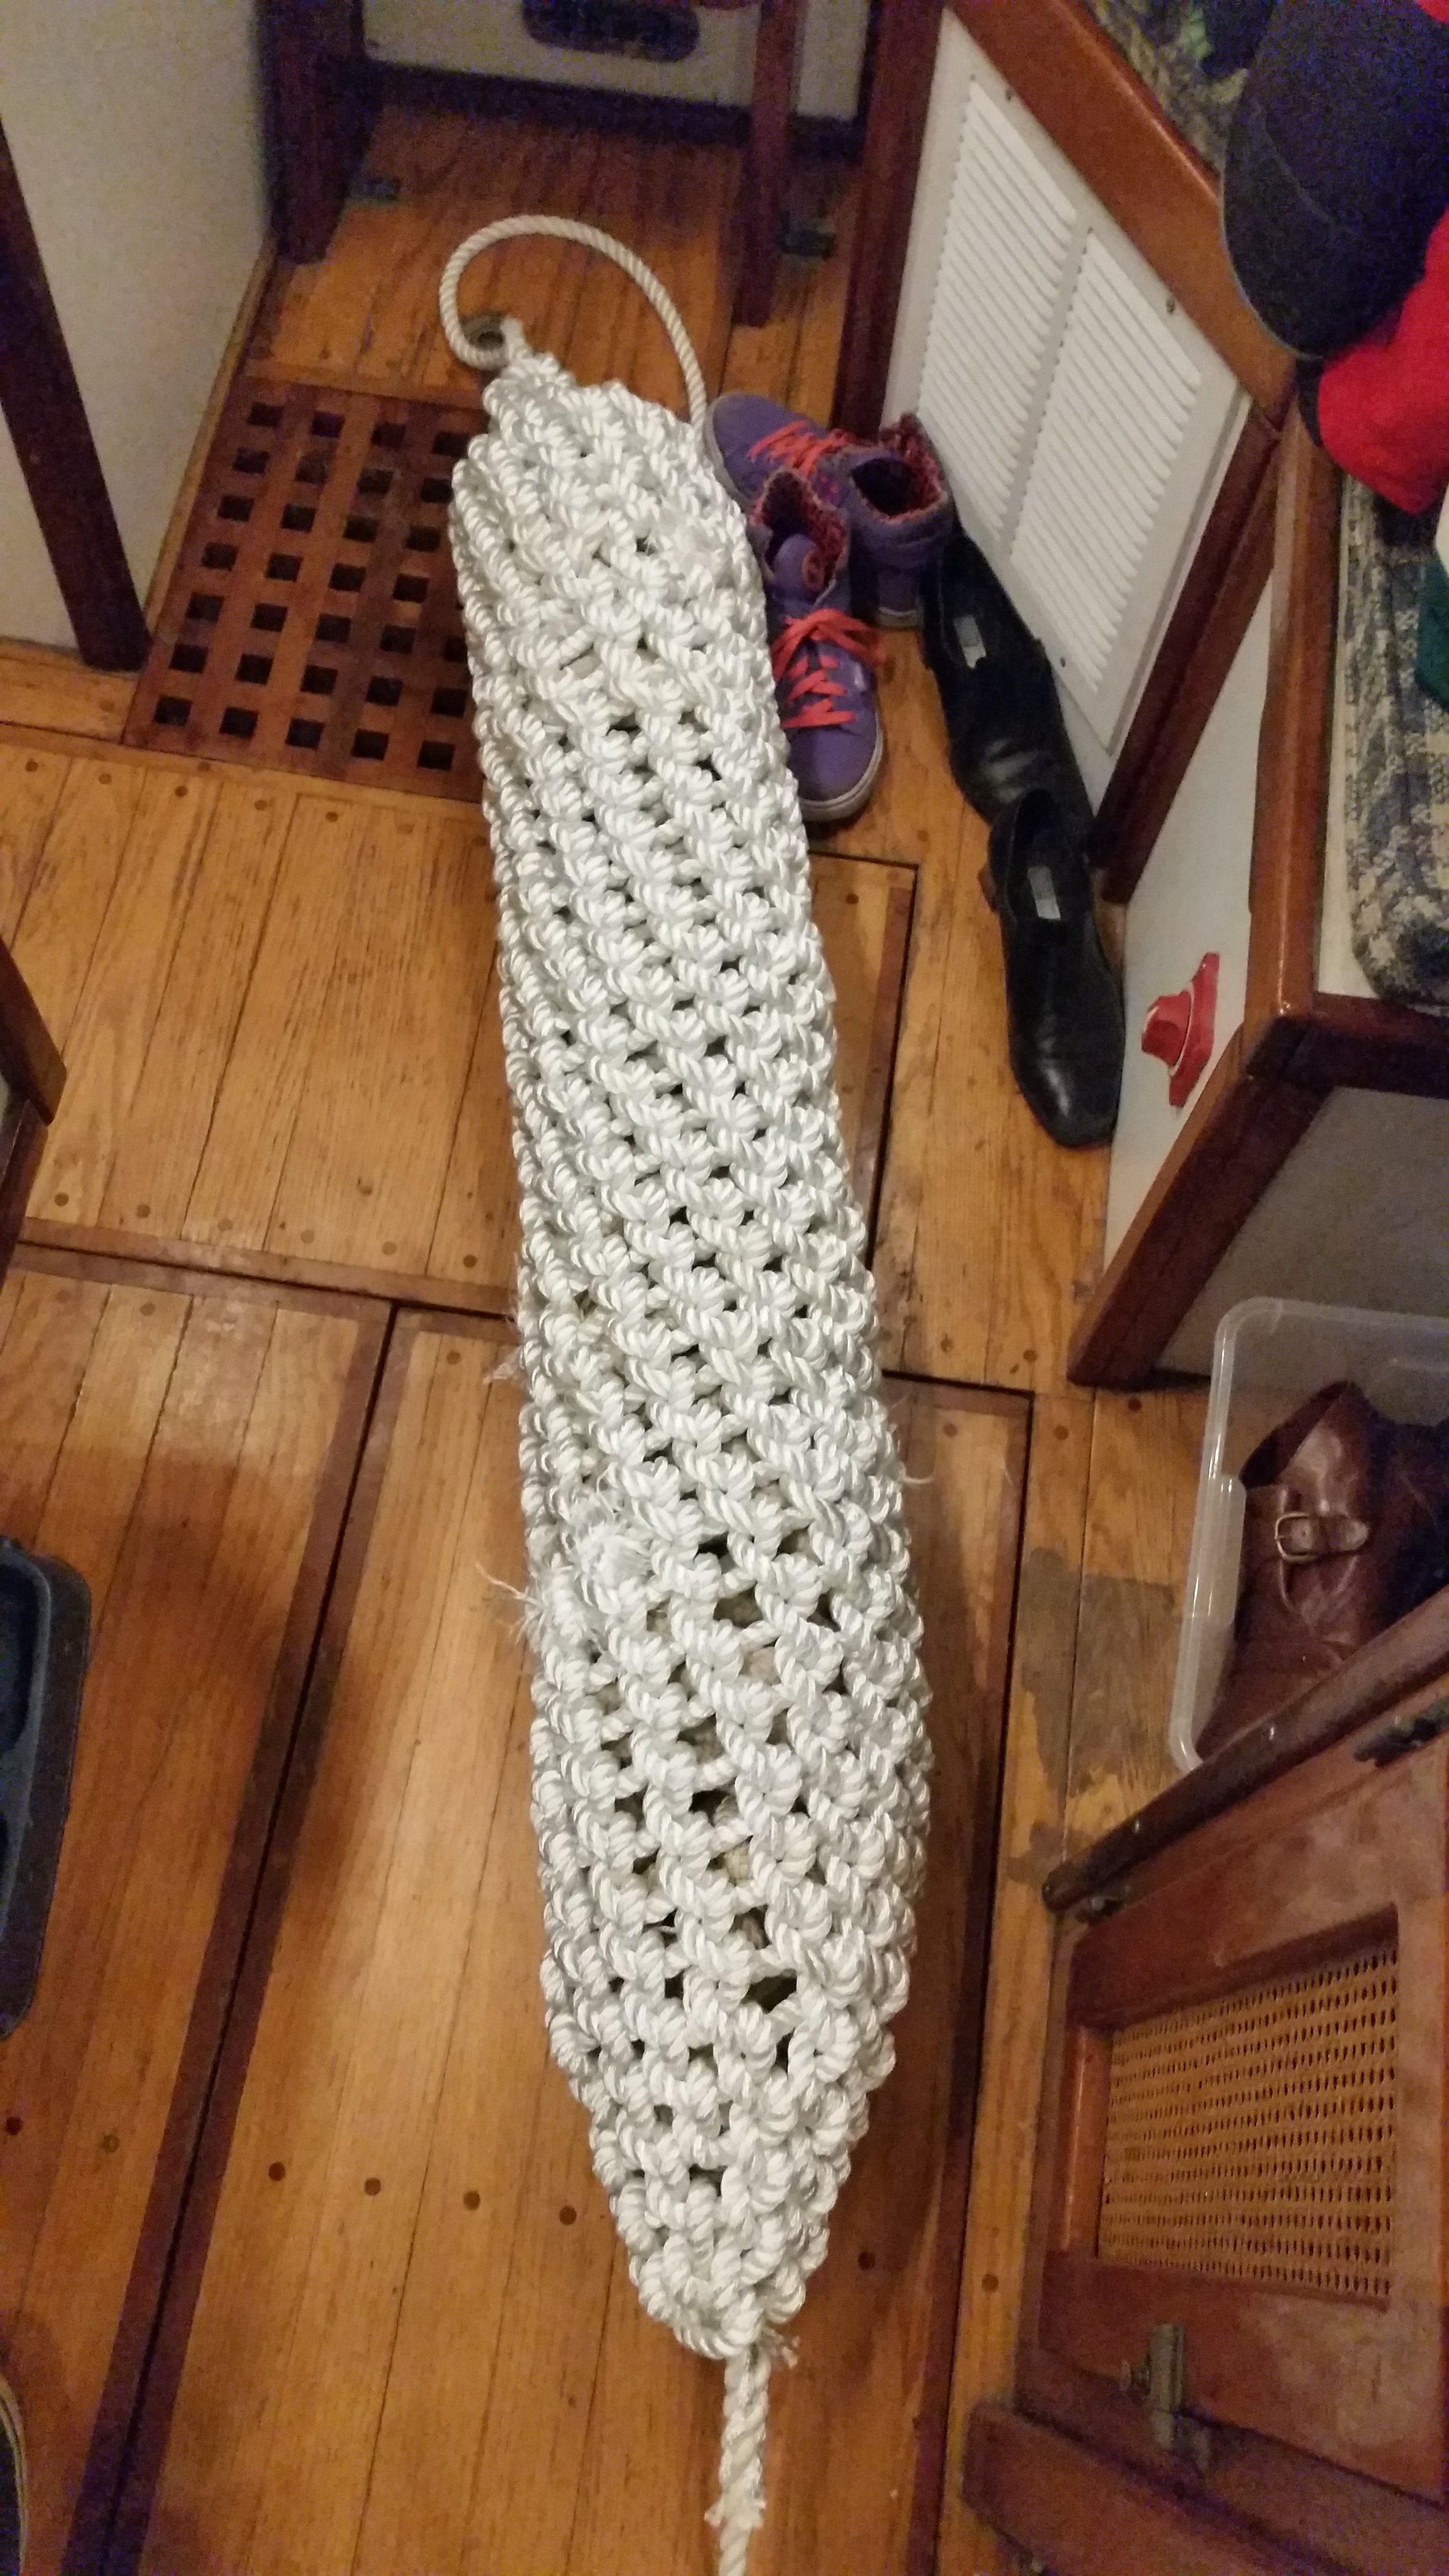
The rope fenders are finally finished! 

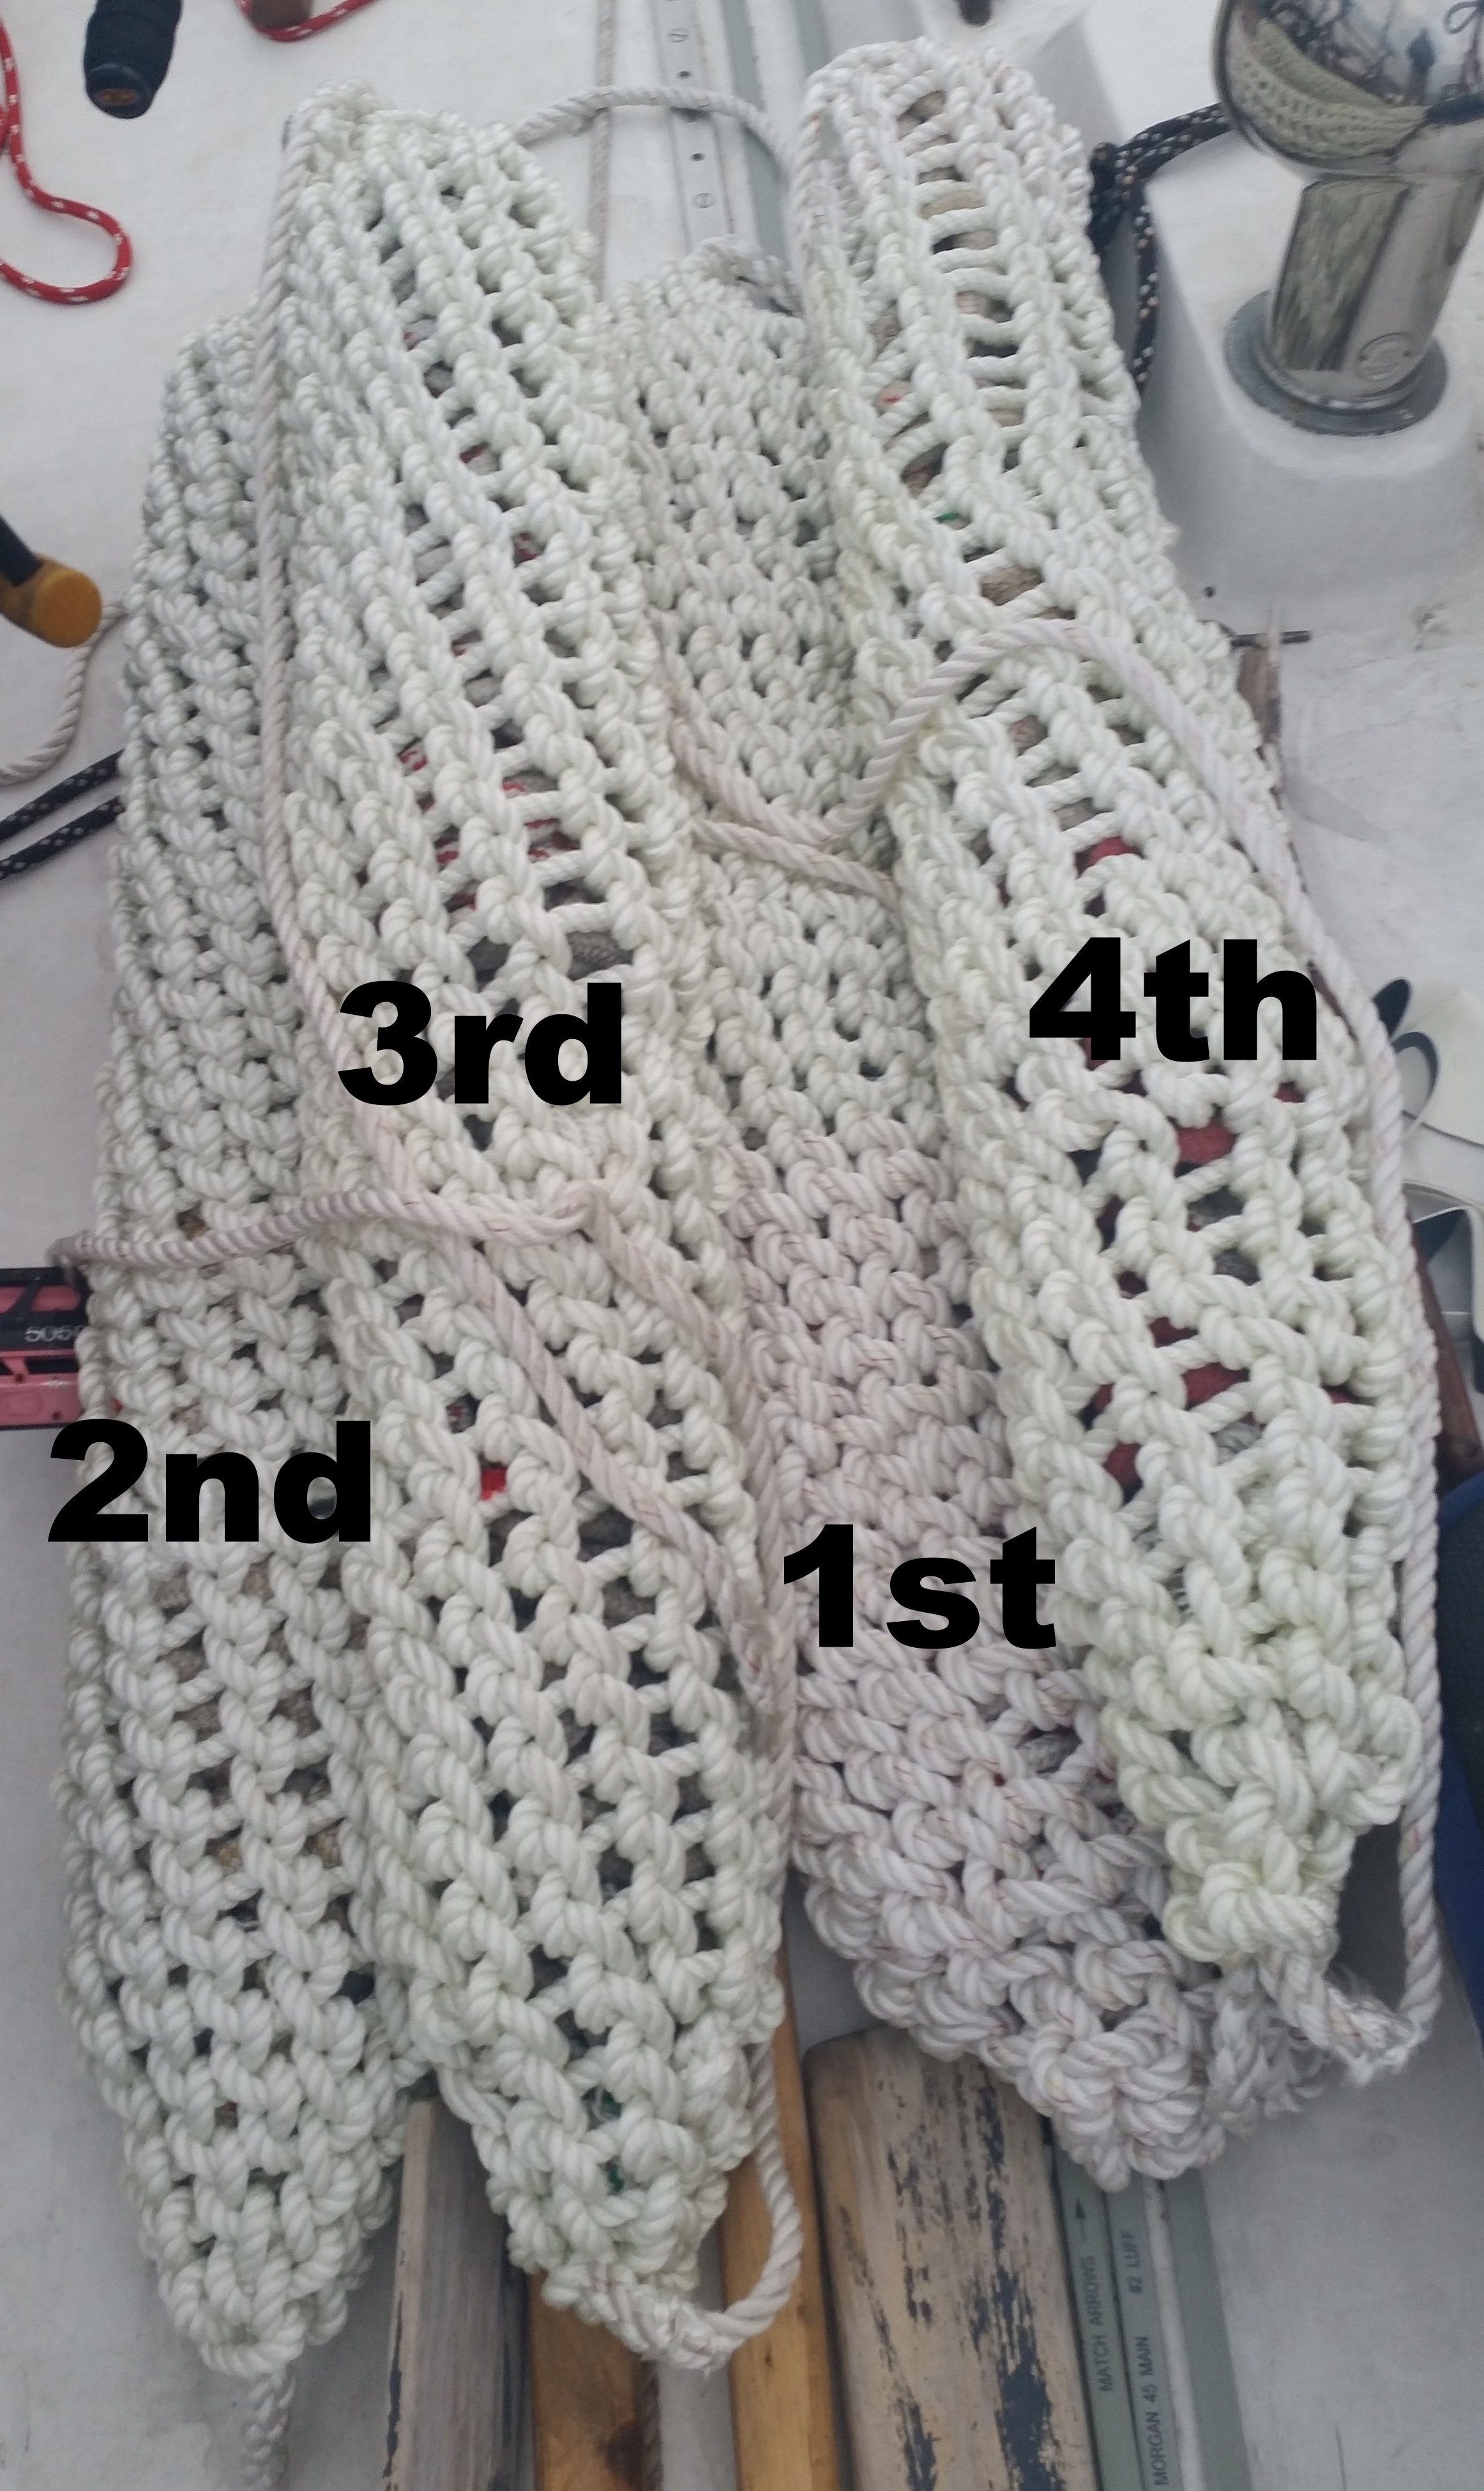
1st: I had plenty of rope!2nd: Still had plenty of rope, but made the gaps a bit larger to consume less rope. Greatly improved the tapers at the ends.3rd: Had plenty of rope. Perfected the tapers on ends of the fenders.4th: Running out of rope, so I…

1st: I had plenty of rope!
2nd: Still had plenty of rope, but made the gaps a bit larger to consume less rope. Greatly improved the tapers at the ends.
3rd: Had plenty of rope. Perfected the tapers on ends of the fenders.
4th: Running out of rope, so I made the gaps much larger to stretch out the available rope. 

Each fender took about 48 hours to make, most of the time was consumed in making the core. The outer cover only took about 4 hours to wrap! This may seem like it goes by quickly, but when you sit on a bench pulling hundreds of feet of rope through the knots for hours on end, it becomes quite the task.

Maddie went to New York to visit some cousins and I stayed in the boat with no distractions to bang out the fenders and it was a success! By the time she returned, I had finished all the fenders and had them out of the cabin space. 

Each fender consumed approximately 500 feet of rope for the core and 280 feet for the cover. I made 4 large fenders and the lot of them consumed 2000 feet of old running rigging for the core, and 1200 feet of rope for the cover.

If you want to make your own or want me to make a fender for you, the amount of rope will vary based on the size of the fender desired and the thickness of the line used.

This project took me 11 weeks to complete! Towards the end, it felt like I would never finish and would forever be tying the knots for the fender's core and cover, this made it all the more satisfying when it came to a conclusion.

The ends of the fenders taper much more gradually, giving a much better appearance to the end of the fender.

The ends of the fenders taper much more gradually, giving a much better appearance to the end of the fender.

The project progressed quickly at first, and then started to drag out. Making the central line for the core was entertaining, making the first few layers to the core progressed at a satisfying pace, then all progressed seemed to halt. Each layer of rope seemed less impressive and the cover seemed to never end!

Maddie was a trooper, living with these behemoths in the small cabin during their constructions. While she preferred time spent with me, she was tired of them taking up so much space and therefore granted me the time I needed to finish the fenders.

Connecting Two Ropes

The quickest way to connect two ropes is to tie them together. The most secure way to connect two ropes is to splice them together. When you need to connect two lines you will have to weigh out the pros and cons of each option to decide what is best for you at that moment

If you have plenty of time and the skill needed, splices will offer the best connection. If you are in a rush, a simple knot might meet your immediate needs.

Splices offer a secure, permanent connection which results in no loss of strength. This is because a properly executed splice will evenly distribute the forces across all of the fibers in the line without creating pressure spots of increased load and tension. The disadvantages of splicing is they can be time consuming and require a skill set for each type of line. 

Lines are characterized as Three strand, Single Braid, and Double Braid. Within the single and double braid, they are then broken down into Class I and Class II fibers.  Each type of line (three strand, Class I, and Class II) has its own rules about splicing. As you can see, it can get complicated in a hurry!

The next option is to simply tie the lines together by way of a knot. Knots create areas of increased stress which weaken the line. The bowline is known as the knot that retains the most strength in the line; retaining approximately 80% of the lines strength. Other knots will be more detrimental to the lines total strength.

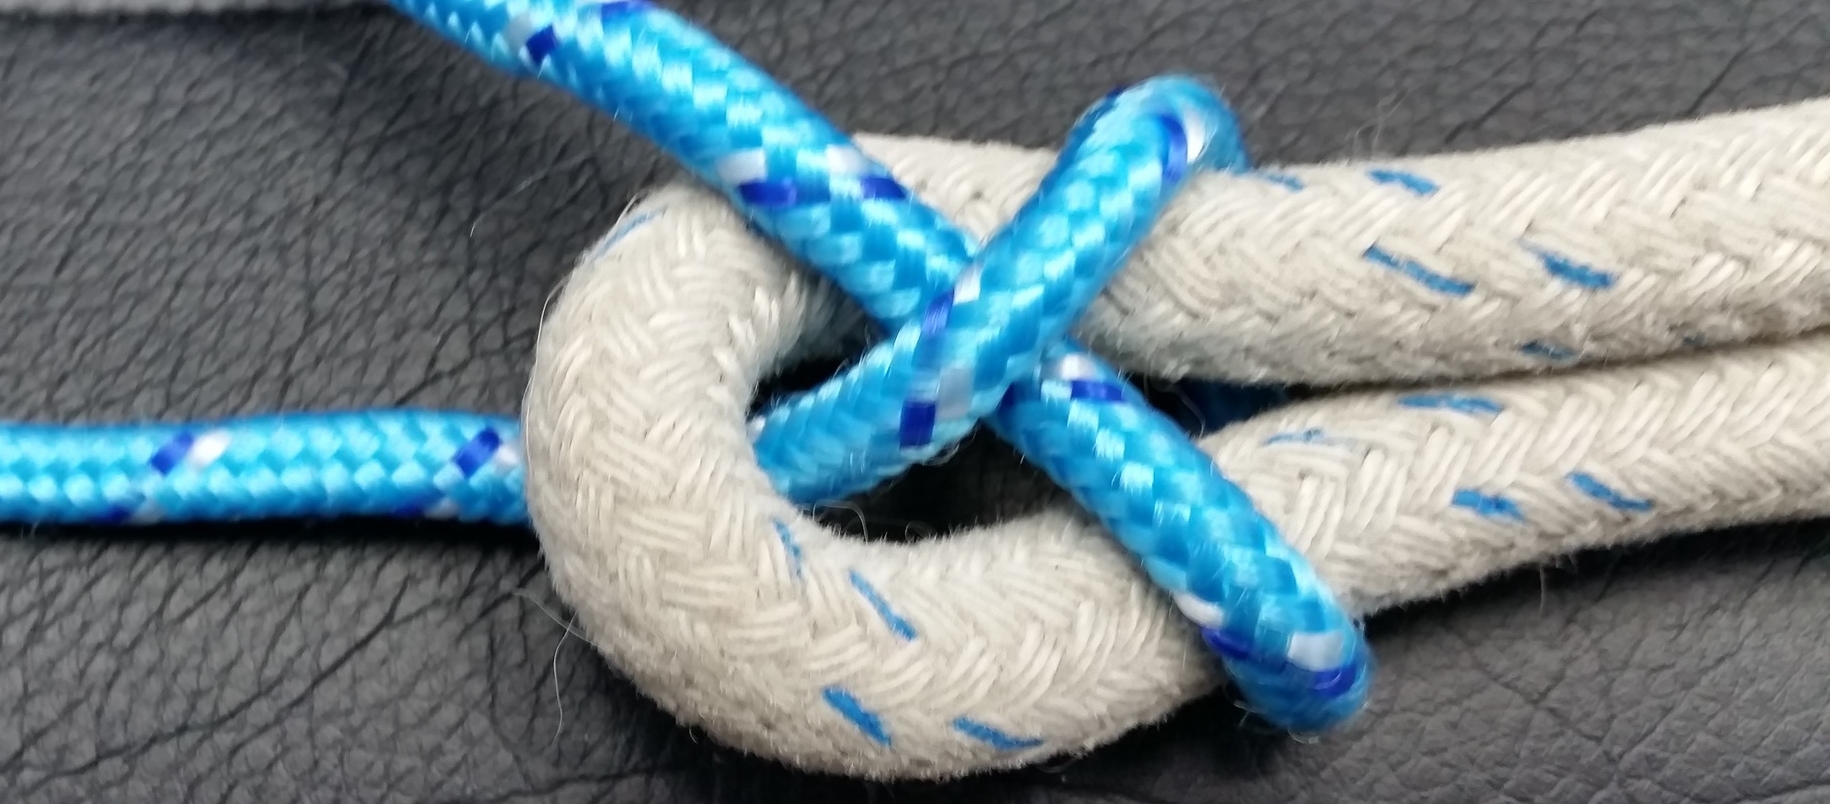
Sheet Bend

Sheet Bend

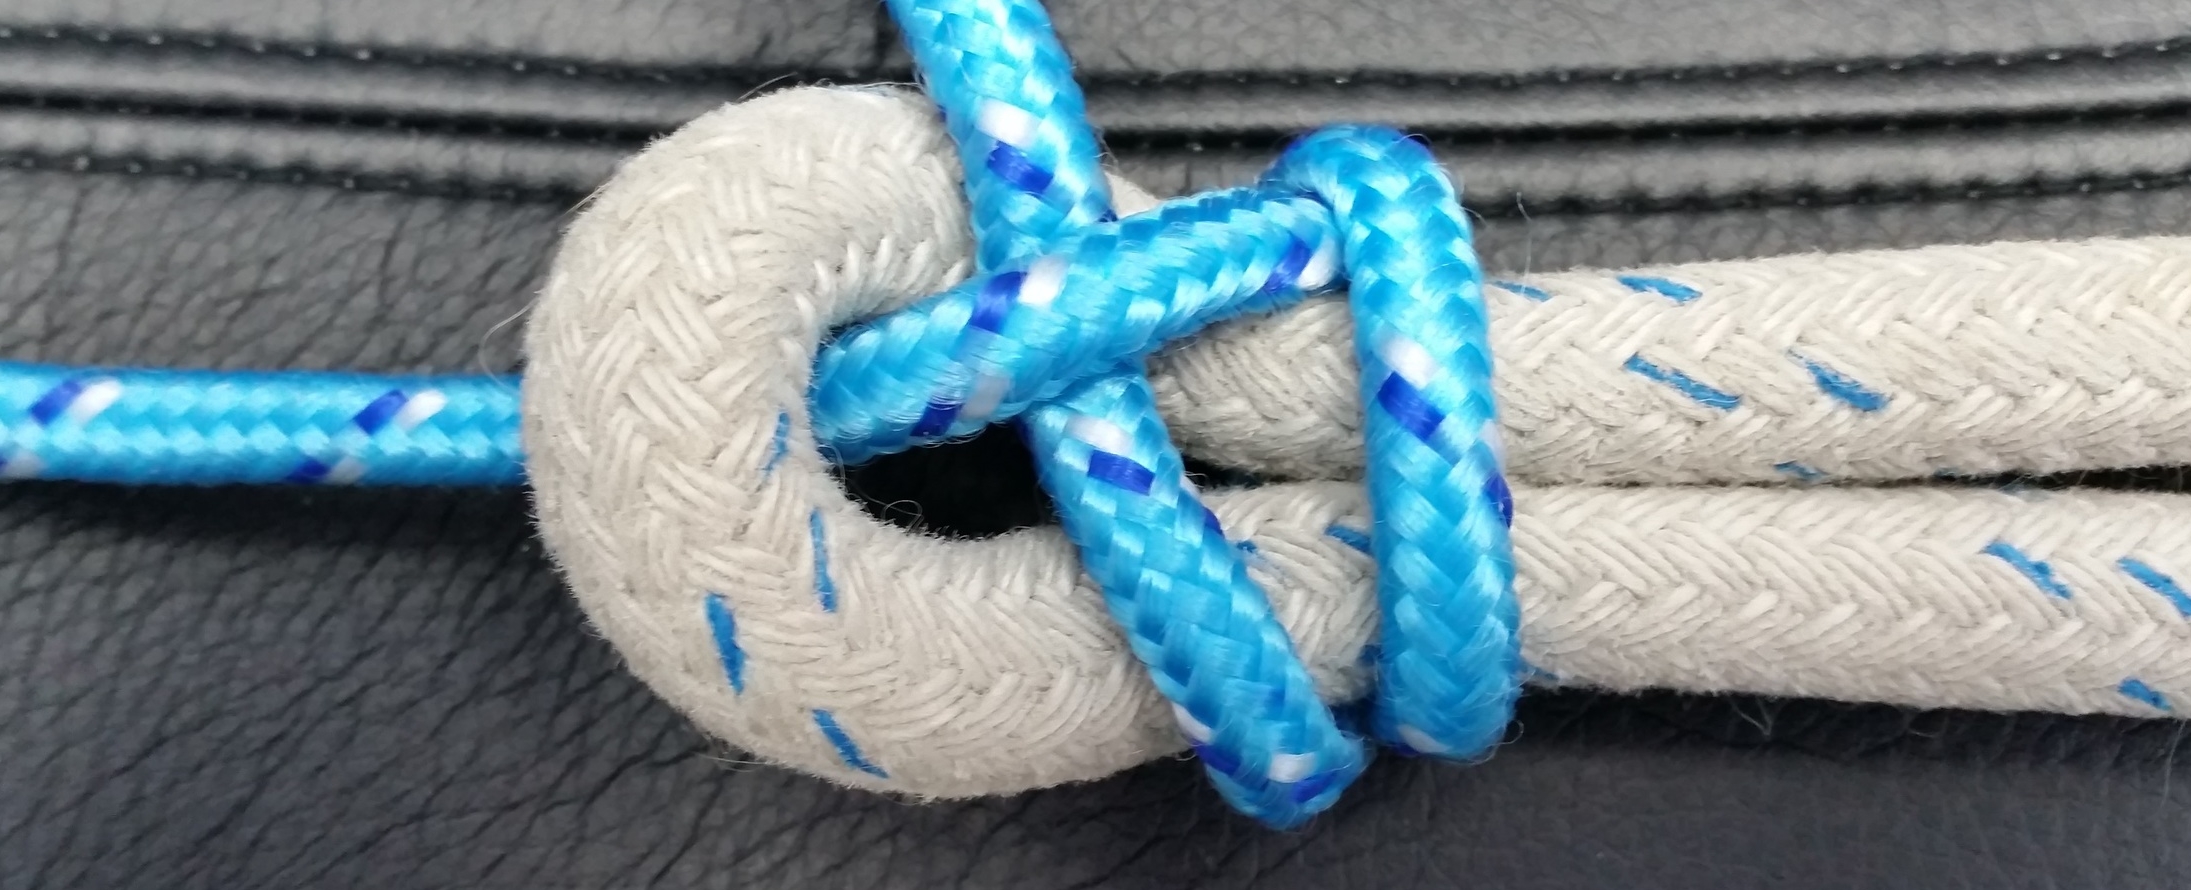
Double Sheet Bend

Double Sheet Bend

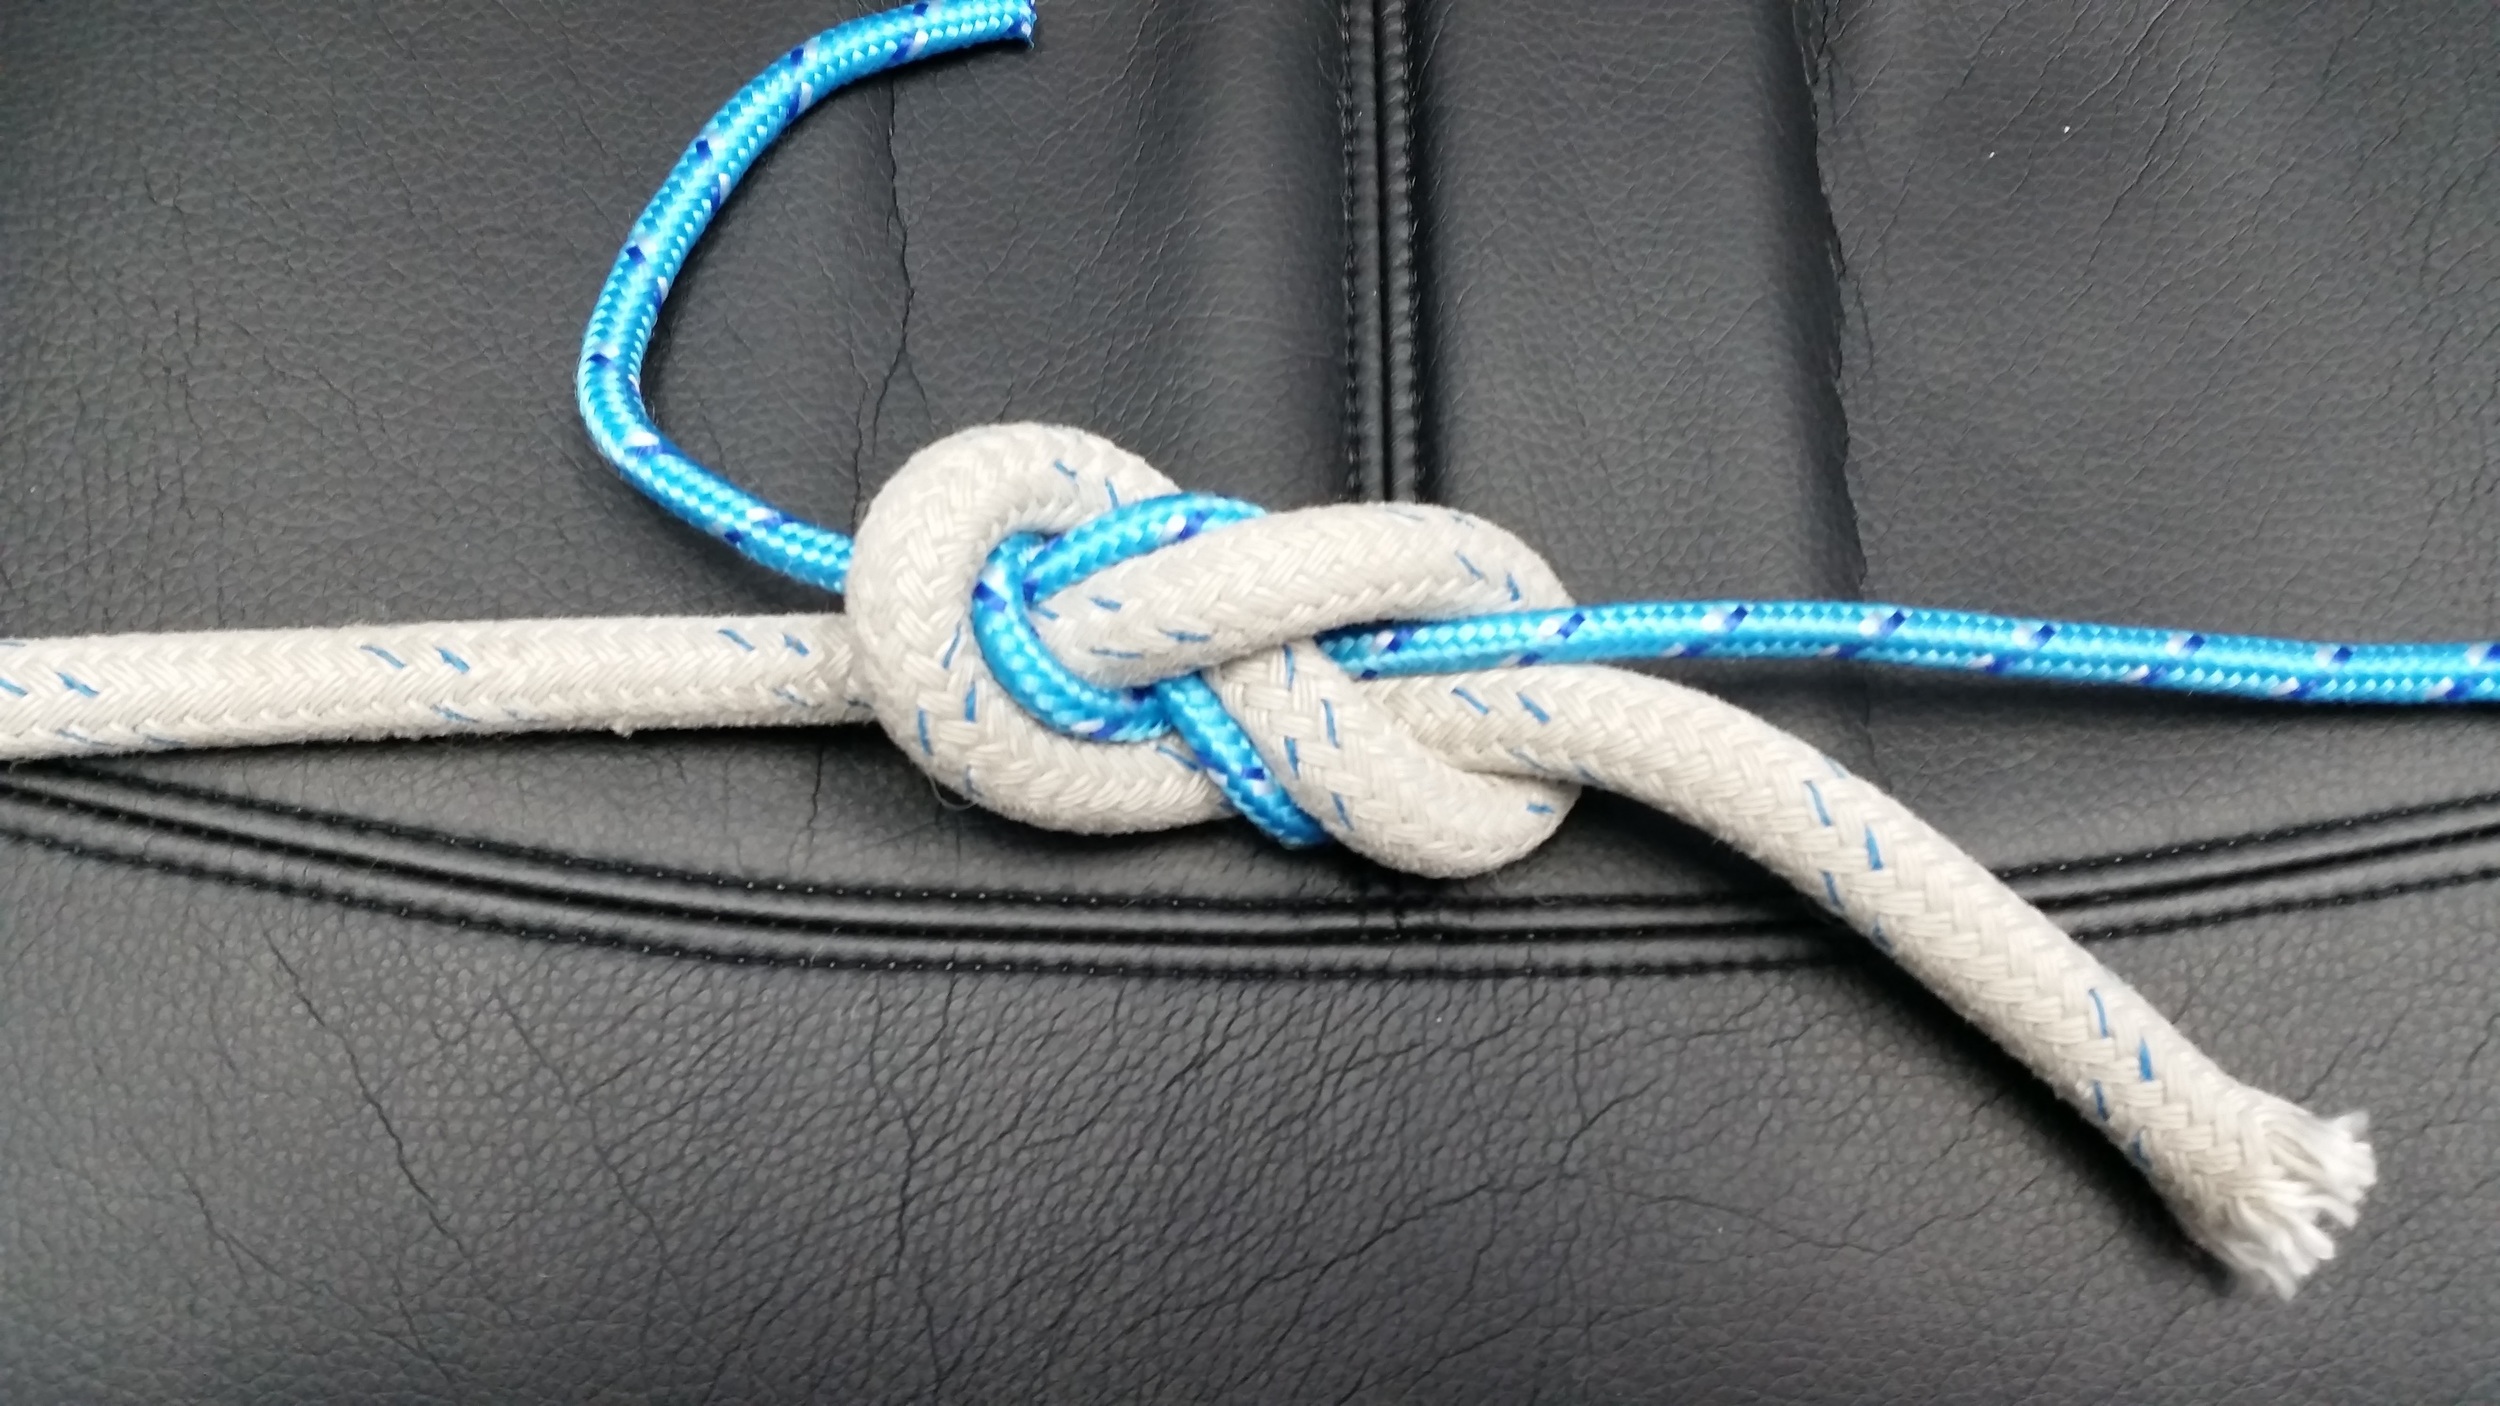
Fishermans Knot

Fishermans Knot

Some knots that can be used to securely connect two lines are the "sheet bends" and the "fishermans knots". These two knots will securely hold the two ropes together without much risk of the lines separating. They also work on lines that are of different sizes.

You can connect lines with square knots, but these knots are not as secure as a sheet bend or fisherman knot.

If the loss in strength is no acceptable and you do not feel confident in your ability to splice the lines, you might be wondering how else you can connect these two lines. Another option that does not involve splicing or tying the lines together is to seize the lines together.

If you properly seize the lines to one another, they will not slip nor yield. They will be locked together without the time of splicing or the stress of knotting. Seizing will require an additional piece of line, and can act as a permanent solution.

For joining two lines together, it would be best to use a "Flat Seizing Knot". This knot is used to bind two lines of similar size together and never let go. Tying three of these knots in succession will provide a permanent junction that will hold the lines together and evenly distribute the forces over the length of the seizes, providing you with piece of mind.

Tying a Flat Seizing Knot is a lengthy ordeal, taking one much longer than it would to tie a Double Sheet Bend. I personally prefer to tie lines together with Sheet Bends, as it is a quick knot to tie and holds securely once tightened. Sheet Bends also allow for easy separation of the two lines once the long line is no longer needed. 

Higher Education

Is higher education really worthwhile? I have been in school for most of my life, and as I look back at it all, I wonder if it was worth it?

What are the pros and cons of higher education?

Pros:

Better paying job
Better working conditions
Greater social acceptance
Greater flexibility with private life

Cons:

Immense student debt

It is a know fact that salaries increase proportionately with education achievements. According to PBS, the numbers are dramatic. 

Highschool dropout: ~$20,000 per year
Highschool graduate: ~$30,000 per year
College graduate: ~$56,000 per year

These numbers seem impressive and can make a good argument for finishing school. The larger jump is when you get into professional schools. 

Average Dentist Salary: ~$124,000 per year Source

That may seem like a significant jump in salary, but so is the amount of student debt. I completed my freshman and sophomore years of college in Puerto Rico at UPRM, costing $76 per semester (if you had a very high GPA, they would only charge laboratory fees). I moved to Maryland for my junior and senior years, and that totaled to $8000. My college education cost roughly $8,304 and I would be set into the average salary bracket of $56,000.

I then went to dental school where I tried to spend as little as possible. The average graduating student debt from dental school is $250,000. I managed to get out with only $160,000 of student debt. 

This debt costs will cost me $2,000 a month for the next 10 years, costing $240,000 to repay it (making minimum payments). Imagine what the monthly payments must be on the $250,000 student debts!

Making more money is great, but then you end up in a higher tax bracket. You have to pay taxes on the money you made to pay the student loan, and in the 28% tax bracket, the $2,000 monthly student loan payment will cost you $560 in taxes. 

This means that the first $24,000 you make per year is already spent on student loans and will have an additional $6,720 in taxes to go along with it. $30,720 of your yearly income is already spent on student debt and taxes. This leaves $93,280 for you at the end of the year! Not really, the $93,280 will carry along another $26,118 in taxes.

At the beginning of the year, you need to earn at least $30,720 to pay your student debt, that's more then a high school graduate makes in a year! After taxes and passing your student debt payments, your $124,000 has now been reduced to $67,162.

If you have a job, you need somewhere to live and you need to get to work. Due to social pressures, you might feel inclined to buy a fancy house and car to impress people you don't know. The house and car payment will have to come out of the remaining $67,162. Don't forget that you also need to pay property tax, as well as insurances. Soon enough, you will have less money leftover than what the college graduate is earning! Luckily, you live close to work and can work everyday until you die to pay off these debts and try to save for retirement. 

Once you're old and stop working, you can try to sell everything and buy the boat you have been dreaming of to sail over the horizon to new lands! Hopefully your health is still good enough to enjoy cruising for a few years before your body can't take it anymore!

The other option is to not follow the system! I have friends that cruise on sailboats in the tropics, everyday is warm weather and beautiful beaches. They don't have much money, but they do have their happiness. When they need some cash, they work as a bartender; otherwise, they just enjoy life for barely no cost!

There is no doubt that cruising has significant startup costs. First, you need to buy a boat! That can be a pricey ordeal. Next, you need to outfit the boat and stock up with provisions, also costly. Lastly, you need to cast off and sail away; not costly!

Having completed my higher educational studies, I have the disposable income to do the first two steps. The problem lies in the last step! It is not costly to cast off, but I have these massive anchors called student debt that are keeping me here! I work to pay them off, but I also need to save up money to cover my student loan payments for a time while I am cruising around. 

As it stands right now, paying the minimum, I will finish paying them off in 2022; that is a serious anchor! It is a project to not form any other anchors to shore during those years that will prolong our departure. Maddie grew up with the land based mentality of "Buy a house, buy a car, buy buy buy" and it is a struggle to not buy anything we don't need or want. 

When we first met, her sole goal for the future revolved around having a house on land, where my sole goal was to get away from land as quickly as possible. After many discussions, we have come to agree on not buying anything with a loan. If there is no debt, there is no anchor; once again, the third step becomes "not costly" and you can cast off to explore anytime you want!