Electric Propulsion

How far can you go?

Electric motors run reliably as long as they have enough power supplied to them. The question of “how good are they?” is just the incorrectly asked question “how good are the batteries?”

We have crossed the Atlantic twice and visited many ports along the way. We have managed this on just eight 100ah batteries hooked up in series and parallel to give us 200ah at 48v. As a result, we have practically no range and as a result do not count on our electric motor to take us far. We have been using it just for docking and maybe for maneuvering around an anchorage, otherwise we rely solely on the sails to get us from port to port.
After 4.5 years, we have never actually done a proper range test to see how it works. Now is the time to see what this baby battery setup can do!

Electric Outboard, Morty Approved

The biggest test of our new outboard motor is getting Morty to shore multiple times a day in a timely fashion. It is plain to say that Morty approves of this motor.
Not only does it get us to shore quickly, it does so silently.

New Electric Motor Testing to Come

With all this battery building, we now have plenty of power on hand and I got tired of always needing to tinker with our gas outboard to keep it running. We decided to build some additional batteries (more info on that process later) and power our dinghy with an electric outboard!

After looking around online, I came across this company that seems to have embraced the electric outboard concept and separated themselves from the limitations of “electric trolling motors”. Electric trolling motors (like the image on the left) have a long motor tube ending in a rather small propeller. They are for fishing and will not move any boat quickly because the propeller they have is not designed to move at more than a few knots. If you go too fast, you are no longer trolling and people who fish would not be pleased! Crazy sailboat people with dinghies do want to go fast, and electric trolling motors left us sailors a bit disappointed in the speed department.

Aquos said: “Let’s make it happen” and built a powerful trolling motor with a massive propeller that can push a dinghy at speeds comparable to a gas outboard!

I bought a 24v 110lbs thrust motor from Aquos and built a 24v LiFePO4 battery for it and gave it a quick test in a pond near my parents house (hardly the conditions we will encounter while cruising), but it was a success and fun! The dinghy moved at the same speeds we got out of our Honda 2.3 and Suzuki 2.5, but with none of the noise that goes with a gas outboard.

We are heading back to the boat next week and will give it a try in salt water (fingers crossed) and let you know how it holds up to real world cruising duty usage.

Building a Bridge

This has nothing to do with Karma or friendships or anything like that. This is about building a battery!

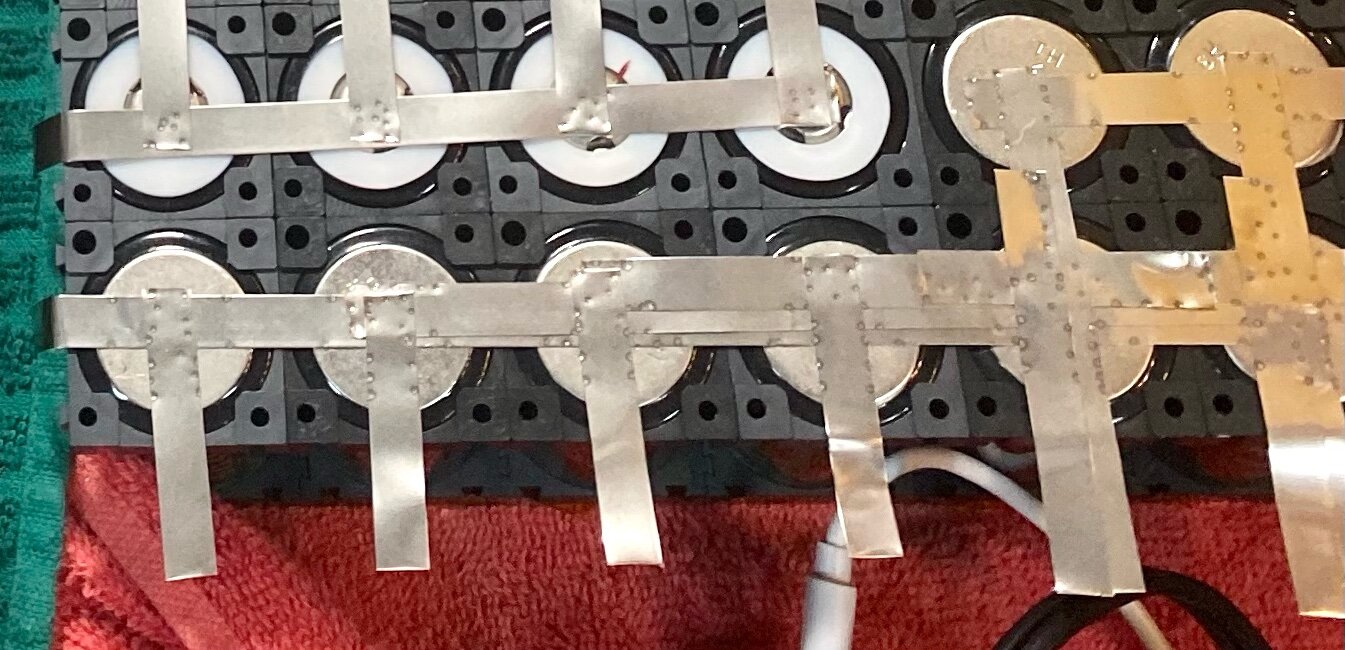
In the battery being built above, the cells are not aligned in neat and even patterns. This is due to space limitations and just makes things complicated. With a little thought, major problems can be avoided, and the implementation takes a small amount of effort.

In this example, I’m building a 16s16p battery. That’s fancy talk for a 48v battery made up of a ton of tiny battery cells. Each cell is 3.2v, and when I link 16 of them up in series, I end up with 51.2v (which ironically is considered a 48v battery). Each cell is only 6ah, so if I just linked 16 of them up in series I would have a 48v battery that holds 6amps; not very useful to power the electric motor in our sailboat along with all of our house loads. To beef up the amp capacity a bit, we simply add more cells in parallel, 15 more to be precise! This gives us a battery that will hold 16x6=96 amp hours and is made up of 16 cell groups in series.

The final result is 16 series and 16 parallel, or also called a 16s16p battery.

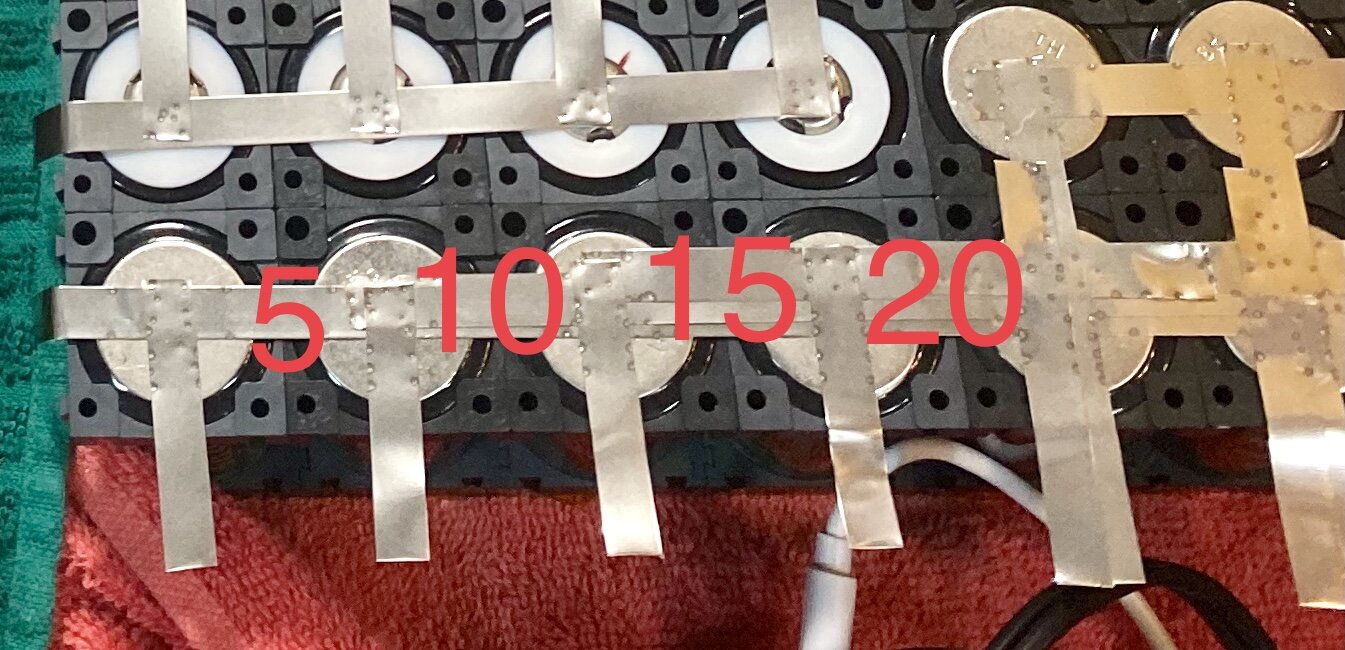
That’s cool and all, but why do the cells need to be in strange interlocking patterns? Space. Being how these are batteries for a boat, space is never existent and we will need to cram these batteries into wherever we can fit them. We didn’t have the space to fit 16 cells in a row, so we arranged them into an arrangement that is 10 cells wide. This means that each parallel group is 10 cells in a row with another 6 cells crammed around next to them in the next row. The next row can fit 4 more cells of the next group, the following row is 10 of the same, and then 2 more cells spilling over into the next row. This pattern will continue all the way down the line until you finally get to the last cell group where the pattern just ends.

Why does this matter?

You need to know how much power you plan on pulling from your battery at any point in time and then build the battery to handle this load. In our case, the battery will need to supply 400 amps to power our electric motor when it runs at full speed. Building one battery that can yield 400 amps is pretty ridiculous so we did the logical thing of building 5 batteries that combined will yield 400 amps. Each battery only needs to do 1/5th of the work and therefore each battery will only need to yield 80 amps.

80 amps is our magical number and those pretty Ni strips we have linking the cells together can only flow 5 amps.

These 4 cells here at the end can become quite the problem! 4 cells can theoretically flow out 4/10ths of the power from the battery. That’s 32 amps that will come rushing out of those cells at full speed from the motor. If we simply connected the cells together with those strips of Ni, power would flow through the area and it would look like everything is fine.

Then when we give the engine a good bit of throttle to move us in a hurry, our battery would break! The little Ni strip that connects those last 4 cells to the rest of the battery can only flow 5 amps. When you start pushing 32 amps through it, that Ni strip will heat up and magically transform itself from a conductor into a fuse. When it gets hot enough, hopefully it will melt and sever the connection. If it remains connected and heated, it can cause the Li cells it is running over to ignite into a flame which will burn with all the fury of Hell, even submerged underwater!

The solution is very simple: Build a bridge.

The last cell will flow out the least amount of power, but the cell leading to it will flow the amount of power that it needs plus the amount of power of the cell downstream from it. The next cell over will have the same conundrum.

By stacking the Ni strips, the amp capacity of the connections increases by 5 amps at each stack. This stacking is called a “bridge” as it bridges a pass that would otherwise serve as an electrical bottleneck. This bridge stacks up to look like the silhouette of an arch bridge which will then flow the power across the gap.

It is important to remember that the bridge needs to extend out the other side in the same manner, otherwise the bottleneck simply gets transferred.

If you notice, I didn’t build the bridge up to 35 amps, but instead stopped at 20. This is because the 80 amps that will flow out of the side of the battery are being directed out through the strips that run off to the sides.

Since we need to flow 80 amps and each strip carries 5 amps, we would need 16 strips to be safe. By doubling the strips, we create a flow of 10 amps out certain cells while single strips only flow 5 amps. This area beyond the bridge only has single strips, meaning that only 20 amps will leave the battery in this area and therefore 20 amps needs to flow by the bridge.

When you build your battery, trace out how the electrons will flow along and trace out their path from the positive pole to the negative pole. If you find an area where a bottleneck exists, simply add more strips to increase the ampacity of that portion. When you build a bridge, also look at the areas that feed the bridge and extend the additional strips into those areas as well to account for the added flow of electrons in these narrow areas.