The Power of Linseed Oil

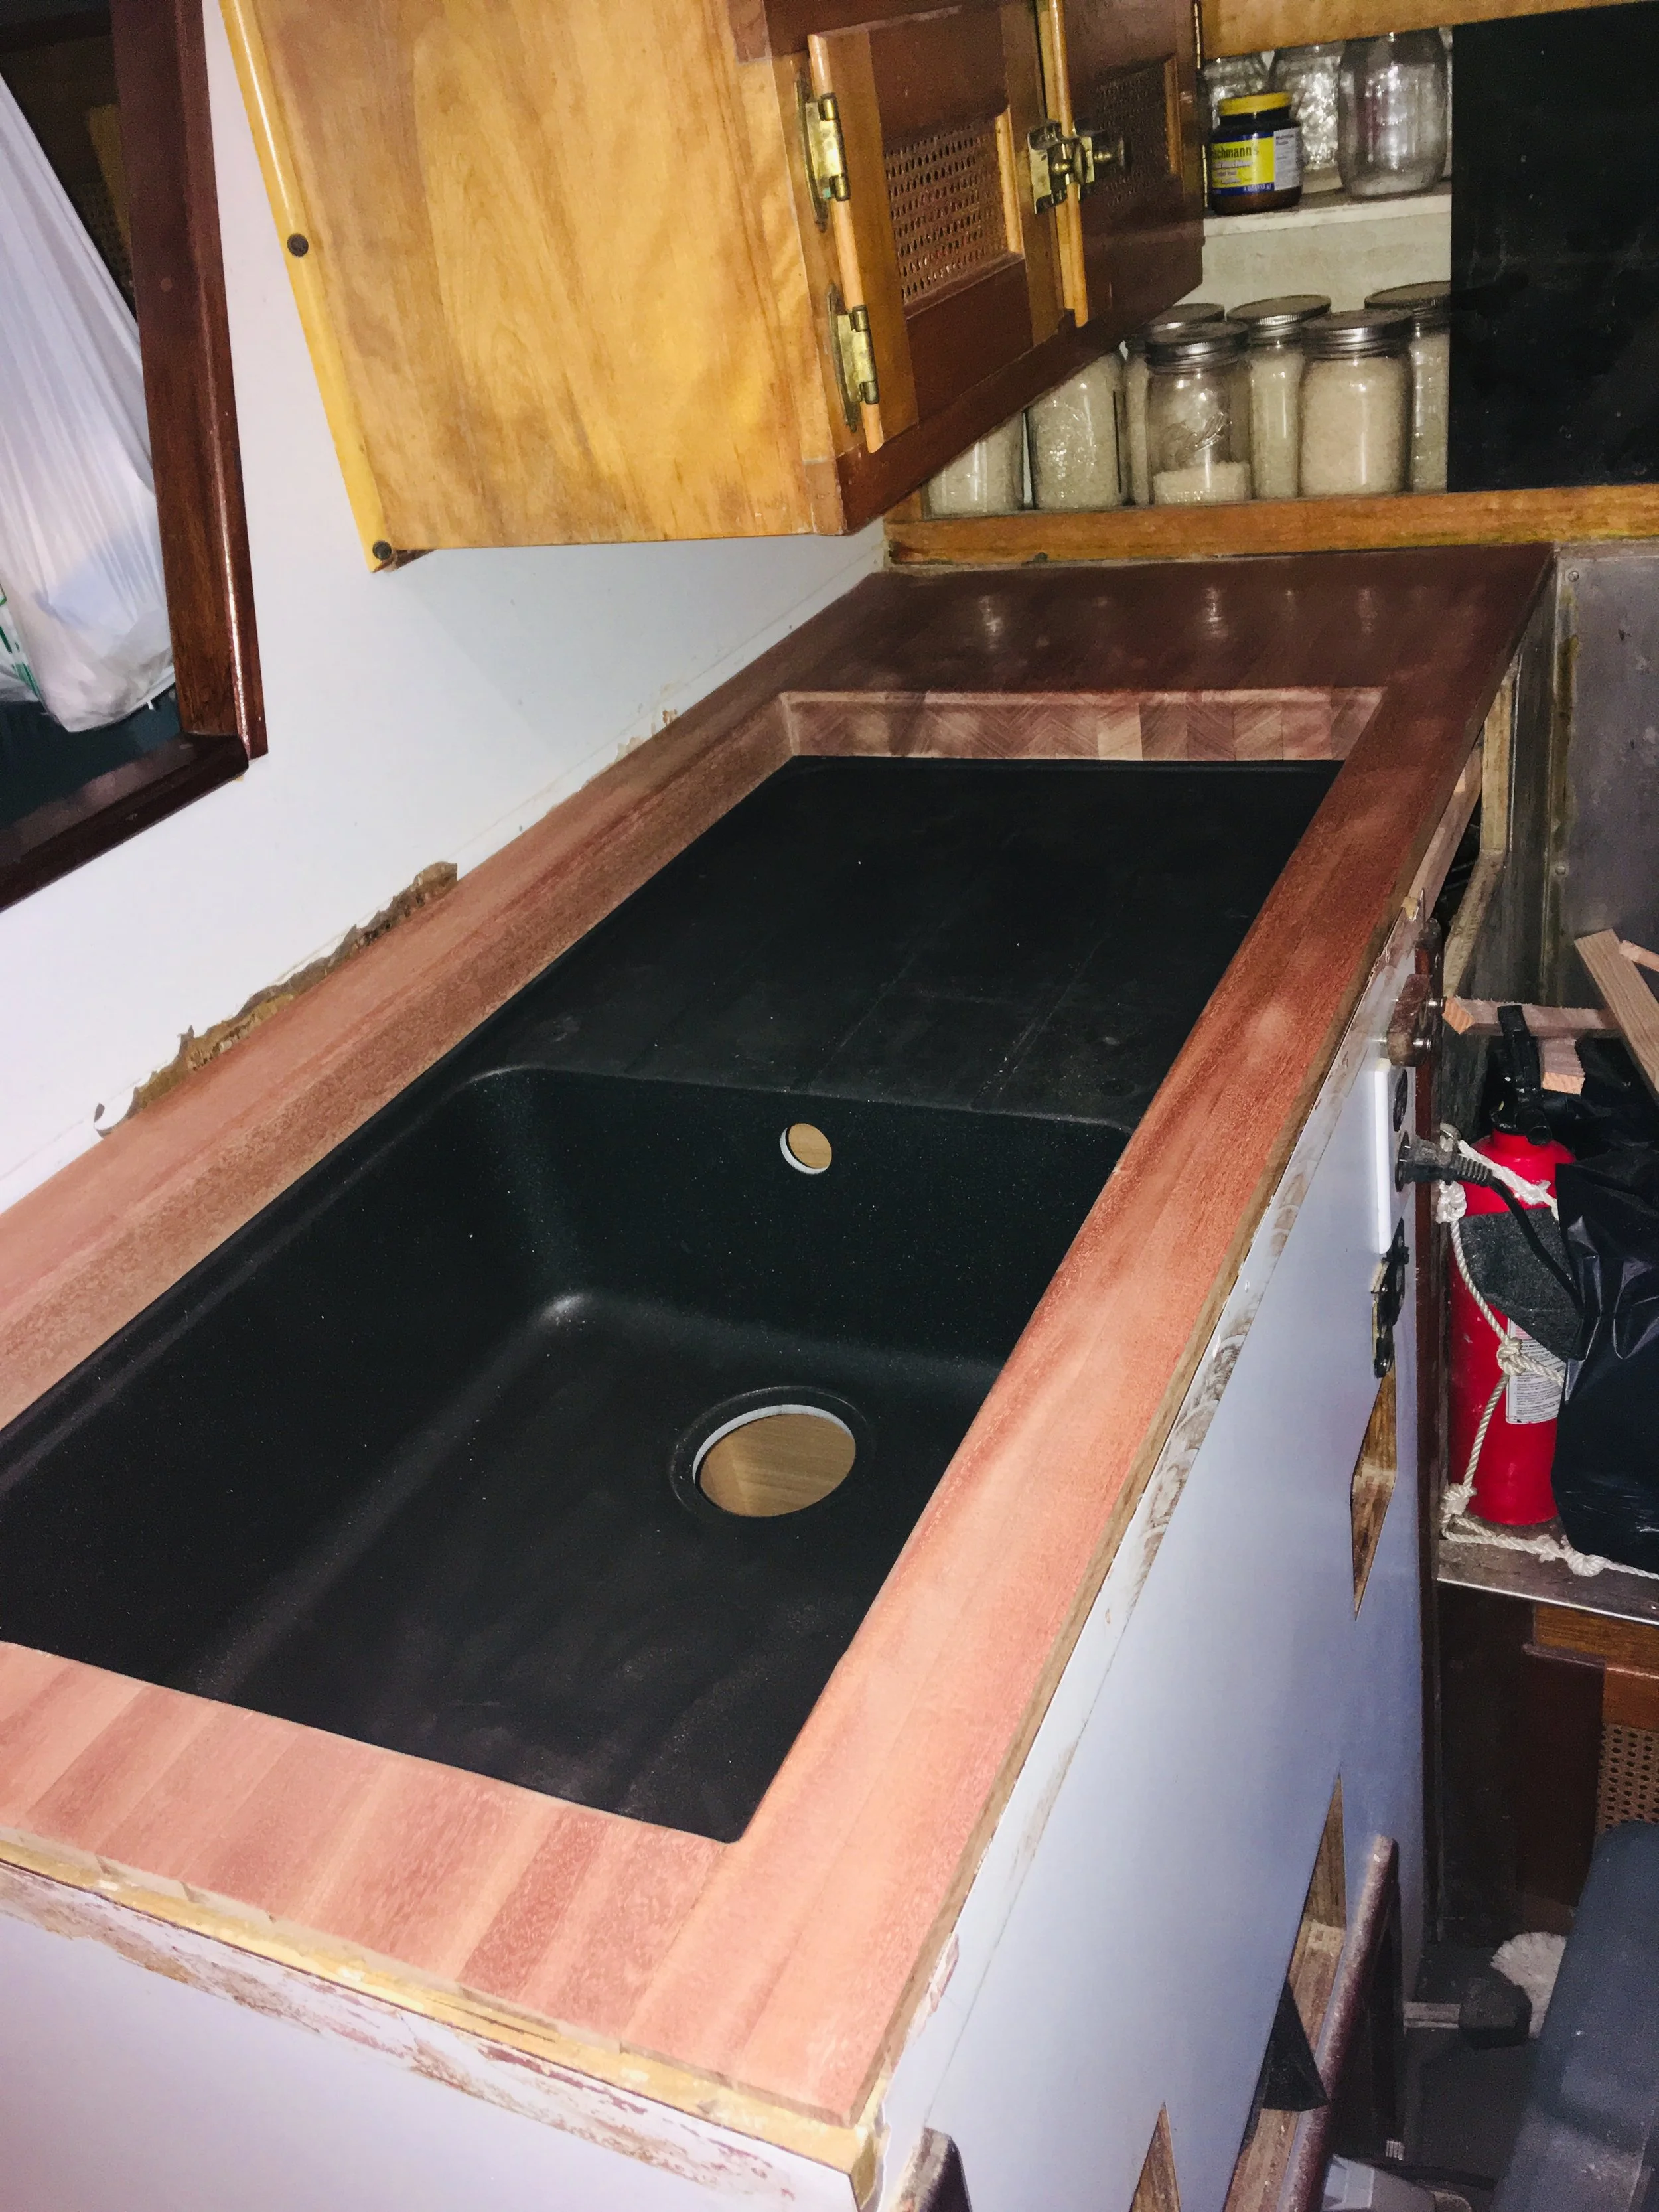
With the sapele mahogany polished with 2000 grit sand paper, it is time to take the finish to a whole new level: oil!

FullSizeRender.jpg

I used boiled linseed oil to finish the counter for a few reasons:

1st: It is food safe. Food will be in contact with this surface and I would rather not poison myself for the sake of having a pretty counter.
2nd: It is forgiving. If the wood gets scratched, scorched, or damaged in any way, I can simply sand it a little and apply some fresh oil. The oil will keep the wood happy and help hide or heal scratches in the wood.
3rd: It makes the wood water resistant. Oil repels water, so if the wood is saturated with oil, water can’t get into the grain.
4th: It makes the wood shine!

FullSizeRender.jpg

The drastic change in the woods appearance is quickly noted. The grain just pops to life as the oil soaks in.

FullSizeRender.jpg

Quarter sawn Sapele Mahogany with ribbon grain can be polished to accentuate and bring out the golden flecks in the wood.

FullSizeRender.jpg

As the oil soaks in, the wood begins to look a little dry. When the wood is “drier” we simply apply a fresh coat of oil. No sanding necessary, just wipe on a new coat of oil.

Having the wood oiled is great in the galley where water splashes all the time. The oil repels the water and causes it to bead up on the surface of the wood. Here the water is easily wiped off without any issues of water stains or marks left on the wood.

Undermount Sink

Undermount sinks look sleek, clean, and modern, but do they work in a boat?

FullSizeRender.jpg

Undermount sinks are attached to the underside of the counter by tiny dinky little clips. Their attachment is aided by the use of adhesive to help hold it on to the underside of the counters while also sealing out any water that might try to leak through the gap between the counter and the sink.

This is all well and good in a house that doesn’t move much, but a boat is the equivalent of living on a fault line while speeding through time. Every day, the boat will cycle through hundreds of movements, each making the entire boat flex and twist. If the heavy sink is hanging from the underside of the counter, it will soon become separated and disconnected from the underside and could possibly just fall off!

So, how do you do it? How do you undermount a sink in a boat? Easy! You top mount the sink beneath the counter!

Under this pretty mahogany butcher block lives an ugly sheet of plywood with a hole cut in it to hold the sink. The sink is simply dropped into this hole and firmly attached to it as a regular drop-in sink. There is no way the sink could possibly fall since it is sitting onto of a sheet of plywood! The pretty counter is then mounted over the sink and firmly fastened into place and the appropriate caulking performed to keep out any leaks.

In a boat, undermounted sinks are better thought of as “sandwich mounted” sinks, where the sink is sandwiched between a plywood sub-counter and the visible counter.

Galley Refit: Polishing Hardwood

All the glue sanded off and the entire counter fit in place. The plastic has been removed and everything is looking ready to go!

FullSizeRender.jpg

Before the wood can be finished, the wood first needs to be prepared! I initially sanded the wood with 60 grit paper to take off the glue lines and fair up any imperfections. Then I graduated to 320 grit paper, then 500 grit paper.

FullSizeRender.jpg

At 500, the wood felt smooth and looked great, but I knew I could do better! To take it the extra mile, I sanded the entire counter with 2000 grit paper, the same kind you use to polish porcelain.

FullSizeRender.jpg

The result was wood that not only felt smooth, but also looked smooth too. Being a very hard wood, the wood itself could be “polished” on it’s own to have an amazing luster where it was “almost” reflective.

With the wood dry and “thirsty” I then caulked the seam between the sink and the counter top. Once that was cured, the counter itself was oiled with linseed oil.

Managing Glue Lines in Corners

The four pieces are assembled and the excess glue has been sanded away. Now we need to glue the four pieces together, but how do you avoid glue lines in the corners where you can’t sand later?

FullSizeRender.jpg

Plastic will keep the boards from gluing to the sink, but how do you keep the glue out of the edges? Masking tape.

FullSizeRender.jpg

Blue masking tape can be placed right up to the edge of the wood joint, then cut off with a sharp knife.

FullSizeRender.jpg

Cutting it instead of tearing it ensures that the edge of the tape is flush up against the edge of the wood with no gap.

FullSizeRender.jpg

The goal is to completely replace the wood in the corner with tape, that way any glue that squeezes out of the joint in the gluing process finds its way onto the tape and not onto the wood.

FullSizeRender.jpg

With the first piece done, it is time to repeat the steps on the next piece of the corner.

FullSizeRender.jpg

If you are lucky and the tape meets the edge of the wood perfectly, you are finished!

If the tape is not perfect, you will need to cut a scribe line into the tape so that it can be peeled off.

FullSizeRender.jpg

Use the tip of a sharp knife to cut the tape on the wood. Don’t worry about scratching the wood as this mark will be in the very corner of the wood, so it won’t show.

FullSizeRender.jpg

With the line marked, simply peel off the excess and be presented with your own custom cut masking tape line.

FullSizeRender.jpg

The tape peels off easy with the tape cut all the way down to the wood with a sharp knife.

FullSizeRender.jpg

Now yo u have the corner protected to perfection. The last step is to fill the wood joint with wood glue and compress the joint with formidable clamping pressure!

Once the wood is clamped up, the excess wood glue will squeeze out. Take a paper towel and wipe up the excess wood glue. Once it is all wiped up, simply peel off the tape and be finished with it. You want to pull the tape off while the glue is still wet or the tape itself will get glued to the wood by the glue, giving you a whole new level of frustration!

The glue that squeezes out on the top of the furniture doesn’t matter because it can easily be sanded off. The glue in the corner is the troublesome part and having tape there will make your life easier.

Galley Refit: Countertops Part 2

Time is short, let’s get gluing!

With the sink set in the area and the mahogany dry fitted onto the counter, everything was measured and fitted. Now it is time to glue up the four independent parts in place, but without getting glue on any of the galley components.

FullSizeRender.jpg

Like the old commercials used to say: “Plastics make it possible!” I cut open a large black trash bag and covered the sink with it, as well as the entire area that will live under the counter. Then the four independent pieces of the counter were isolated from each other with shrink wrap. Having everything in place makes the gluing process easier since I can assemble the whole counter top and just clamp the edge to the bulkhead, applying even pressure to the entire structure.

Titebond III was used to give a permanent and waterproof bond between the planks.

FullSizeRender.jpg

The pieces were allowed to cure overnight and then all the clamps and plastic could be removed from between them.

The inboard edge needed to have a rabbet cut into it to fit onto the edge of the counter’s plywood sheathing. The issue is I didn’t bring my rabbet plane to the Azores, so I had to use a table saw and carefully cut out the section of wood that needed to disappear in order to get it to fit flush up against the edge.

With the four pieces glued into solid pieces and everything test fitted, the next step is to glue the whole counter together, just like before but without the shrink wrap isolating the four pieces of wood.