Welding Aluminum Quadrants

If your aluminum rudder quadrant shatters, you might be tempted to simply have the pieces welded back together! This will work as a temporary solution, but it will never be as strong as the original. 

IMG_1924.JPG

Our rudder quadrant shattered, and we did just that! We paid a welder to "glue" it back together so we could keep sailing along. We knew we would need to replace it with a new one, but the further we sailed, the less we thought about replacing the quadrant.

Several months passed by, and securing a replacement went from a top priority to another item on the list should we happen to stumble upon it at a consignment shop. 

Then we had a serious mishap occur and the rudder quadrant shattered again! 

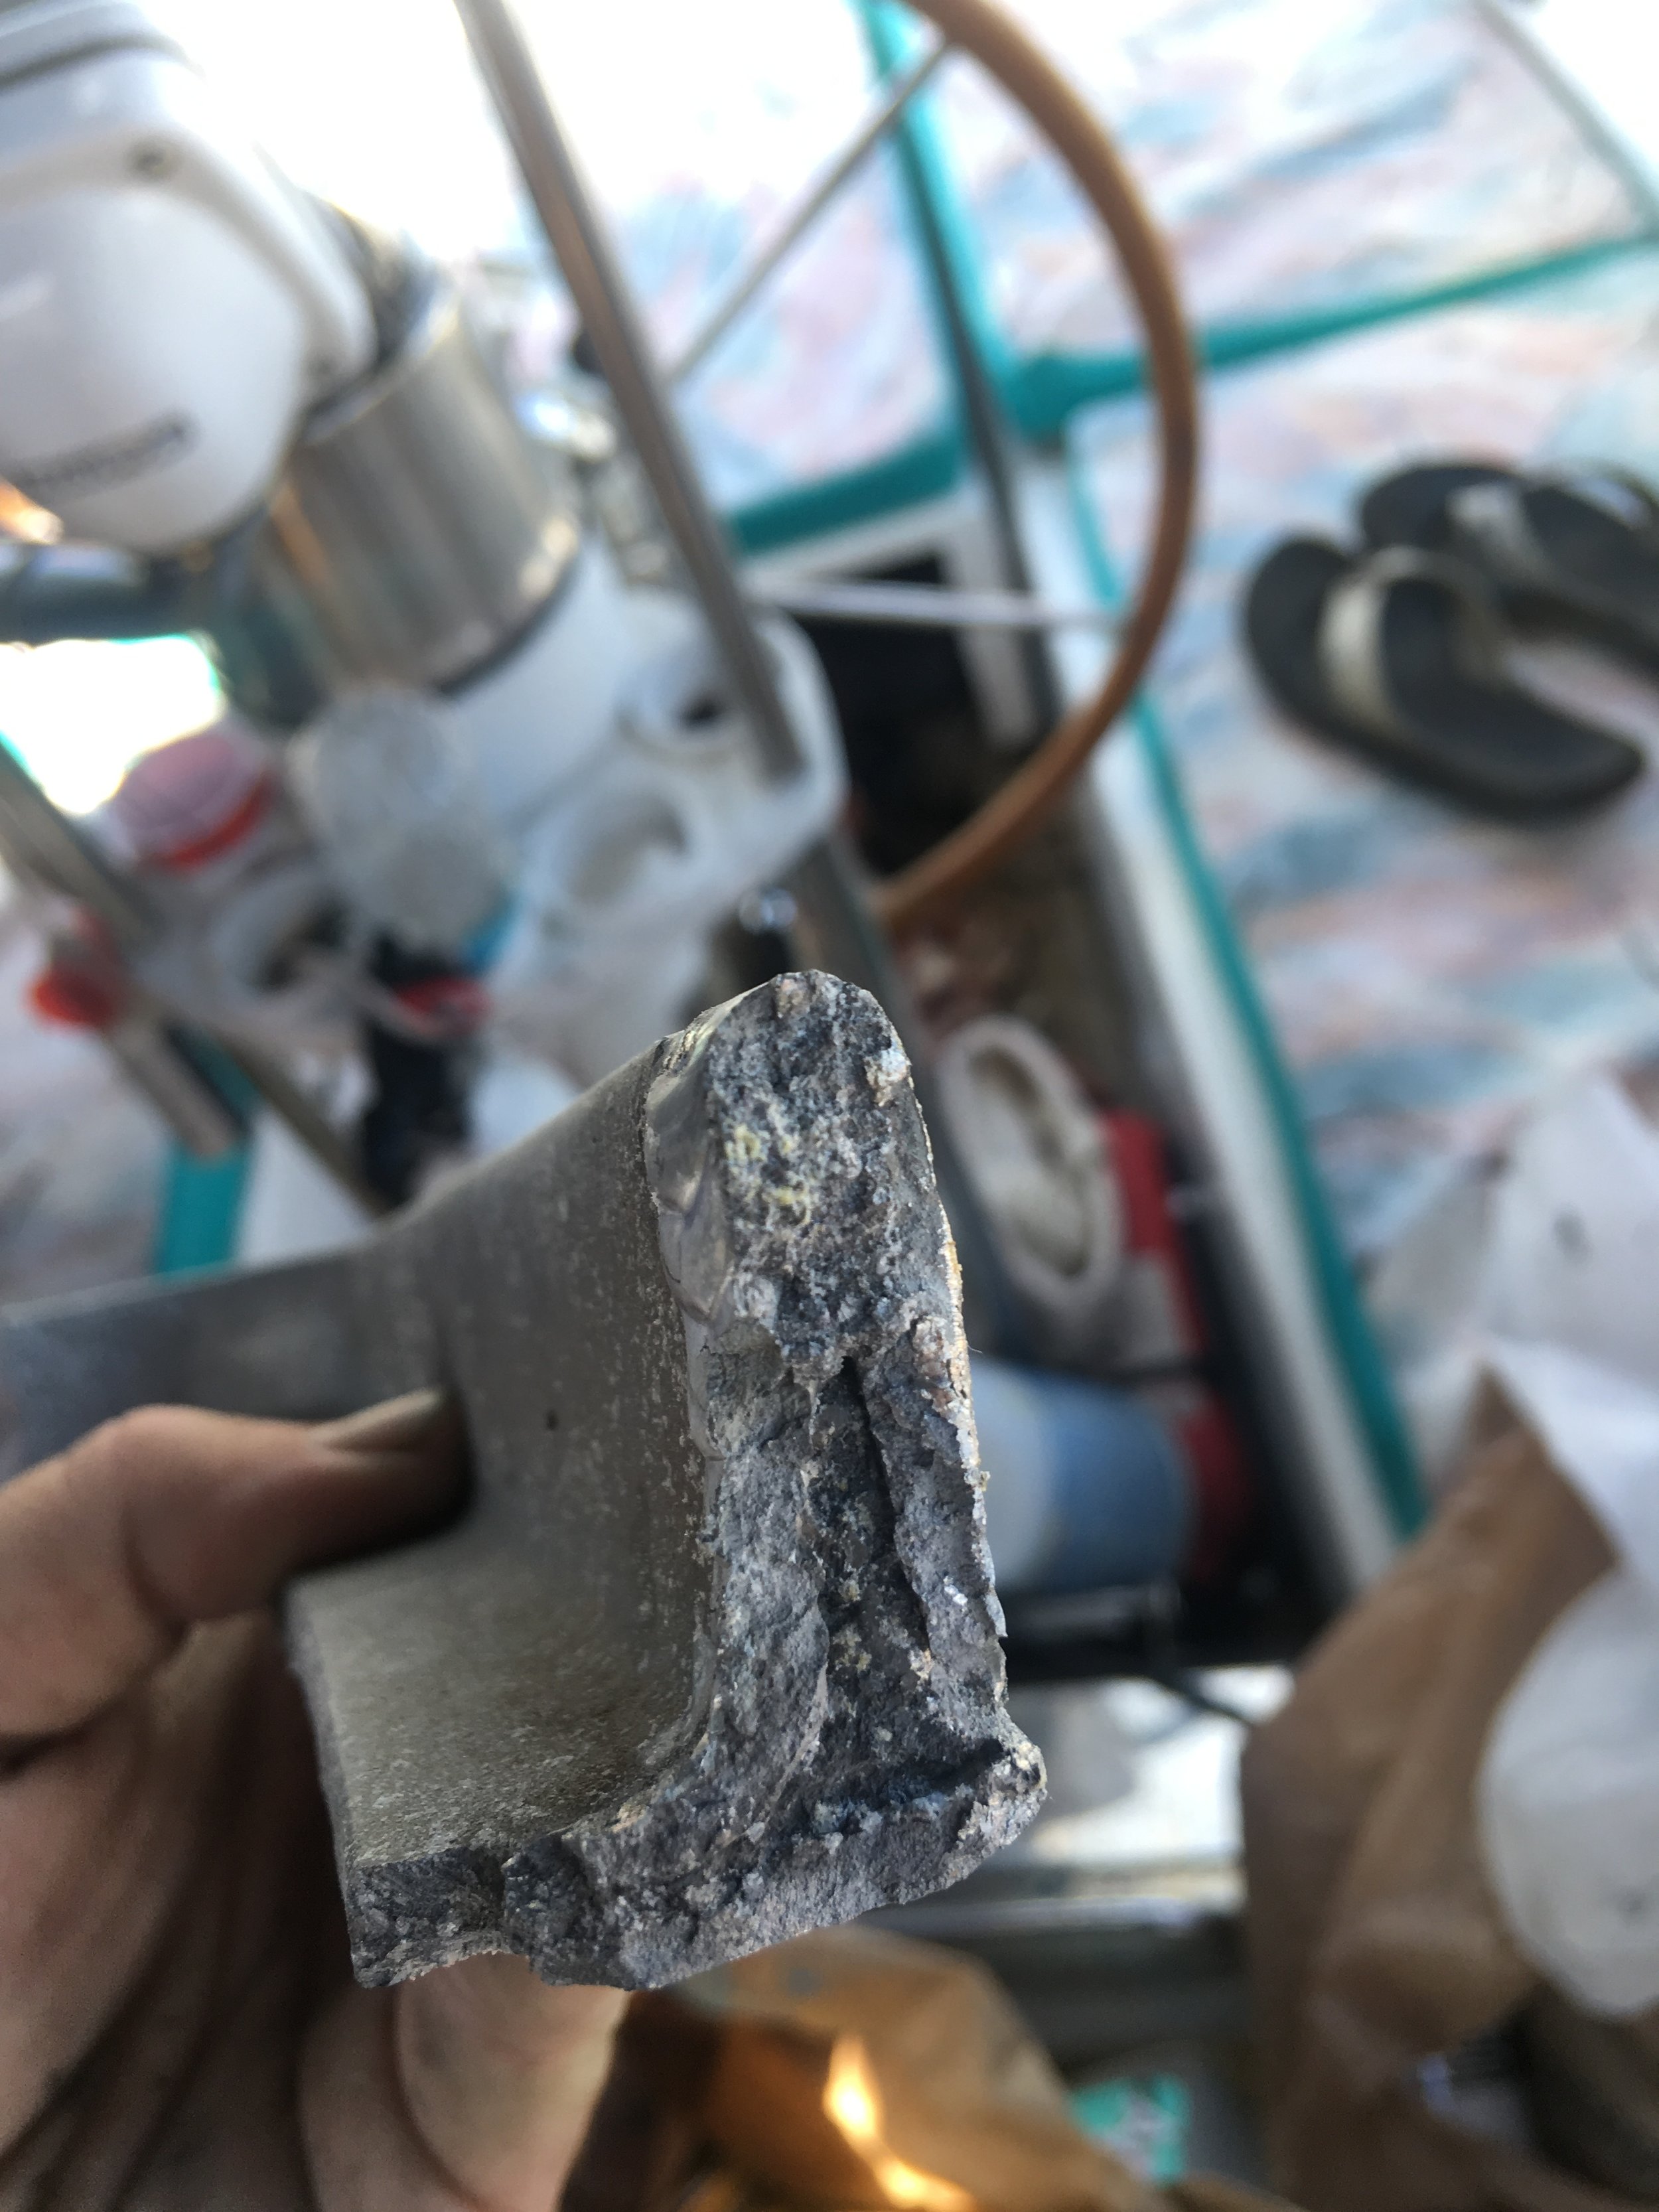
Looking at the cross section of the break, you can see that the welded aluminum has a different crystaline structure when compared to the cast portion. You can also see the depth of penetration of the weld. This means that only the outside of the quadrant was re-welded, and the inside merely sits approximated but not welded. 

I don't weld, so I can't really judge on the quality of this weld, but I can state that this welder also fabricates stainless steel and aluminum towers and railings for boats. The quality of his other jobs gave me the confidence that this repair would be as best as he could do it. 

Rudder Quadrant Replacement

Our old rudder quadrant was made out of aluminum, and has had a tough life.

IMG_1859.JPG
IMG_1860.JPG

A few months ago, it was shattered while we were towed off a shocking in North Carolina. The pieces of the quadrant were then welded back together, though this was more of a patch than a fix. 

Cast aluminum doesn't weld well, so this shouldn't be thought of as a permanent fix. That being said, we sailed over 400 miles of blue water with it before it shattered again. Again, it shattered as we were being pulled off a beach on the coast of Florida. 

The patch worked very well, but it shattered on the welds (and one new place) this time, so we knew it was time to replace the entire unit with a stronger material: Bronze. 

Bronze is preferable over aluminum in a boat because it is stronger, corrosion resistant, and less likely to break. The biggest downside is the weight of the unit. The aluminum quadrant was only a few pounds while the bronze unit weighs almost 22 pounds (10kg)! 

Since bronze is so much stronger, it doesn't need the middle spoke that the aluminum quadrant required. If severely punished, the bronze quadrant would wrack or bend, rather than shatter into pieces. This will mean that your steering will be a bit off, but still operational.

The choice to switch to bronze was simple, but the costs were not. A bronze quadrant will set you back hundreds of dollars! Ours cost a wee bit over $700.  

Hopefully, with better watch keeping and deeper cruising waters, we won't have to torture test the new quadrant like we did the old quadrant. 

Rudder Damage

The rudder did not break during the beaching, but actually during the recovery process. The rudder had dug itself into the sand, and when the boat turned during the salvage, the rudder wanted to stay put. 

The keel rotated around the rudder (instead of the rudder on the keel) and turned past the limits of the rudder. 

IMG_1854.JPG
IMG_1855.JPG

The top and bottom of the rudder snaked into the keel and chipped off bottom paint as well as producing some damage on the rudder's skin. 

The first step in the repair process is to sand away the area to reveal any hidden damage or cracks. All cracks are then ground out. The core of the rudder is then inspected for water intrusion and moisture. 

Luckily, in our case, the rudder is filled with a foam that will not accept water, so there was no moisture in the body of the rudder. The bottom only suffered a compression, but no crack. 

The voids were filled in with fiberglass and epoxy with 406 thickening agent and allowed to cure. This was then covered with epoxy and 407 fairing compound, making it easier to sand the final fix into the airfoil shape of the rudder blade. 

Steering is critical, it means the difference between a yacht and a shelter! This was the repair needed for the external damage to the rudder, but we still have to deal with the internal damage that occurred: the rudder quadrant. 

Haulout After Beaching

It is rather painful to hear that your home needs to be "salvaged" and I hope you never need to go through this. We beached on the coast of Florida and laid in the surf on our port side. The sand rubbed off all our bottom paint and the rudder quadrant broke while we were being pulled off the beach. 

IMG_2188.JPG

Being towed to the marina, I had many thoughts running through my head about what the bottom might look like and what damage might have been incurred. Thankfully, she is an overbuilt boat and survived this ordeal with only cosmetic damage to the hull!

IMG_2199.JPG

The keel looks like it has been sandblasted, and the turn of the bilge had scraped through the blue, black, and into the red layer of bottom paint. 

IMG_2221.JPG

The rudder also had a small crack in it from being over turned after the quadrant had broken. These issues will all be addressed shortly as we prepare to repair our home and continue voyaging in a much more responsible manner. 

Surviving a Beaching

Getting beached is a horrible experience. At the moment you contact the shore, a million thoughts will run through your head. Cloudy minds can lead to poor judgements, and that can cost you your boat!

IMG_2217.JPG

When you run aground, hopefully on a soft sandy beach in calm weather, there are a few things you need to do to save your yacht.

First, you need to seal up any point that water can seep into your boat and cause it to sink. This means you need to close and dog down all your hatches and portholes. Dorade vents work well to let air in and keep water out when the boat is sitting at its usual angles, but when you beach, you might be heeled over so far that they fail to drain and will allow water to enter. You want to seal up any of these openings and replace them with their sealing plates. Solar fans are also a nice way for water to pour in and flood your yacht while you sit careened. 

Second, you need to protect the yacht from the surf. The pounding waves on the hull will not break your yacht, but the pounding of your hull on the shore will. Each wave that passes will lift your boat a bit as the wave comes in, and then drop you on your side as the wave goes out. If the waves are big enough, the force of the fall can cause your hull to crack and you will sink! 

So, you need to get out of the surf, and the best way to do this is to beach your boat as far up on the beach as you can! It might seem smart to drop your sails immediately, but don't! You want to use the wind that is blowing you ashore, along with the waves that are picking you up and carrying you onto the high sands.  

The storm is going to get your boat up on the beach, this is inevitable. The trick is to get your boat up there without breaking the hull! Keeping your sails up will beach you faster and minimize the number of hits you will need to take in getting there. 

IMG_2216.JPG

Once you are up on the beach, the waves that will reach you will not be strong enough to lift your hull and drop you again. Instead, these waves will simply crash onto your boat like if you were a boulder on the beach. At this point, you can stop worrying about the hull cracking and focus more on keeping water out of the boat. 

Water intrusion will still be a critical issue, even up on the beach. Spray and surf can fill your hull and cause you to sink on dry land. It is best to try and orient the boat in a manner that will save your yacht in this disaster. 

Third, if you have a fin keel or full keel, try to orient yourself so that your deck is facing the shore and your keel is facing the surf. Breaking waves will smack the underside of your boat which is well sealed and waterproof. The deck will be spared this bombardment of waves and all your portholes and hatches will only have to deal with attenuated spray. 

If you have a long keel, try to beach bow into the shore. The keel will raise the stern out of the water and breaking waves will pass under the stern. The rudder and keel will also help cut the waves as they pass under the boat. 

Deck orientation is very important, but there is one caveat: Length of stay. If you are going to be rescued promptly, you want to orient your deck to the surf no matter what. Seal everything up and pump out any water that comes in. If you are going to be there for a while, point your deck towards shore.

The reason is, when they pull you off the beach, they will pull your bow into the water. The keel will act as a break and you risk rising up and tipping over on your keel. This hard smash can crack your hull and destroy your yacht. So, if you are going to be rescued very soon, put your deck towards the water so that you are already in the orientation to pull you in and you won't need to tip over. 

First and foremost, avoid running onto the shore. If you do, then follow these steps to save your yacht. The quicker you act on these basic principles, the better the outcome will be.