Running Rigging

Seizing a Shackle

When you install a shackle, it is important that you seize the bolt so that it doesn't come unscrewed and fail. This is very easy to do, all you need is a little piece of stainless steel wire. 

IMG_2153.JPG
IMG_2156.JPG
IMG_2168.JPG

The wire is passed through the little hole in the bolt and then around the shackle. Then the tails are twisted together tightly and bent over to prevent snagging on anything. It is always a good idea to tuck the twisted tails close to the bow that way they are less likely to snag on anything. 

That's all there is to it! Now make sure that your anchors shackles are all seized up so you don't lose them because a simple pin came unscrewed. 

Backstay Flag Halyard

Flag halyards are small halyards designed to raise and support a flag. The backstay is a great place to fly a flag because it will allow the flag to fly clear of any obstructions that could otherwise tangle or snag the flag as the wind shifts. 

Now, to install a backstay flag halyard, you have to install a block of some sort high up on the backstay,. This will be the maximum height that the flag will be raised, and there are two options on how to do this. First, you can climb the mast (via the backstay) and attach the block on the backstay itself. The second method is to tie a hitch knot that will hold in one direction, and slide in the other.  

IMG_2157.JPG
IMG_2165.JPG

I opted for the second method, as we do not need the flag to be too high up, so by tying a hitch knot on the dyneema backstay, I was able to then simply push the knot up the backstay with a pole. This allowed me to raise this point without leaving the deck! (Be sure to install the halyard in the block before you push it up the backstay though). 

IMG_2161.JPG

This hitch knot will slide up but when the block is pulled down, it will bind on the dyneema and hold firmly in place.

IMG_2172.JPG

If you have a backstay adjuster, you want to make sure that the flag halyard remains lower than the lowest position of the backstay adjuster. This will keep the flag halyard from interfering with the more important function of the backstay adjuster. 

IMG_2171.JPG

With the halyard installed, you can fly your flag from the backstay! 

Storm Sailplan

Storm sails are small and very strong sails that are flown in high winds. While the sails themselves are very strong, there is another aspect of the sails that adds to the survival of the storm without damage to the yacht: where the sails fly. 

IMG_2150.PNG

When a mast breaks during a storm, it almost always breaks off at the first spreader. This means that the spar above the spreader will buckle and break, leaving you with a shortened mast and a broken rig.

What you can learn from this disaster is that the section of the spar above the spreaders is not as strong as the section below the spreaders. It is not a matter of strength of the spar being weaker above the spreader as the spar is the same size and strength over its entire length, its a matter of how the rigging is setup. 

The lowers, which attach below the first spreader do not need a spreader to reach the mast at a good angle (minimum angle for the stay to approach the mast is 12 degrees) without any guidance. The run from chainplate to mast is the ideal angle. The run from chainplate to cap shroud is not as lucky, and the angle would be very small. This is why a spreader is needed to hold the stay outboard, so that it can then turn in towards the mast at an angle of no less than 12 degrees. 

The mast is only supported at a few points on a yacht, and these points are the areas where the stays attach. Your first unsupported length is from the deck to the first spreader. The second unsupported length is from the first spreader to the next set of stays. On a single spreader rig, the next supported section is the mast head. On a multiple spreader rig, it is the next spreader. 

The strongest unsupported section of the spar is the first section, from deck to spreader. Therefore, when loads are high and failure occurs, it occurs above this point, causing the mast to buckle at the first spreader. 

So, flying full sail in a storm is not only bad because you are applying too much strain to the sails, rigging, and yacht, but also because you are applying strain in the wrong areas. Full sail means that the mast is being loaded all the way to the top! The loads it will be subjected to are mind boggling! 

Reefing not only reduces the sail area to decrease the force on the yacht, but it also lowers the sail area, concentrating the loads to the first unsupported section of the spar. Storm sails take this one step further and concentrate the loads entirely to the first unsupported section. 

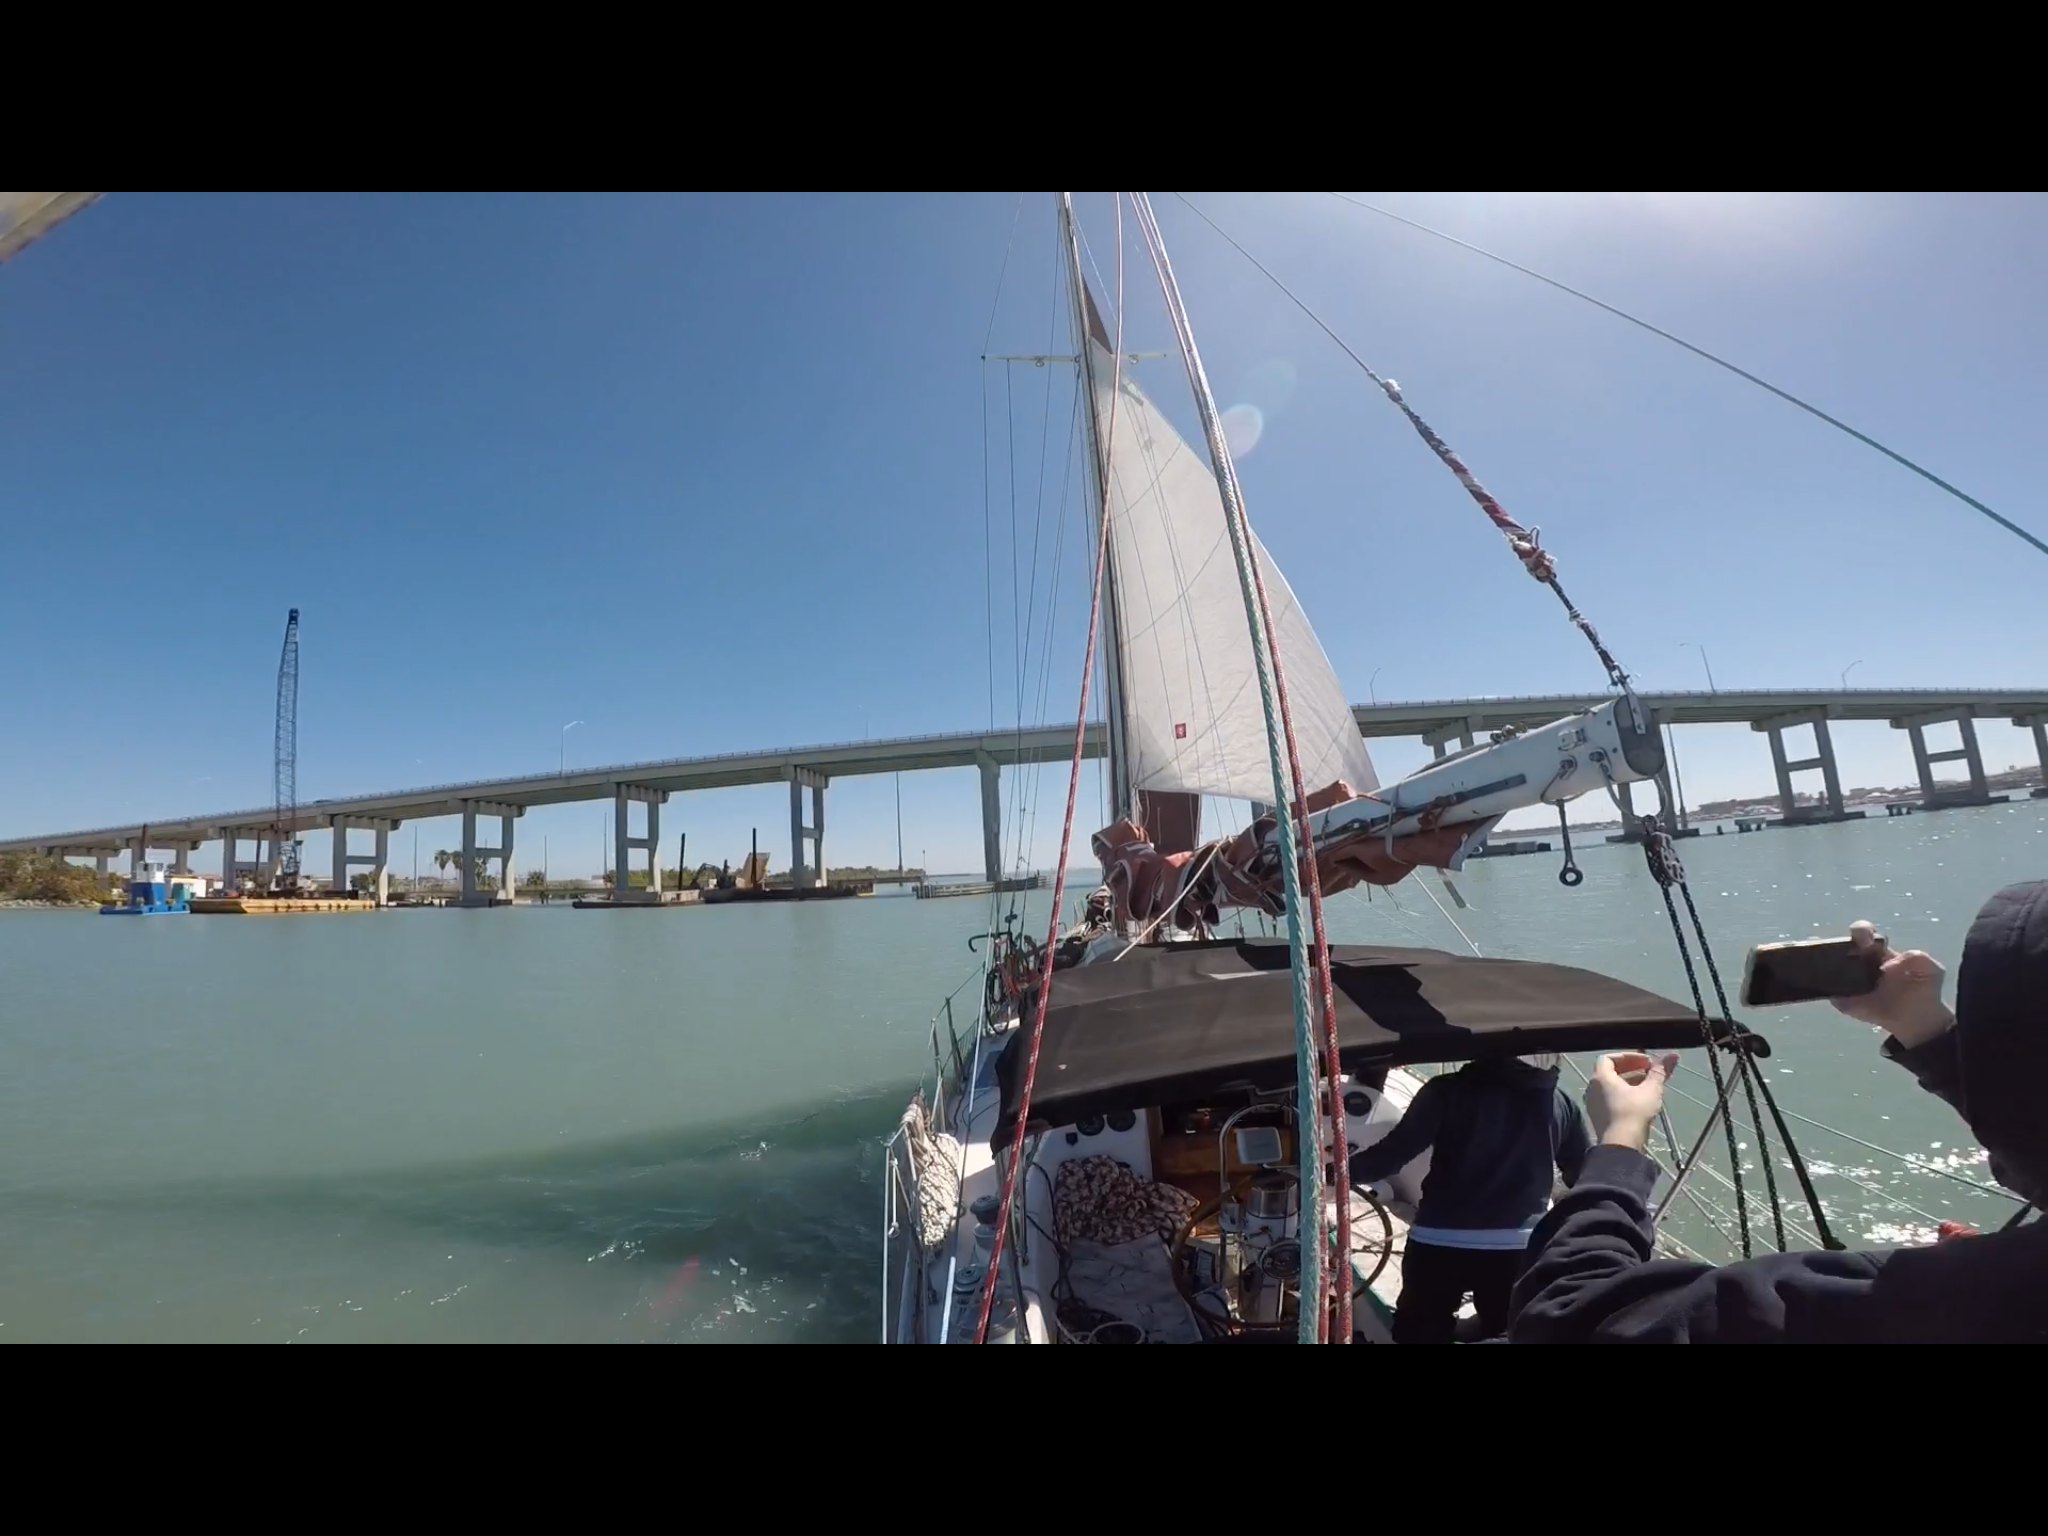
When you setup your trysail, the tack needs to be set so that it is higher than the stack height of the mainsail. This will allow it to flow easily on either tack. While you might feel inclined to simply add a longer tack pennant to clear the mainsail, it is important not to raise the trysail too high. 

The head of the trysail should end up in the area of the first spreaders, that way the loads are concentrated in the first unsupported span. Yes, the loads during a storm will be strong, but the strongest section of the spar is being loaded and the rest of the mast is simply along for the ride. 

Once the winds calm down, you can raise your full sail on your full spar, instead of trying to jury rig something with the stump of your mast that runs up to your first spreaders. 

Self Steering in Action

Our self steering system was designed and built by Scanmar. We have their Monitor Windvane mounted on our stern. The unit is known as a Servo-Pendelum system, where the wind information from the windvane is fed down to the servo-pendulum (rudder paddle in the water) to then use the force of the water passing by to power the wheel and control the boats rudder. 

IMG_2148.PNG

The system works very well and is powerful enough to steer us straight on a course in the worst of weather. The harder it blows, the faster you will go. The faster you move through the water, the more force the paddle has to pull on the control lines of the wheel and turn the rudder. 

While sailing in heavy weather where you are surfing down waves in excess of 8 knots may seem fun, it is in light weather that the unit really proves itself! 

We have found that it works well when we are sailing along at around 4 knots, and well enough to keep us on course all the way down to 2 knots. When we are sailing slowly, there is less wind and we don't move very fast; meaning that the paddle has less umpf to pull on the wheel, but at the same time, a well balanced boat will sail straight in these conditions regardless. 

We absolutely love our Monitor Windvane, and greatly enjoy watching the paddle snake its way through the water behind us as we manage to sail straight on our course! 

Snagging Other Anchors

Every time you drop your expensive anchor, you run the risk that you will never see it again! Deep below your keel lurks many unknown hazards that can grab onto and never let go of your anchor. You never know if you will hook onto something that will snag your anchor and never let it go.

Popular anchorages are a double edge sword. This location is obviously a popular spot since amongst boaters, but at the same time, there is more risk of debris being on the bottom to snag your anchor!

In Charleston, SC, the most popular anchorage in the harbor is right across from the City Marina. This anchorage is also famous for eating anchors, and according to the reviews on Active Captain, it will "eat your Rocna." The anchorage is deep, but also full of wrecks, some boats are tossed up on the shore while other masts are poking out of the water.

Since this place was the best location to anchor and reach the dinghy dock and the historical part of town, we decided to anchor on the outer edge of the anchorage and try our luck!

Our holding was great and we had no issues with dragging as the tides changed. Then the day came to leave and we encountered a problem.

IMG_1511.JPG

​The chain was rather difficult to raise, and I was forced to pull it up with the windlass on low gear. This meant that each stroke that I gave the windlass handle caused 1 link of chain to be raised. Slowly but surely, we raised the chain up into the boat and stowed it in the anchor locker. When we got to about the 140 foot mark, we got a big surprise!

It appeared that an old helical mooring screw has been snagging anchors over the years. These anchors had all gotten stuck and the owners had given up on retrieving them, cut the chain and said goodbye. As the years pressed on, more and more anchors had been snagged, and their chains wrapped around the mass. The ball of dead anchors had grown in size, making it easier for other unsuspecting anchors to get fouled as well.

Our anchor was spared, but it appears that our chain had wrapped itself around the mass with each tidal change. The simple choice was to cut our chain and say goodbye to our anchor.

The not so simple choice is to untangle our chain and retrieve our $700 anchor and 150 feet of chain! To do this, I attached a halyard to what looked like an old rope pendent that seemed secured to the mass and wouldn't come free as I raised the mass. With the halyard secured, I slowly winched the abomination upwards and onto the deck.

Our chain was still leading out of it and off to the anchor, so the mass of dead anchors wouldn't swing in towards the mast. I then secured a line from the mass to the bow cleat so that it wouldn't swing back as the chain came free. I also tied a short snubber line to the chain leading to the anchor so that the chain in the mass would be freed of tension.

With the tension released, I began unraveling the chain from the mass. The chain was wrapped and coiled around the helical screw, as well as tied tightly around the flukes that projected from the death ball.

IMG_1514.JPG

Luckily, the original ball was full of mud that got washed away by the tidal current, making the chain a bit looser and allowing me to get the tangle undone.

After a few hours, the chain was clear of the snag and we were finally able to get back on our way, leaving Charleston, SC, and heading offshore to Florida!

IMG_1512.JPG