
Morty wasn't sure if his little legs could get him over the shrink wrap door. After some encouragement and practice, he has mastered jumping through the door to get in and out of the shrink wrapped cockpit.
Being Crew
My first offshore experience on a sailboat occurred when a friend of mine invited me to crew with him as he traveled north during the spring. He is a cruiser who travels north towards Maine in the summer and then sails south to Mexico for the winters. I hopped on his yacht in Key West, FL as we made our way up the East Coast of the United States. We made landfall again in Charleston, SC where we tied up to a city pier and I took a cab to the airport to make my way home to Baltimore.
For most of the voyage, the winds were light and consistent, moving us along at a steady pace through the water. When we got near Charleston, the weather changed as a gale approached us with massive seas. We furled up the sails and turned into a powerboat as we motored head on into the large waves. Once we were able to turn and were no longer beating dead into the wind, we let out a bit of headsail which helped to steady our motion as we motorsailed the last bit into the harbor and up to the city pier.
A cheaper way to go cruising is to skip buying a yacht and be crew on other peoples boats. This lets you see the world with no upfront costs!
Aside from having a powerful diesel engine, the most notable difference between this modern design yacht and Wisdom is the amount of beam that exists in the cockpit! Wisdom is 11 feet wide at the widest point, but the cockpit is very narrow as the stern tapers down to a tiny width. This modern yacht, with its sugar scoop stern was 14 feet wide, and the width was maintained for pretty much the entire length of the yacht. Th
This translates directly into the massively open and wide cockpit which gives you plenty of space to move around and relax. All the lines are led back to the cockpit, so this extra space helps you keep everything organized and separate.
Morty Has Sea Legs
Morty has it pretty good! He gets to relax on deck as we take him to new lands to explore.
Sailing on the Calm Days
Cruising isn't always storms and moving along at hull speed. Honestly, most days are composed of light winds that ghost you along slowly. These are the days when we set our drifter "Dill" and let it catch all the wind it can as we slowly move through the water.
Rope to Chain Splice
Most windlasses will not accept a thimble connection between rope and chain. Instead, they need to be spliced in a low profile way where the transition from rope to chain goes unnoticed and seamless.
The rope to chain splice has a lot in common with a long splice, where the lays are removed and replaced to connect the lines.

To begin, you need to understand a few basic points. First, the length of your splice needs to be at least 2 feet, which means that the start of your splice will occur two feet in from the bitter end.

To begin, you will unravel one strand of your three strand rope. The strand will want to unravel, but you must keep it all together. With practice, you will be able to do this on new rope without any added stiffening agents (which is how I am doing it here), but if you have trouble keeping the strands from unraveling, a liberal coating with hair spray might be the answer to your woes.
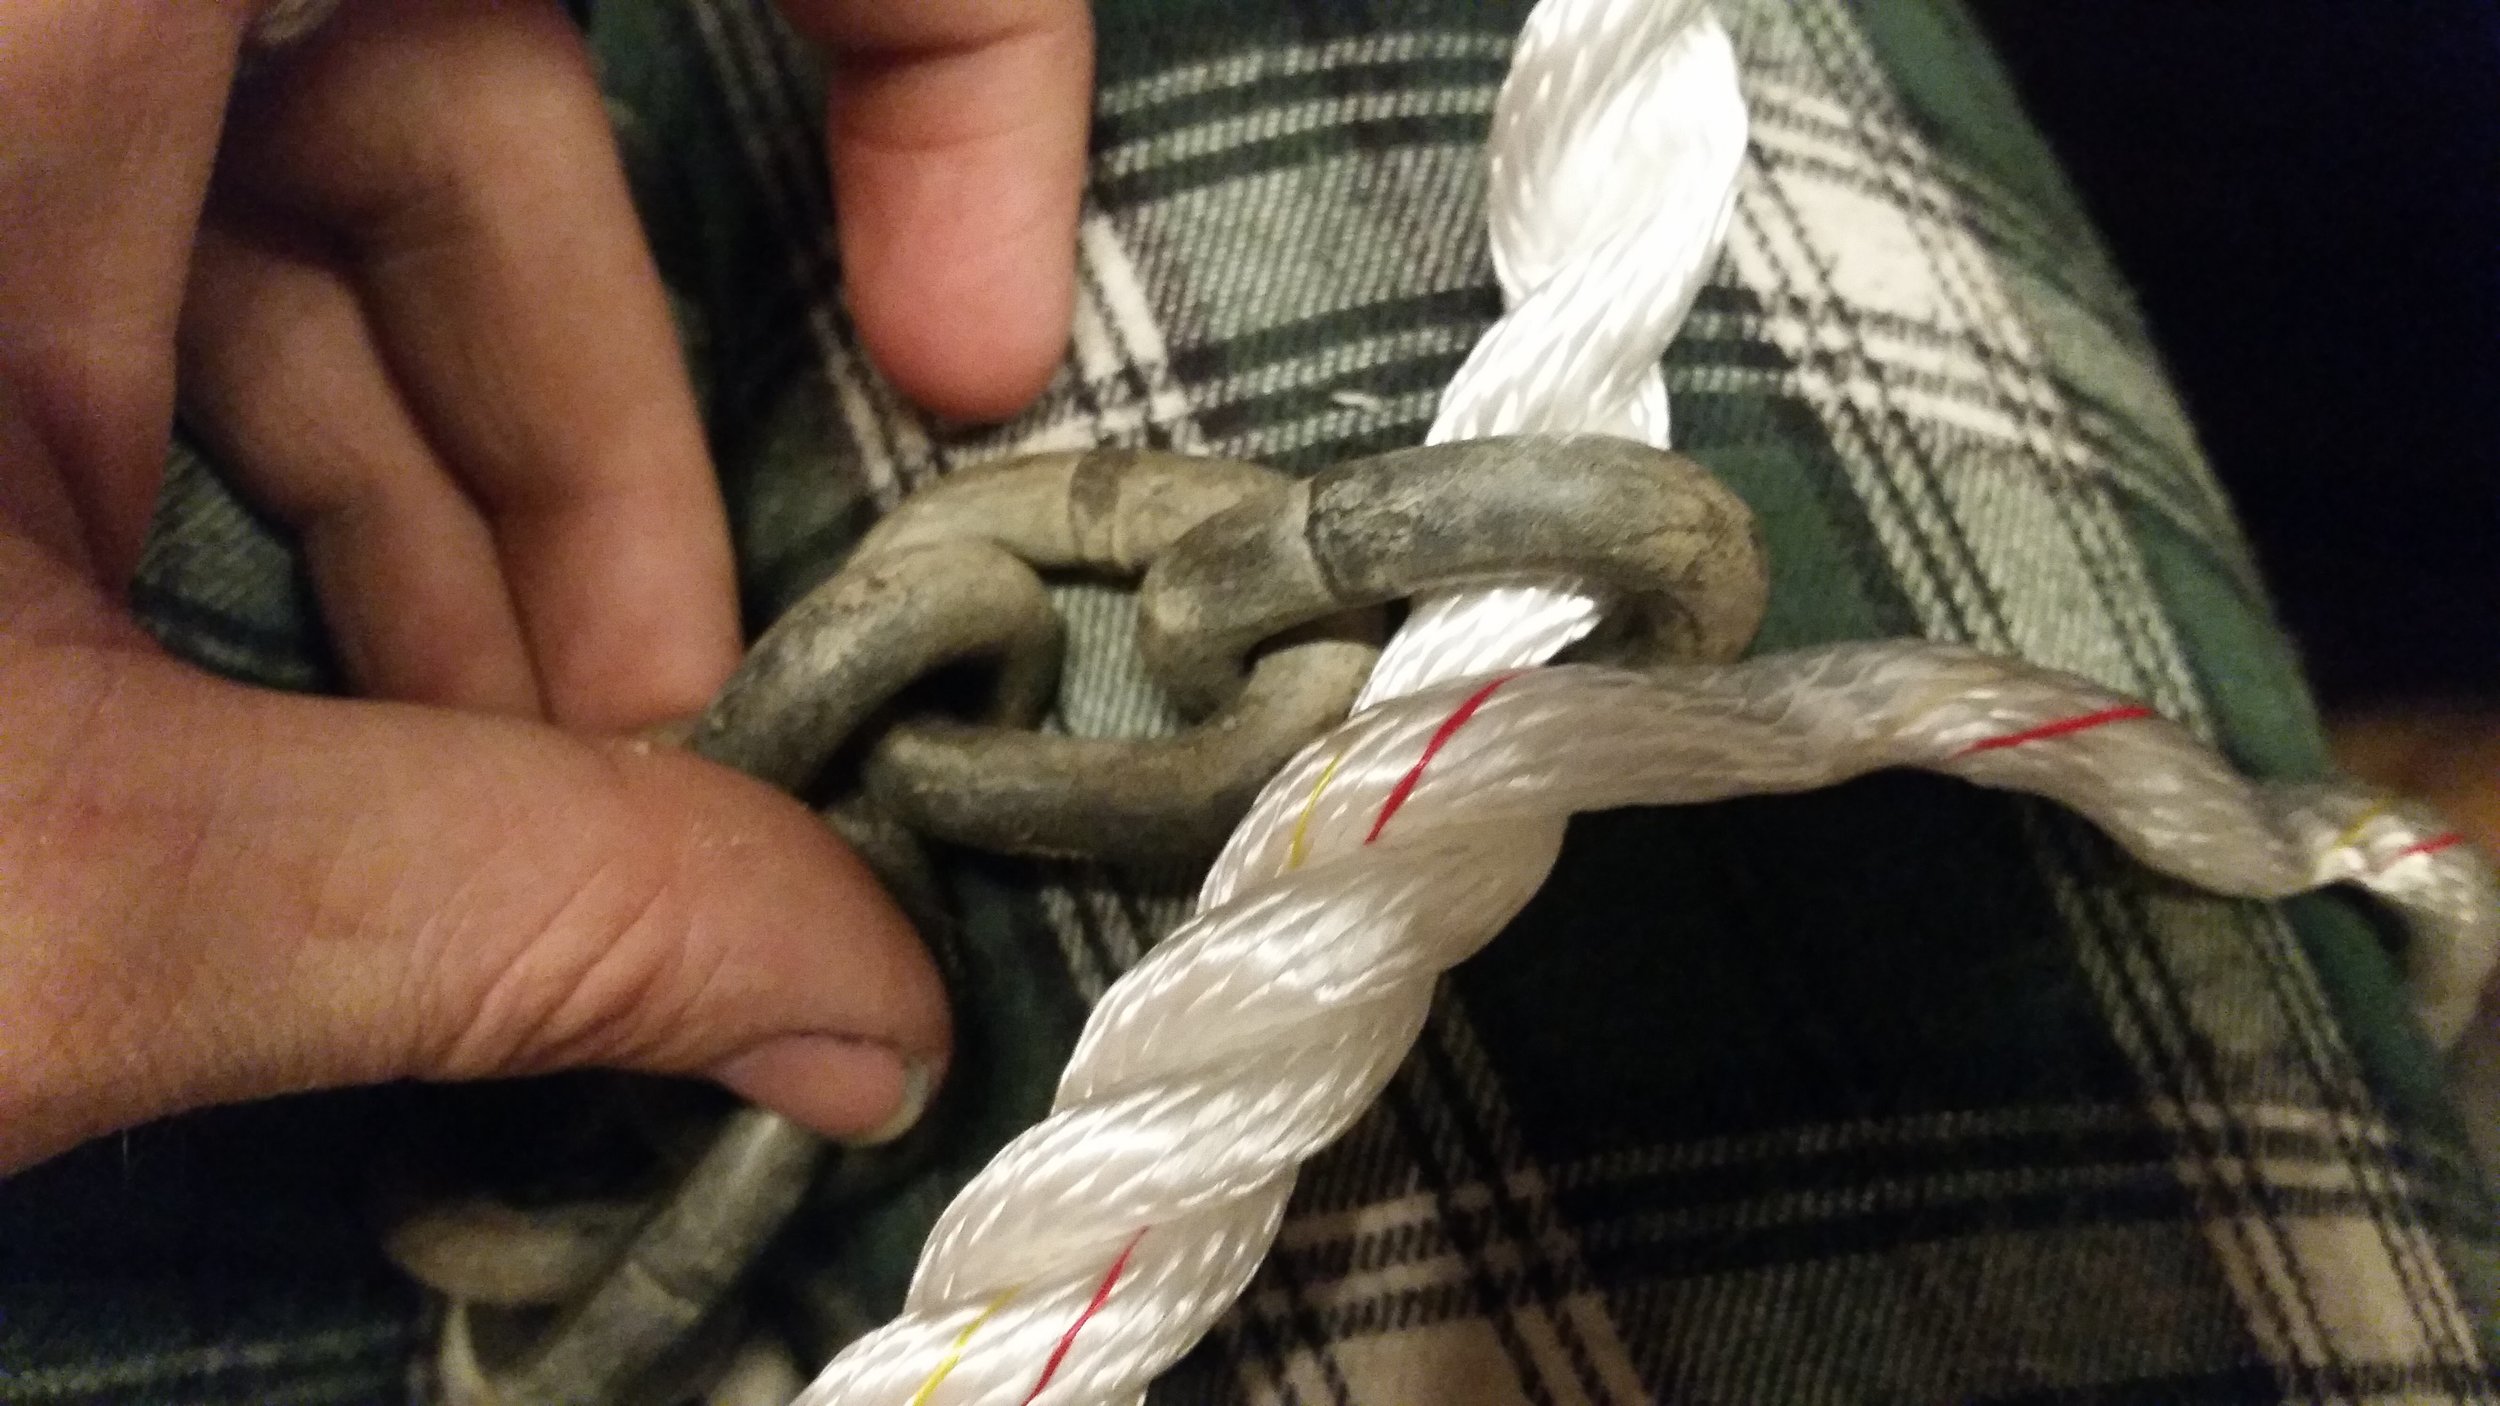
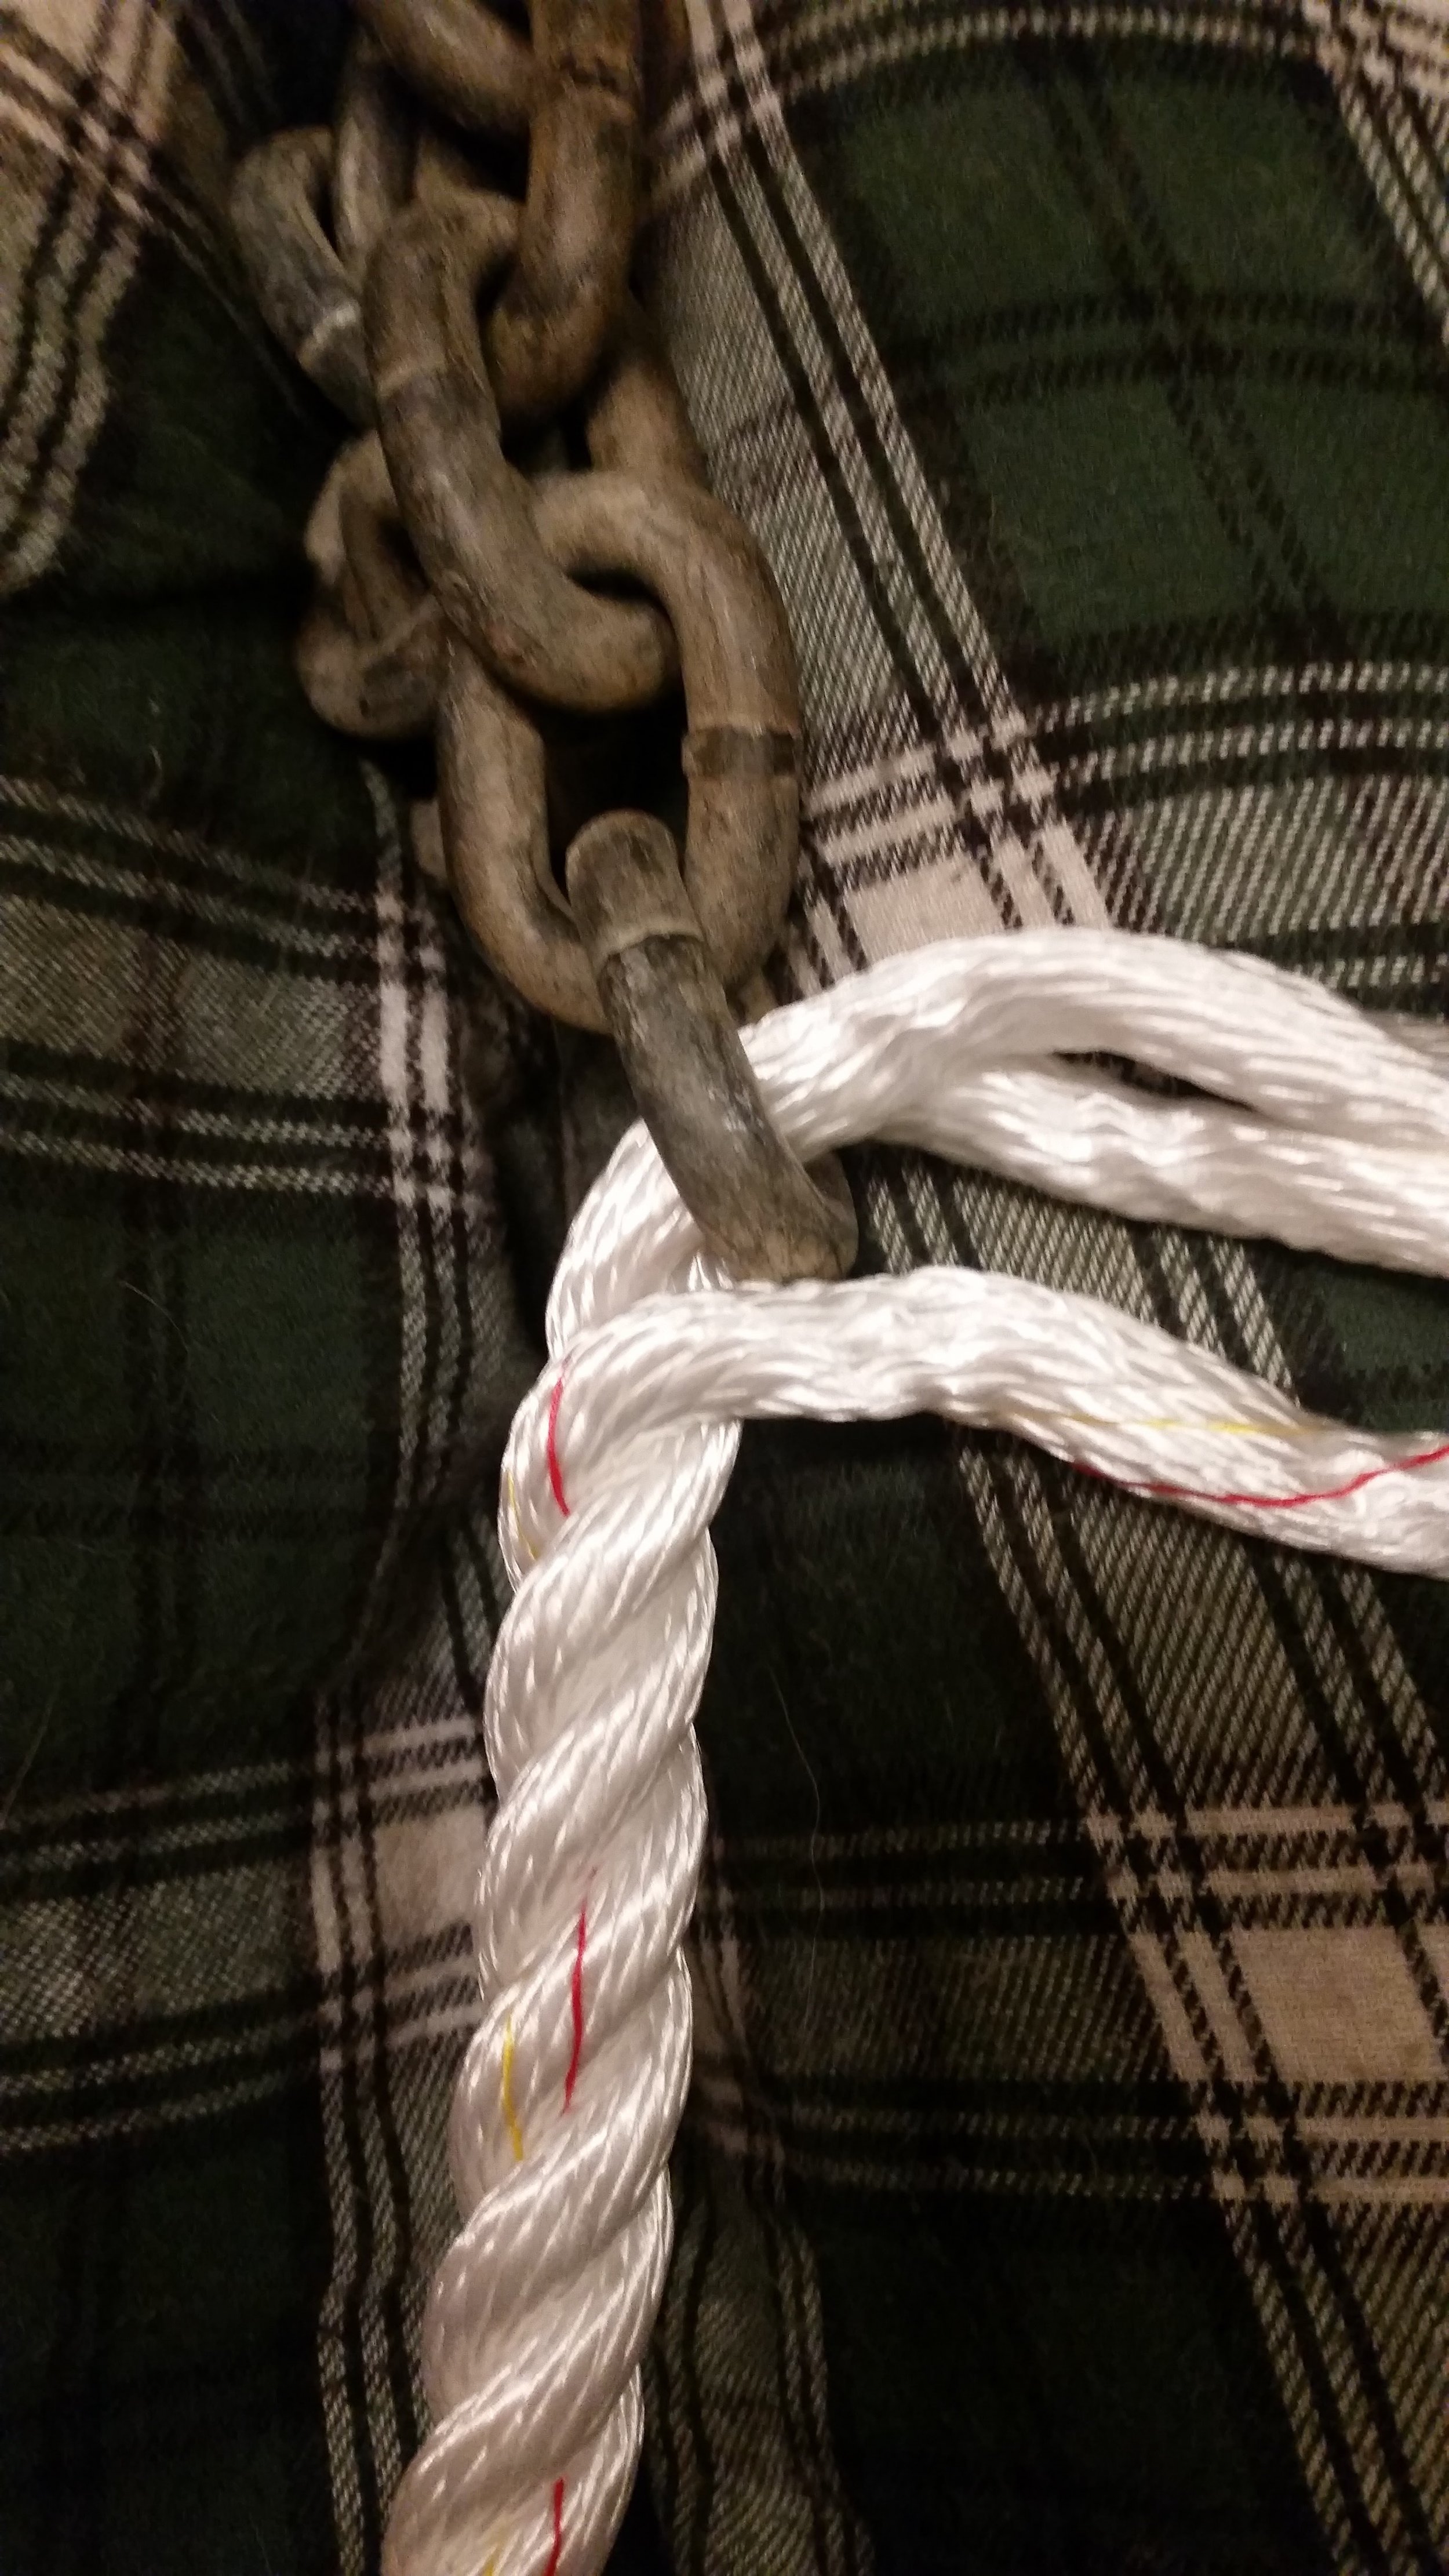
With one strand removed, you now have two strands that are still twisted together. You want to slide the chain link down these two strands until it meets the separated strand. There should be at least 2 feet of tail extending beyond the link.
Now begins the splice. I like to bend all three strands over to the side and separate the two that have passed through the chain. The strand that is closest to the outside strand will be the strand of interest for this next step. We will call this one the second strand.

You are going to unwind the third strand, and wind in the closest strand, which we are calling the second strand.
Let me clarify, you will lift out the third strand that did not go through the chain and you will replace it with the strand that is closest to it that did go through the chain. As you lift out the third strand, you will pack the second strand into the groove it has left behind. You will continue this process as you go burying the entire length of the splice, which is at least 2 feet.

Down the rope you will go, removing the third strand and closely following it with the second strand.


When you get down to about 5 inches from the end, you will tie a square knot with the third strand and the second strand. The square knot will sit neatly into the groove of the rope, hiding it from view. The tails of the square knot will then be tucked into the lays of the rope at least 3 times. It is wise to taper the tails as you go through each tuck, that way the transition leading up to and away from the knot is gradual and will not foul the windlass.

Back at the chain, you not have the second strand folding over the link and tucking itself back into the rope. The first strand remains however and needs to be addressed next.

You will take the first strand and tie a half hitch with itself.

This half hitch will be tightened down.

With the knot tightened up, the tail can then be tucked into the lays of the rope.
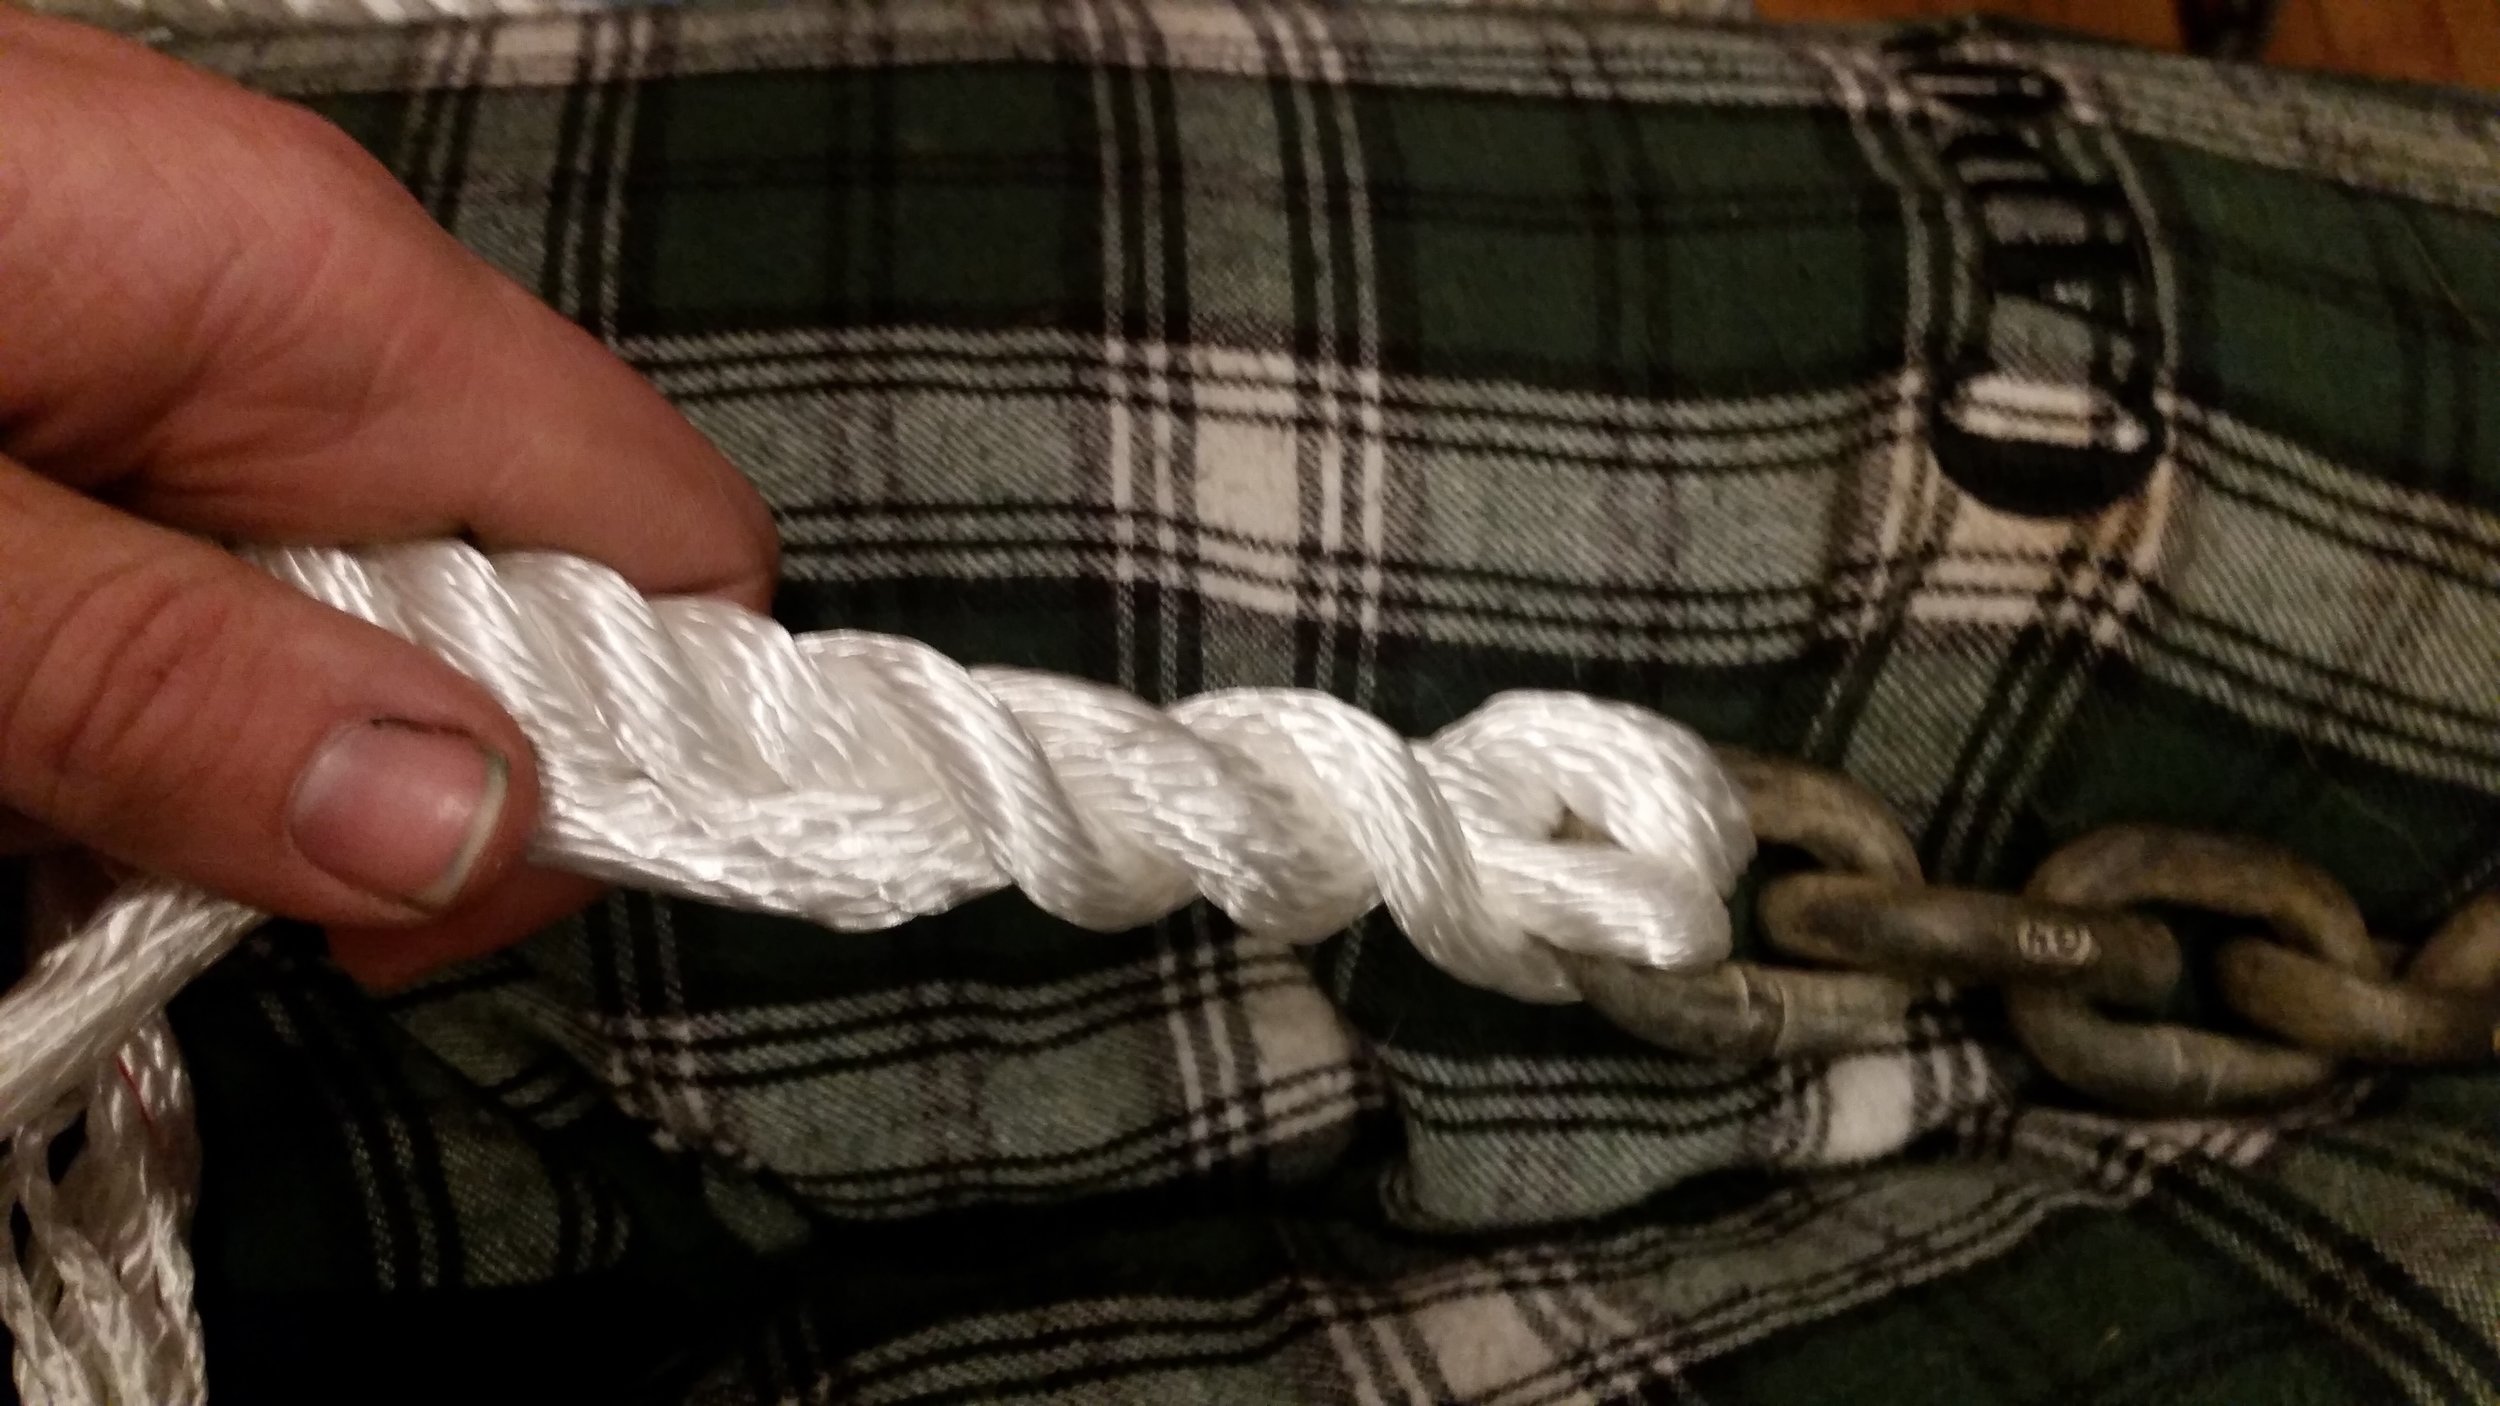
The second strand was connected to the rope via a long splice while the first strand is connected to the rope via a short splice. You will want to continue tucking into the rope, at least 5 tucks at a minimum, though 7 tucks would be ideal.

I personally like to tuck the first strand in 7 times and then begin tapering the rope on the subsequent tucks. Tapering is easy, all you need to do is separate the yarns of the strand that you have worked so hard to keep together and count how many yarns are present. Simply divide the yarns into equal quantities and begin snipping them as you go. I like to do three equal groups, as this gives an even taper that is 33% smaller on each tuck.
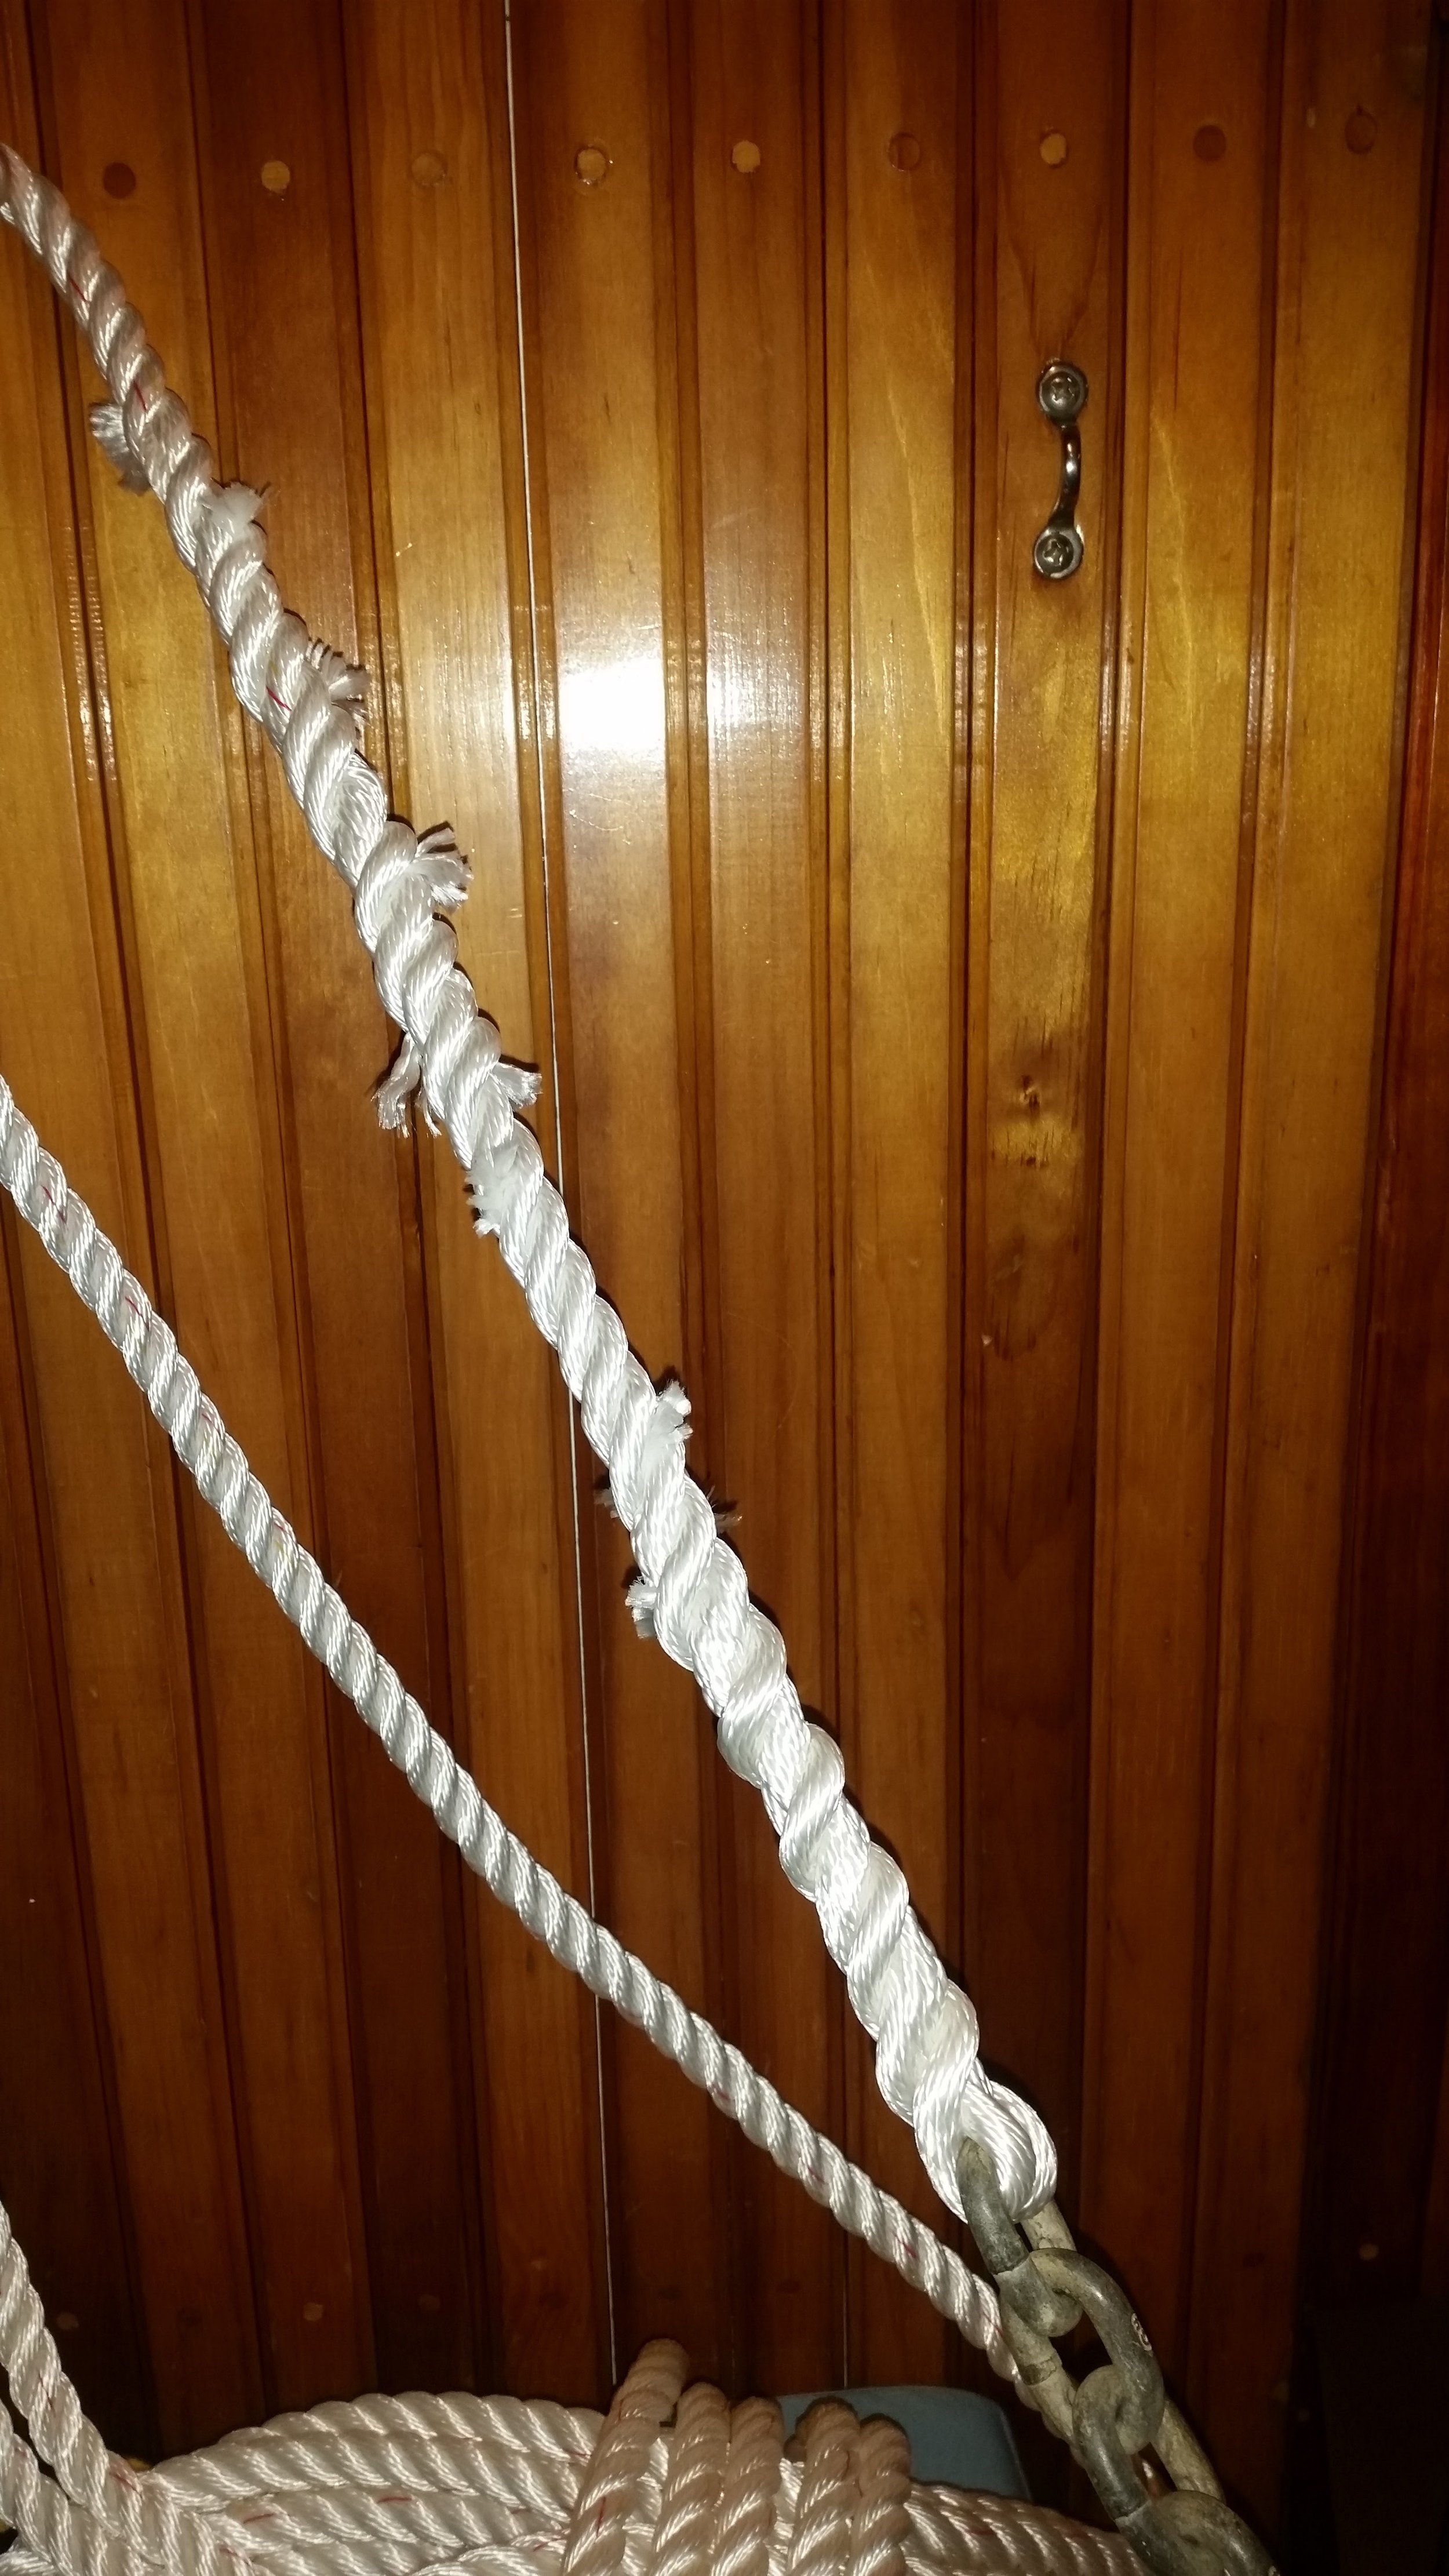
The end result is an even tapered splice that will flow through a windlass with ease. It helps to roll and work the rope to get the lays back into their place. You need not to fret much about this though as the load placed upon it by anchoring will work the strands back into their lay in no time!
You might be concerned though, about only using two strands to hold your chain instead of all three. In a sense, you have reduced the strength of the rope from three strands to only two!
The truth is, this splice is stronger than the three strands, as the two strands that are working are folded over and tucked back into the rope. This creates a 2:1 on each strand, meaning that there are actually 4 strands holding the force of the chain! That's right, you started with three strand rope and ended up holding the chain with four strands.
It is very important though that the link be tied tightly in the rope that way it doesn't wiggle around while in service. Movement will lead to chafe, and chafe will saw through any number of strands in a heartbeat.
By tightening the strands snugly around the rope and splicing them back into the rope, you will create the strongest rope to chain connection possible without the use of a thimble and with the ability to flow through a windlass undetected.
