Sailing Wing on Wing

When sailing downwind, you might find that the main is stealing all of the wind form your jib. This will manifest itself as a jib that continually falls and can never remain full of air. This loss of sail area will translate into reduced speed through the water, which means it will take you longer to get to where you are going.

There are a few ways to rectify this situation:

  • You could broad reach instead of run
  • You could lower the main
  • You could reef the main
  • You could raise the topping lift
  • You could sail wing on wing

Broad reaching will put your yacht at an angle to the wind, allowing clean air to reach your headsail and fill it. This will cause your yacht to sail faster, but it will also add additional distance to your destination. It is pretty much the equivalent of tacking downwind. If you do some math, you can find an angle where your Velocity Made Good is higher than if you were sailing on a run, making the extra work worthwhile. 

As stated, broad reaching would be more work than running. In the effort of keeping effort to a minimum, lets look at how we can run more efficiently. The headsail offers significant sail area, but it is hidden behind the mainsail. If wind could get around the main, the headsail would also fill, letting you sail faster while still on a run.

You could lower the main, allowing all of that wind to reach the headsail. This will move you along with a full headsail, but you are still suffering from lost sail area. If your headsail is massive, this might function better than the main, giving you a bit more speed, but there are other options.

If you reef the main, it will be smaller and wind can get around the top of it and past the leech, letting this wind reach the headsail. The fuller headsail will provide more power when combined with the main and will help pull you downwind at a faster pace.

Instead of lowering the top of your sail, you could always raise the bottom. Tightening the topping lift will raise your boom and let air scoot by under the main to reach the foot of the headsail. Sailing along with a twisted main and headsail will be better than sailing along with a main and fallen headsail, but there is still a better way.

Instead of trying to get the air around the main, why not place the headsail in its own clean wind? This is called sailing wing on wing.

When on a dead run, as in the wind is directly behind you, you can set the main on one side of the yacht and the headsail on the other side. Each sail can be set full and in its own clean air with no disturbances or compromises. Now you have all your sail area functioning to carry you straight downwind towards your destination with as little effort as possible. 

You must be wondering why more people don't like to set the sails in these manners? Well, to sum it up:

  • Broad reading is more work than running
  • Dropping your main and sailing under headsail alone is usually as fast as sailing under main alone
  • Reefing the main is work, and when people are running, they don't want to work
  • Raising the topping lift will induce twist into the main and cause it to chafe on the rigging
  • Wing on wing is very prone to accidental jibes.

Accidental jibes are a real and present danger when sailing wing on wing. A preventer can be used to stop the main from slamming across the boat, but preventers can make a mess if you need to change directions quickly, so I prefer to not use one. Instead of using a preventer, I will sail along at a slight angle to the wind, so I am not truly on a dead run, but instead the slightest of broad reaches.

With the main set on the leeward side, this slight angle will protect against those accidental jibes. If I see that my angle to the wind is changing, I can correct it before the boom comes smashing across the cockpit. With the main set to leeward, the drifter will be set to windward. 

The drifter is a very safe sail to fly by the lee, as it is simply a nylon genoa with a very full cut. It will stay on the windward side and fill up like a kite. If I sail too far off angle the drifter will fall and lay against the rigging. There is no noise, bashing, or terror on board when this happens. I just alter course a little bit to fill the drifter with wind and continue on our way.

Sailing at a slight angle won't guarantee that accidental jibes won't happen, they just reduce the likelihood. Since they are still a very real and present issue, I don't recommend sailing wing on wing in strong winds. If I can't grab the mainsheet as it runs out to the boom and pull the whole boom towards me without any assistance, I won't sail wing on wing. If it were blowing harder, the pressure on the main were greater, I would not be able to pull the sail as easily and there would be more potential for damage if an accidental jibe did occur. 

Another issue with wing on wing sailing in strong winds is you are at higher risk of broaching. The sails are set on either side of the hull and the rolling waves could push the boat into a roll which could lead to a broach or worse, a Chinese jibe! Keeping this sailing technique restricted to light air days will ensure that running is as little work as possible, letting you reach your downwind destination in comfort and with ease.

Starting the Siding

Shiplap siding is very simple to install, all you need to do is start the process correctly! If there is any discrepancy you are doomed from the start, so take your time to make sure it is perfect!

The first thing you need to do is install the starter strip. A starter strip is merely a ripped section of fiber cement board that is set at the bottom of the first plank. It should be around 2 inches wide and run the length of the wall discontinuously. If the starter strip is continuous, water running down the wall between the siding and wrapping will become trapped between the siding and starter strip. By installing segmented pieces, water is able to drain out through the gaps at the bottom of the wall.

I installed two strips with a nice gap between them and a nice gap near the corners. With these two strips in place, the first plank can be installed.

The first plank is the most important to get straight. On a trailer, there is little that is level. The trailer is probably not on level ground, so a bubble level is pretty much useless. Instead, a fixed known reference point must be used. In our case, the trailer is known to be perfectly flat.

Since the trailer is flat, I can feel safe about using its front edge as a reference point to level the first plank. I set the first plank to overhang the top lip of the trailer by 1/2 of an inch. I propped the plank against the tiny house wall and measured the overhang on the trailer by the prescribed distance. I then verified that it was the same on the other side. Once everything was 1/2 inch of overhang, I screwed it into the tiny house.

With the first plank attached, I then proceeded to set and attach the planks one after another all the way up the front of the house.

With the first plank set properly, all the other planks went on smoothly and easily. As you can see, the planks all went on straight and even, using the simple tool I fabricated out of a metal strap.

Attaching the Sheer and Shelf Clamp

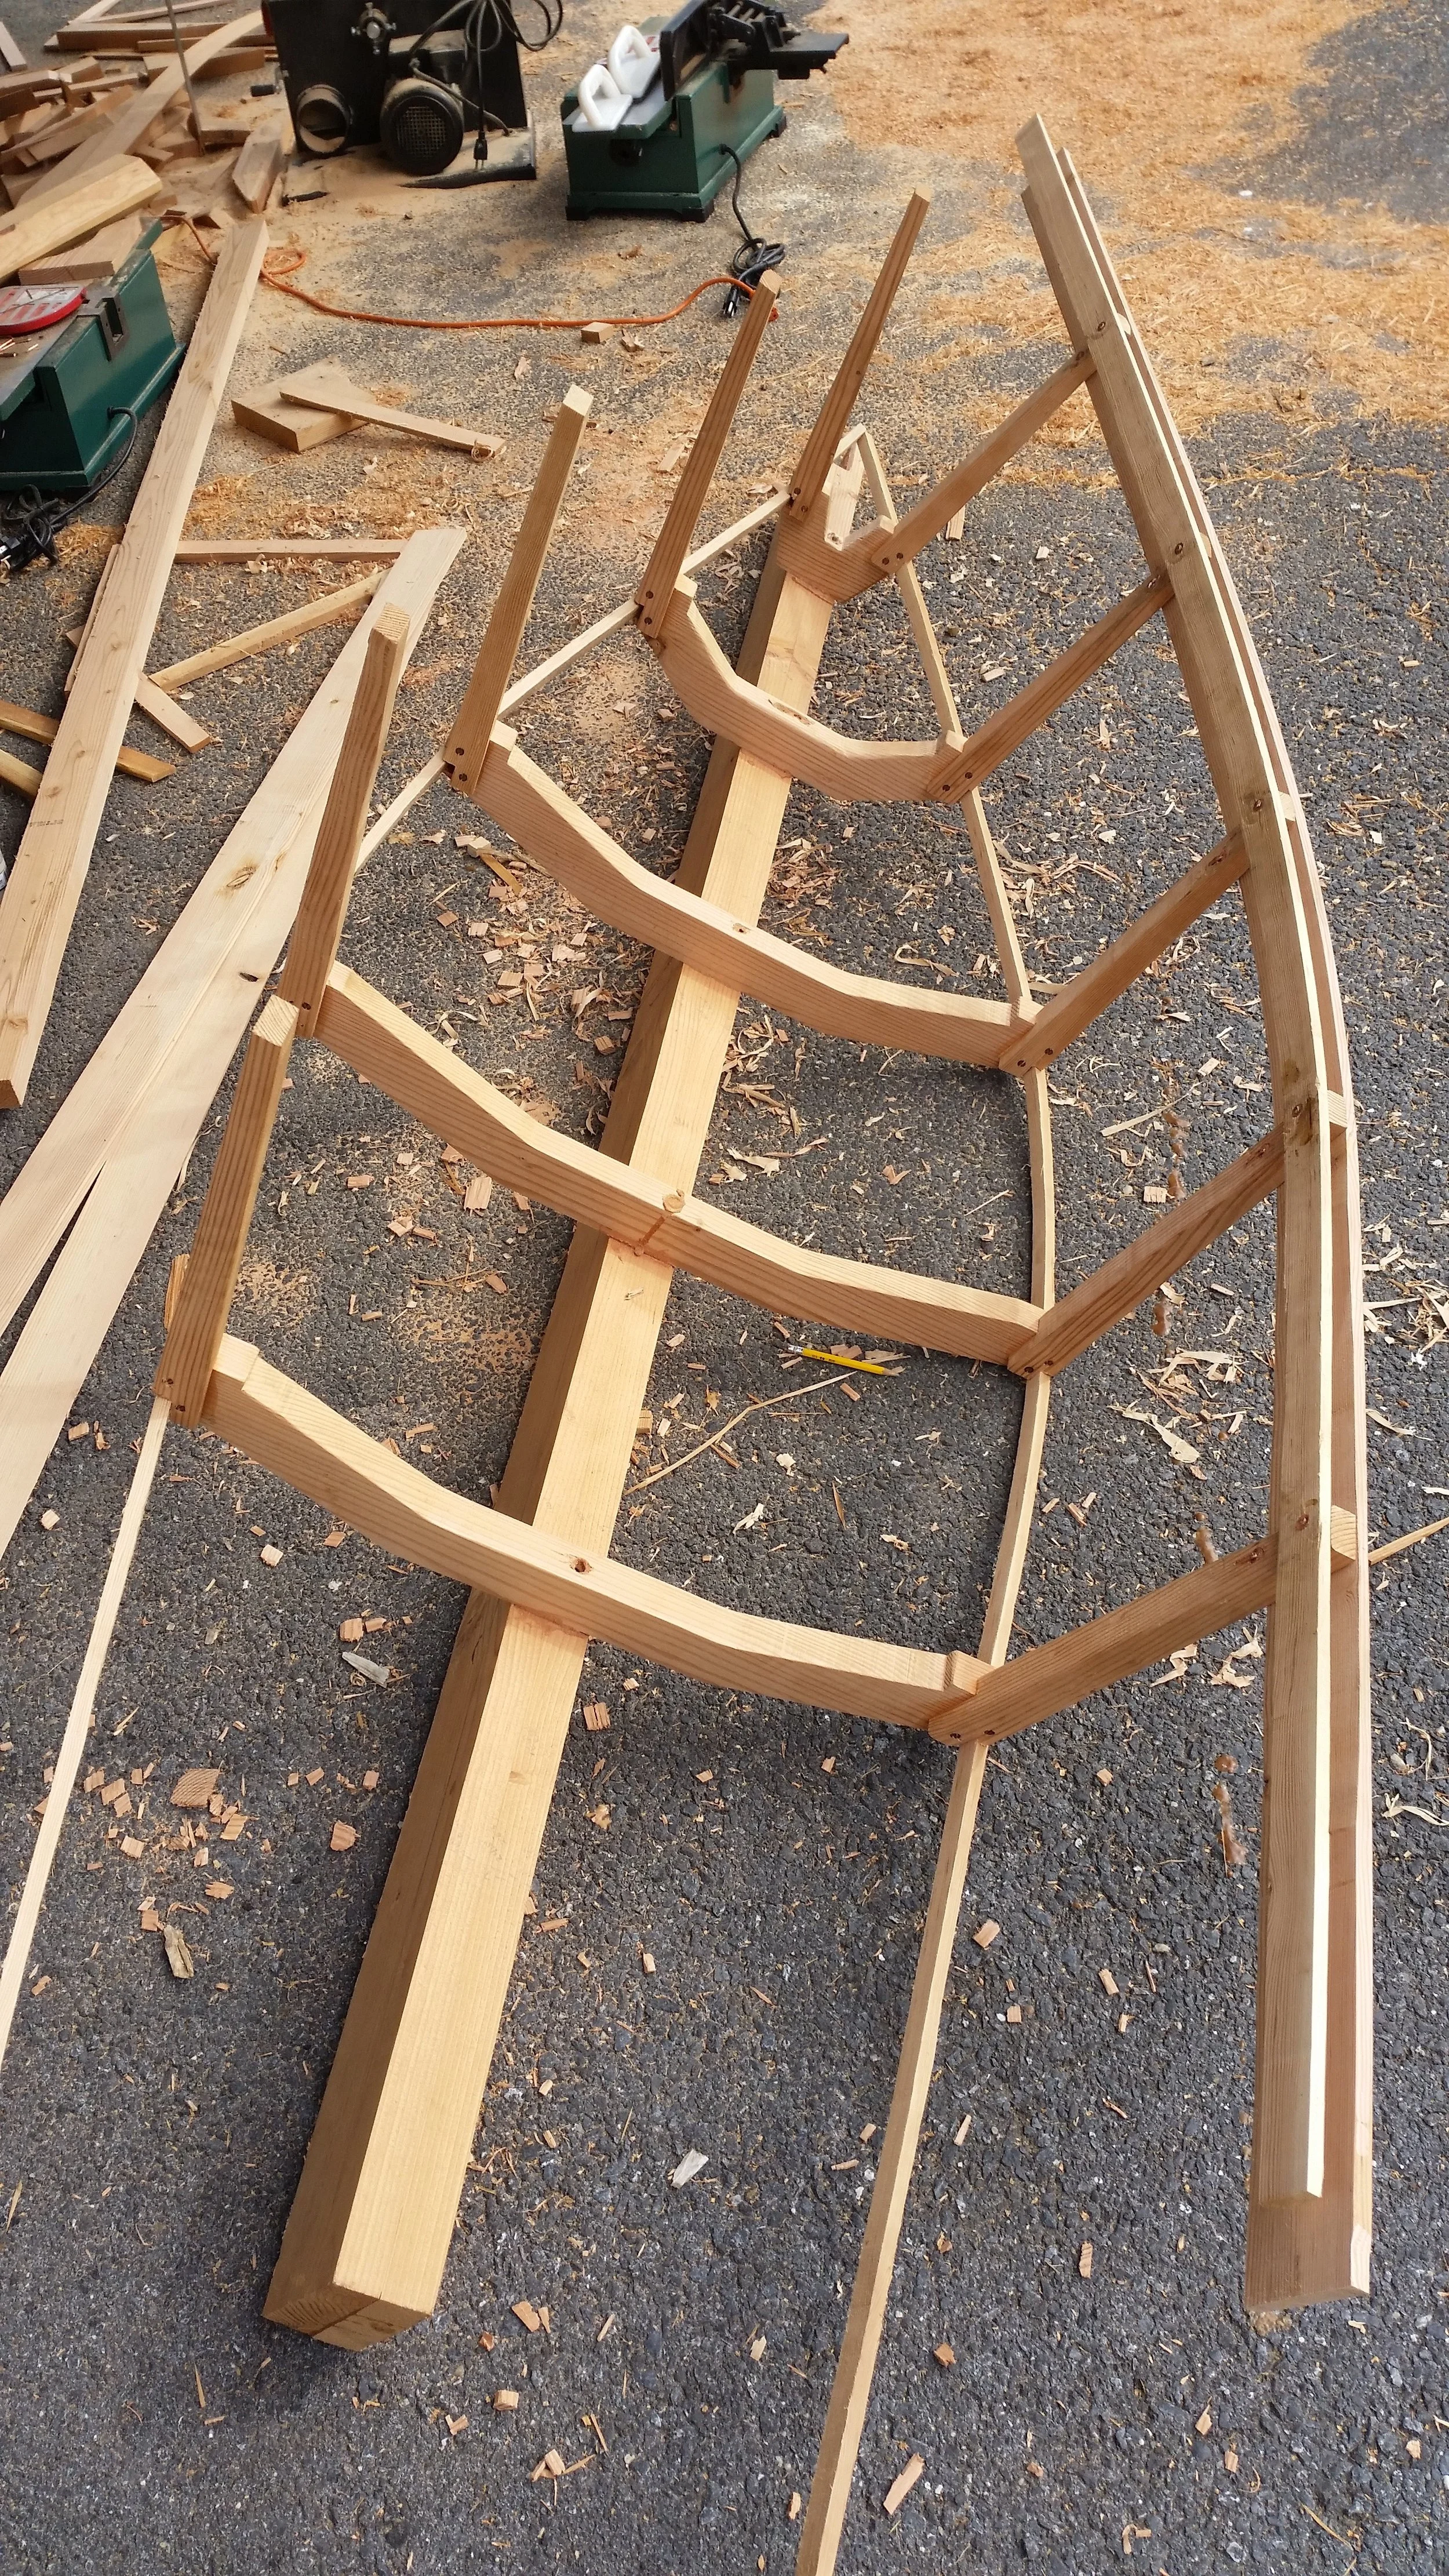
With the chines in place, it is time to attach the sheer and shelf clamp. These two strakes will tighten up the top end of the dinghy frames and make the framework look like a potential boat instead of a possible boat. 

image.jpg

The sheer and shelf clamp need to be installed at the same time since they are riveted together. I began with the first three stations, setting the two strakes on the third station with a C Clamp to hold it in place while I worked on stations one and two. Once the first two stations were secured, I could remove the clamp as I worked my way aft.  

The bend in the hull proved to resist accepting the strakes. These strakes wanted to remain straight and were not keen on being bent into shape. The downfall of these strakes is their length, providing me with the leverage I need to bend them into place and rivet them together. 

image.jpg

Work proceeded quickly, first connecting all the sheer and shelf clamps with a single row of rivets at the top of the frames, followed by a second row of rivets to further attach the bottom of the sheer strake. The stem is still not present so the strakes are set longer than the length needed in both fore and aft dimensions.  

image.jpg

In the end, the starboard sheer and shelf clamp were securely fastened to the frames. This solidified the starboard half of the boat and tied all the frames together. The dinghy is really beginning to look like a small boat instead of a pile of random cuts of lumber. 

Provisioning

When provisioning for a trip, don't make the same mistake we made. We went out to the grocery store and purchased a massive amount of food! 

We had two full carts of food with everything stuffed into them. We had cases of waters, chips, fruits, vegetables, and canned foods, as well as everything else you can think of. 

We ate what we normally do, and all this extra food simply began to rot! What's worse is the canned vegetables were disgusting, so aweful that they are still in the back of a locker, just waiting to be thrown out. All the money we spent on wasted food could have been used towards anything else on the boat, but instead was thrown out as rotten lettuce.

Thinking that we learned our lesson from this fiasco, we decided not to go overboard with food provisioning on our future trips. When we set off for a 2 week cruise, we once again bought what we thought would be an adequate amount of food for the trip. Once again, the extra food we purchased began to rot and had to be thrown out.

The moral of the story is, only buy the normal amount of food that you would consume on a regular basis. If you buy extra food, it will go bad and you will have wasted that money. Instead of "provisioning" for a trip, what we do now is cast off. If we find that we need more of something, we will pull into a port and pick it up. 

This is an easy approach for us since we liveaboard. Our regular grocery shopping is what we consume in a regular amount of time. We typically go shopping every other week, so we know that we have around two weeks worth of food on board at any given moment. Instead of wasting money on extra food, we simply shove off and provision along the way.

Another word of warning: Canned vegetables are disgusting and there is nothing you can do to make them better. I have tried everything like adding them to delicious dishes, but all they do is ruin everything. Canned string beans are the worst offenders, followed by canned carrots and canned peas. Canned corn isn't that bad, and can be hidden in chili, but fresh corn is a million times better. Canned beans on the other hand are wonderful and they will keep for years!

While we don't stock up on extra fresh foods or foods that need refrigerating, we do stock up on rice, beans, and canned meats (Vienna Sausages are amazing) as these foods won't go bad and make a great meal that can be eaten while on watch.

Fiber Cement Siding Tools

Fiber cement siding is very easy to install in a shiplap pattern (called lapstrake on boats). This pattern of siding works very well to shed rain water and keep the house dry. Shiplap needs to be installed from the bottom to top, and progress proceeds quickly.

They do sell tooling to install the planks evenly, but these tools cost around $50 to $80 for a set.

These tools are great, and make installation quick and easy. Shiplap siding needs to be even and consistent. If the amount of overlap varies, the siding will look crooked, uneven, and ugly. These tools also let you install the siding alone!

If you don't have any tools, you need two people to install the siding. Each person needs to hold the plank, measure the overlap, and secure the plank. If there are any variations between the amount that overlaps, the job will look sloppy and the end result will look unsightly.

Tools are set to a specific amount of overlap, and simply slip on to the lower plank and hold the next plank in perfect place. A single worker simply sets the plank on the tools and screw it to the wall. Each plank will go on exactly the same as the previous plank with no variation. The result is a very even job that looks professionally finished. All of a sudden, an expensive tool sounds worthwhile!

It's a small price to pay for a high quality result that will last for years to come. The truth is, you can make your own set of tools for a fraction of the price.

I purchased a pair of metal straps which I bent into an "S" shape for $0.92 per metal strap. While the expensive tools are adjustable, allowing you to vary the amount of overlap, these tools are fixed in their size. 

I wanted 6 inches of exposed plank, so I need 2.25 inches of overlap. To manufacture this, I clamped both strips into a vise and beat them into shape with a hammer. I made sure that the bends occurred at the same position on both by forcing the bend to occur at the edge of vise jaw. Both tools were verified for symmetry, and measured to make sure that the length of the body was 2.25 inches.

Installing the siding was very simple, all I had to do was set the tools on the top of the current plank, and then rest the new plank in the tools. The tools held the plank in place while I screwed the plank into the studs.

Some tricks to using these inexpensive tools are:

  • Put the tool on the edge of the plank before you tighten the screws all the way, this makes it much easier to get the tool between the plank and the wrapping.
  • Tighten the plank once the tool is in place.
  • Place the tool half way on and halfway off the edge of the plank to facilitate removal after the new plank is installed.
  • Alternate the side you use the tools on with each plank to avoid manifestations of any discrepancy in the lengths of the tools you created.
    • If the tools are off but just a little bit, the planks will not lie evenly and the problem will compound as the siding goes on the house. For example, if the tools are off by 1/16 of an inch, this means that at the 16th plank, the planks will be off by a full inch! 
    • If you alternated the side you use the tools on, the planks would only be off by 1/16 of an inch on each plank, and the 16th plank will still only be off by 1/16 of an inch. 
    • From a distance, 1/16 of an inch discrepancy is very hard to detect, so if your tools are made even better than that, any discrepancy will be even less notable and the end result will be a professional looking job.