
Climbing a mast in the heat

Safety must be the top priority when climbing the mast. On hot and sunny days, extra care must be taken while up there as the sun will fiercely beat down on you, causing all sorts of heat related problems. Climbing the mast is strenuous on its own, adding intense heat and sun to the mixture only compounds the difficulty.

One of the problems that can happen while aloft is passing out from heat exhaustion. If you pass out and are climbing the mast alone, you might be hanging there for quite some time which could pose a great threat to your life. Preparation is the key to safely climbing the mast in the heat of the day.
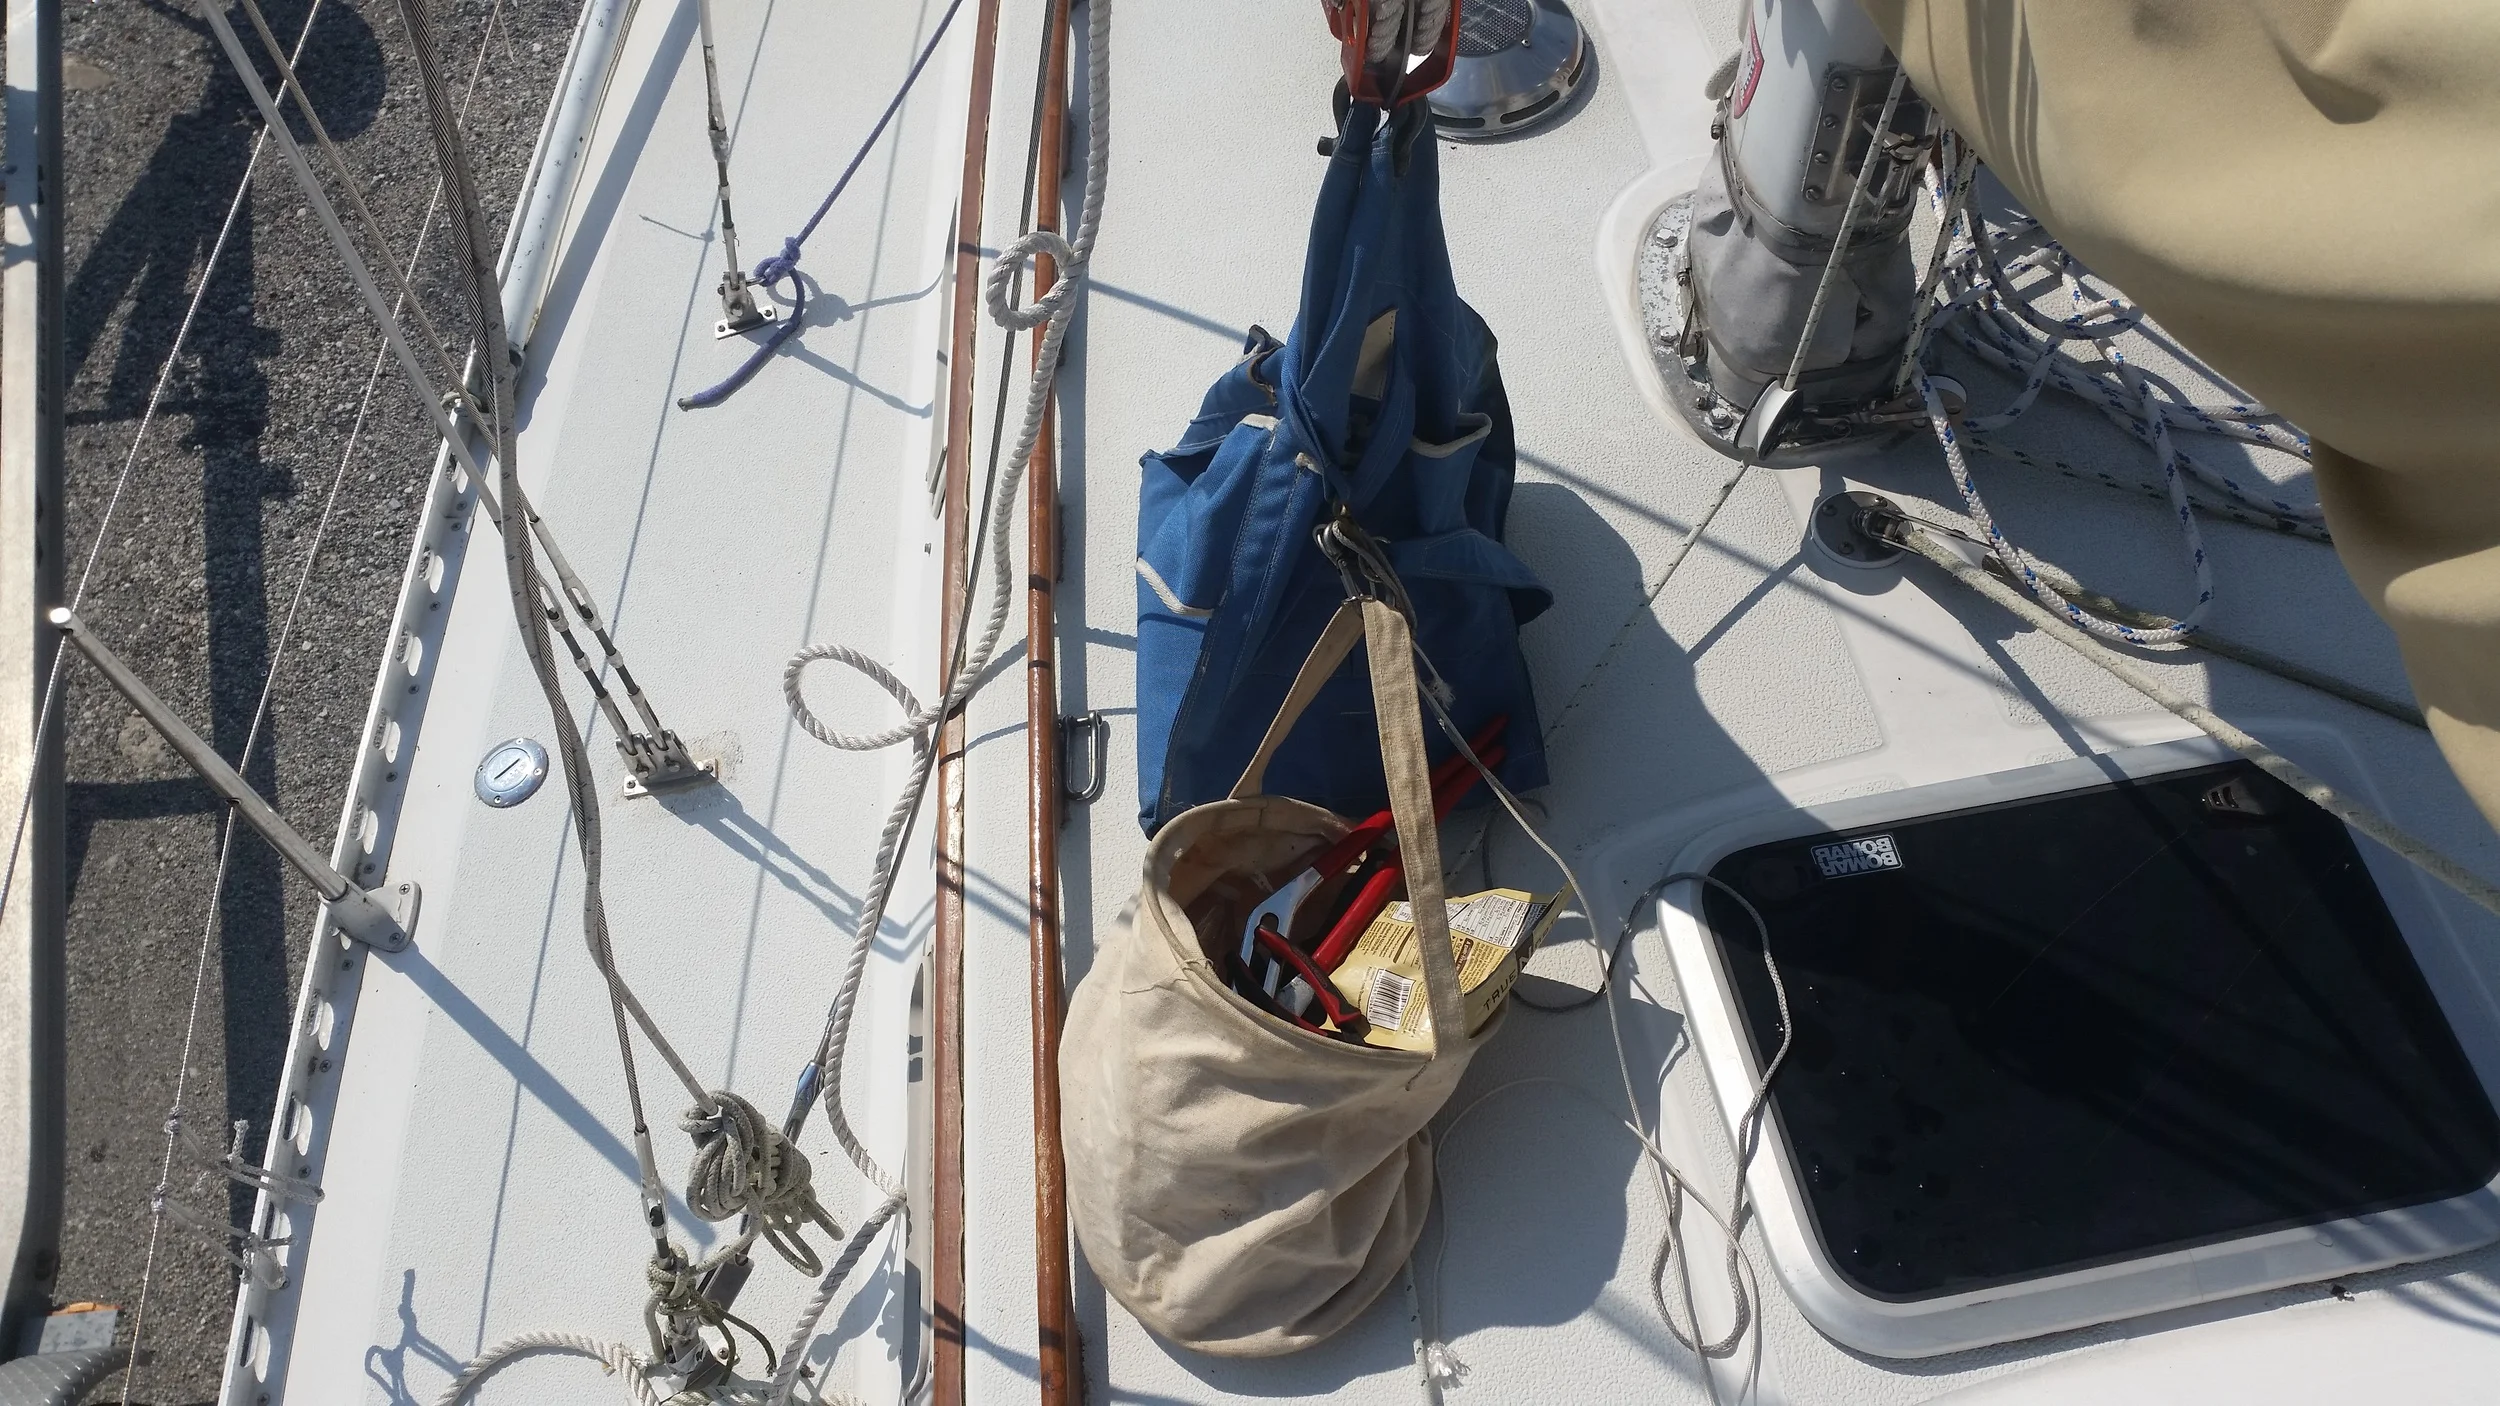
When you go up the mast, your entire world becomes restricted to what you have with you. If you are hungry and there is food in the galley, you have no food! You need to plan ahead and take everything you might need with you in your canvas bag: tools, lines, food, water, and anything else you might need.

Food is important to carry up with you as your blood sugar can drop from all of the effort involved in climbing. I like to carry honey nut snacks, as they give me a boost of sugars as well as protein to help fight off hunger. They are also bite size and won't get your hands dirty. This means that you can easily reach into the bag, grab a few, and eat them while you work aloft.

Staying hydrated is very important while up the mast. I carry 1L of water per hour I plan to be aloft, as well as an additional 250mL bottle, just in case I end up staying up there for longer than I intend. If I plan to be up there for an hour, I'll carry 5 bottles of water, and typically consume them all before I get back on the deck.

Another crucial component in the equation is clothing. You need to dress in clothes that will both keep you cool and protect you from the sun. I wear cotton shirts and pajama pants when going up. The light fabric keeps me cool while the long sleeves and pants keep the sun off of my limbs. They also protect me from the heat of the spars that have been roasting all day in the sun! A straw hat will keep the sun off your head and still allow air to flow through, keeping your head cooler than if you were exposed to the sun. Lastly, wear some good sunglasses; everything is white and the sun will be glaring into your eyes while you try to work. 

If you have to be hot, sweaty, and baking in the sun, at least be as comfortable as you can with plenty of water, snacks, and shades.

Going Up!

Mast climbing should be carefully performed with an utmost emphasis on safety! Each component of your gear should be looked over with scrutiny to make sure everything is in perfect working order. If anything is questionable, don't hang your life on it.

While climbing the mast on the Islander 36 that I am converting to synthetic standing rigging, I noticed that the main halyard is not properly spliced. Instead, the halyard is looped back and stitched together with whipping twine. I was not about to hang my entire life on a questionable halyard termination, so instead I eliminated the weak link from the equation. 

I removed the shackle from the halyard and tied the whole halyard through the gantline block with a secure bowline. This will ensure that the strength of the connection is as strong as a good condition New England Ropes Sta-Set rope, rather than as strong as a whipping twine.

Once back on the deck, the halyard was untied and the shackle replaced into the halyard. This way, nothing was altered on the clients yacht and my personal safety was never hanging by a whipping twine. 

Going up a mast carries inherent risks, most due to falling. By carefully inspecting every part of your gear before you climb, you can make the climb and controlled descent as safe as possible. Be sure to inspect everything each time, as your own gear will break down over time and catching any weak links early is critical to your longevity.

Un-cluttering the Deck

We currently have 5 sails on the deck: Drifter, Jib, Staysail, Mainsail, Trysail; and we can't take them off the deck of the boat. We keep the sails flaked and/ or bagged on the deck to keep them out of the way, but we can't escape the fact that all of these sails are always on the deck.

Maddie has told me that we can't have any more sails on the boat if they are all going to live on the deck. While the sails are put away, they still take up our limited deck space, and she wants as much space as possible for living and relaxing.

The solution is simple: The working sails can stay on the deck but the light air sails need to be stored in a locker. The storm trysail will remain on the mast, as it needs to be ready to hoist at a moments notice should a squall develop quickly.

The reason all of these sails needed to remain on the deck is the way the sheets are tied to the clew. I used a larks head knot, which offers a very secure attachment to the clew while keeping bulk to a minimum. This means the sheets won't foul on the rigging as we tack and the sails have to slide through the forward stays slot. The problem is a larks head knot can not be untied without removing the sheets from the deck. I would have to pull the sheets out of their leads and coil them up to store the sail off the deck. To set the sail up, I would also have to run the sheets through all their leads and back to the cockpit. This seems like a lot of effort in my opinion, so the drifter lives in a bag with the sheets permanently run to it. 

The solution to our clutter problem is simple, change the knot we use to attach the sheets from a larks head to a bowline. A bowline is a very strong and secure knot which is a standard for sheet attachment with a little bulk that can get caught on the rigging. Being how we have synthetic standing rigging, we won't let a fouled sheet stay fouled for long because it could saw into the rigging as the sail flogs around in a blow. 

With bowlines, we can easily untie the sheets from the clew and store the sails that are not in use in a locker. The sheets can be left tied to the lifelines forward of the shrouds and ready to attach to the clew of the sail we want to raise. This also helps make it easier to reef the jib, as we just need to lower the sail, tie the sheets to the new clew, and re-hoist the sail.

The sheets are out of the way attached to the lifelines with the excess coiled up on the lifelines by the cockpit.

Chart Symbols: Wrecks

A very important notation on navigational charts are wrecks and other hazards. These are represented by a variety of symbols which demonstrate the variety of wrecks that you can encounter on the water. 

The dotted line is to delineate an area where a hazard exists. It would behoove you to not sail over these marked areas. Some dotted and shaded areas will have a depth mark on them, these are somewhat safer to navigate over as the depth shows the depth of safe water over the hazard.

This symbol surrounded by dotted lines indicates a wreckage which may show part of the wreck through the surface of the water. PA stands for "Position Approximate" which means they don't know exactly where the wreck is. In general, this is a good warning to stay away because the wrecked vessel could be just under the water and cause serious damage to your yacht. 

Another symbol for a wreckage looks like a boat coming out of the water. This symbol refers to a partially submerged wreck where part of it can be seen above the water. 

Asterisks are used to denote rocks that are awash. Rocks marked by a plus sign (+) signify a rock of an unknown depth.

In general, dotted lines signify places that you should avoid while navigating. If a depth number is marked in association with the obstruction, and you will have enough water between your keel and the obstacle, you may traverse over this area. While it might be safe to pass over, the ocean is huge and there is plenty of water around the obstruction, so why not play it safe and go around the potential hazard?

Pumping Out Rainwater

Our dinghy, Tooth, doesn't have a garboard plug so he has to live floating in the water. If Tooth were out of the water, the weight of the rainwater would blow the hull open. Instead of dealing with a disastrous dinghy repair every time it rains, we leave Tooth in the water where he can fill and simply sink into the water a bit further until I can pump him out. 

When you live on the rainy East Coast of the United States, this almost daily routine quickly becomes a tedious chore when you have to pump out the rainwater with a hand pump or hand bailer. When you walk down the pier heading to your boat after a long days work, the last thing you want to do is deal with this.

The dinghy is sitting a few inches deeper as it has filled up with rainwater during the downpour that occurred earlier today. Since I was not in the mood to pump Tooth out, I set up my handy electric bilge pump. 

The electric pump is a self contained battery powered pump that takes all the effort out of the job. I simply hook the hose over the side of the dinghy which holds the pump in position and turn it on. The pump will suck the water out and slowly get the job done without me breaking a sweat!

As the dinghy begins to empty, the pump will start to draw in air. To remedy this, I simply push down on the gunwale with my feet to tip the dinghy and collect the water in a smaller area with more height. This keeps the pump submerged and continues to suck the water right out of the dinghy. 

After a while, Tooth is floating on his unloaded waterline once again with no major effort on my behalf. To get the last bit of water out of the hull, I will tip the hull and scoop it up with a hand bailer. After using the pump, you will only need to do about 2 to 3 insignificant scoops to get the last bit of water out of the hull.