Life Aboard

Keel Art

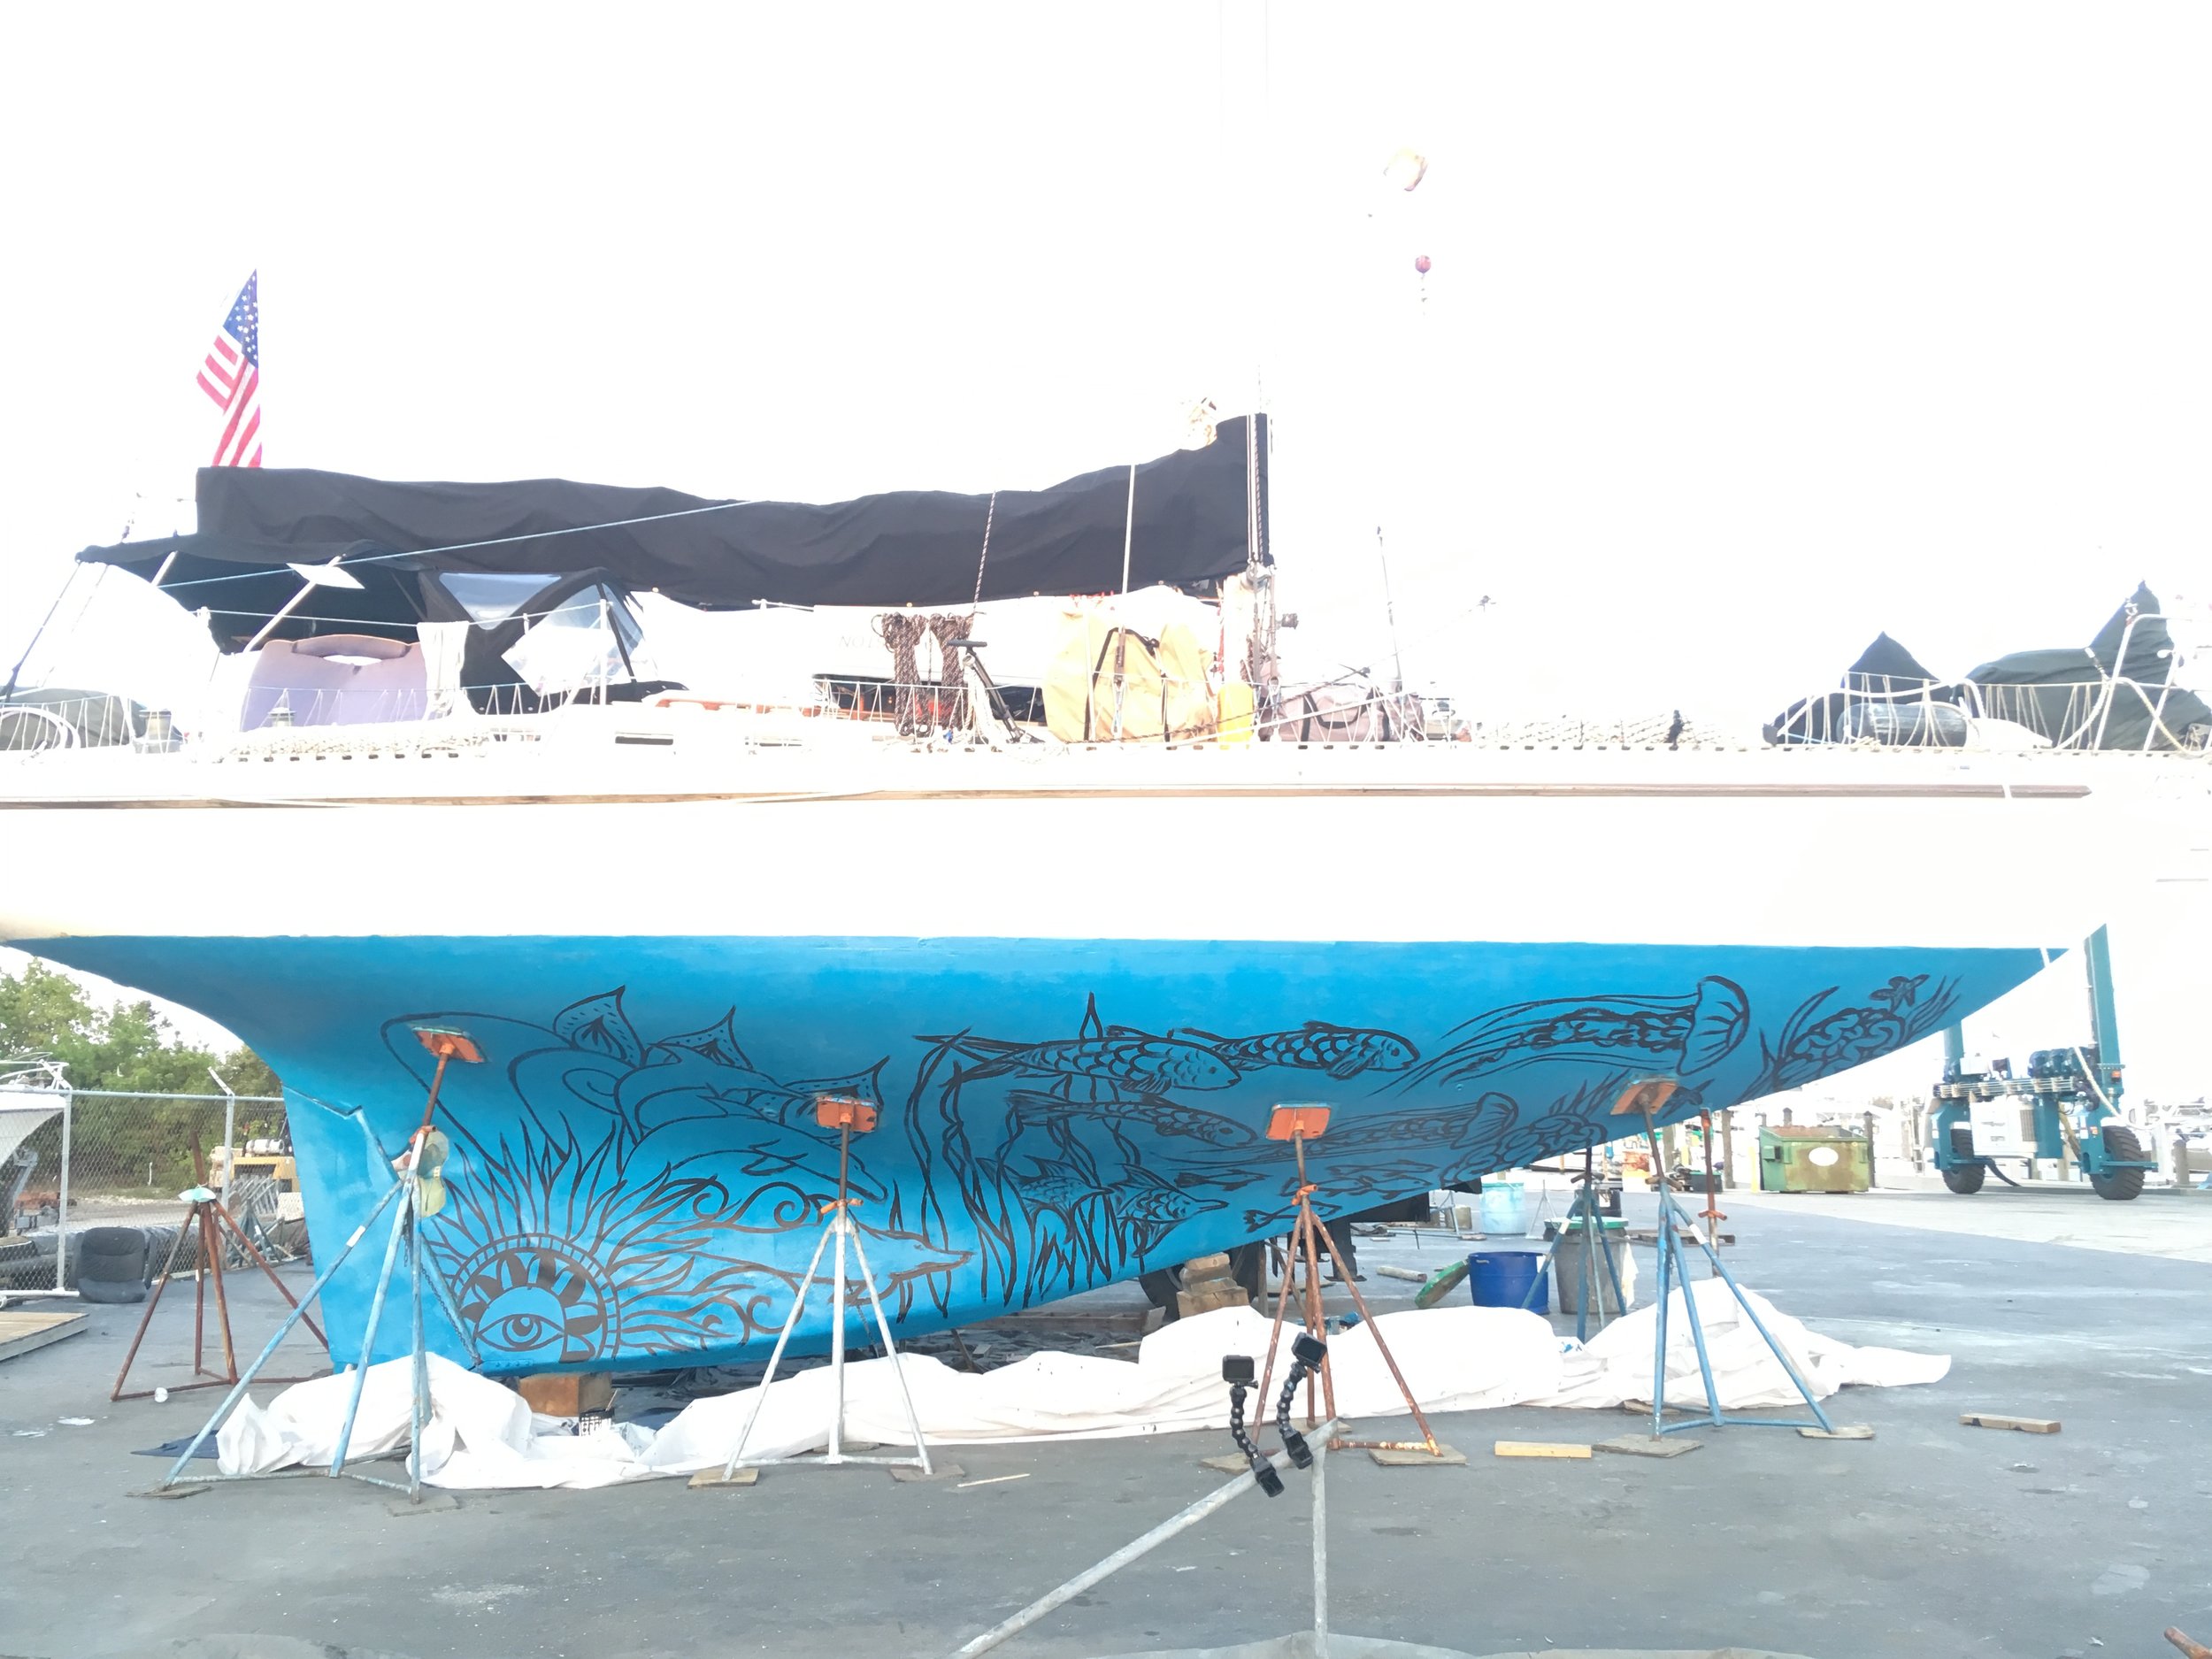
Bottom painting usually implies smearing a slow release poison onto the bottom of your boat, but for Maddie, it is a moving canvas! 

IMG_1873.JPG

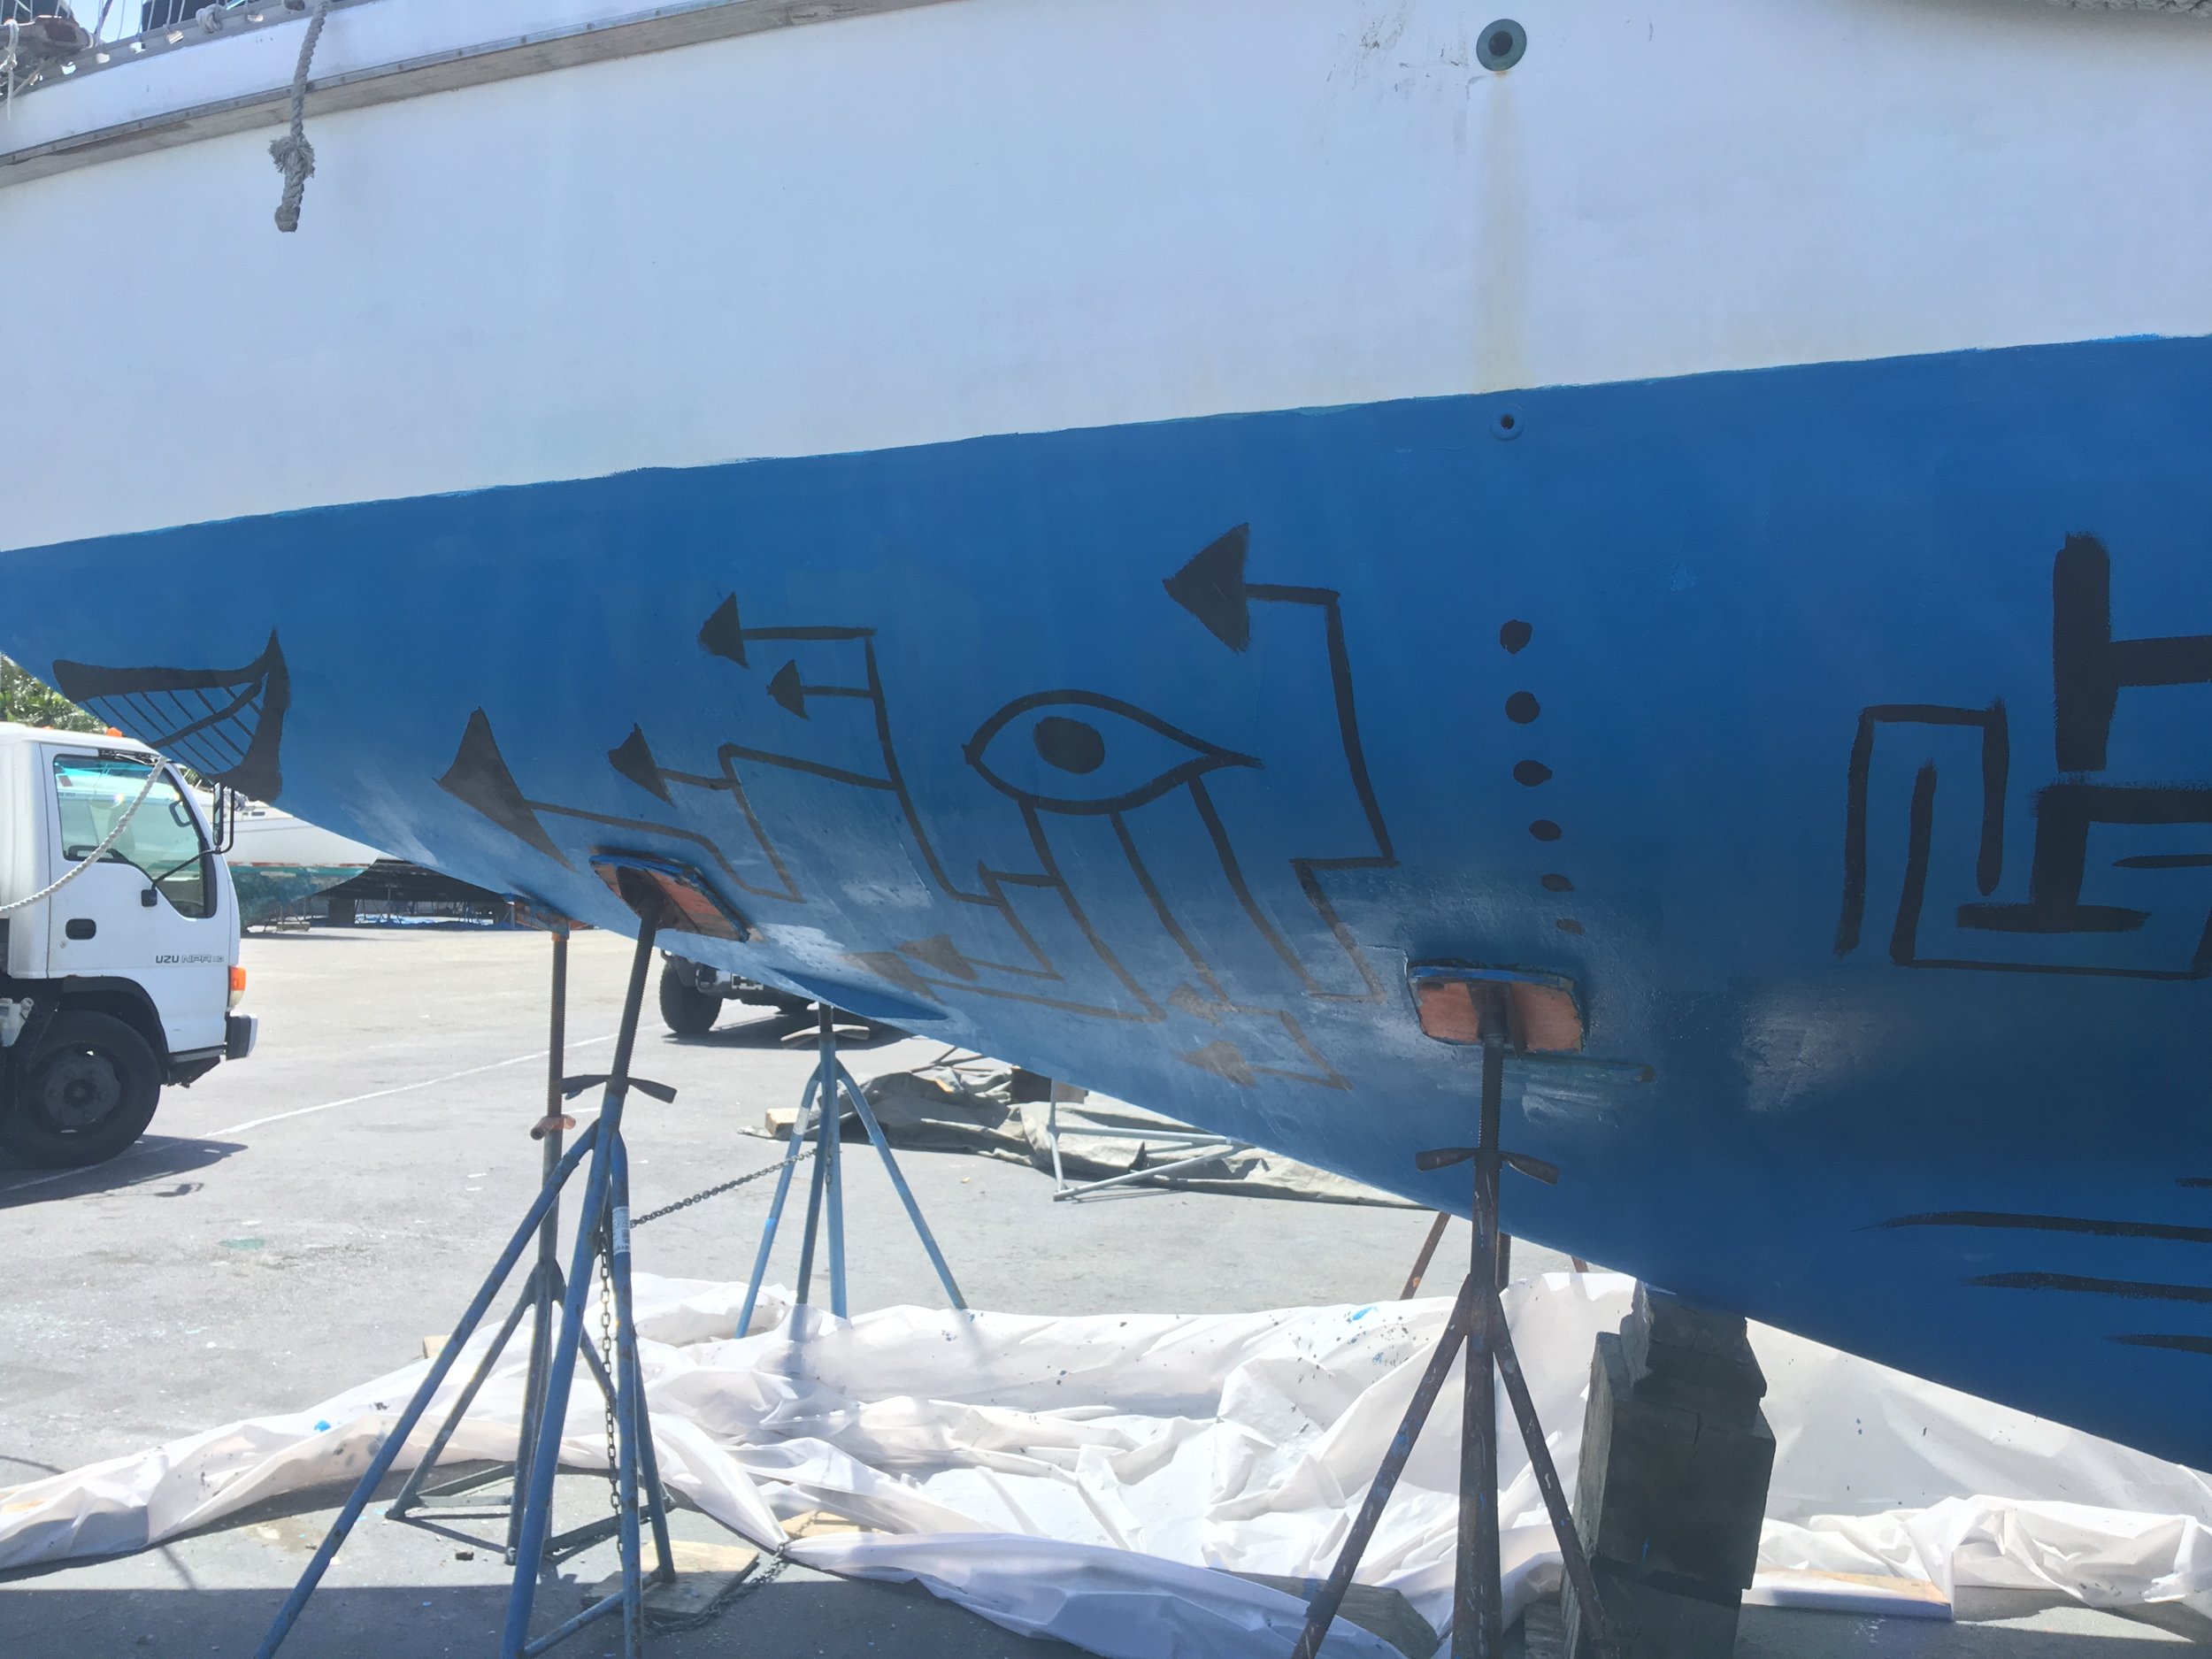
Last time Maddie painted the mural in topside paint over the bottom paint. It held on well, but so did everything that grows under the sea! In a week, the mural was very fuzzy and required constant scrubbing to keep the hull clean. 

This time, we were planning on doing a new mural, so we picked up some back antifouling paint while we were at the chandilery.  

IMG_1888.JPG

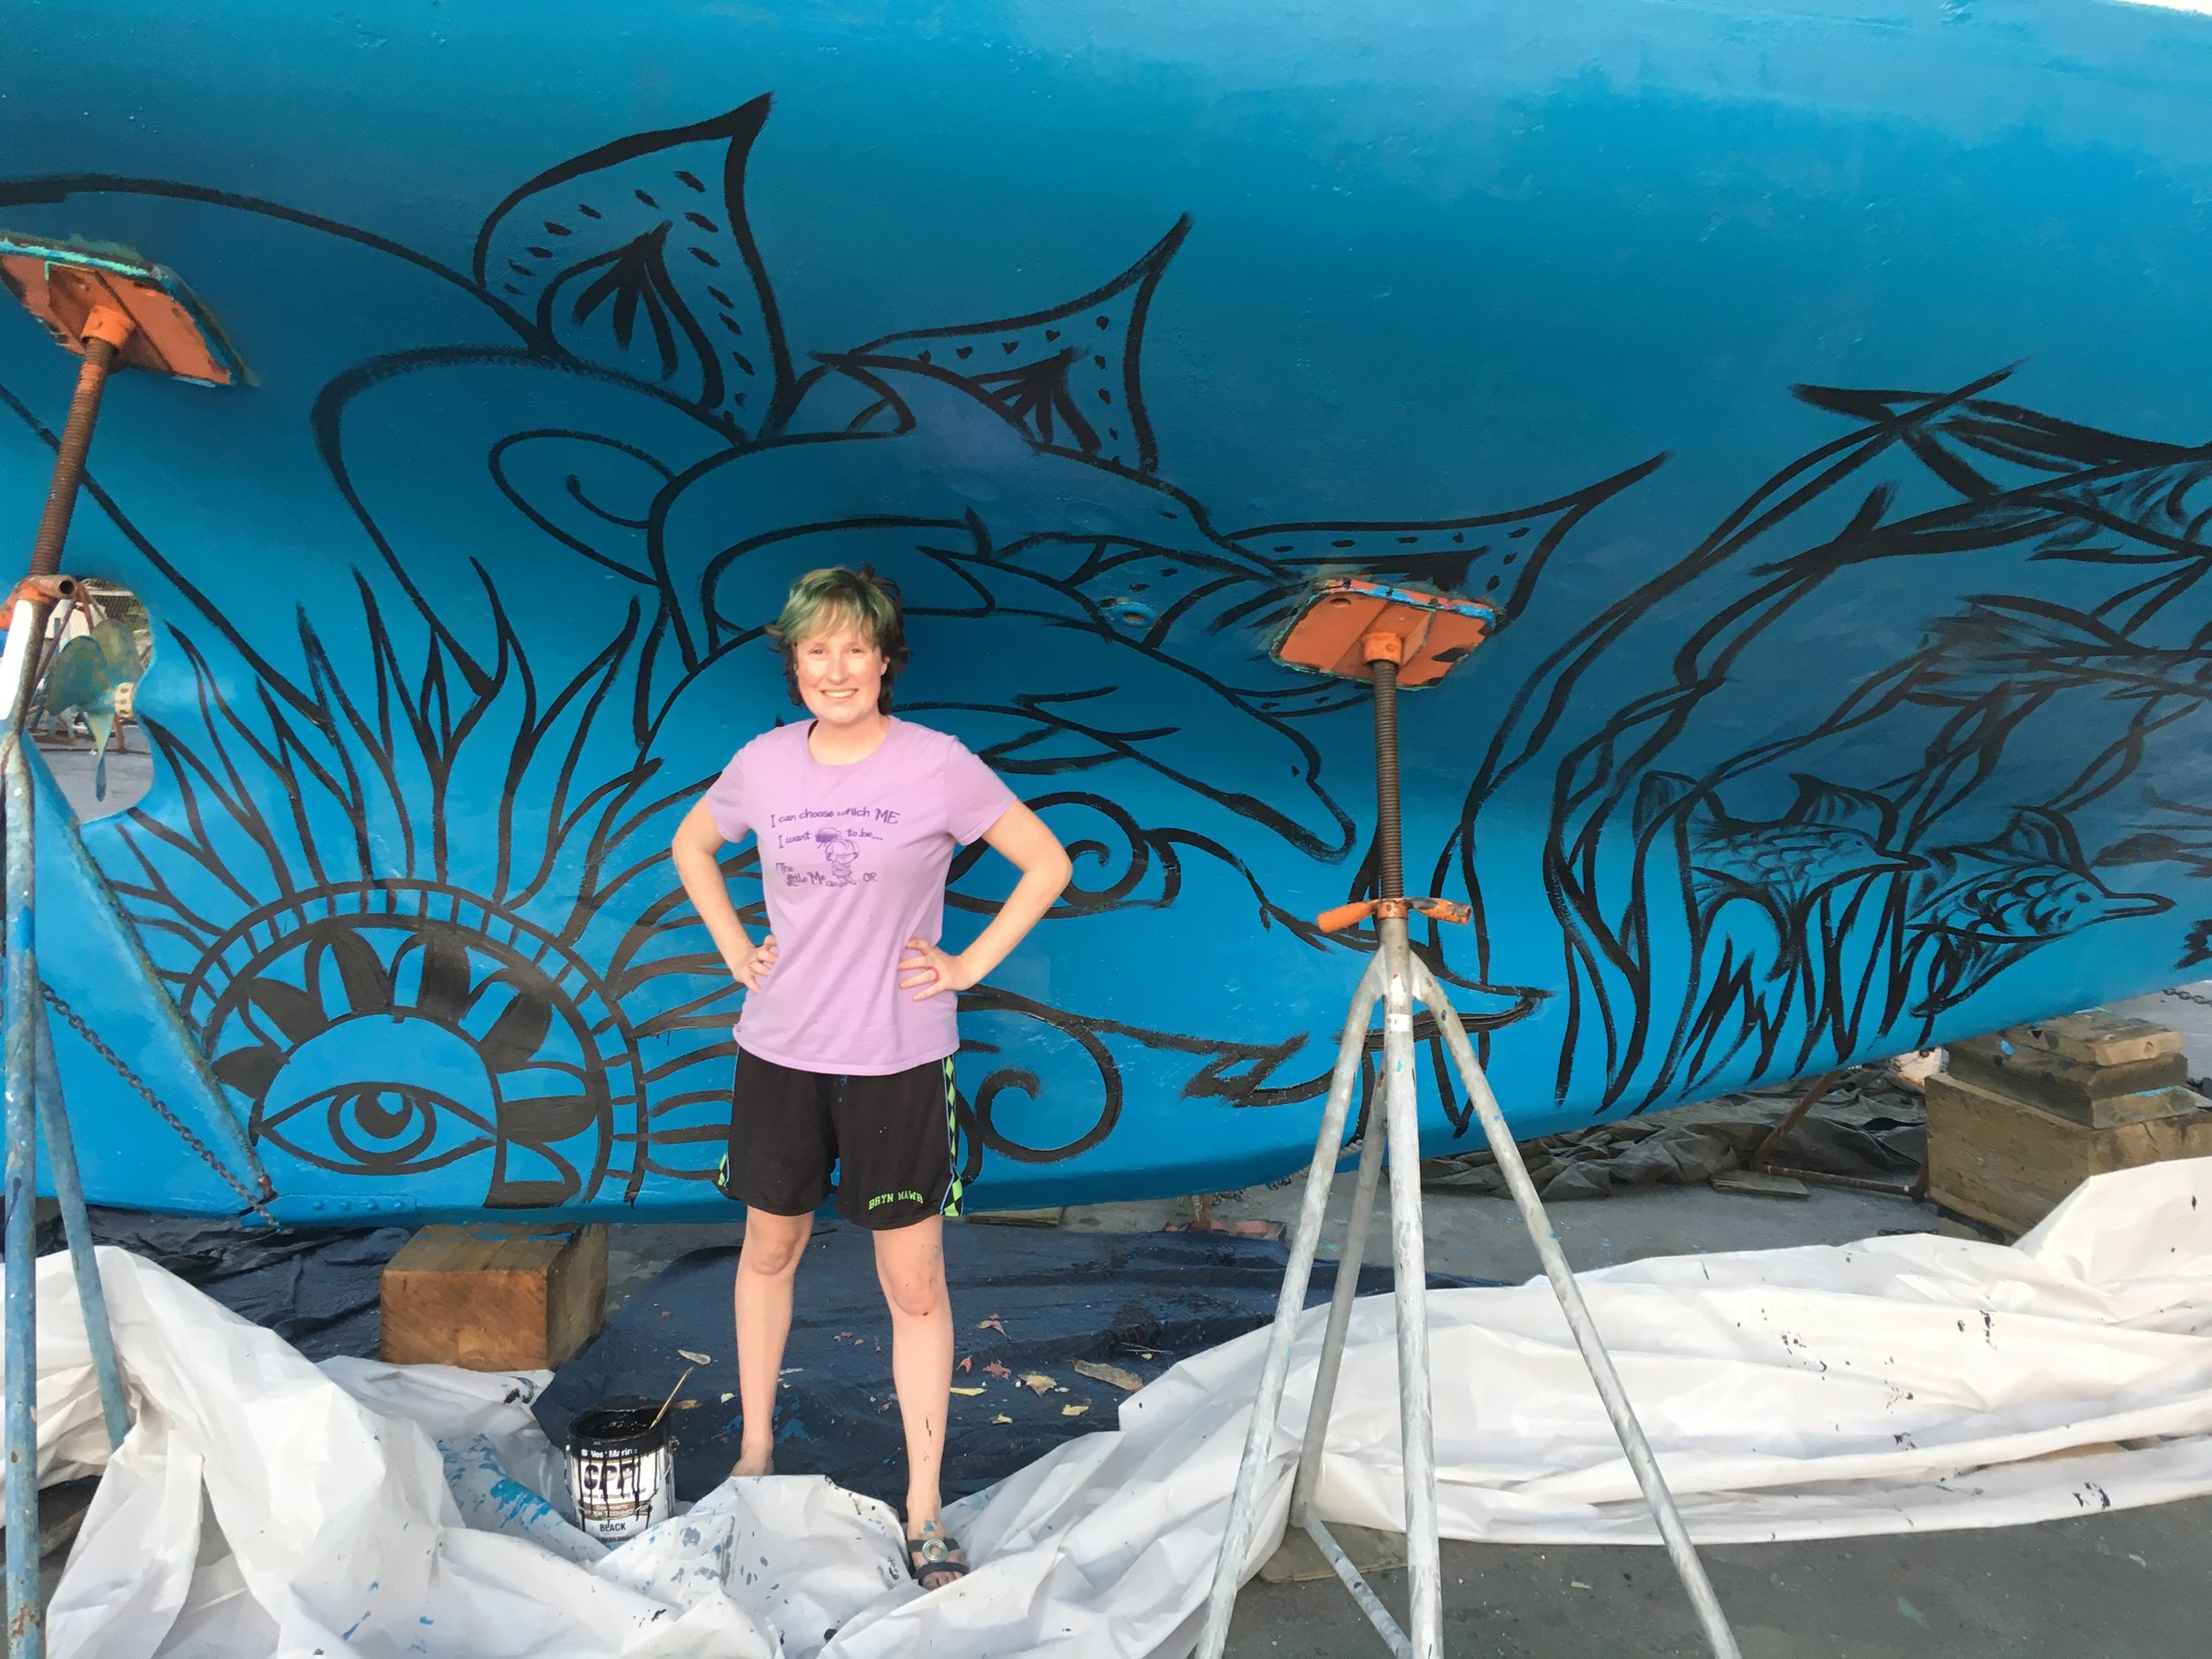
I tried my luck on the port side, and we quickly learned why Maddie does art and I do teeth and rigging!

IMG_1904.JPG

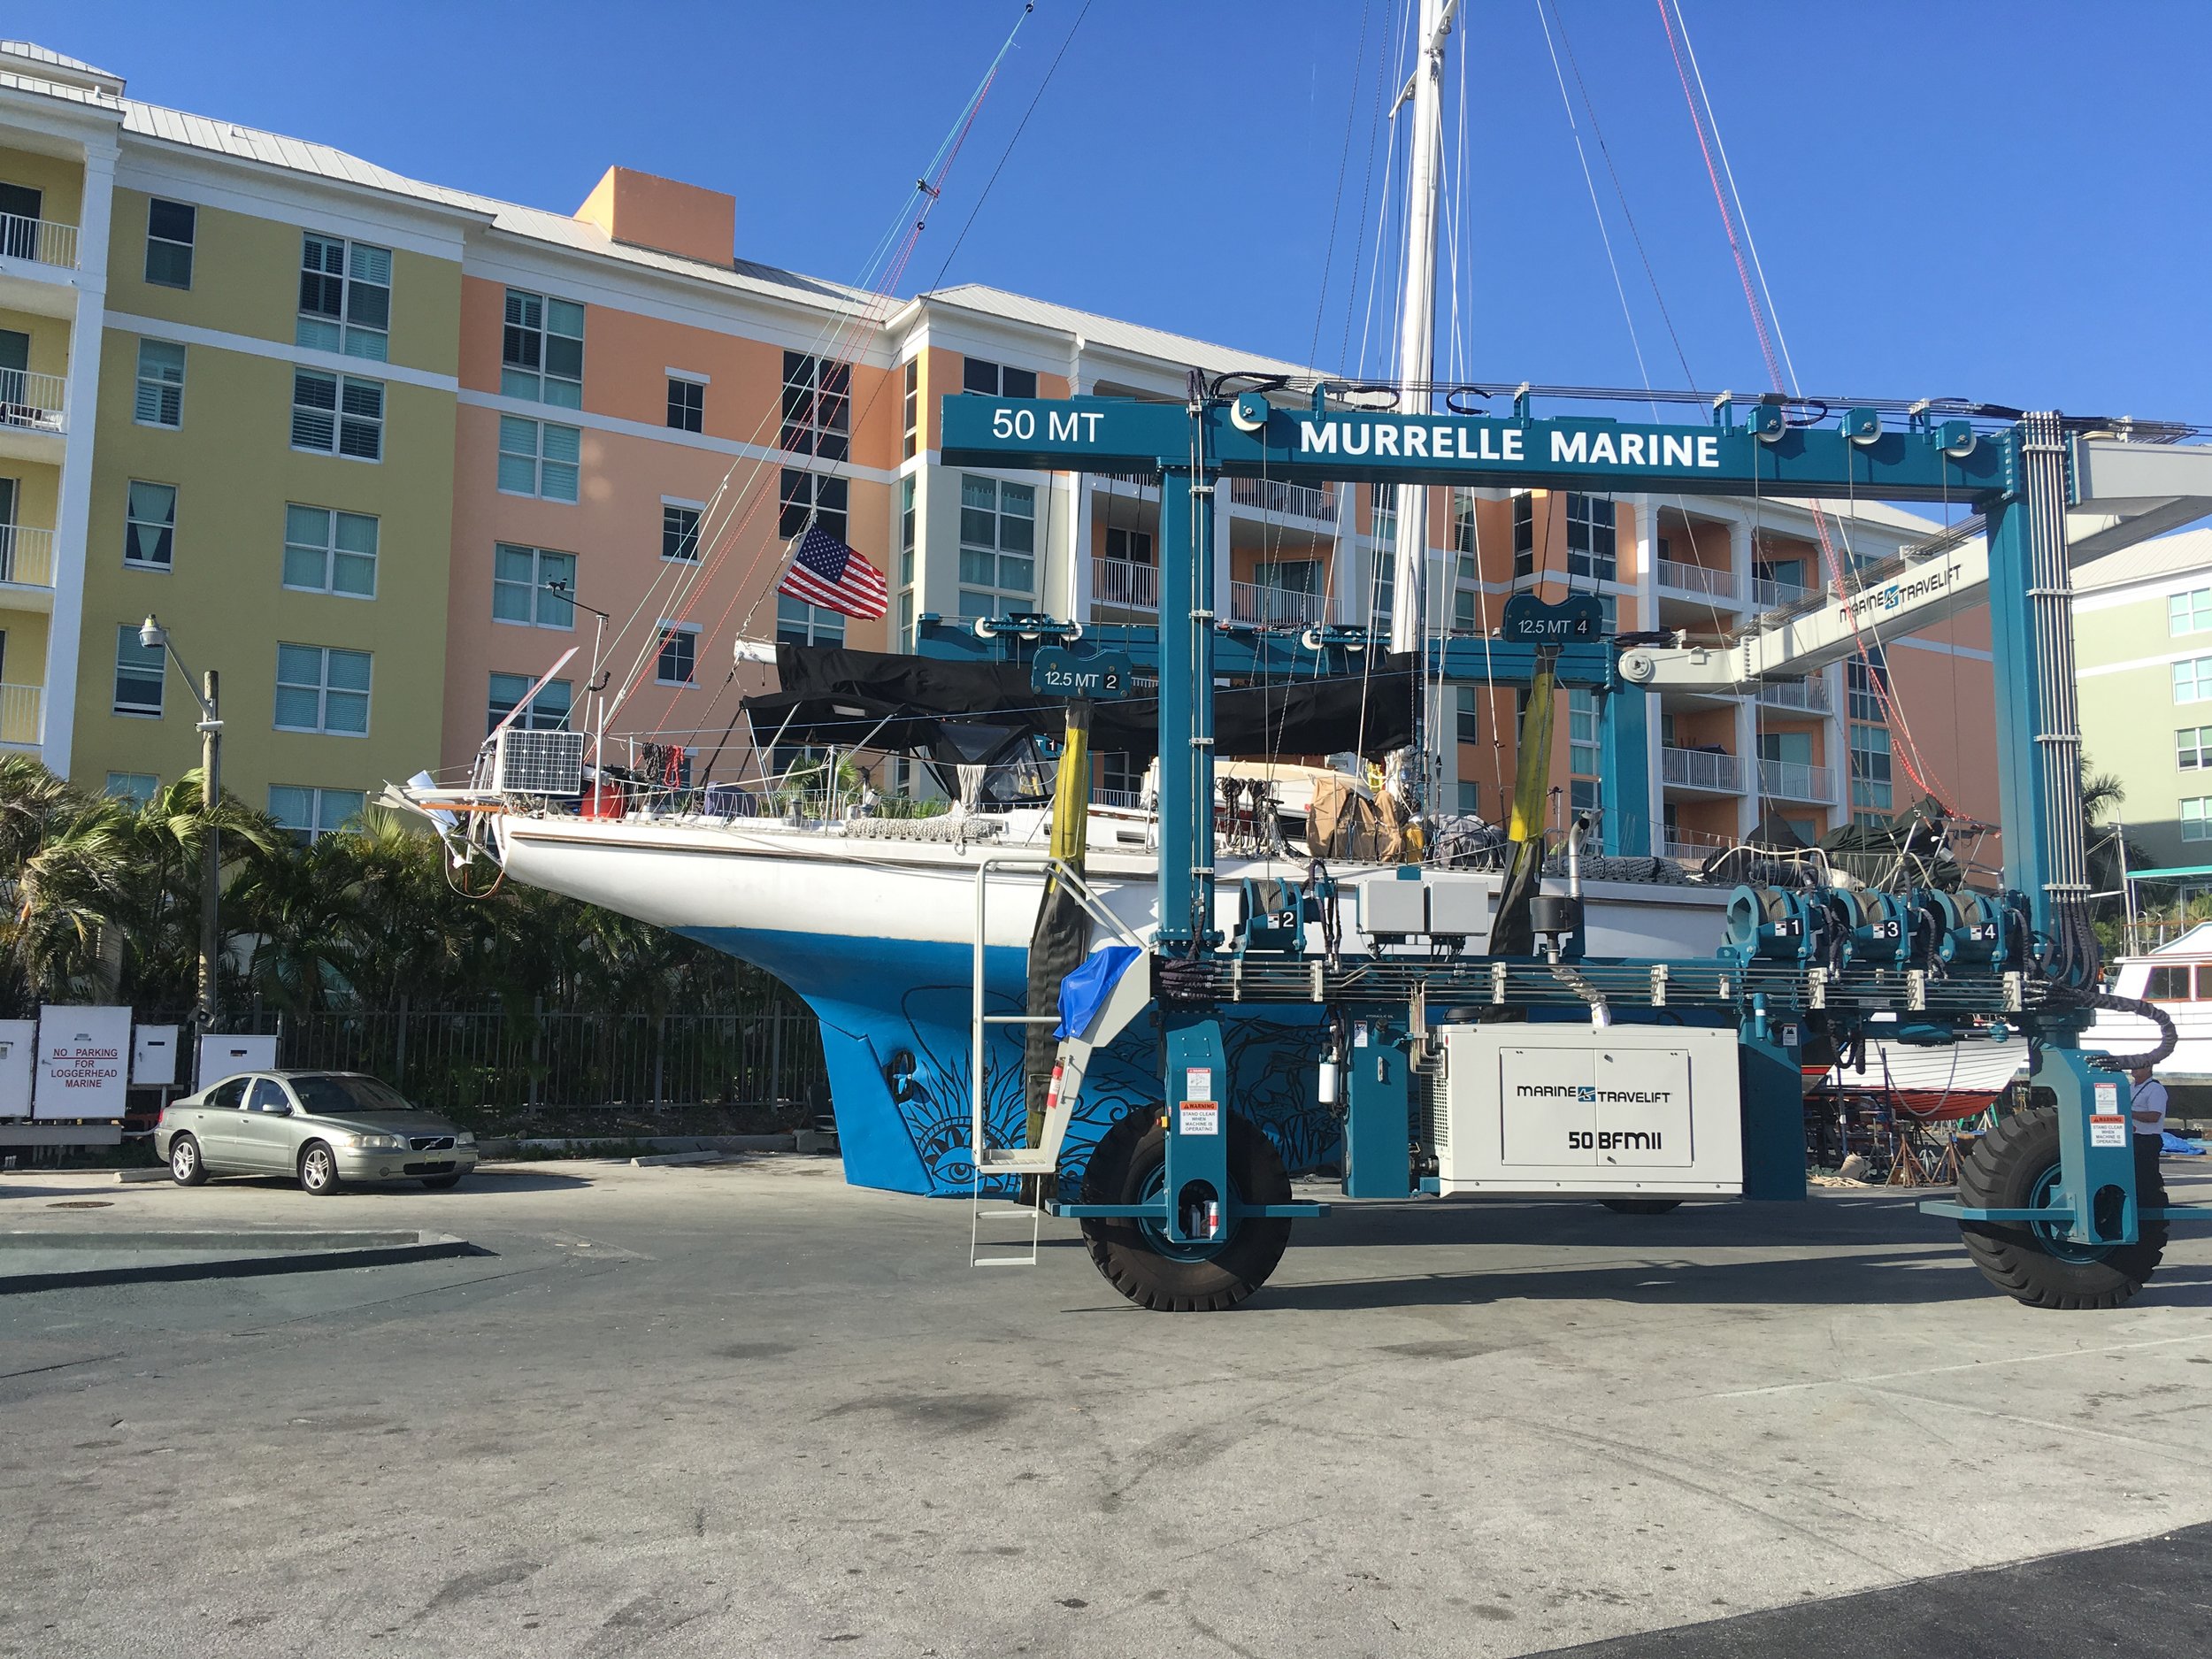
At the end of it all, we splashed Wisdom and the mural is now in a place where only the fish can enjoy it (at least until we get to clearer waters)! 

IMG_1948.JPG

Once we get to the Bahamas, the bottom will be much easier to see! 

IMG_1957.JPG

Keeping the Sun Off

It's a gorgeous day, so why be inside?

image.jpg

We at inside often when the weather turns on us, so when the warm bright sun comes out to shine, we enjoy being in its presence as we enjoy the splendor it brings. The issue is we are both very pale and burn to a crisp in a few minutes!

Maddie has found a lovely solution to keep the sun off of here while still enjoying the light it brings as she reads her book in the cockpit. She has make a tent out of a blanket. The blanket casts a shadow on her while not laying on her. This lets the breeze flow through the setup and keeps her cool and shaded! 

Waiting for Wind

Sometimes the best wind to get to your next destination is not the same wind that you need to get out of your anchorage. We were very happily moored in Fort Pierce, FL. ​

We were on a mooring ball and the conditions were comfortable, even in foul weather. But, we want to get to Miami, which lays about 120 miles south of Fort Pierce. ​

To get to Miami, we really need the Northerly winds brought down by a cold front. These systems will bring powerful winds that will blast you towards your destination with very little sail flying. We have sailed this way successfully since Charleston, SC, flying only the storm jib and trysail.​

To safely leave the Fort Pierce inlet, we needed a nice calm day when we could ride out gently with the current. So, we slipped out of the inlet and out into the Atlantic Ocean, where we were met with a gentle southerly breeze. We tried tacking a bit to make some miles south as we wait for the cold front that will arrive tomorrow., but to no avail. We tacked for over 2 hours, and only moved a few miles from the inlet. The palm trees that line the inlet are still very clearly visible and the work seems to be in vain. ​

image.jpg

So, here we sit, on a gorgeous day, hove to. three yachts are dialing past us, flying only their massive genoas, as they ride the downwind passage to their northern destination. We, on the other hand, must wait for tomorrow to make our miles!​

Courtesy Flags

When visiting a different country, it is customary to fly your countries flag off the stern of the boat and the flag of the country you are visiting on the starboard flag halyard (located under the starboard spreader). 

IMG_2178.JPG

When you arrive in a new country and have not cleared in yet, you will fly a yellow flag in this place, indicating that you have not cleared into customs yet. Once you have cleared in, you will then replace the yellow flag with the flag of that country. 

The boat in the image above has an American flag flying from the stern and the Bahamian courtesy flag flying from the starboard spreader. This is the appropriate flag setup for an American vessel visiting the Bahamas, but not the correct flag setup to find in Fort Pierce, FL.  

This guy is our neighbor while we are on a mooring ball in Fort Pierce! I'm not sure if he simply forgot about the flag, or if he hasn't cleared back into the US, or what the situation is? The important thing to remember is that flags are signals that you send to other boats around you and it is important to be mindful of this and make sure that you are always sending the correct signs. 

Exhaust Riser Gasket

When replacing the exhaust system on your boat, you need to pay special attention to the gasket orientation with regards to the water ports in the riser and elbow.

IMG_2166.JPG

Your replacement exhaust gaskets will include various combinations of holes and materials. 

If your motor is fresh water cooled with raw water cooled exhaust, you will put the metal plate between the manifold and riser. The metal plate will be sandwiched between paper gaskets. This will separate the cooling fluids and keep raw water out of the motor and fresh water out of the exhaust. If your motor is raw water cooled, then you will not use the metal plate at all. 

IMG_2173.JPG

Be sure to use stainless steel studs when you bolt the riser to the manifold. This will help make future replacement easier. On the studs, you want to thread the short threaded section into the exhaust manifold and use the long threaded section to guide and slide the riser into place. You also want to use solid washers on the bolts as they will form a metal O-ring that will add and help in the seal. If you don't use a solid washer or use a split washer, the studs will leak water.

Once you come to the riser/elbow junction, you will be faced with another choice to make. The riser has the exhaust port in the middle and is surrounded by a water jacket with 4 water ports. The elbow has the same setup on its mating face, but careful gasket selection should be taken at this step. 

IMG_2159.JPG

If you install the gasket with three holes in it, water will flow from the riser to the elbow in the lower portion of the junction and the top of the unit will become very hot. This heat buildup will cause the elbow or riser to crack!

IMG_2151.JPG

Be sure to install the gasket that has one hole with the hole up at the top of the interface. This will force water to fill up in the riser and flow into the elbow from the very top. This will ensure that the entire exhaust system is covered in flowing water to keep the heat levels down and to prevent cracks due to heat buildup. 

On the faces of the gaskets, you want to use aviation grade gasket cement to ensure a proper seal on all ports.

Hopefully these tips and tricks will make your exhaust replacement easier and avoid any need to "revisit" the exhaust setup for several years of boating.