Cost of Conversion

One of the first questions I am asked by clients is: "How much will it cost to convert to synthetic standing rigging?"

The short answer is: Around the same price as 1x19 SS rigging if you have me do all the work, and much cheaper than 1x19 SS rigging if you do the work yourself.

The cost of materials is significantly cheaper than stainless steel, mostly due to the fact that stainless steel is made of metals that need to be mined and processed. Synthetic standing rigging is made out of UHMWPE (Ultra High Molecular Weight Poly Ethylene), otherwise known as plastic. Plastics are cheap and as manufacturing processes and techniques improve, costs go down!

Since the costs of materials are so much cheaper, the total cost to re-rig your yacht is also cheaper. Turnbuckles cost around $100 each where the materials to make a deadeye cost around $24 each. The fittings at the end of stainless stays cost between $100 to $400 each, where the fittings at the end of synthetic stays cost around $1 to $12 each; significantly lowering the cost to re-rig.

The major difference is the cost of labor. Splices are more labor intensive to perform than a swage or compression fitting, and tensioning standing rigging with deadeyes is a lot more labor intensive than with conventional turnbuckles. The cost of labor is significantly higher than with steel rigging which offsets the cheaper material costs to give a similar end price.

If you are the type of person who will do it yourself, you can save a significant amount of money by doing the conversion to synthetic standing rigging yourself. If you need to pay someone to do it, the costs will be around the same in the end.

Using the Islander 36, which fits the mold of an average 36 foot cruising yacht with a double spreader rig, the material costs were:

  • $861.49 for the stays
  • $64.60 for the deadeyes
  • $379.62 for the lashings
  • $156.84 for the thimbles

At this point, the materials only cost $1,462.55

If your mast has regular tangs that can accept a clevis pin, you are set! If your mast has t-ball fittings or some other connector, the costs will go up as you need to include the costs of adapters into the cost of conversion.

  • $1,303.76 for 8 T-ball fittings and toggles to connect to the synthetic stays

Now the material costs have nearly doubled to $2,766.31. This is significantly less expensive than if you were to re-rig with stainless steel, as long as you do all the work yourself and don't need to pay anyone for labor.

Fabrication of a backstay and eight shrouds (Cap, Intermediate, Forward and Aft Lowers [Port & Starboard]) and all 9 deadeyes took me 30.14 hours on the Islander 36. This number doesn't fluctuate very much because the length of the stay doesn't add considerable time to the job. I work at the ends of the stays and the space in between doesn't affect my working time. On average, it takes me around 32 hours to fabricate the rigging for a double spreader sailboat. Single spreader sailboats are quicker because they have two stays fewer and only need 2 areas serviced instead of 6 with a double spreader rig. 

Being how I currently charge $105 per hour for labor, 32 hours of labor adds $3,360 to the cost of re-rigging.

In the case of the Islander 36,

  • The material cost was $2,766.31
  • The labor cost was $3,164.70

This brings the cost to re-rig the Islander 36 up to $5,931.01. This number is significantly cheaper than the cost to re-rig a 36 foot yacht with stainless steel, but the job is not finished yet. At this point, the new rigging is sitting in a box awaiting installation. If you install and setup the rigging yourself, this would be the final number in the cost to re-rig. If you don't want to do it yourself, you will need to pay someone to continue doing the work.

Average installation and setup takes around 30 hours (at $105 per hour), which would add another $3,105 to the bill, bumping the cost to re-rig up to $8,010 for an average re-rig.

This number is reached by assuming that the average cost for materials is around $1,500, 32 hours to fabricate the rigging, and 30 hours to install the rigging. As you can see, there is a significant difference between the $1,500 price point of doing it yourself and the $8,010 price point of paying to have it done professionally.

$8,010 is an average amount to pay to have the standing rigging replaced with 1x19 stainless steel on a 36 foot yacht. The prices are currently around the same level, but the savings in weight are quite great! Steel is very heavy and dyneema is very light, 1/4 inch 1x19 SS weighs 0.15 pounds per foot and 6mm dyneema weighs 0.017 pounds per foot. In this example, dyneema is 8.8 times lighter in weight than steel!

Looking back at our example with the Islander 36, the final cost of materials was $3,454.56. I did the fabrication and the owner did the installation, followed by me doing the setup of the standing rigging. Lastly, I climbed the mast to inspect everything and seized the spreaders in their correct position. The total labor time was 49.74 hours and the final cost to re-rig was $8,677.26. 

The owner showed me other estimates he had received which were right around this number as well for 1x19 SS standing rigging. Once again, the cost of materials is significantly cheaper, it's the cost of labor that brings the price of re-rigging right up to be comparable with that of steel rigging. 

If you need to pay the same amount to re-rig your yacht, why would you choose a material that is heavier and prone to corrosion over a material that is so much lighter and immune to corrosion?

Islander 36 Conversion: Seizing the Spreader Tips

Seizing the spreaders is a simple concept: you tie a knot that will hold the shrouds in the tip of the spreader and prevent movement of the spreader on the shrouds!

This may sound easy enough, but each spreader tip is different, and your boat may look different from this tip. You need to look at your spreader tip and evaluate how you can attach the seizing line to the shroud to the tip without damaging any of the components. This spreader tip had holes drilled through next to the shallow notches to hold mousing wire. Mousing wire will prevent the shroud from jumping out of the notch but it won't prevent movement on the spreader tip. 

By tying the spreader tip up with dyneema and taking advantage of the holes in the spreader tip, it is possible to hold the shrouds in place and prevent movement at the spreader tip. The basics are to tie the spreader tip to the shroud and then to the shroud, this will hold the shroud in the notch and keep anything from moving at the same time.

You can easily visualize the damage that movement of the spreader tip can cause by observing the severe chafe in the lower portion of this photo. The spreader tip rested there during the initial setup of the synthetic standing rigging. Once the major adjustments were taken care of, I climbed the mast and positioned the spreader so that it would bisect the angle to the shrouds. This results in a slight up-sweep of the spreader (which places the drain hole at the lowest point to keep water from collecting in the spreaders if they are mounted correctly). The spreader was tapped and pushed into its correct place, several inches higher than where it was originally sitting and then seized in that position.

By removing any movement between the spreader tip and the shrouds, it is possible to reduce the chafe that will occur to the shrouds. Any damage that does occur between the shrouds and the spreaders will be limited to the serviced area. This sacrificial layer will protect the structural stay within from chafe while still being easy to repair if the chafe ever becomes too severe.

Broken Spreader

While aloft for the final inspection, I noticed that the lower starboard spreader was in serious trouble!

First, the spreader was mounted upside down. The trailing edge of the spreader was facing forward and the forward edge of the spreader was trailing. The distinction in directions is only evident due to the air foil shape of the spreader. Round and square spreaders create a lot of drag and wind resistance, air foils create significantly less drag. An air foil creates less drag in a specific direction, and slightly more drag if it is set backwards (though still much less than a round or square air foil). Being how this is not a racing yacht, a slight increase in drag is not going to be detrimental to the sailing performance of a cruising yacht.

The reason that the direction of the spreader is so important is due to the drain hole for water in the spreader. The spreader has a drain hole near the mast on the bottom side. If the spreader is mounted with the trailing edge leading, the drain hole will now be on the top side of the spreader and instead of a drain, it would act as a water fill hole. Water inside a spreader will cause more weight aloft but more catastrophically, it will hold water that can turn into ice during the winter. The expansion of the freezing water inside will place great and unnecessary stresses on the aluminum air foil spreader and lead to its eventual and apparent failure.

The other factor that came into play with this particular spreader is the location of the spinnaker halyard and flag halyards. Both of these halyards (which look like they haven't been moved in 30 years) were rubbing on the front of the spreader. While the lines themselves were not significantly chafed, they did grind away at the soft aluminum of the spreader. The lines are full of dirt which acts like sand paper rubbing on the thin trailing edge of the spreader. If you have spare halyards installed on your mast, be sure that they are not contacting anything on their run. Over the years, either the halyard or the rig will become chafed and lead to costly repairs in the future.

The combination of the thinner metal of the trailing edge of the spreader being ground away by the halyards and the ice expansion inside the spreader may have led to the opening of the spreader.

Upon this discovery, the shrouds were relaxed and the spreader unbolted. It was then taken to a metal shop to have new aluminum welded onto the trailing edge and then ground into shape. The spreader was then painted and reinstalled the next day! With the repaired spreader in place, it is time to position the spreaders and seize the tips.

Islander 36 Conversion: Deck Clean-up

With all the stays up and tensioned, it is time to do some tidy work to the stays around the deck. 

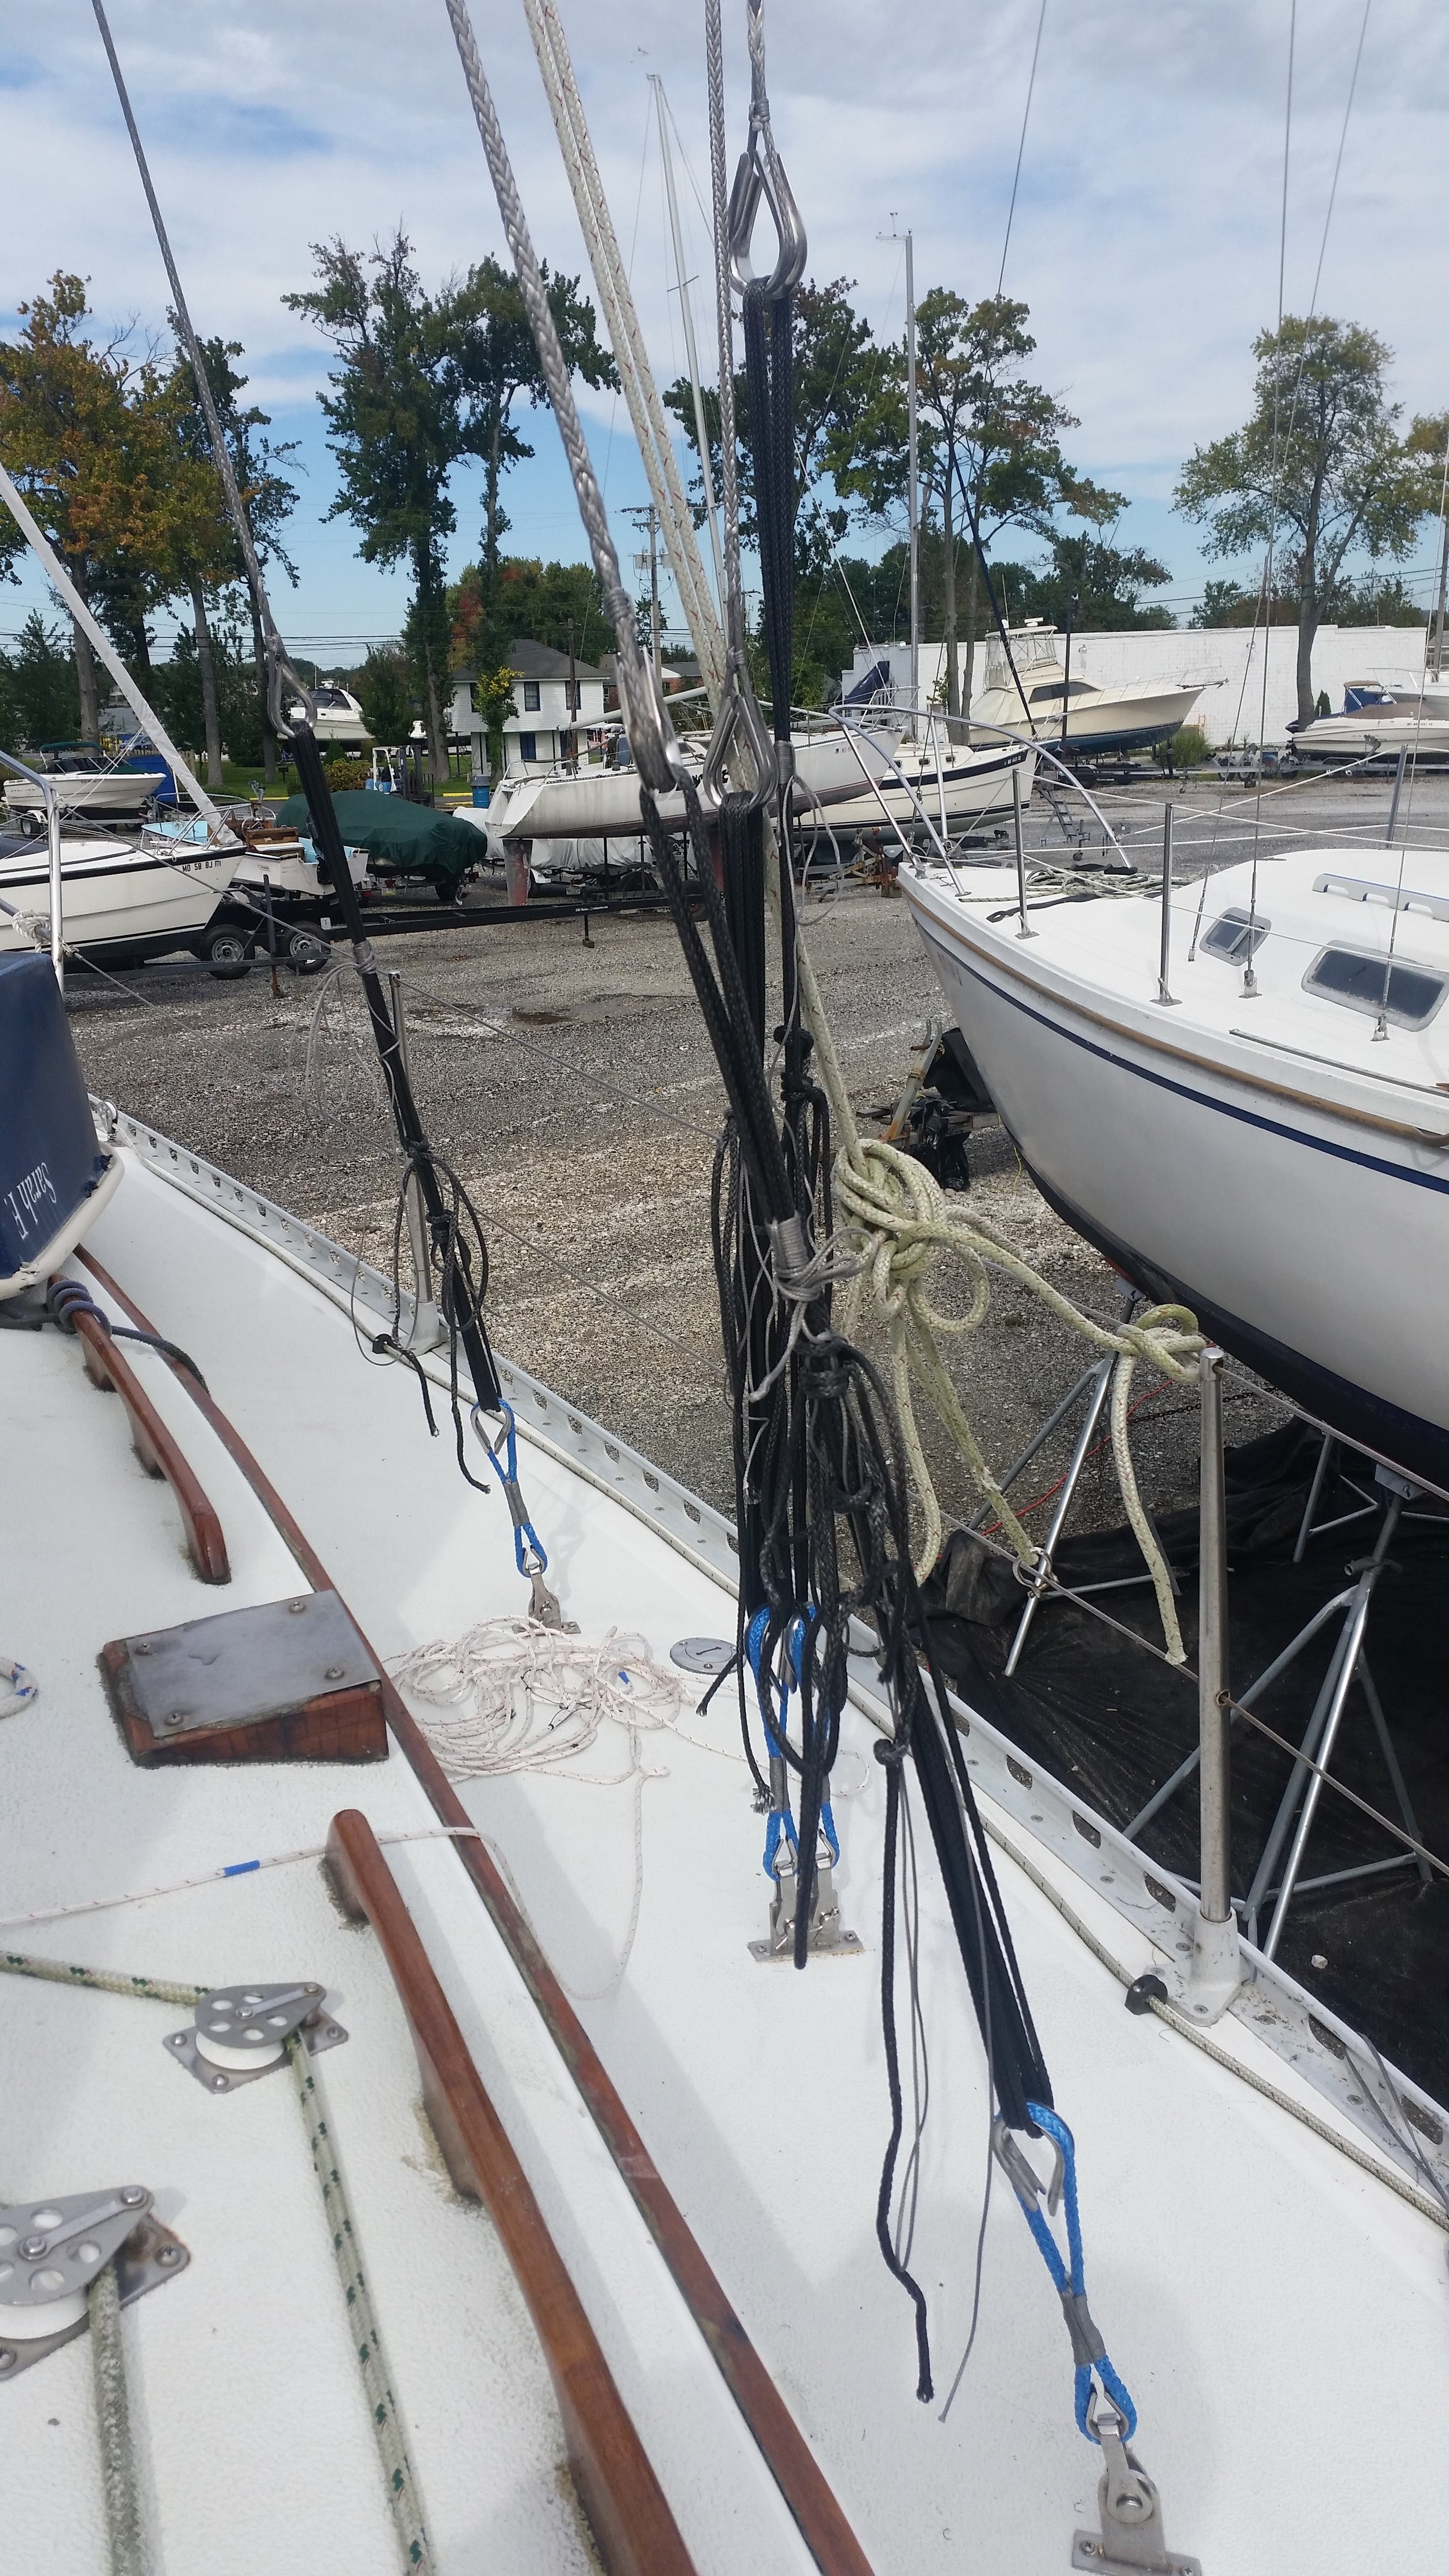
If I were to leave his rigging looking like this, I wouldn't get hired! This rats nest of rope is only acceptable during the tuning process when the stays are frequently untied and retied. There is no point in tidying up the lines if you are going to retie them tomorrow. Now that we are putting on the finishing touches, it is time to clean up the deck since we wont be messing with the lashings for some time.

The tails of the lashings were tied to cover the shroud frapping knot and to consume all the long free ends that used to hang like Spanish Moss from swamp trees.

All the shrouds are finished and tied off, the backstay is set and tensioned, and this job is almost complete! With everything tied off and tidied up on the deck it will soon be time to go aloft and seize the spreader tips and perform a final inspection of the rigging conversion.

Islander 36 Conversion: Synthetic Backstay

The backstay on the Islander 36 retained its turnbuckle, making adjustment much simpler to perform as compared to the deadeye system.

Attaching synthetic stays to a turnbuckle is very simple, all you need is the correct fittings on the turnbuckle. The turnbuckle needs to be a "double jaw" turnbuckle, meaning it has a jaw toggle on the bottom to attach to the chainplate and a jaw toggle at the top to attach to the deadeye. The deadeye then acts as a receptacle to receive the stay via the lashings.

While a double jaw turnbuckle may look symmetrical and can function just fine if it is installed in either direction, it is nice to pay close attention to the thread direction on the turnbuckle. It is standard practice to install the RH threaded toggle on the bottom and the LH threaded toggle on the top. If you install it the other way, it will still function the same, but the confusion comes when you are doing repairs.

If you see that the top toggle is cracked or showing the faint clues of crevice corrosion, you know that you need to order a LH toggle because you always install a LH toggle on the top. If you do not follow this simple convention, you will need to look closely at the threads and determine which handed threads you are working with.

When using a turnbuckle, there is no need to develop a large pulley system to provide the mechanical advantage to provide tension thanks to the wonderful turnbuckle located in line! Turnbuckles are compact wonder machines, containing a very long inclined plane as well as lots of leverage to push the load up that plane. Inserting a long screwdriver into the turnbuckle body will add a lot of leverage to the system and allow you to achieve the necessary force to tension the rigging. 

The reason turnbuckles can't be used alone with synthetic stays is they don't have enough travel to absorb the stretch that will occur over the life of the stay. Turnbuckles offer five inches of travel, and once that is consumed, you can no longer tension the stay further. Lashings on the other hand offer a lot of travel and can absorb the stretch and creep of a synthetic stay over its life.

To tension synthetic standing rigging with a turnbuckle, all you need to do is connect the turnbuckle to the deadeye, the deadeye to the lashing, and the lashing to the stay. With the turnbuckle as loose as it can be (just one thread showing on the top and bottom screws), tighten the lashing using a marlin spike hitch as much as you can by hand, then tie a shroud frapping knot in the lashings to lock them in place.

With the lashings secure, begin tightening the turnbuckle until the desired tension is achieved. If and when the turnbuckle becomes two blocked, which will happen, simply loosen the turnbuckle completely and re-tighten lashings again using a marlin spike hitch. Simply tie a new shroud frapping knot and re-tighten the turnbuckle. 

You might think that the stay will be just as tight as it was when you started, but in fact it will be very slack. In essence, the stay that was pretty tight while two blocked will now be five inches longer when the turnbuckle is relaxed. These five inches will then be absorbed by the lashings and tension can be re-introduced via the turnbuckle once again.

It might seem like a convoluted procedure, but trust me, it is much simpler than running tensioning lines on the deck to a cockpit winch and setting fair leads at the perfect position to tension your deadeyes. Turnbuckles offer excellent ease of adjustability in a compact package for an equally significant price.