Our Dinghy Tooth

There are many options when it comes to a dinghy, you can have an inflatable, an inflatable with a rigid bottom, or a hard dinghy. I chose to go the route of a hard dinghy, allowing me to row it along without the need to rely on an outboard motor to propel us.

Tooth is a kit boat from Chesapeake Light Craft (clcboats.com) and has served his purpose well. Tooth has a flat bottom, allowing him to plane behind us while under tow, and a skeg to keep him tracking straight while being rowed. 

While Tooth is comfortable to be in and a good row boat, he is too large to store on deck. This presents problems when going long distances as we are forced to tow him, no matter what the conditions are.

Tooth has been a sturdy dinghy who has stood up to a year of use and abuse so far and is still floating and comfortable to use.

Pilot Holes for Cut Thread Screws

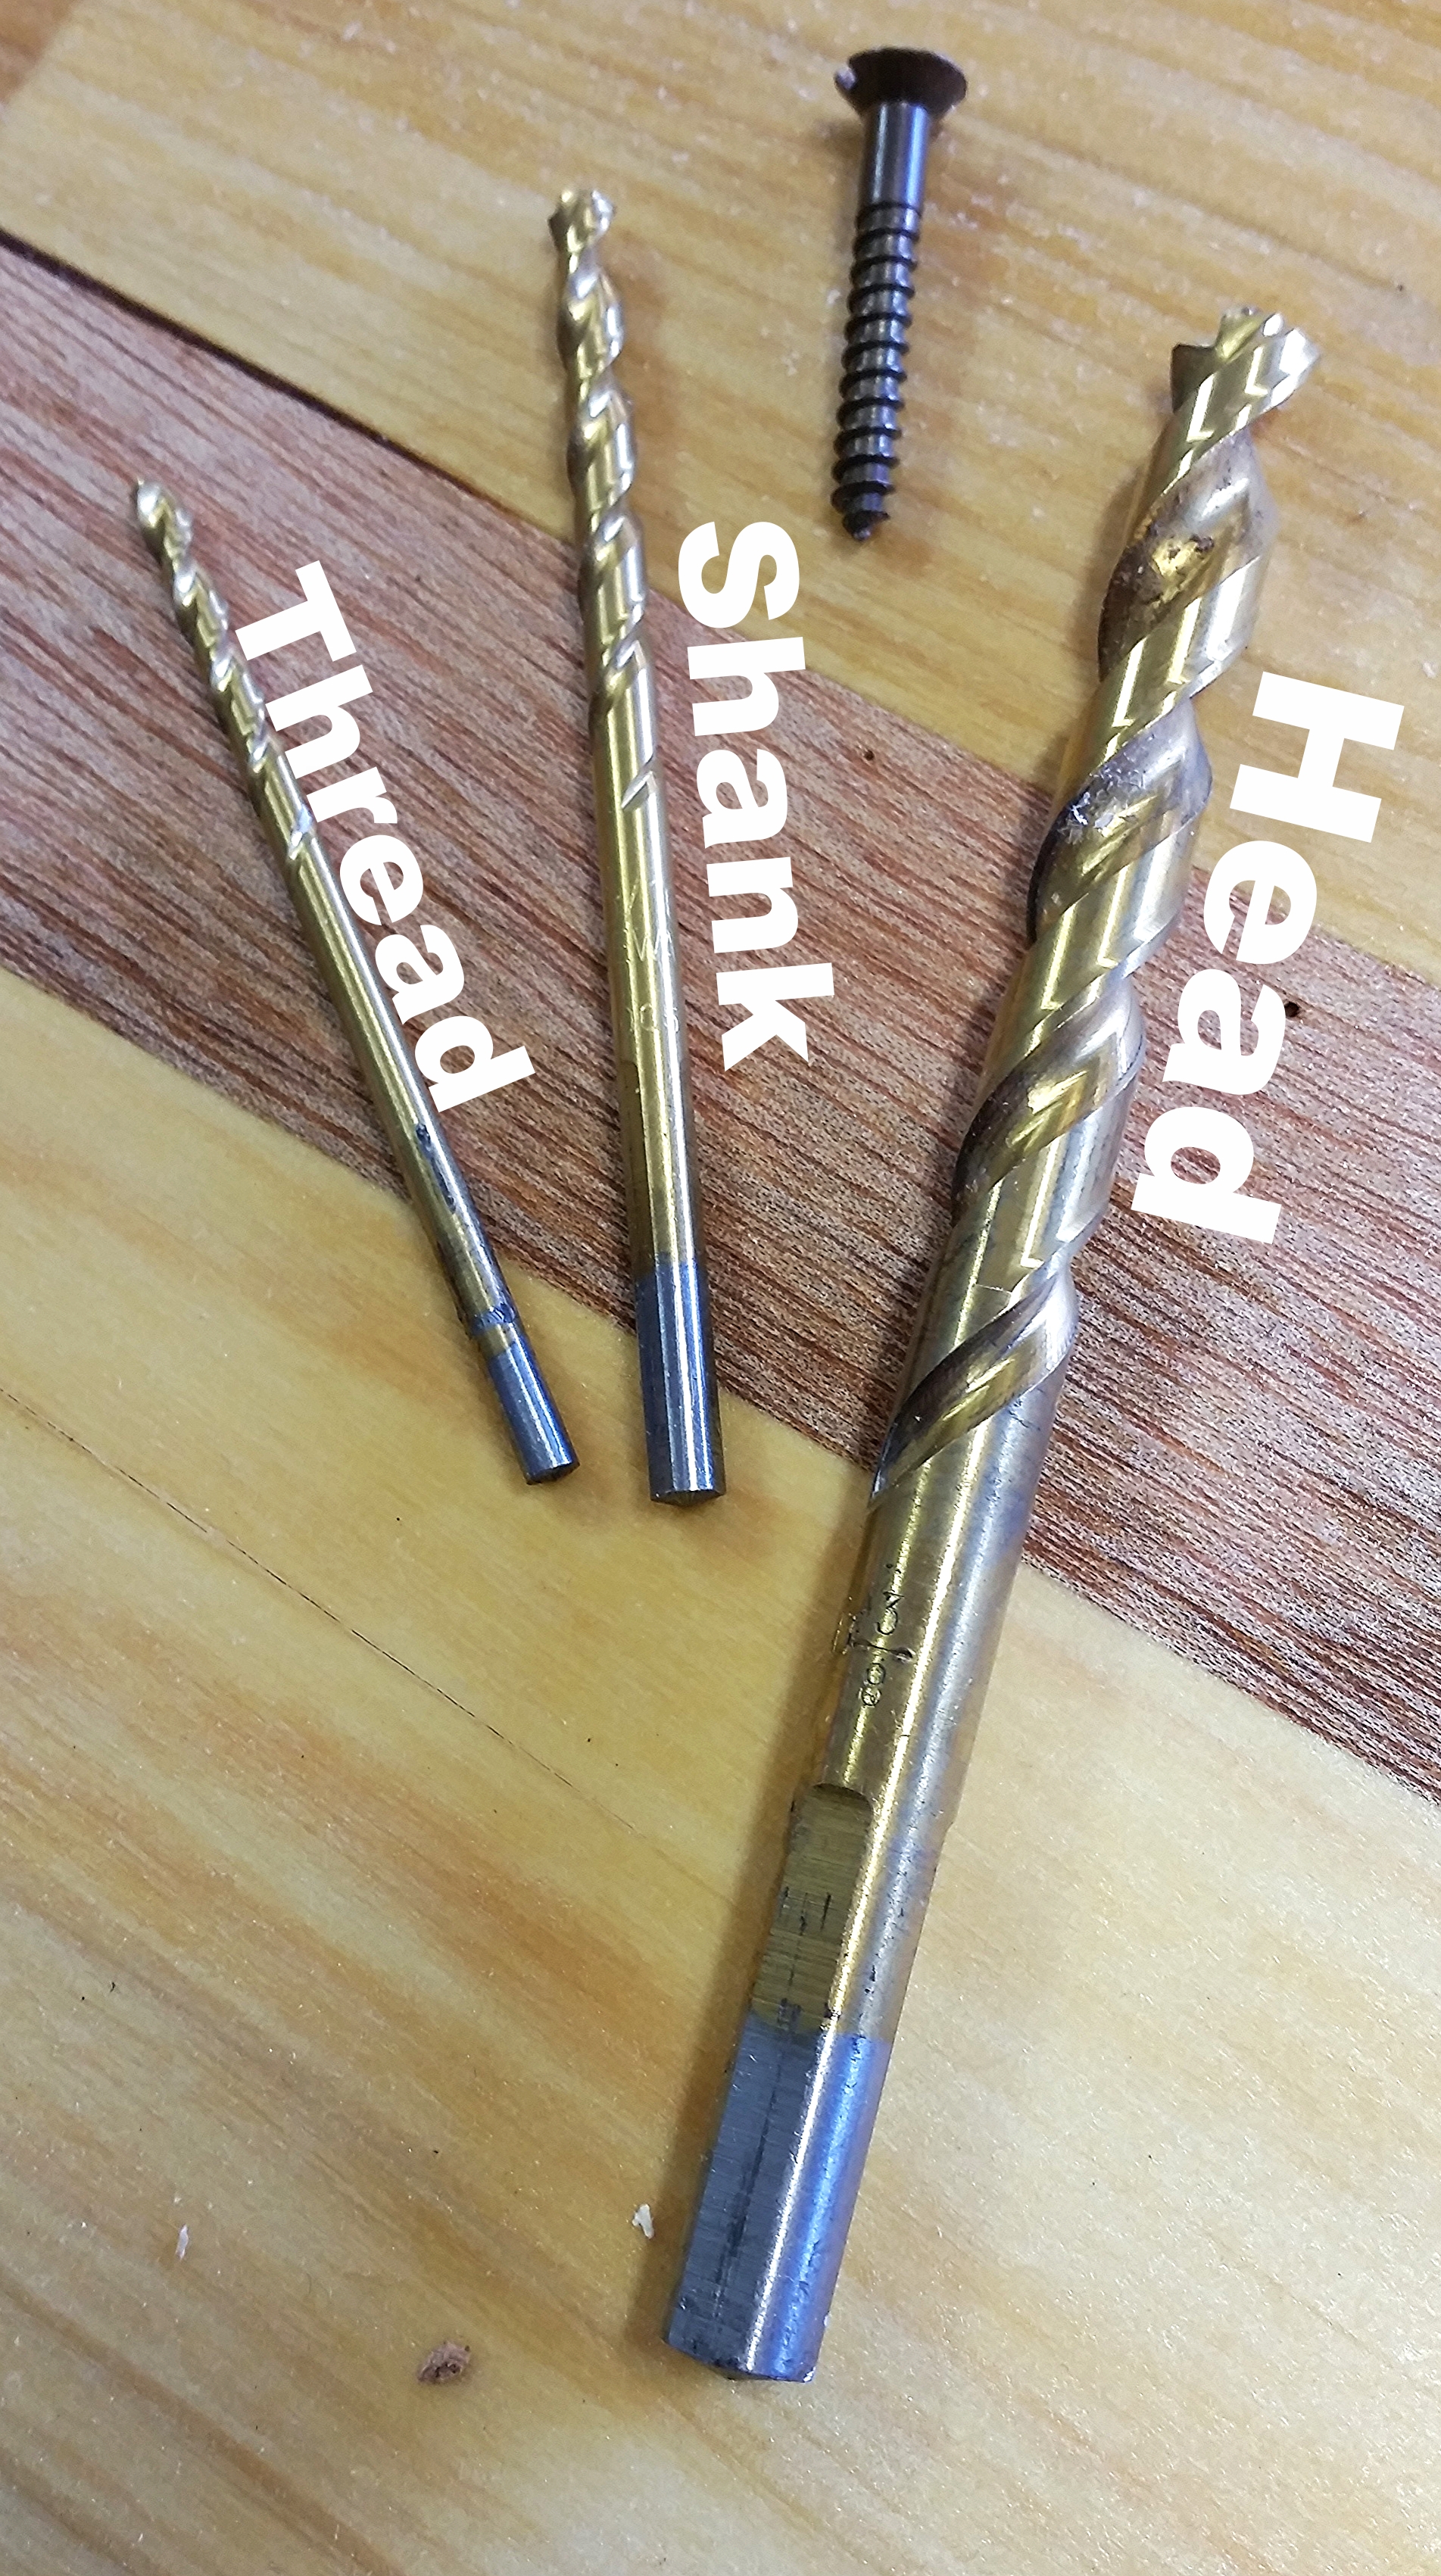
When drilling pilot holes in wood for wood screws with cut threads, it is important to take your time. Each hole will need to be drilled three times!

The first hole will be for the threaded portion of the screw. Since the threads are cut into the nail, the hole must be smaller than the size of the screw. Templates exist that offer guidance for selecting pilot hole sizes.

https://www.boltdepot.com/fastener-information/Wood-Screws/Wood-Screw-Pilot-Hole-Size.aspx

https://www.boltdepot.com/fastener-information/Wood-Screws/Wood-Screw-Pilot-Hole-Size.aspx

After you drill the pilot hole for the threaded portion, you will need to drill another hole for the shank. 

Lastly, you will need to drill the third and last hole to countersink the head. It is a good idea to countersink the head at least to make it flush. As the wood wears away over the years, this will keep the screw head just below the surface. If you are going to walk over this fastener, it won't dig into your foot, and if you are going to stand next to this fastener, it won't cut your leg or rip your clothing. 

The important thing to remember is that you should drill the hole three times, once for the threads, again for the shank, and lastly for the head. Then the fastener will be able to hold everything together as best as it can while being out of the way.

Stainless Steel vs Silicon Bronze

It seems that more and more items for boats are being offered in stainless steel and bronze items are becoming increasingly hard to find. 

The current aesthetic trend seems to favor the shiny mirror known as stainless steel over the brown patina that will turn green if neglected. While stainless is prettier to look at with its mirrored finish, bronze has many good qualities going for it.

Stainless Steel is an alloy which contains at least 10.5% chromium, this leads to better corrosion resistance for most applications; except in environments that are low in oxygen, high salinity and low air circulation. Sure sounds like the environment below the waterline or encapsulated inside of epoxy! When Stainless Steel is in a low oxygen environment, it begins to suffer what is known as crevice corrosion which is hard to see and detrimental to the metals strength.

Bronze is an older alloy primarily composed of copper, tin, and other corrosion resistant metals. The Bronze Age began around 3000 BCE, and many of the original artifacts are still in relatively good condition. The addition of non-metals, such as silicone, greatly increased the strength, while still retaining the workability and ductility of the alloy. 

Stainless Steel will retain its shape while cyclically loaded, showing little sign of distortion or elongation when being pushed near its breaking strength. This cyclic loading in the corrosive marine environment can lead to stress fractures in the metal which will cause catastrophic failure.

Bronze on the other hand is a bit softer and will show signs of elongation and distortion as its limits are reached. This makes it easy to notice during inspection and allows for prompt replacement. Bronze also does not suffer from crevice corrosion, instead it simply forms a light green patina on its surface. This coloring forms a protective barrier called verdigris, which protects the deeper layers from further oxidation. 

While most fasteners available in local chandleries tend to all be stainless steel, it is a good idea to know where to get si-bronze fasteners and keep an assortment on board for repairs while underway. 

Northern Lights

Maddie and I are planning a future sailing trip up to Maine during the summer of 2017. I proposed the idea of then continuing further North, into the Labrador Sea to see the Northern Lights. I got this idea because we flew to Iceland during November to see the famed Aurora Borealis. 

We were there for three nights, the first two nights were cloudy and with little solar activity reported, so we were unable to see past the low lying cloud cover. Our third night was clear and we did finally see them!

Sorry for the blurry pictures, I didn't have a tripod

They are not as advertised! My father noticed three vertical green bands just north of the Big Dipper. To me, they looked like a whispy cloud, along the lines of a cirrus cloud, not the classic image of an aurora that I believed I would see. I thought I would look up into the sky and see bright neon green ribbons floating overhead, when in fact they looked more like pale green clouds.

The intensity of the light display is ranked into kp values. The values range from 0 to 9, nine being the most intense. The night we saw them, they ranged from 1.67 to 4.33. I would recommend reading up on the kp values. I personally read through this website and kept it handy while out searching for the Northern Lights:

http://www.aurora-service.eu/aurora-school/all-about-the-kp-index/

I took a photograph with a very long exposure time (1 sec. shutter speed, f/ 2.0) to see if it looked like an aurora on the camera to either prove or disprove what we were looking at. Sure enough, it was an aurora.

kp = 2

kp = 2

kp = 4

kp = 4

This gave us the motivation to drive an hour out into the country to find ourselves in a land with no light pollution (other than the full moon). Once our eyes adjusted to the darkness, we were able to observe the aurora as it moved across the sky, but it moves much slower than they show in the movies and is much dimmer as well. 

I'm glad I got to see them in Iceland rather than braving the Labrador Sea to find these lights. I would have had much more difficulty trying to capture the lights on board a moving vessel.

If you do get the opportunity to enter the arctic circle to view the Northern Lights, I would recommend it, as it is impossible to actually explain what it looks like. But do take a camera to see if that cloud-like object in the distance is a cloud or the Aurora Borealis!

Traveling While Living Aboard

Living aboard has many advantages, one of which is the reduced cost of living. This can translate into saving for retirement while at the same time having extra money on hand for entertainment.

Maddie and I did a trip over Thanksgivings weekend to Iceland to try and see the Northern Lights. No, she didn't want to go by boat; we had to fly and leave our home behind for a few days.

Whenever you leave your boat for an extended period of time, it is advisable to take certain precautions before going.

Close all seacocks
Turn off all electronics
Leave on battery charger
Leave on bilge pumps
Tell a trusted neighbor

A hose can easily split or slip off of a fitting below the waterline, leaving a giant hole in the hull gushing in water. This is why frequent inspections are necessary to make sure that all hoses and fittings are in working order to avoid this from happening in the first place. Since you will be away for an extended period, it is best to close all seacocks. A closed seacock will not let water through, even if the hose slips off or splits. 

Turning off all electronics is another important step in leaving your boat. If a wire were to overheat and cause an electrical fire, it may create a good amount of smoke before the breaker trips. If the breaker is faulty, it could continue to burn and ignite other structures in the boat which could burn it to the waterline if left unchecked. 

Do leave on the automatic bilge pump and battery charger, that way if water does find its way inside, the pump can get it out and the charger can keep the pumps running if there is a leak.

Most importantly, tell a trusted neighbor that you are leaving. They can keep an eye on your waterline to make sure that you don't start sitting low in the water. I always give my neighbor a key to my boat when I leave so they can also get inside to take care of things should the situation arise. Make sure they know where your pumps are located, where the breaker panel is, which breaker is for the battery charger and the bilge pump, and where the lever is for the manual bilge pump, should the electronic ones fail.

Living on a boat gives you so much more freedom! You should take advantage of these freedoms while still taking good care of your home afloat.