Life Aboard

Our Floating Home

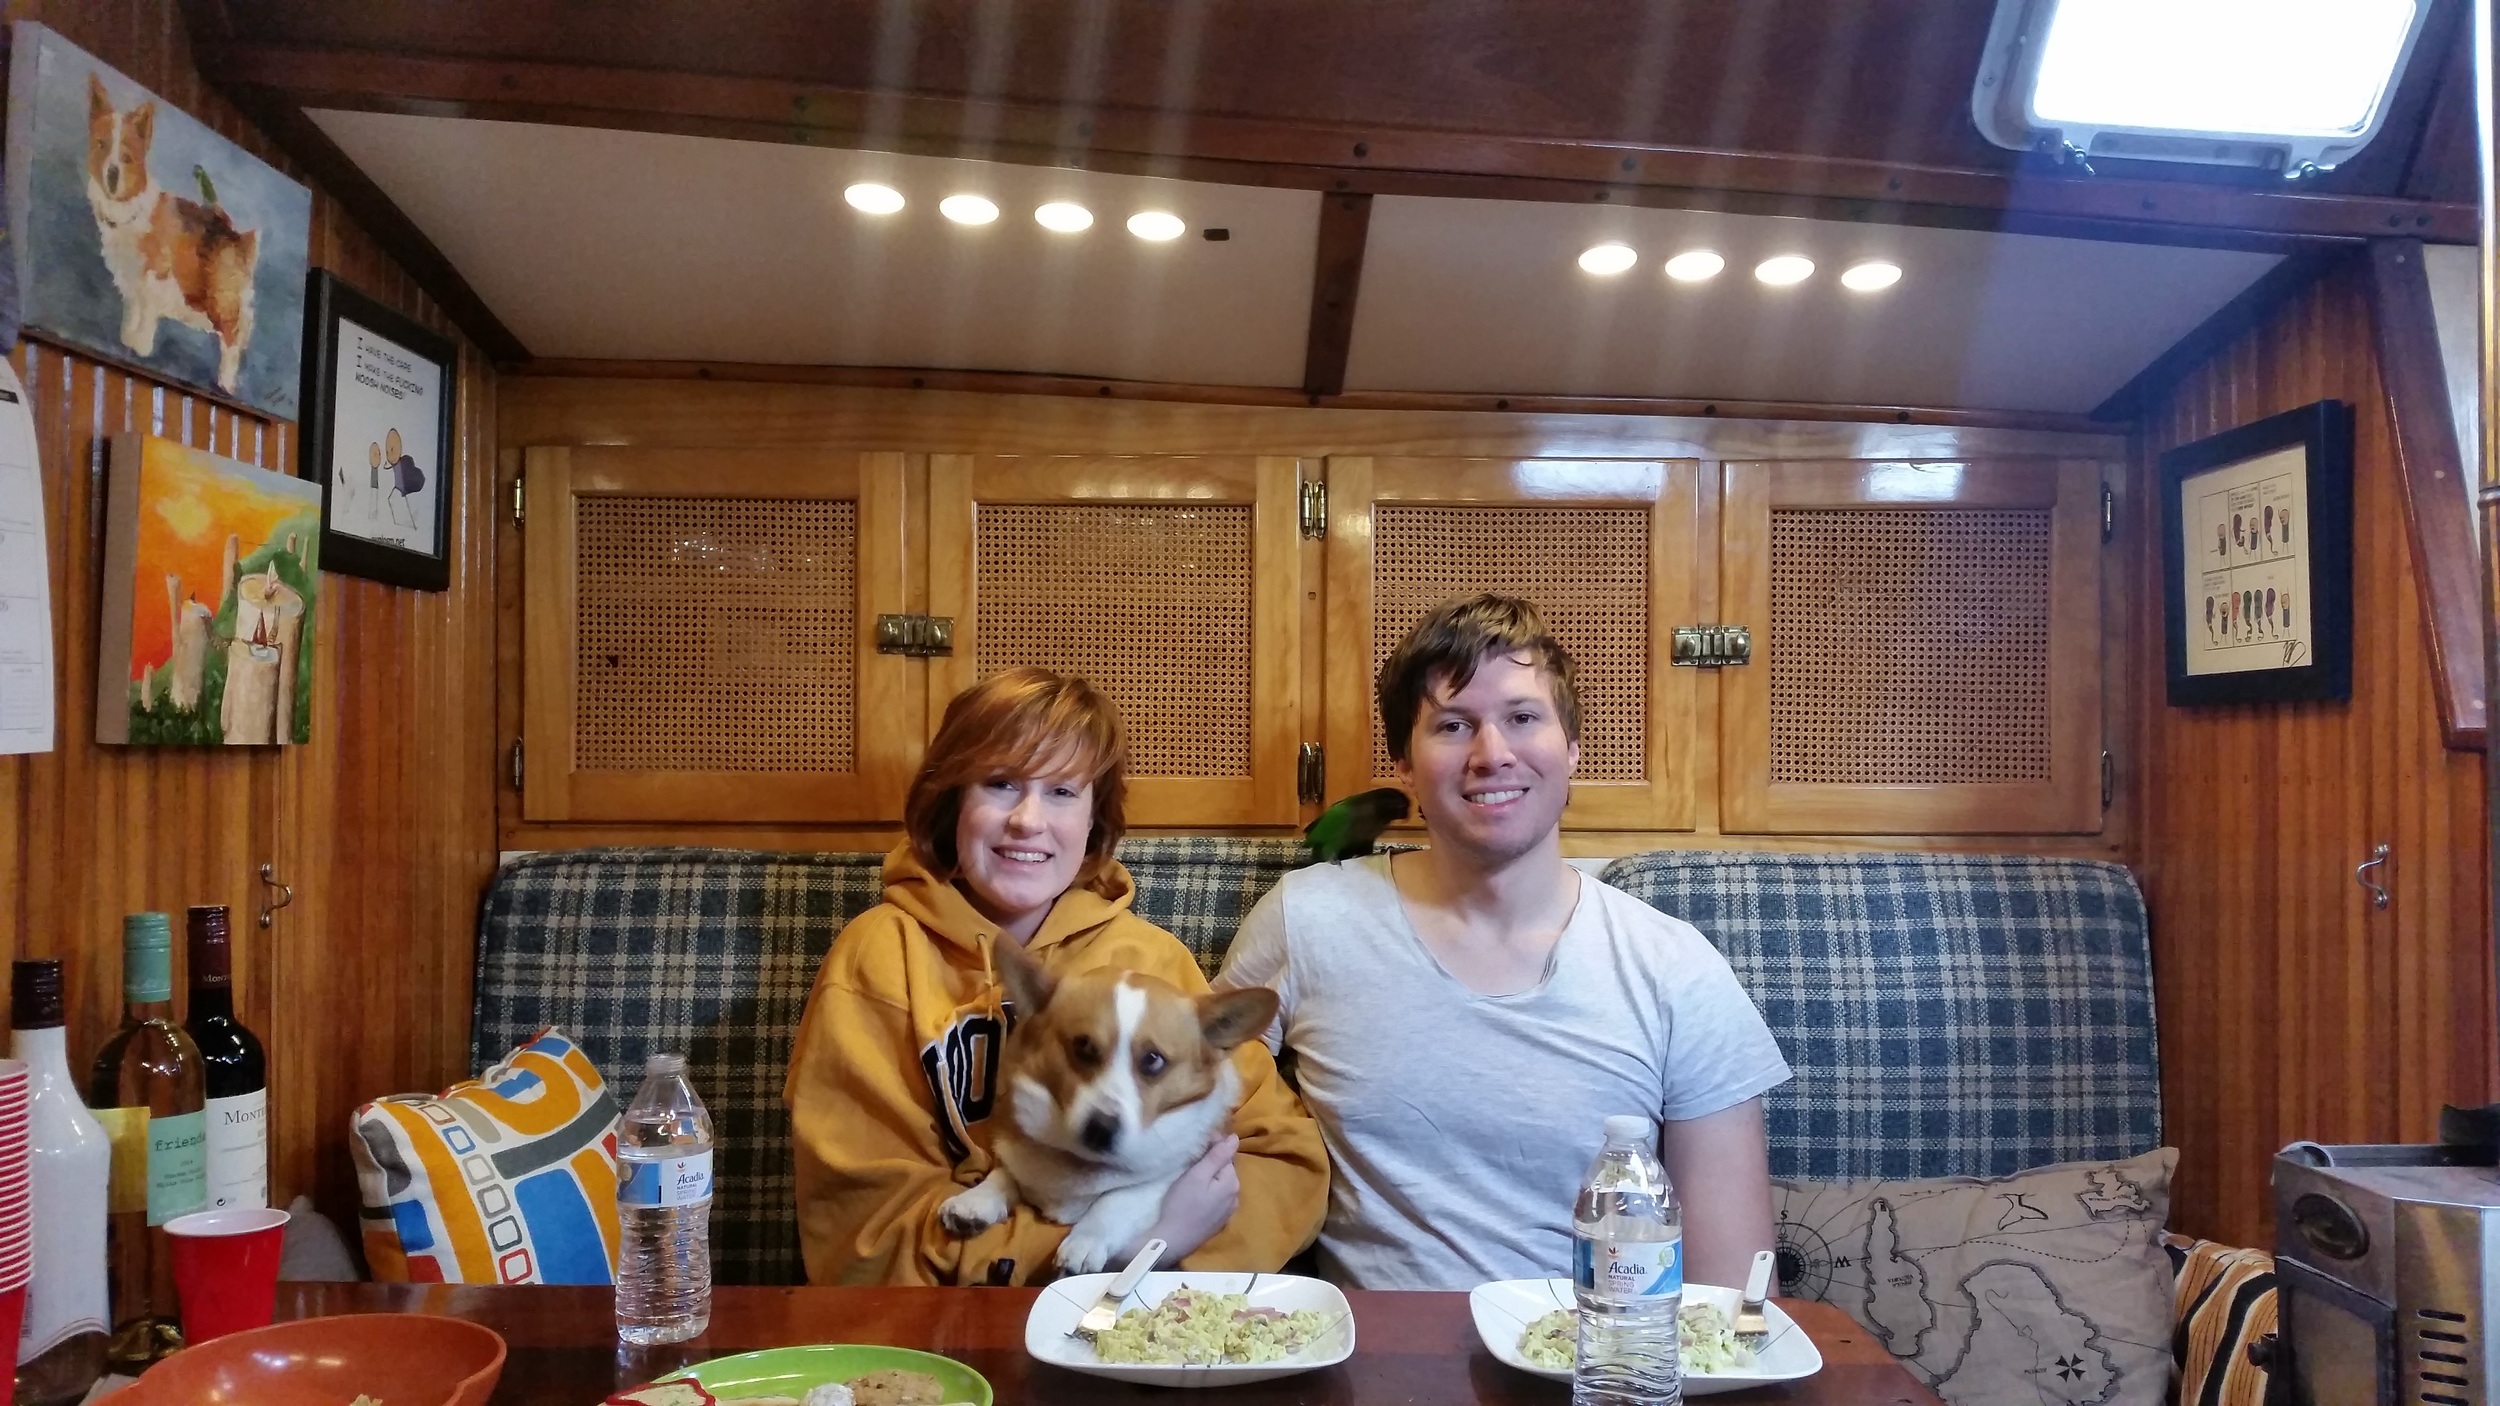
Maddie and I live in our 45 foot sailboat year round. We live here with our two pets, Morty (our corgi) and Sammy (our parrot), through the heat of summer and chills of the winter. We spend most of our indoor time right here on this bench. 

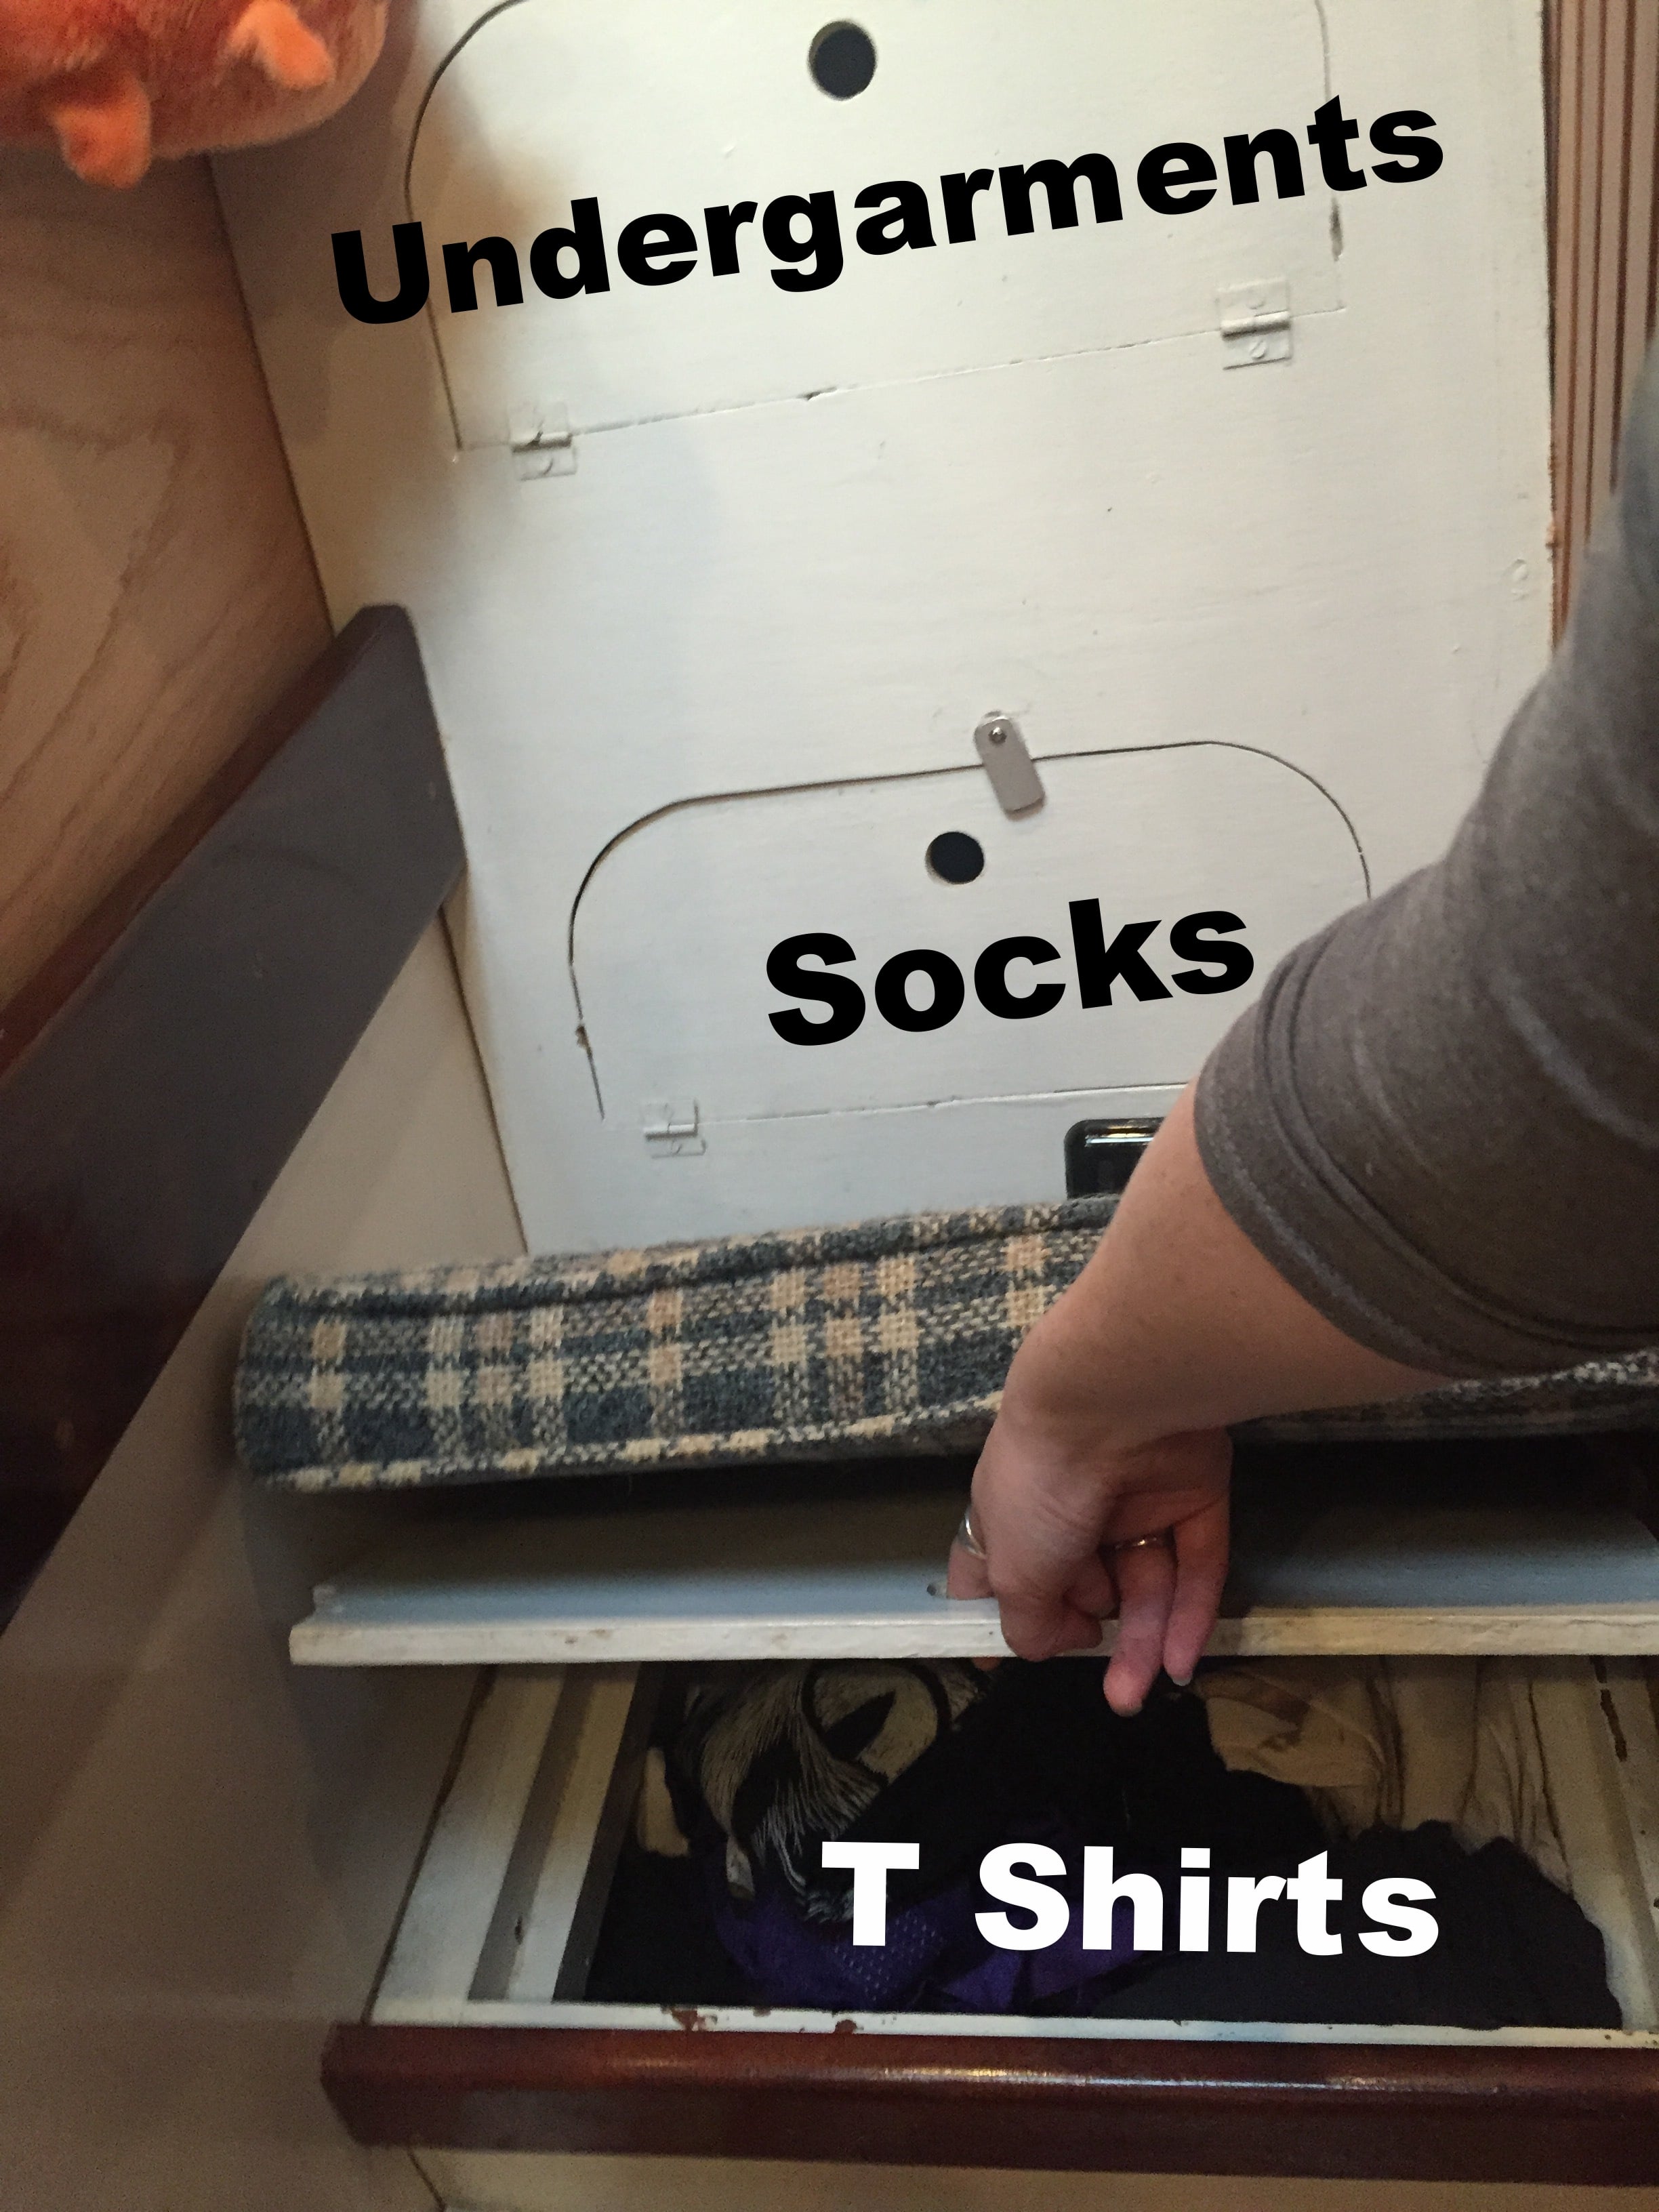
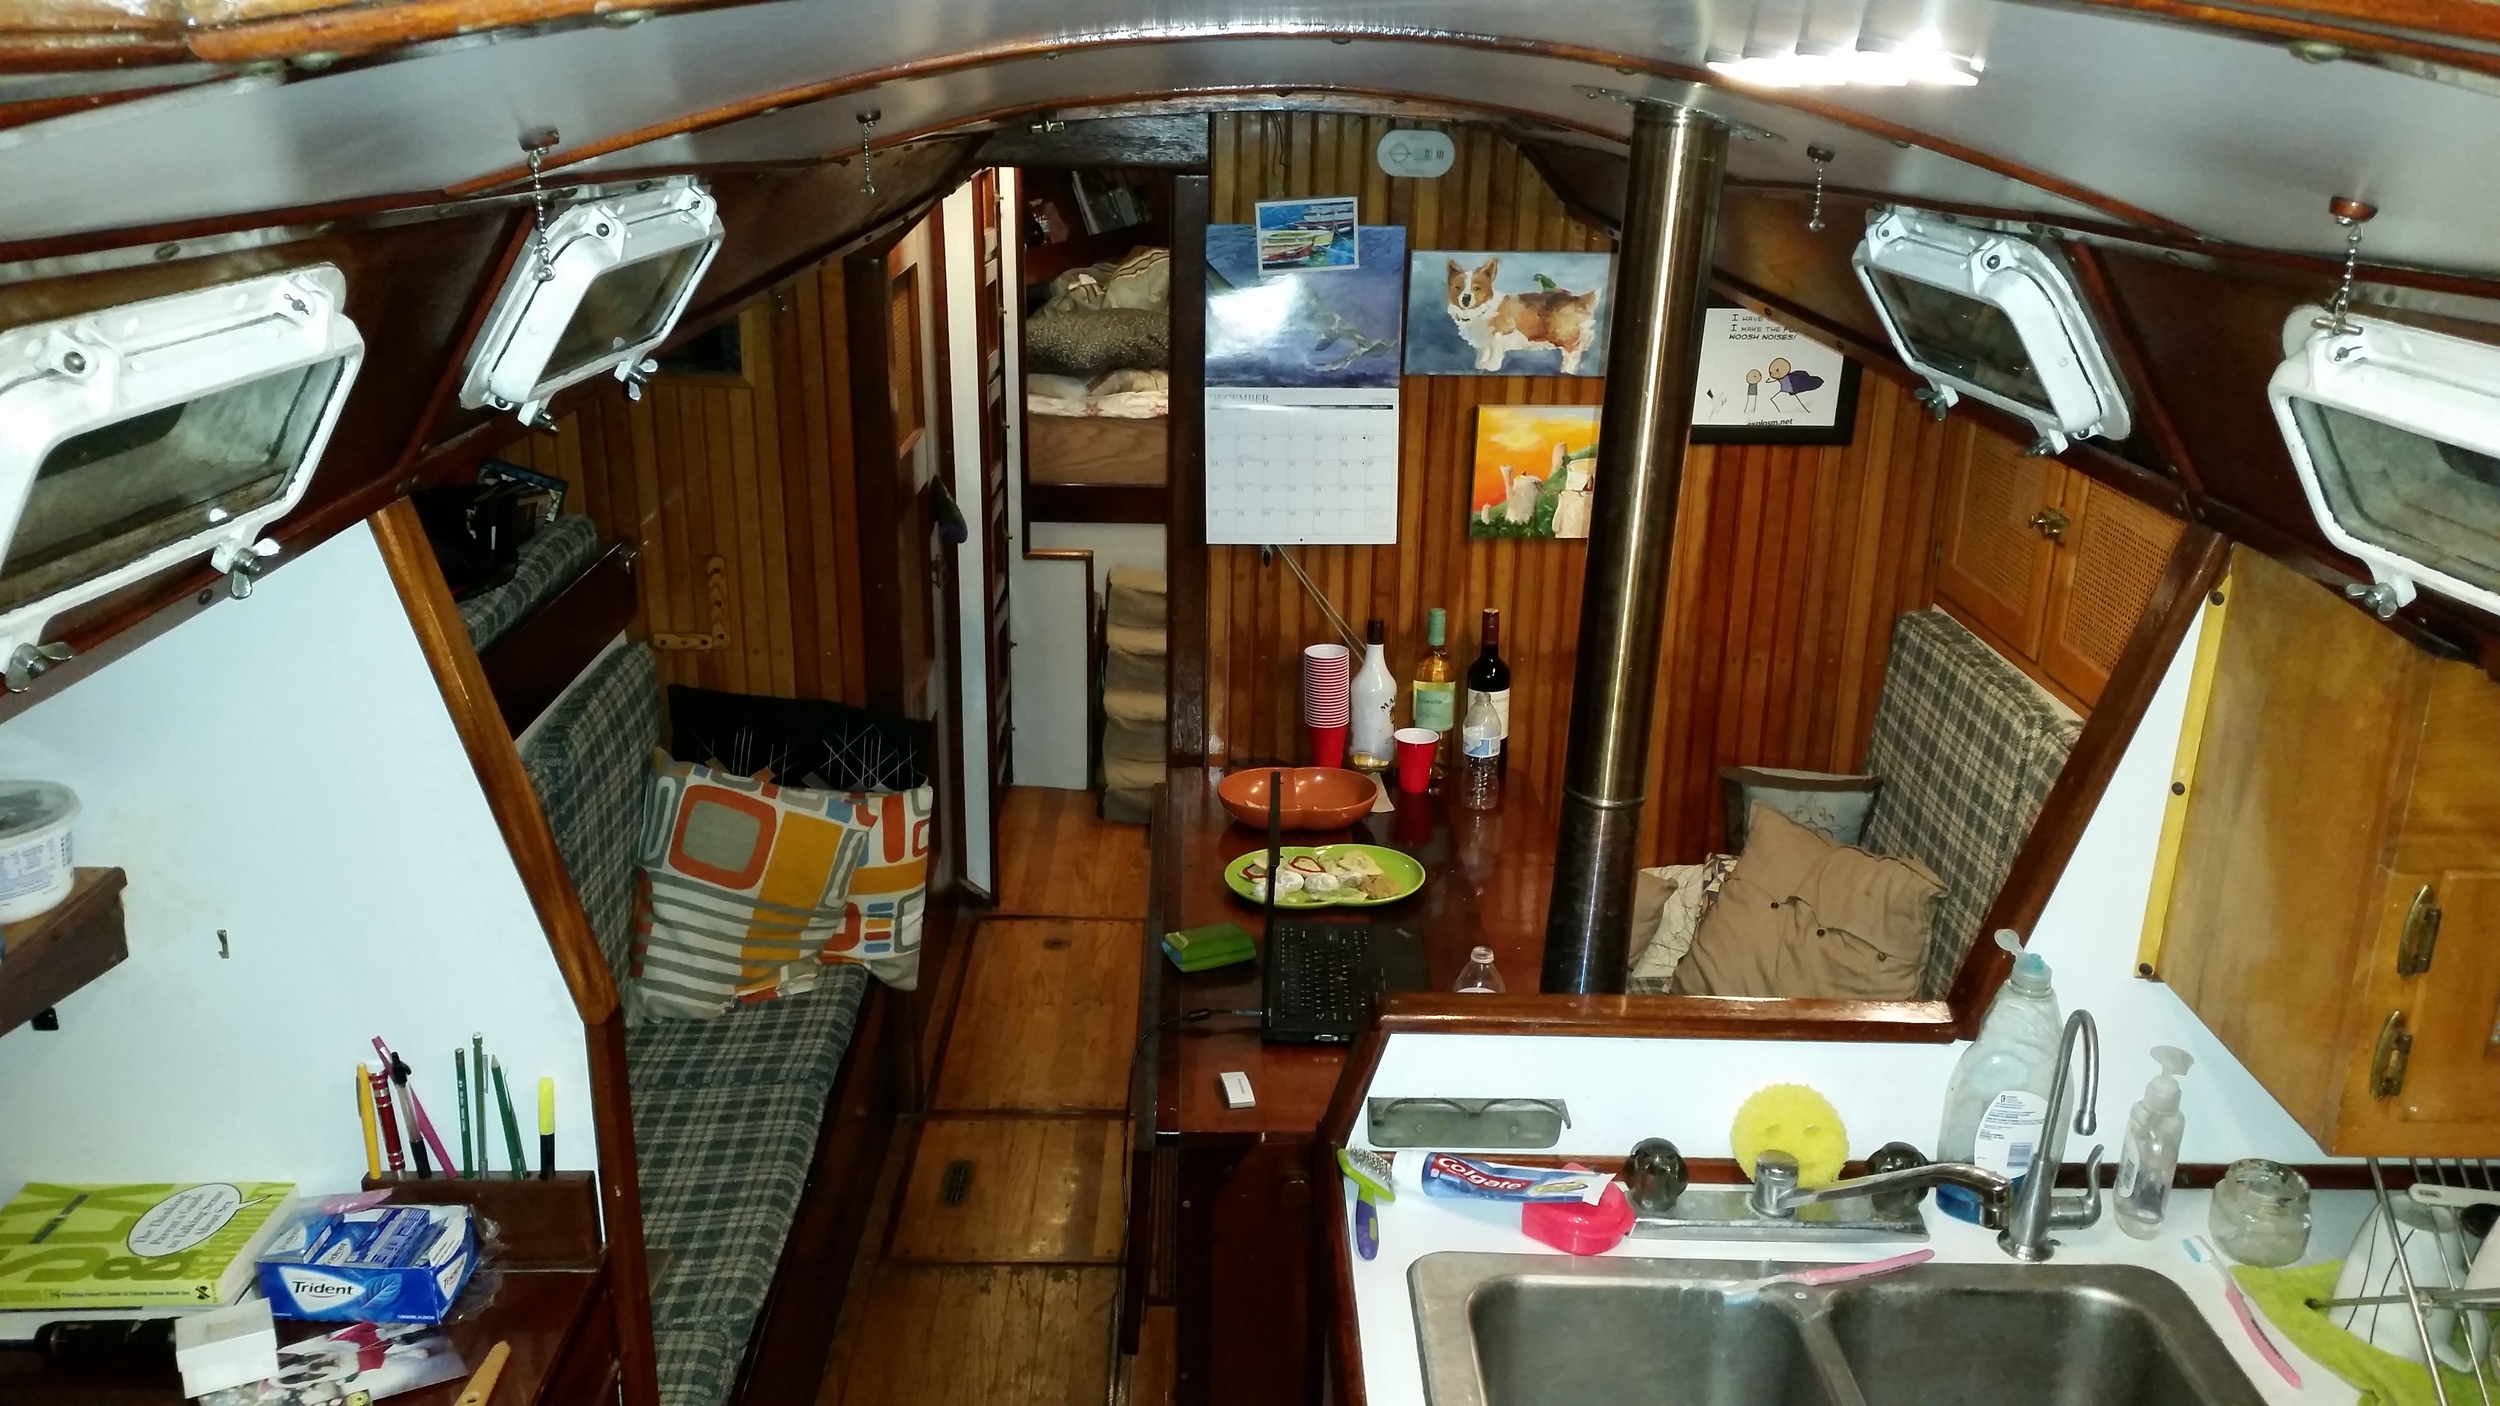
It is amazing how versatile such a small space can be! The cabinets behind us are storage for booze, diesel for the stove in the lower right corner of the picture, plates, pots and pans, and electrical connectors. Behind our backs is more storage, where we keep towels, electric heaters, ropes, paints, plumbing connectors, and paper towels. Under our seats are two of the eight water tanks in the boat, along with the water pump. The table itself also has space for storing the bedding supplies, as well as games. 

We eat, work, and relax at this small table. Maddie opens the leaves to do her paintings and I use the table for all the other projects I have done in the boat. I even built the rigging for the whole sailboat sitting right there! Add some more pillows to the bench and we can stretch out to watch a movie on our laptop computer. 

The boat is only 45 feet long, and yet we spend most of our indoor time on that bench in a room that is 7 feet long by 8 feet wide. When you have a well laid out common area, it can take the place of multiple specilaized rooms that would require much more space. I originally wanted to live in a tiny house, and then discovered sailboat living (which offers unlimited mobility to the tiny house). I think tiny houses and boat designers should work together to maximize the amount of living with minimal space! 

I have learned to organize my things more efficiently thanks to information about tiny house living. I feel that tiny house design could benefit by taking cues from sailboat interior layouts.

Storing Clothes

I’m not going to lie…it took me a full year to get used to living in a sailboat.  Herby has touched on the many things that I improved during the process of creating a comfortable living space aboard Wisdom, and I’m sure I’ll be talking about them as well in the future, but right now I’m going to focus on the challenge of storage.  As a female, I have many, many clothes.   Before moving into the boat, I filled a walk-in closet and two dressers with my various seasonal garments.  One of the biggest challenges, therefore, has been selecting my favorite clothes and storing them in a way that doesn’t drive me nuts.

 You may not like to hear this, boys, but if you want your girlfriend or wife to move into a boat with you, you must relinquish all claims to your largest closet.  I went to target and bought a ton of hangers for my sweaters, dresses, and button-down shirts.  I did give up quite a lot of closet space for the installation of the AC unit, but this was a necessary sacrifice and I have no regrets.  I am not a big shoe person, but when you live in a boat, even the smallest collection of items seems like a mountain of possessions.  It was a huge help when we got one of those shoe pocket things from Ikea to hang on the inside of the closet door. 

The rest of my clothing is stored in forward cabinet space.  Now in order to divvy up these cabinets fairly, I drew a chart of all the spaces and then we placed our names inside each one along with a label for what we planned to store in them.  Herby got the high up cabinets because he’s tall, and I got most of the bigger ones because I’m stubborn and have way more clothes.  Nevertheless, this worked very well for us and gave us a clear visual of all the space available before we started shoving clothes in random compartments.  I highly recommend it. 

I have an overflowing bin of pants in the largest cabinet and two plastic drawer bins from Ikea that I’ve filled with shirts.  There’s a convenient cluster of cabinets on either side of the V-birth entrance that are the perfect size for under-garments, PJ pants, and belts, and a small seat under which I store all of my graphic T-shirts.  It actually all works out quite well. 

My only complaint is when it comes to doing “The big seasonal switch,” as I have dubbed it.  This is when I take all my winter clothes in bags and switch them out for the summer ones because, I’m sorry to say ladies, but there just isn’t enough room to store warm and cold weather clothes.  My poor parents will be having to deal with half my clothes remaining in my old bedroom for quite some time.  This also includes all of my formal dress wear that I don’t use on any regular occasions. 

I’m going to list some other tips for storage that I have either discovered myself, or were passed along from my neighbors.

  1. If you have more storage room in your boat that isn’t readily accessible, store your off-season clothes there in tightly packed bins.
  2. Hang a rod in the back of your car and use it as extra closet space for dresses. (I’ve seen this done, but I wouldn’t suggest it if people frequently ride in your back seat.)
  3. Roll your clothes into tight cucumbers instead of folding them. 
  4. Use the bed to fold/roll laundry
  5. Go to Ikea
  6. Don’t wake up with a specific outfit in mind.  You’ll never find it. 
  7. Draw a picture of all the storage and divvy up space accordingly with your partner.
  8. Keep an open mind…you’ll get used to it once you establish a system that works for you.     

LED Lighting

The old dim florescent light

The old dim florescent light

Wisdom came with florescent lights mounted throughout the boat. A total of 9 lamps could evenly distribute a pale yellow glow. Each lamp consumed 16 watts,  burning 144 watts to light the whole boat. The truth is only 2 lamps worked so the boat was rather dark inside. 

I decided to update the lights rather than replace high energy consuming bulbs. I decided to convert all the lights to LED!  

I took a stroll over to West Marine and suffered incredible sticker shock as I gazed upon small lamps with prices ranging from $23 to $52 per lamp! I returned to the boat without any lamps but full of ideas. 

The lamps they offered all reminded me of lights I had seen before in IKEA. I made a trip to the closest IKEA and discovered that their cabinet lights are 12v DC! The best part is that a 4-pack only cost $22!

I decided to place the IKEA lamps over the existing holes from the old lamps. This allowed me to complete the conversion without replacing the ceiling. 

Each lamp had 3 holes that we not evenly spaced, one for the wires, and two other areas for the screws. I simply placed a set of 4 lights evenly spaced to cover the 3 holes. I also added a few extra lights in dark areas of the boat.  

The IKEA LED lights provide more illumination than the florescent ones and only consume 3 watts between 4 lamps. This allows me to have interior lights on while anchored out and not worry about my house battery bank holding up. 

The conversion itself was more involved than I had anticipated (like all boat projects tend to be). I had to lower the ceiling in each part of the boat to remove the old lamp, then (by the use of a jig I made out of the box the lights came in) install the 4 new lights in their respective spaces and run the wires. 

IKEA lamps are 12v DC which means you can cut the fancy IKEA connector off and wire the lamp directly into the boats 12V system. LED lights are polarized, so be sure you connect the lamps positive to the boats positive (you can trace the wires inside the transformer to figure out which wire is positive).

I have read that if the lamps are connected with their polarity crossed, they will either die instantly or else have a shorter life. I did not want to find out so I made sure it was correct before I connected it to the current. 

Once the lights were wired and tested, the ceilings and all their associated mouldings were reinstalled.  

The new lights provide plenty of light to live and read by while producing minimal heat.  

The downside to the cheap lights is they are not marine grade. I don't believe they use tinned copper wiring, and I don't expect them to last forever. They have been working wonderfully since 2012 and for a fraction of the price, I think they are doing just fine!  

When installing 48 lights (which only draw 36 watts when they are all on), cost became a significant determinant. My cost from IKEA totalled to $264. If I had bought them from a marine store such as West Marine, it would have cost me around $1,104.

These little cabinet lights deserve some credit, they can light up a tiny living space with minimal electrical consumption, they look modern, and they are flush mount!  

Make it a home

While I used to maintain the idea that Wisdom is a Sailboat that we live in, it is important to make sure that your comforts are met.

The beds should be soft and you should surround yourself with what makes you comfortable. When Maddie moved in, she brought along her collection of stuffed animals. 

I am strongly against the idea of "collecting" because all I hear is "holding on to a bunch of stuff for no reason". She did only bring her favorites to the boat, but over the past year, a few new ones have been bought and added to the boat.

Before Maddie, the possibility of having a collection aboard would have been non-existent. But Maddie has made me see that there are things whose sole purpose is to make the space you live in a home. 

I now maintain the idea that Wisdom is a sailboat and our home.

No matter how small the space is that you call home, make it comfortable and make it yours!

Layout of a liveaboard

This is our tiny floating home when viewed from another sailboats mast. I have lived here since 2012, my fiancee has been living here since 2014.

The overall dimensions are 45 feet long, 11 feet wide, but as you can see, it is only 11 feet wide at one point. Most of the boat is much narrower than 11 feet, but we maximize all the space available.

The actual living space is much smaller than 45 feet though. The back half is almost entirely storage lockers. Forward of the bed is storage for the anchor chain. 

20160101_180545.jpg

The thin area with no label is the only space available for walking, everything else is consumed in seating, sleeping, or storage areas. To add additional storage space, all the floors can be picked up to reveal even more storage space. 

We store water bottles under the floor on long trips because it keeps the weight low in the boat and we don't have to get to them that often. I usually pull up the days ration for drinking water in the morning and then close the floors up again. 

While it might not look like much space available, the limited amount of space is used very efficiently. Every area serves multiple purposes, it's usually a combination of storage, sleeping, sitting, or working area.