Knots

Tree Surgeons Backsplice

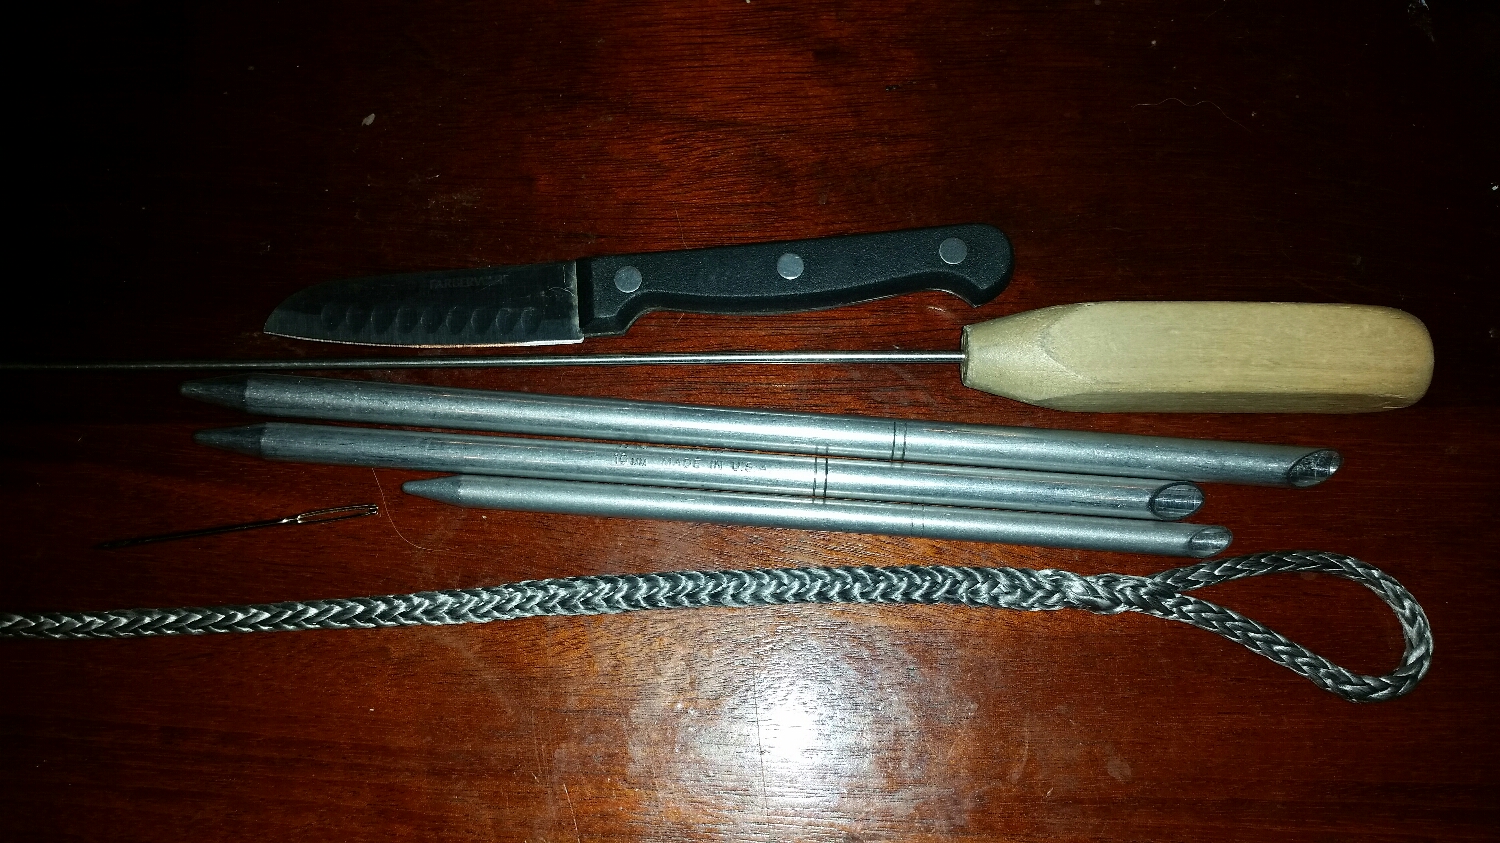
The Tree Surgeons Backsplice has been mentioned before but there was no explanation as to how it is ma


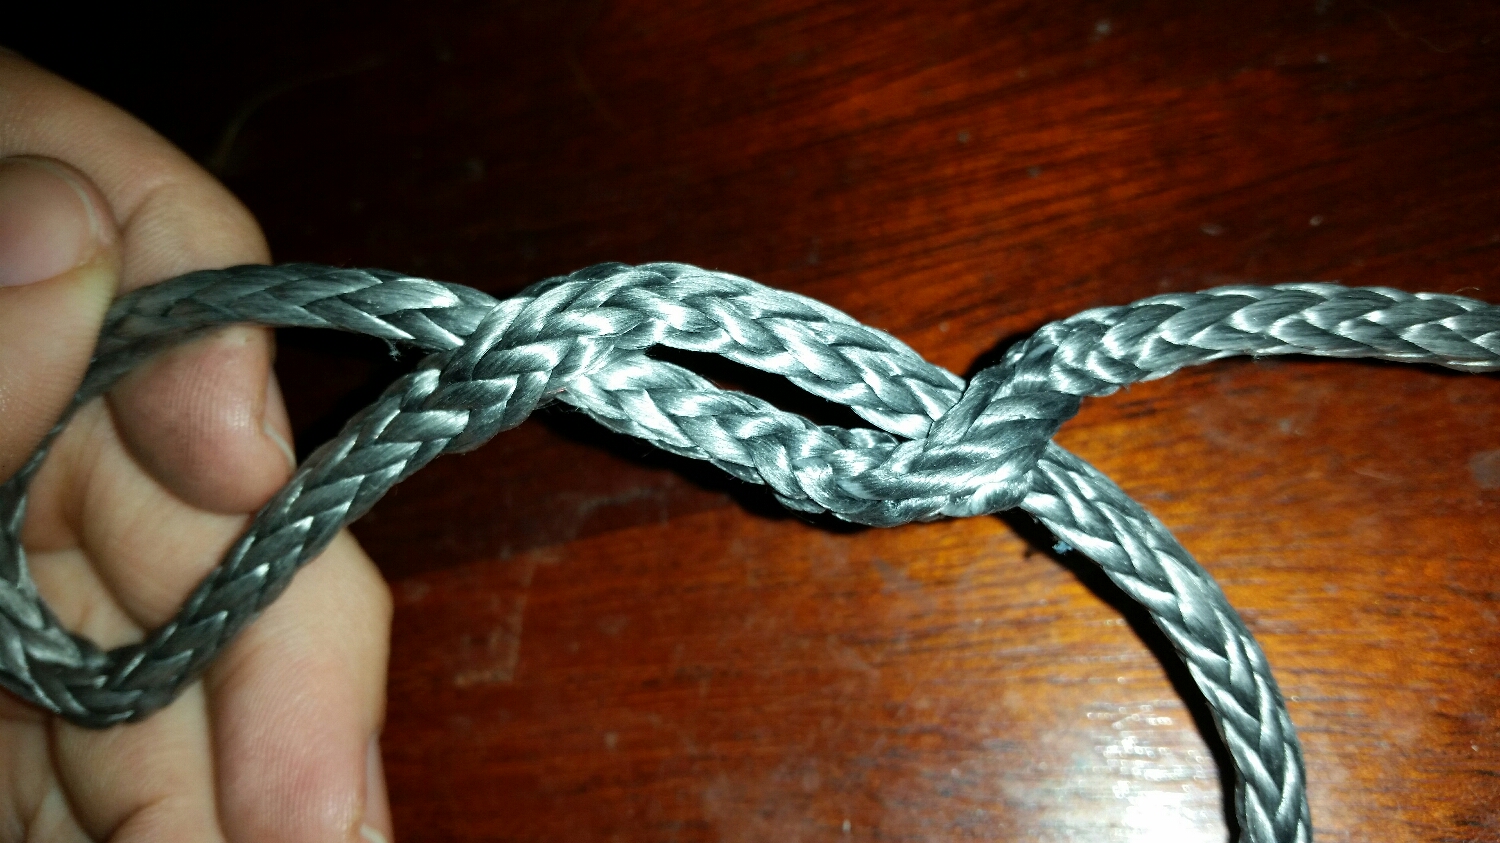
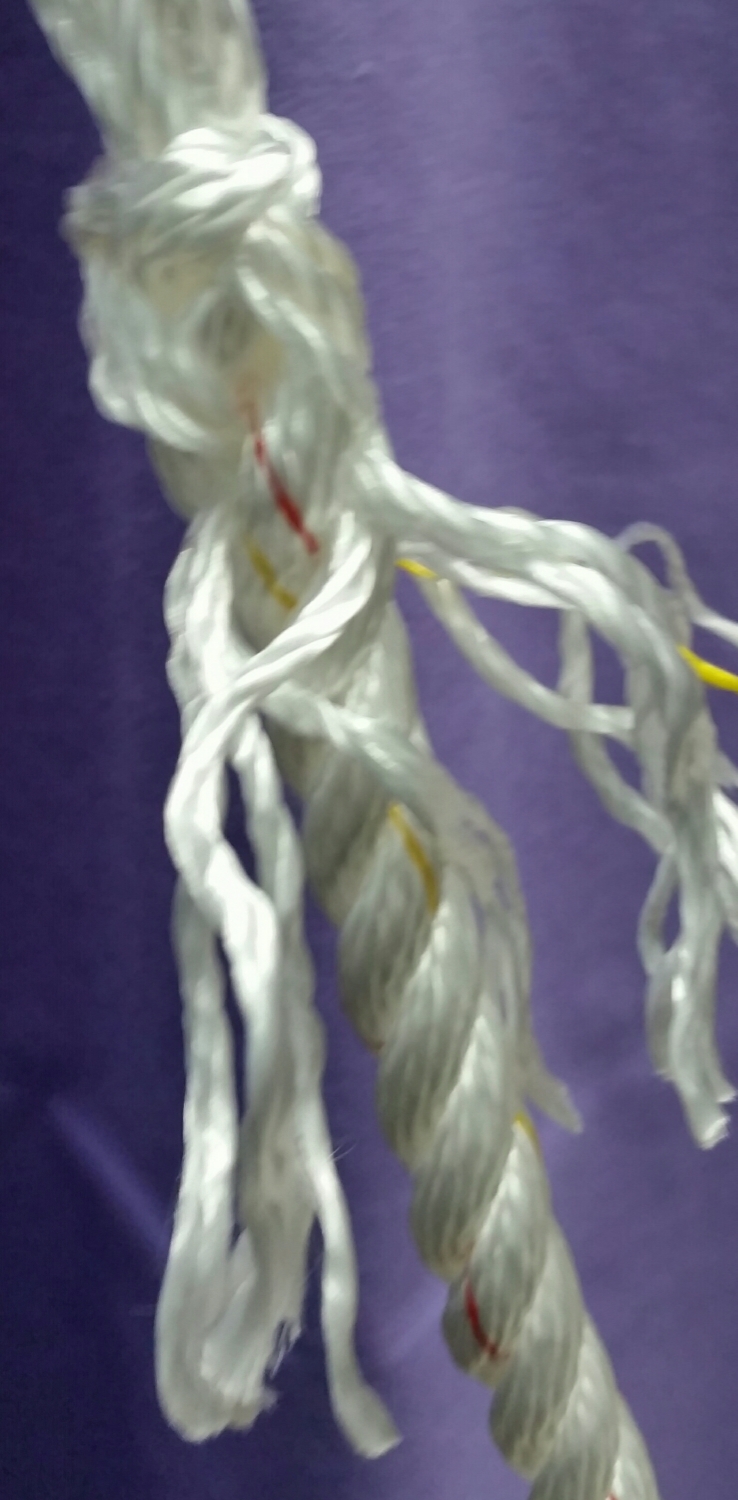
To do a Tree Surgeons Backsplice, you need to reduce the number of yarns that compose each lay. I separate out 3 yarns from each lay (9 yarns total) to tie the crown knot and then back splice. This results in minimal bulk added to the end of the line so that it can still pass through small openings. 

upload.jpeg
upload.jpeg
upload.jpeg
upload.jpeg

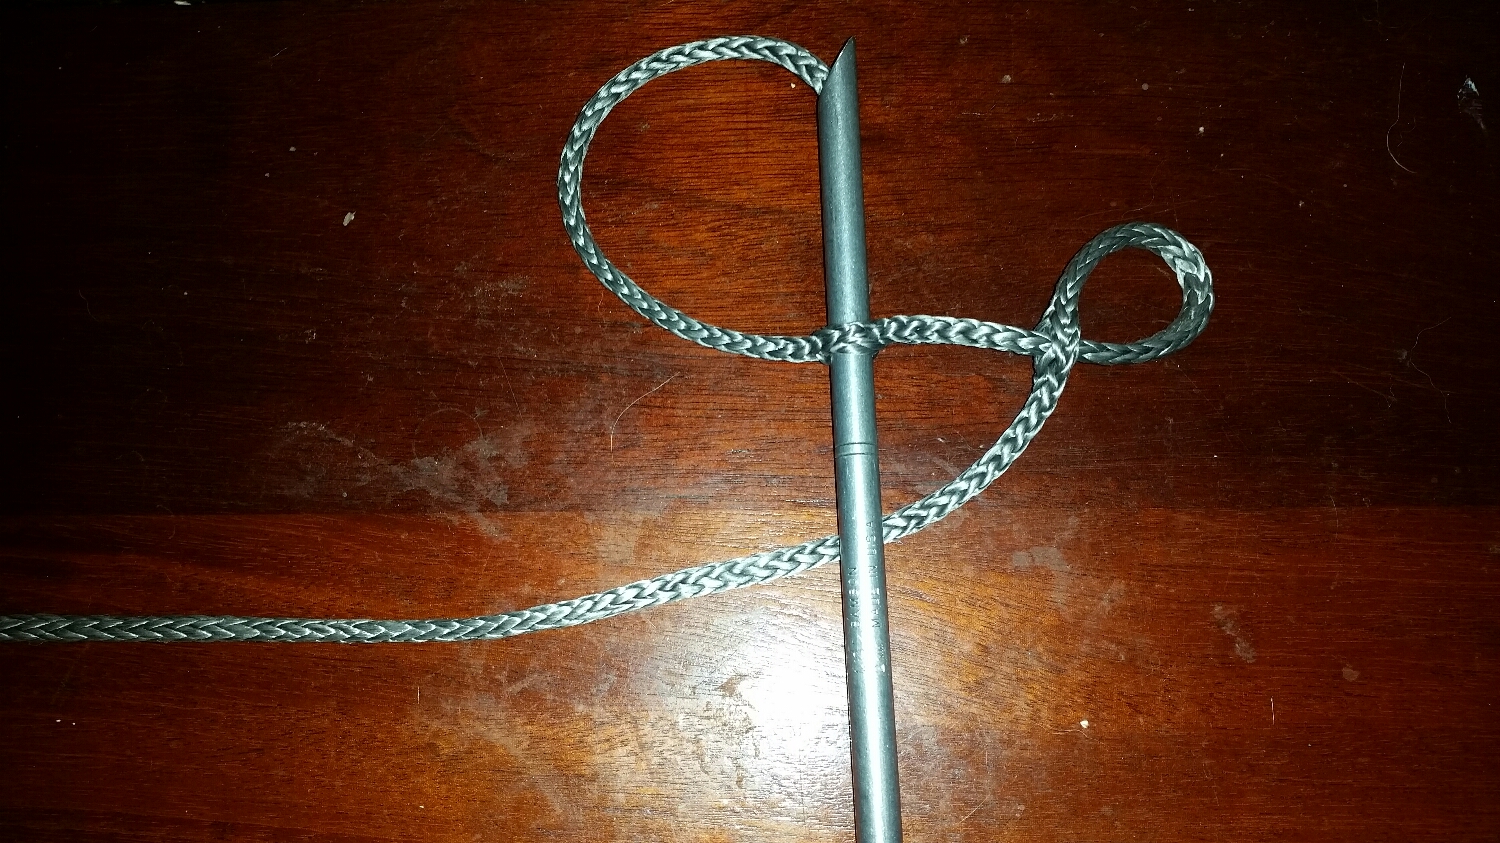
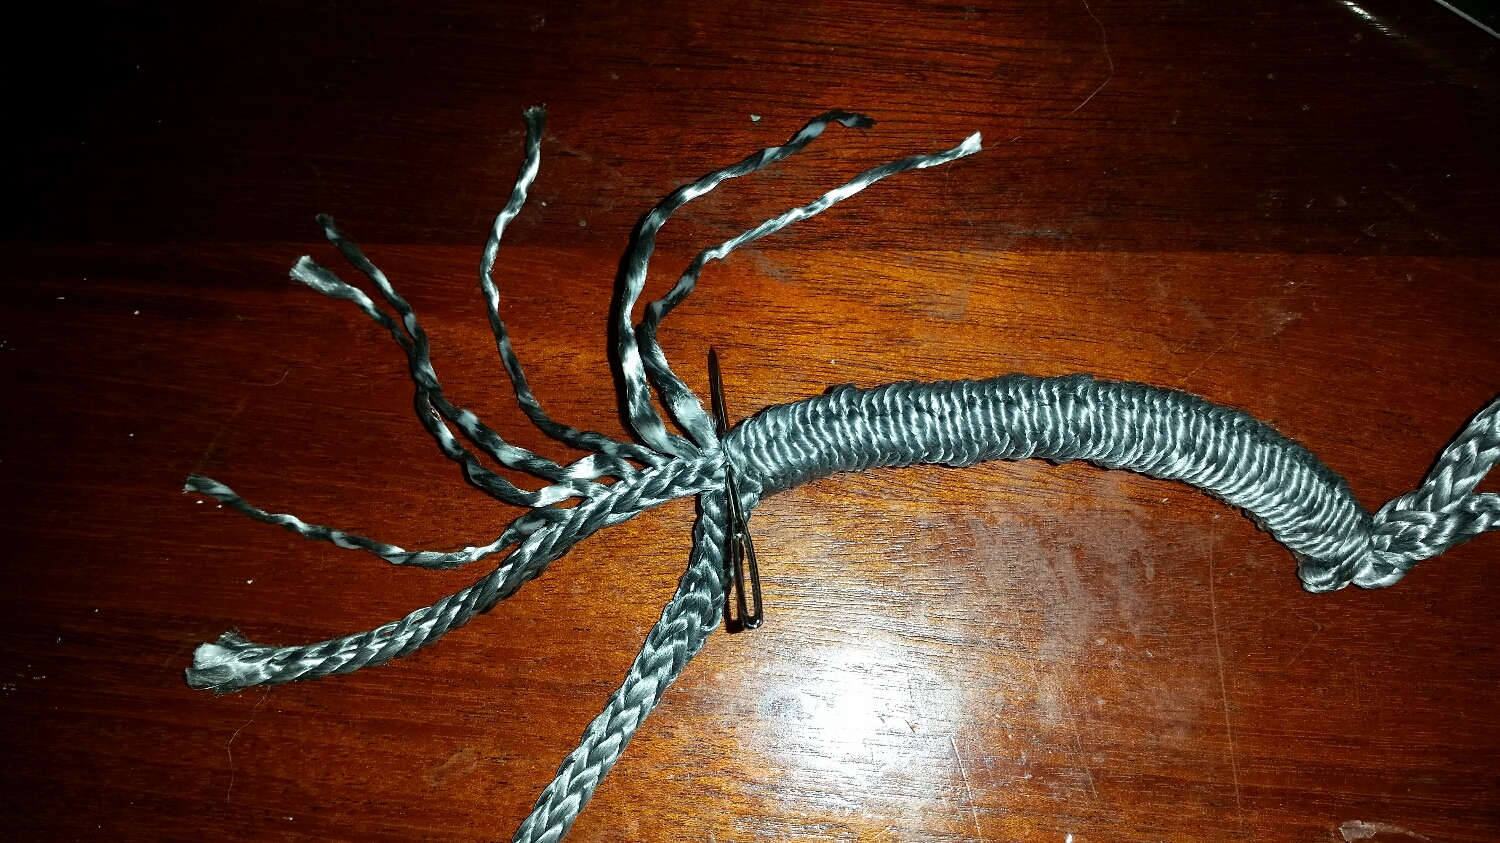
Tighten the crown knot all the way down until it reaches the tape (if you are using tape) or constrictor knot (if you are using cord) and then begin the back splicing.

Be sure to remove the tape or cord before beginning the backsplice, it is much more difficult to remove with the tails in the way.

upload.jpeg

Be sure to skip one lay before beginning the backsplice. This gives enough room for the crown knot to tighten down even more as the splice takes shape. A tighter crown knot will prevent the fuzzy end from working its way free and causing the end of the line to unravel.

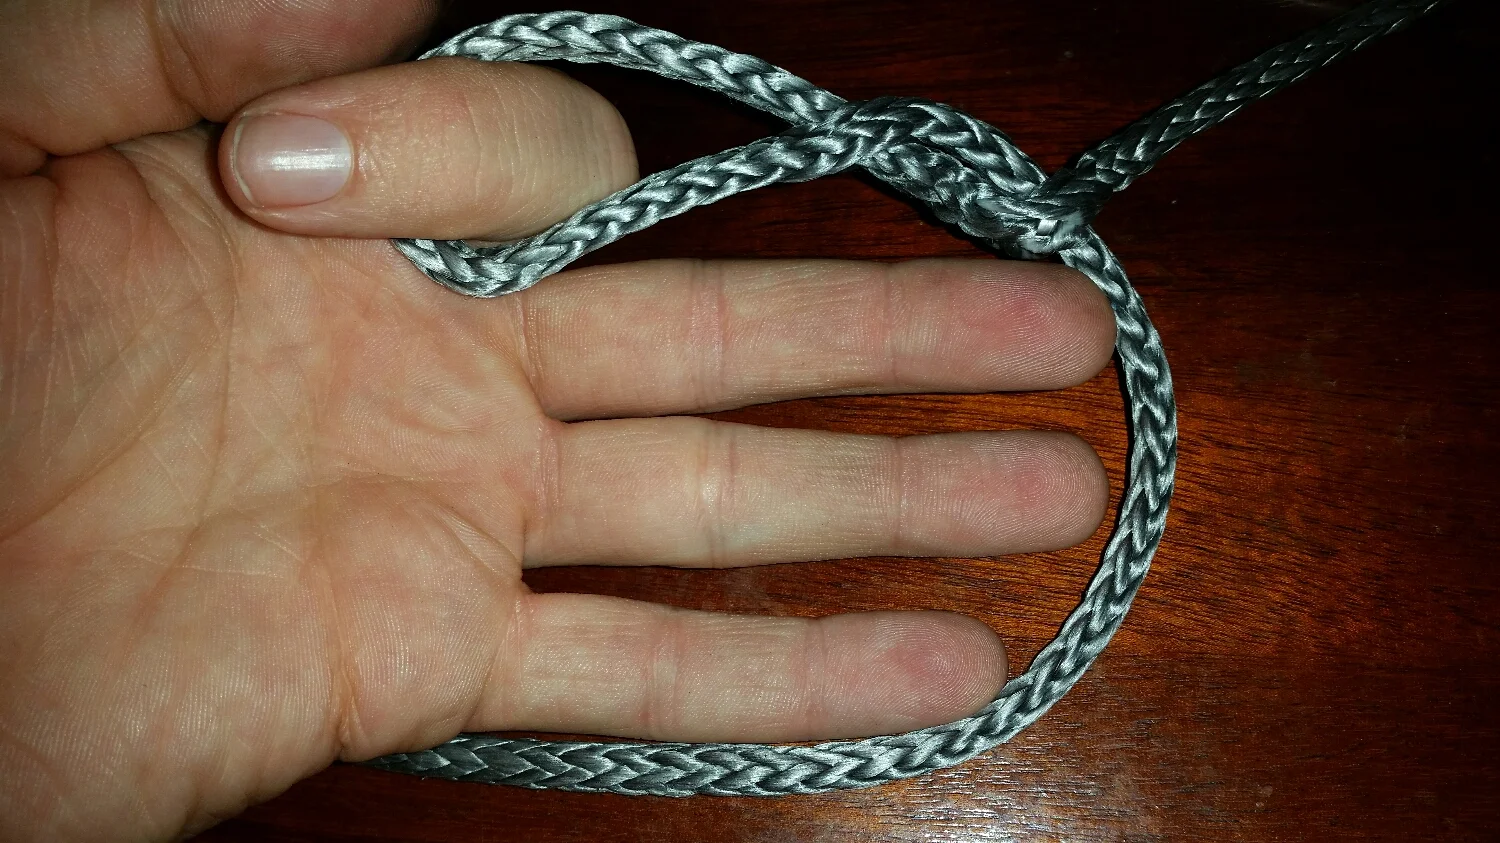
Continue splicing the tails into the line as usual until the tails have been spliced in completely. I try to have at least 5 passes, but if I end up around 4 passes, it's not the end of the world. If your tails are long enough that you make it to 7 passes, you can cut off the excess because there is little advantage to making a backsplice longer than 7 passes.

upload.jpeg
upload.jpeg

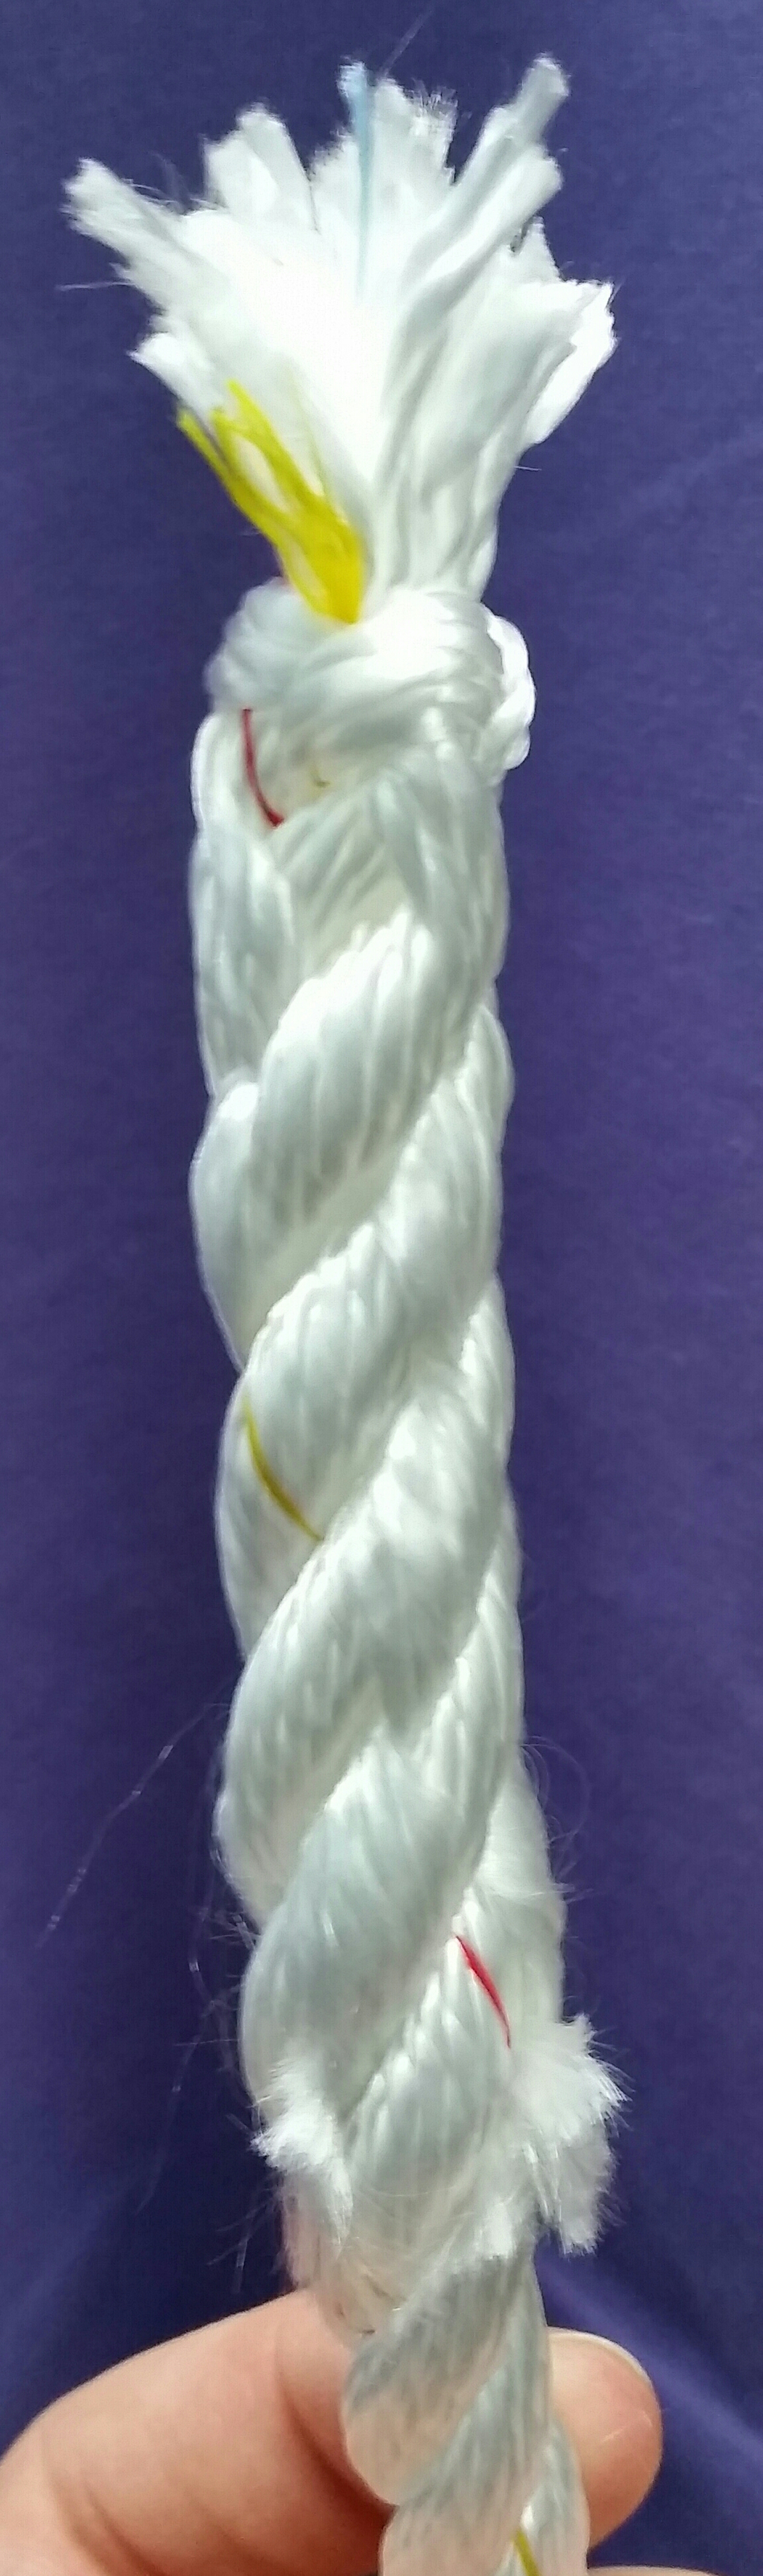
The last step will be to cut the end of the line off. Be sure to leave around 1+ inches (around 3cm) of line past the crown knot. This line will be held tight and prevent the line from slipping out of the crown knot and causing the line to unravel.

Once it is completed, be sure to tidy up the splice by rubbing it between your hands. This will work the splice into the lay and cause the backsplice to even out. After it has been smoothed out, be sure to fuzz all the ends to prevent them from chafing other parts of the yacht. Lastly trim any long ends to make the splice look more presentable.

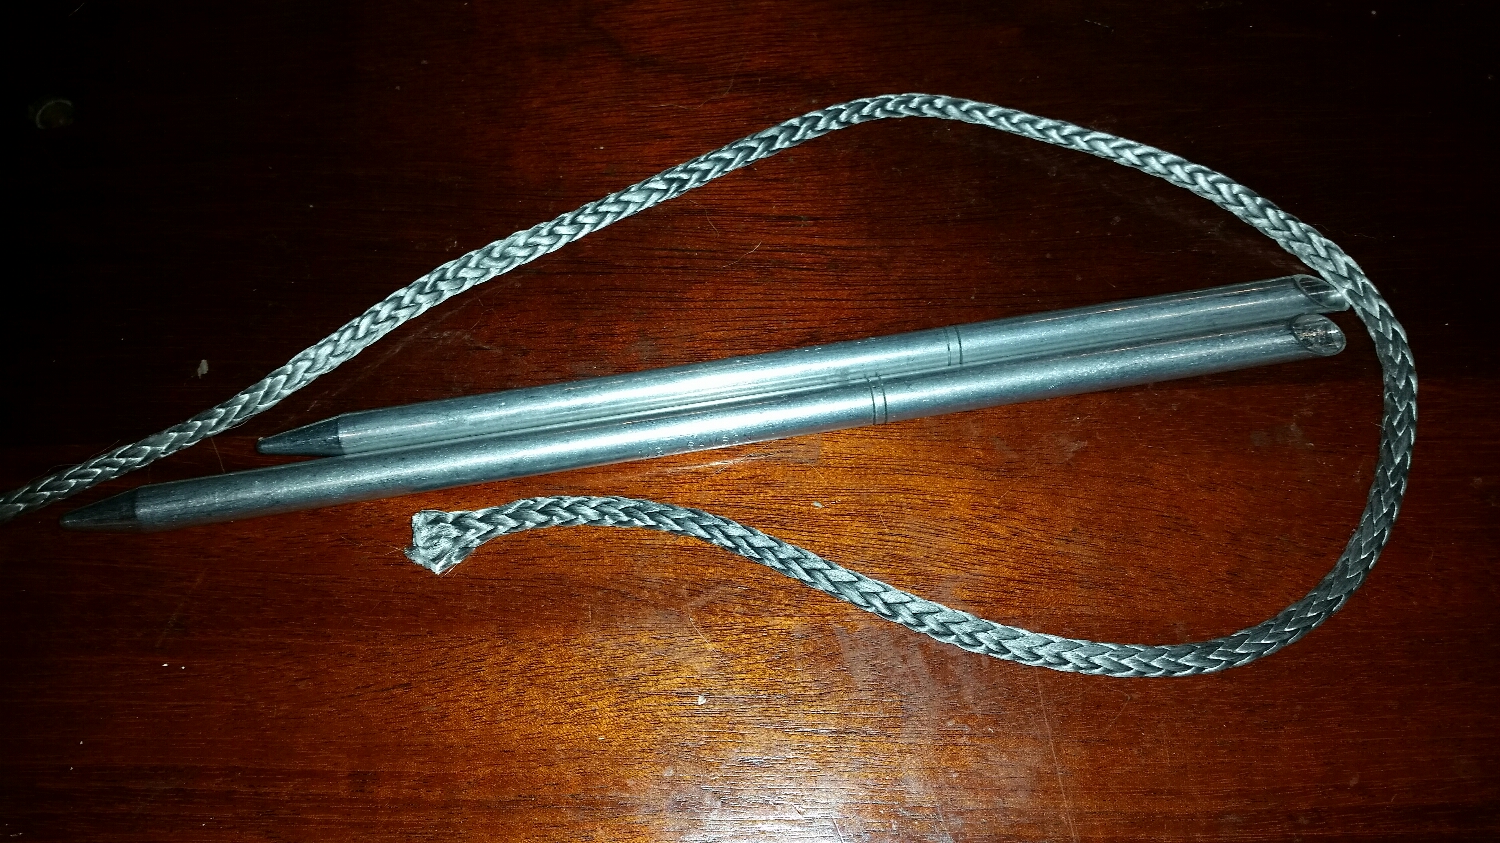
If you decide to use cord instead of tape, tie a Constrictor Knot just below where you want the crown knot. The distance from the constrictor knot to the end of the line is going to be a little less than the length of the tails available to complete the backsplice. I like to leave approximately 6 to 7 inches of line to give enough length to the tails.

upload.jpeg
upload.jpeg
upload.jpeg

Be sure that the 3 yarns from each lay occur near the outer edge of the line, that way they will help bind the whole line together rather than originating from the inside, and not having as much pull on the line as desired.

Be sure to remove the constrictor knot before beginning the backsplice, skip 1 lay, and then insert the tails into the line to complete the backsplice.

This backsplice will hold up well to use and abuse. As the ends of the line fuzz, they will become more unlikely to unravel and be less likely to chafe other lines they may come in contact with.

As you may have noticed, the Tree Surgeons Backsplice takes a notable amount of time to complete as compared to melting the ends with a flame. It takes me around 10 minutes to complete it while relaxing on my settee while watching a movie. It doesn't take a lot of thought or effort to complete, but it will last longer than melting and will not scratch the topsides or snag another line. I highly recommend this backsplice as it will last the life of the line!


Crown Knot

upload.jpeg

The crown knot is a very useful knot to keep the end of three stand rope from fraying. This knot is actually very easy to tie. 

It is best to look down at the knot while tying it. I always orient the knot in an anti-clockwise direction so that it will tighten the lay of the line as it holds.  

The crown knot finishes with the tails aiming back into the rope, where as the wall knot finishes with the tails aiming away from the rope. The tails are then poised to be tucked back into the line to complete the backsplice.

The crown knot will untie if the tails are not seized into a splice or other knot, making this knot rather weak when used alone to hold the end from fraying; but when used in combination with a splice, it will hold the line securely and can be used as the permanent termination to the line.

Mobius Brummel Eye Splice

The easiest way to make a Mobius Brummel is to have both tails free, pass the first tail through the second tail, then the second tail through the first tail. The end result is a solid splice which can't slide apart because they lock each other. 

upload.jpeg

When you are splicing a stay, it is either not convenient or not possible to pass the second tail through and that is when this technique will shine. Following these steps, you can achieve the same Mobius Brummel Eye Splice with only one free tail.  

upload.jpeg

To complete the splice, you will need 2 large fids, 1 small fid, a pusher, sharp knife, and a large needle. 

upload.jpeg

To begin, you must know your measurements. The important parts in this situation are the length of the tail that will be buried as well as the size of the eye. 

The tail that is to be buried needs to be 72 times the diameter of the line. For this example, the line used is 6mm, therefore, 6mm x 72 = 432mm, or 17 inches. For this example, I did not use a long enough tail because this eye splice will never be subjected to loads and it's hard to capture the long tail in these pictures.. 

If you want a 3in eye in 6mm dyneema, your measurements would be: 6 inches for the eye, and 17 inches for the tail. This means that you would begin the splice at least 23 inches away from the end of the line. Having a longer than necessary tail will not cause any harm, whereas a short tail can lead to a weak splice. If you are unsure how much tail to give yourself, always error on the "too long" side.

upload.jpeg
upload.jpeg

The first step is to simply pass the fid and line through itself. Be sure to pass the fid through the line at or further inward than the measured distance needed. Like I said before, it is better to have too long a tail (which can be trimmed shorter if needed) than to have to undo the whole splice to gain a longer tail. So far, it is straight forward; but now we move to the trick to working with only one tail.

upload.jpeg
upload.jpeg
upload.jpeg
upload.jpeg

You will pass the fid through the tail at the location of the end of the eye, or beginning of the tail, depending how you want to think about that point. You will then pull the tail through itself and invert hole. This will introduce a twist in the hole which will be relieved later.

The tail should pass through in the same direction that the eye loop will pass through. If it is set the other way, you will introduce twice as many twists to the line which can cause undue stress on the fibers.

upload.jpeg

Push the fid through the twisted hole in preparation to pass the eye through the hole next.

upload.jpeg
upload.jpeg
upload.jpeg
upload.jpeg

I use the back of the other large fid to push the loop through the hole following the largest fid I have. 

Once I have it to this stage, I work the rest of it by hand. You simply pass the eye through the twisted hole in the tail.

upload.jpeg
upload.jpeg
upload.jpeg
upload.jpeg

Work the line so that the twist undoes itself as the line is passed over the eye and down the line. You will now have the classic Mobius Brummel Eye Splice. You can see how the splice can slide to shrink the eye, but once the two sections meet, they will lock onto each other and make it impossible for the eye to open and the splice to fail (as long as the tail is properly buried).

upload.jpeg
upload.jpeg

Here we can see a closer look at how the splice should look. If it doesn't look like this, it would be wise to take it apart and try again. This splice is extremely strong, but certain variations that look very similar are very weak.

upload.jpeg
upload.jpeg
upload.jpeg
upload.jpeg

Work the small fid through the hollow portion of the line, making sure not to snag any of the woven fibers along the way. Push the tail through and pull it out the other end. On yours, the tail would be much longer, so you will have to bury more of it into the line.

upload.jpeg

Pull the tail out as far as you can and stick a large needle through the tail. This will keep it from sneaking back into the line while you work on your taper. 

upload.jpeg

Taper is all math at this point. Dyneema is made of 12 strands, so count how many fibers are sticking out from the needle to the end of the tail. I then divide the number by 12 and ignore any decimals. In this example where there is too short of a tail, there were 15 fibers present. 15/12 = 1.25, so 1. This means that each fiber gets pulled out and then cut off. This will give a uniform reduction for the first 6 fibers. If there were 37 fibers, it would be 37/12 = 3.08, so 3. Then it would be every 3rd fiber gets pulled out for the taper.

When I was building my standing rigging (9mm dynemma), I was pulling out every 4th fiber. This gave a long gradual taper over the 25 inch tail to the splice which reduces any sharp bends that will stress and damage the dyneema line which could reduce its strength and lifespan. 

upload.jpeg
upload.jpeg
upload.jpeg

Be sure to evenly cut the last 6 fibers and make some attempt at re-braiding or at the least, twisting the strands back together.

upload.jpeg
upload.jpeg
upload.jpeg

Now remove the needle and slide the outer layer over the tail to bury it. Work the line so that the weave looks like it did originally. 

upload.jpeg

When you first load the line, it will stretch considerably at first. This is not creep, it is constructional stretch caused by bunching up the fibers in the 12 strand. Once under load, they will straighten out again allowing the line to stretch in the process. 

Once this stretch has been satisfied, the line will then begin Phase I of its lifecycle, characterized by rapid elongation caused by creep. Once it reaches Phase II, the creep will slow down and the dyneema will deliver as promised!

Double Constrictor Knot

The Double Constrictor Knot is almost the same as the Constrictor Knot to tie but it has very different properties.

The Double Constrictor Knot is permanent, and can bind things together so tightly that it can cause damage.

upload.jpeg

For academic reasons, I used two double constrictor knots tied with nylon cord instead of hose clamps when I installed a check valve in Wisdom, back in August 2013. The  check valve is on the shore water inlet and is subjected to city pressure when a shore hose is connected. I thought this would be a good place to try it out, as the high pressure would expedite any failure. I tied the double constrictor knots where hose clamps would go and then pressurized the system, expecting the hose to slip off the check valve, or at least drip a little; but nothing happened! It was completely dry!

I left it on for the rest of the day to see when the dripping would begin but it was still dry, so I decided to leave it on for the rest of the week, then rest of the month, and now 2 years later, it is still on there and no leaks!

This knot can be used to hold a broken tiller, a splitting boat hook, or as a "temporary" hose clamp. I say temporary because it will hold just as well as a steel one. This knot truly lives up to its name, it will constrict and then hold forever. 

Like all knots, there are advantages and disadvantages. The Double Constrictor Knot is considered permanent once it is tightened down. It really is permanent because it is almost impossible to untie. I have always been forced to cut them off because they will not loosen once tightened.

Tying the double constrictor is almost identical to tying a constrictor knot, the only difference is one extra wrap going from Lower Right to Upper Left when making the X. Then tighten it down and it will hold permanently.

I didn't tighten this knot all the way because I wanted to have the line back for other knots. 

By using marlin spike hitches, you can tighten the double constrictor knot fully and count on it as a permanent knot. 

The marlin spike hitches allow you to tie the tails to sticks or rods that you can then pull on like handles.  

To really tighten the knot as much as humanly possible, you must sit on your butt and balance yourself. You will pull up on the stick in your hands while simultaneously pushing away on the other stick with your feet. This action will involve your strong leg muscles into the tightening process, securely tightening the line to permanent levels. 

Once finished, you can simply cut the tails off the knot and rest assured that it will hold forever.  

Constrictor Knot

When you need to bind something together, there is no better knot to use than the constrictor knot.

This knot lives up to its name! It will tighten down and bind items together like no other!

This knot is very simple to tie, as well as easy to release. Its ease of release does limit its range of use as it can not be used as a permanent knot (but a variation of this knot is permanent). 

I use this knot frequently when I'm splicing lines and don't have tape handy, or when I'm tying things up for a short period of time. I even used this knot to put pressure on a wound when I cut my finger while making rope fenders. 

To tie this knot, you begin by laying the line on the left and crossing up to the top right. 

From there, straight down, passing on the outside of the starting line

Then straight down behind the bundle


And around coming from the bottom right to the top left across the front.

Then wrapping around the first line and exiting out the middle between the top part of the X.


It looks a lot like a clove hitch, but it makes an extra pass under the starting line, which creates a twisted section bound down by an X. This makes the knot very easy to tighten when both ends are pulled, and hold itself tight when tension is released from the lines.


To really tighten it, tie marlinspike hitches in the tails and pull hard on the spikes, this will tighten it down to insane levels.

20151214_163647.jpg
20151214_163654.jpg

I use this knot all the time, it holds securely and can be easily released. I find it works best in situations where you would usually tie a square knot, but need it to hold tighter. 

In the picture to the left, I'm using the constrictor knot in lieu of tape to hold the line from fraying while doing a tree surgeons back splice. The knot above it is a Crown Knot (which we will go over in a later post).