Knots

Rope Fenders: Inner Core

The inner core is the working part of the fender. This is where the bulk exists to protect the hull from damage. It needs to be soft to absorb impacts, yet firm to retain its shape. 

Rope Fenders typically use a plastic fender covered in a rope mesh (which is cheating) or tightly wrapped rope. Plastic cores have all the drawbacks of plastic fenders, they simply look nautical. Tightly wrapped cores are much too heavy for Maddie to manage, making them difficult for us to use regularly, so I had to come up with other options.

I came up with an open structure which will provide bulk while still having a lot of dead air space (which has no weight to it), allows the fender to still be soft and flexible, and bulky enough to provide protection to the hull and topsides.

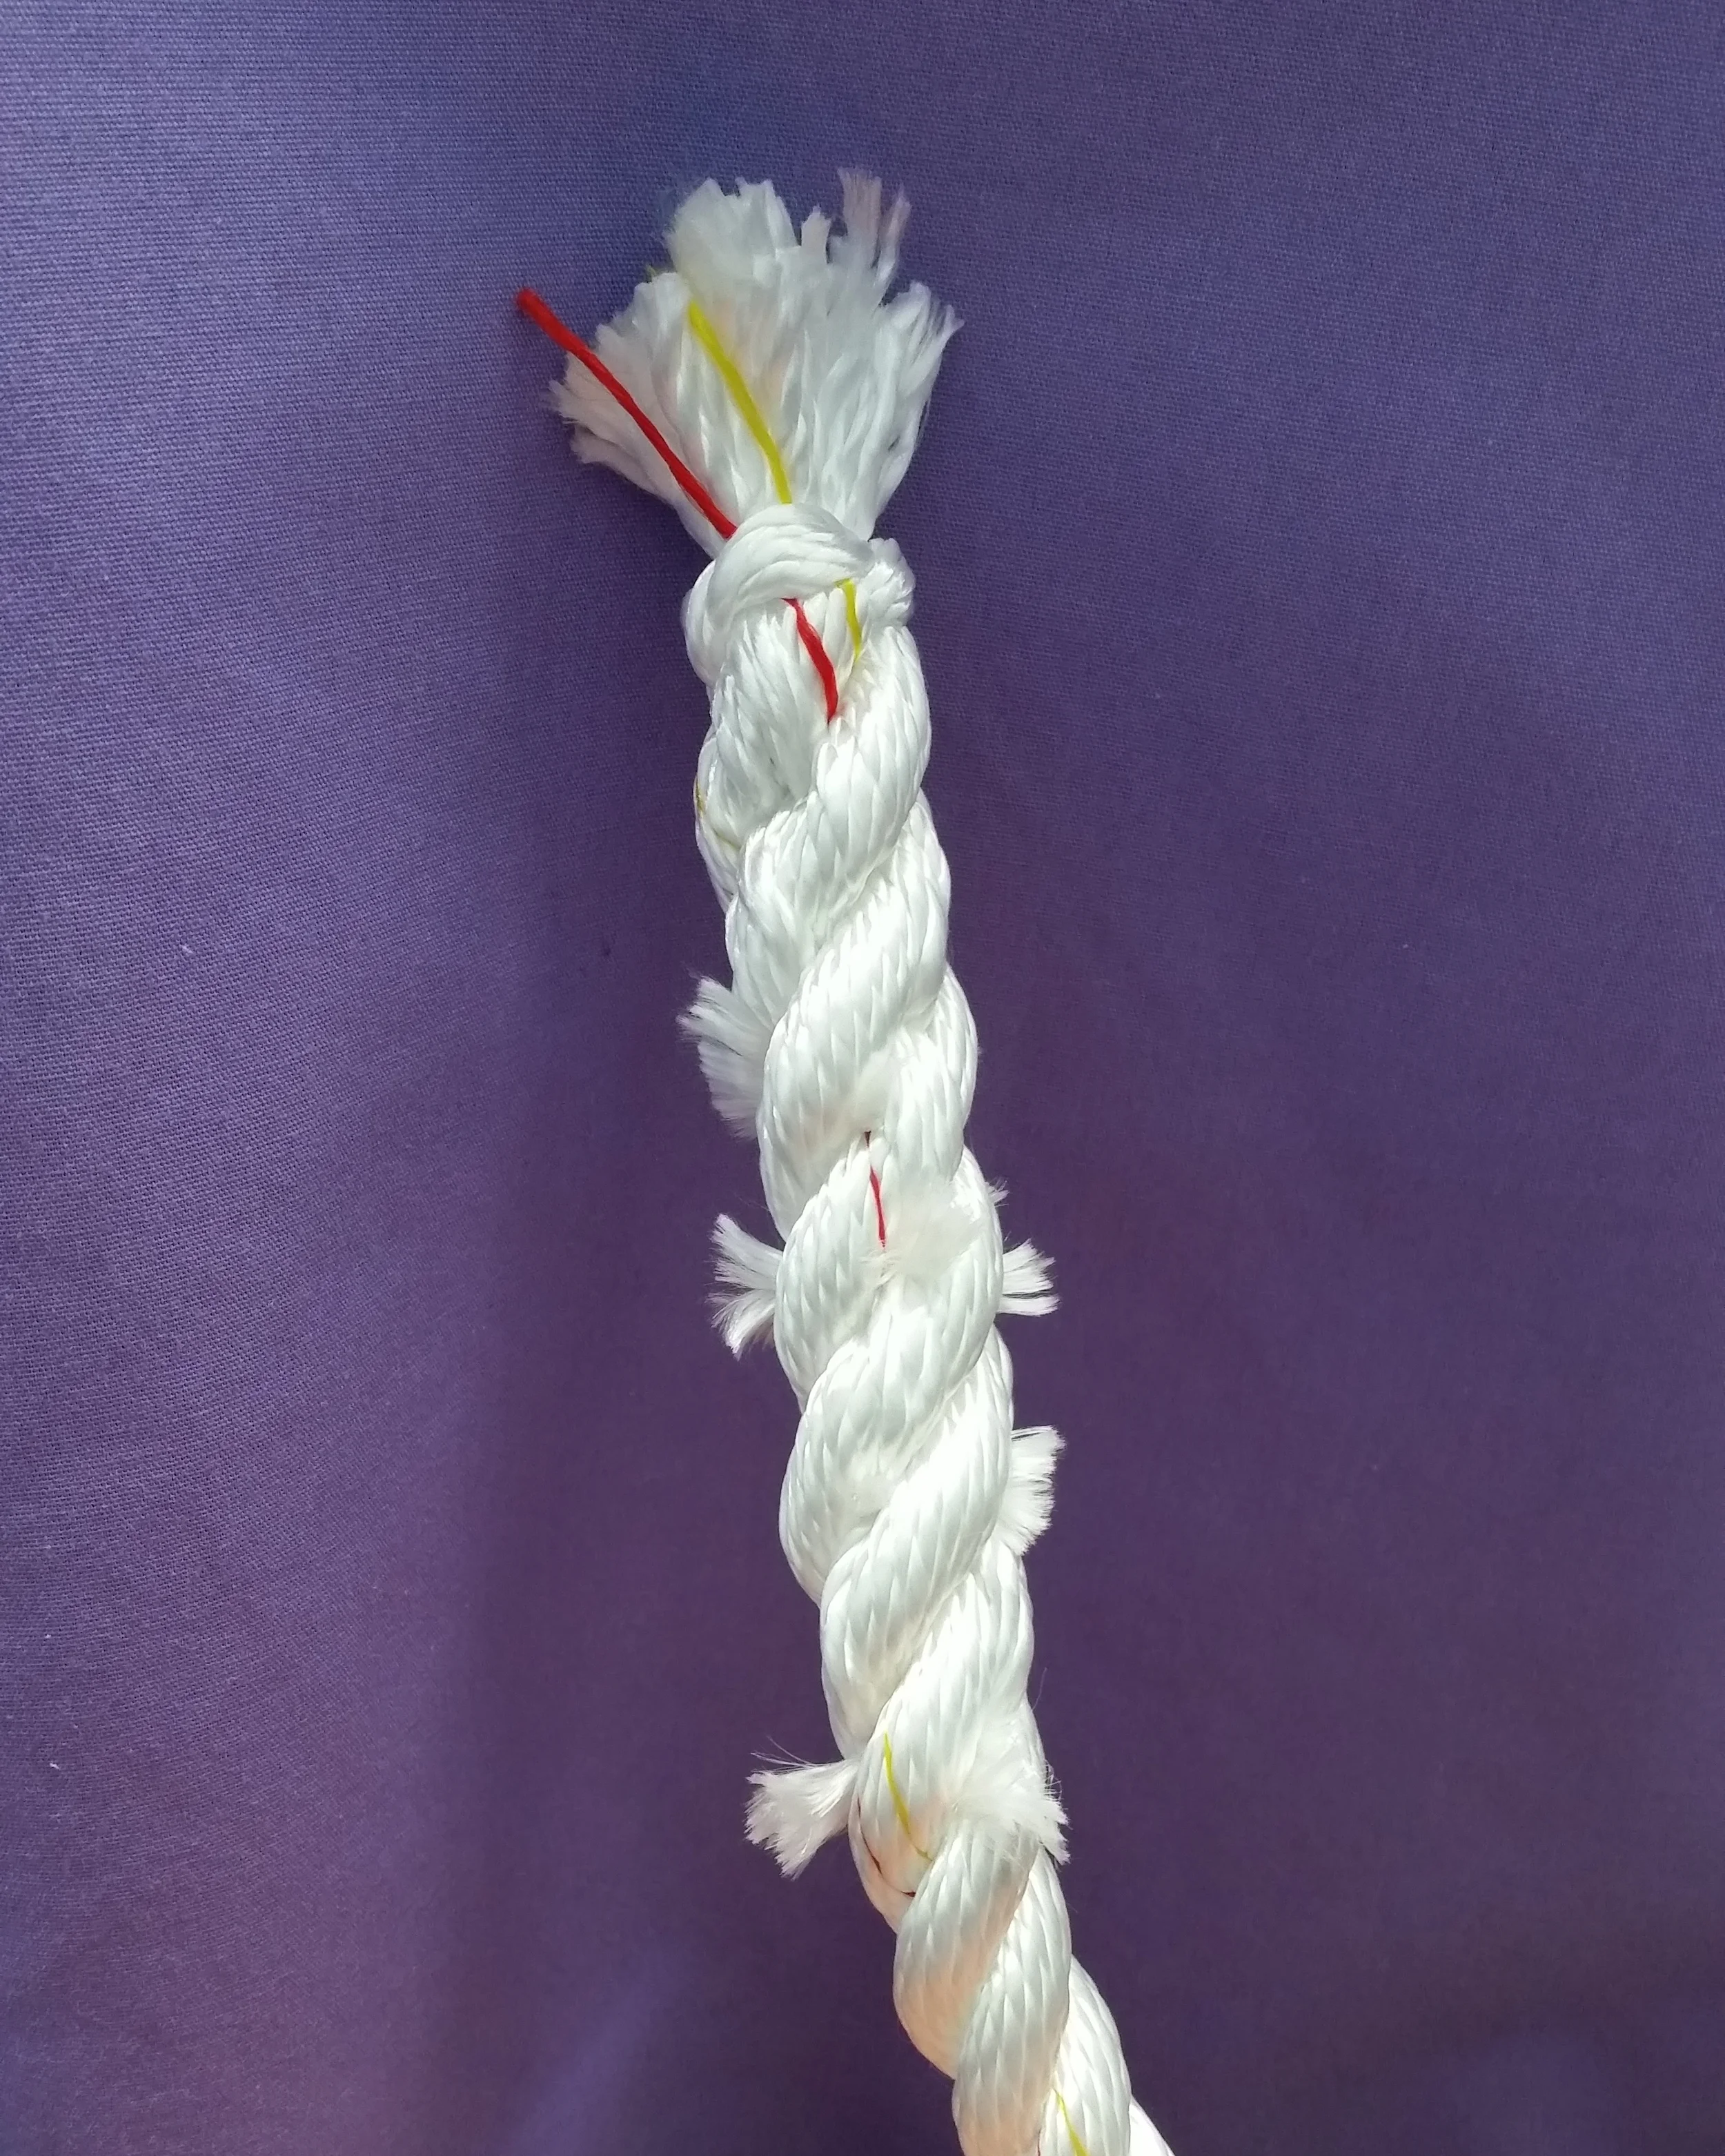
The whole process began by preparing the main line of the fender. The ends of the lines were backspliced using the Tree Surgeons Back Splice with fuzzy ends. This backsplice will hold the line together well while being used and abused. There is no risk of the ends unraveling as the line is pulled through the toe rail or stepped on, and the fuzzy ends pose no threat to anything on board since they are soft and fuzzy.

The line selected is 1/2" Three Strand Nylon from New England Ropes. This line will have the fender seized to it, and then run out into the whips that will be used to tie the fender to the boat. I chose Three Strand Nylon because it can be repaired over the years. If a strand or two gets damaged, I can splice in a new strand rather than trying to replace the line that the fender is seized onto.

In 2013, I replaced the running rigging and kept the old lines coiled up in a locker for 2 years. I think this is a wonderful way to put the old sheets and halyards to use again. They will make up the bulk of the fenders in the non load bearing areas. The old line was cut into even lengths and then seized to the fender line.

I used double constrictor knots to seize the old lines to the new fender line. This knot will bind them all together so tightly that there is no risk of them slipping out.

I repeated this on all four fenders before proceeding to the next step.

The next layer added to the fenders is a coiled line that wraps over the first four lines. This coiled layer will provide a lot of bulk while riding over the underlying lines and provide the dead airspace needed to increase the bulk while keeping weight down to a minimum. This once again was repeated on all four fenders.

I did this part of the project while I was between patients at my dental office. I then continued the project once I was back home on board Wisdom.

The first layer was completed, and so it was time to apply the second layer of bulk. Once again, lengthwise lines were run and seized at the ends using Double Constrictor Knots. This bulks up the fender and provides the framework for the next coiled line.

To keep the lengthwise lines in place, I tied them together the way I suture long cuts of tissue, using the "Continuous Locking Technique". It's begins by tying a knot at one end, and then looping the line around the bundle, back through the loop and then onward. This technique provides a tight bind to the bundle without pulling it in any direction.

Once the bundle is tied together, the next layer of coiled line can be installed. 

You can see how just one additional wrapping will greatly increase the bulk of the fender and all the dead air space will keep weight down. I do not suggest wrapping the layers in tape as that will only trap water inside and never allow the fender to properly dry out. They will get wet, and the open internal structure will help them dry out.

Be sure that the coils wrap in opposite directions, this will avoid the possibility of the coils falling into each others grooves, instead they will always intersect and ride over one another, keeping a greater volume with the same mass.

It is impressive the amount of volume that it gained by simply adding one more layer of lengthwise lines and a coil. The fender on the left only has 1 layer, the fender on the right has 2 layers.

This was repeated on all four fenders. As you can see Morty in the corner, it was late and I went to sleep at this point. 

Rope Fenders: The Design Process

I began a new project! I'm building rope fenders that will replace by plastic inflatable ones and also serve the purpose of a fender board. If you would like me to make rope fenders for you as well, let me know what size you want and I can give you an estimate.

I currently have two 10"x26" Taylor Made fenders, and they are not enough for when we tie up to a pier or raft up with friends. My options are add more fenders to my vessel (and figure out where to store them) or make myself rope fenders to meet my needs.

The fenders need to accomplish the following:

Be light enough for Maddie to deploy them
Be soft to protect from impacts
Cover the opening in the gate so that Morty can't fall out
Be long enough to serve as fender boards

I was going to make 2 very large and long fenders, but quickly decided that their weight would make them difficult to manage which would result in us never using them. I then switched ideas to making 4 large and long fenders that are easier to store and deploy.

The fenders are also going to double as a way to close the bottom of the gate while we are under sail. Morty loves to sit on the leeward side, right next to the gate with his head hanging out over the toe rail (this is why we keep him tied to the jacklines to make recovery easier if he were to slip off the side). This is the only place on the boat where the netting to keep him on board is missing, and it is his favorite place to sit.

By being long enough to serve as both fenders and fender boards, we will be protected in any docking and rafting situation while only needing to carry four rope fenders on board.


Fuzzy Ends

When you buy rope, they always offer to sear and melt the end of the line to keep it from fraying. While melting the end will help keep the line together longer, it actually does more harm than good.

A seared end will be hard and may have sharp edges that can scrape the topsides or chafe on other parts of the line. The end of this supple line will turn into a rock hard scraper that will tear into everything around it. If you coil the line up on the deck and then pile other things on the line, that seared end will be under a good amount of pressure. Rather than flattening out, it will simply dig into the topsides. As the boat moves around, that hard edge will scrape and scratch everything under it.

The solution is very simple: Don't melt the ends!

Either whip the end of the line, backsplice the end of the line, or if you are in a real rush: tie a stop knot in the end of the line. 

Whipping the end is a bit time consuming, and you need to have whipping twine handy. I personally keep a few spools and needles in my splice kit on board, but I do this professionally. Most people don't keep these sorts of things.

Backsplices are the alternative when no whipping twine is available. It simply takes the end of the line and ties it back to itself. 

Knotting the end is the least desirable solution. It is bulky and clunky, but also insanely quick! If you need to cut a rope in a hurry and put it to use, simply tie a knot in the end and that will stop the whole rope from fraying. Try to place the knot as close to the end as possible, because everything after the end can fray.

Back to the fuzzy ends! When you finish a splice or whipping, don't sear the ends of the lays. This will simply make more of those hard spots that will cause problems. Simply fuzz the ends of the lines and lays!

Fuzzy ends prevent chafe because when a load is applied to the side of the line, the line can deform and flatten out. When something rubs up against the end, it will be pushing against a very large area (compared to the point of a seared end) that is very soft and forgiving. This is why the chafe protectors (Baggy Wrinkles) on tall ships are fuzzy. Fuzzy ends are something that should be desired instead of melting them out of existence!

Fuzzy ends also weather over time, just like natural teak. As time goes by, the fuzzy parts begin to look more and more weathered as they age. While the line won't be new and shiny anymore, it does begin to look very seasoned as the miles and years pass by.

20150911_191529.jpg
20150915_185218.jpg

The ends get worked and the line stays together. Fuzzing the ends of the line can make a sweeter situation out of a bitter end.

Figure 8 or Fishermans

The most common knot that I come across used as a stopper knot is the Figure Eight. It is fast to tie and does the job. The only time the Figure Eight doesn't serve its duty is when the line is much smaller than its fairlead hole. In times like this, a Figure Eight will pull through because it wasn't bulky enough. This is when the Fisherman's Knot reigns supreme!

The Double Fisherman's knot is very easy to tie, and can be untied after being loaded (with some effort). I personally like the Triple Fisherman's Knot over the Double Fisherman's Knot simply because of aesthetic reasons. It looks like a barrel on the line rather than a square. 

The other advantage of a Fisherman's Knot is they lay straight in the line. A Figure Eight will make a bend in the line after the knot has been loaded, which will make a kink in the line when flaking or coiling. The Fisherman's Knots simply lay quietly in line as they serve their purpose.

You can see in this comparison I tied, the Figure Eight looks sufficient from some angles but flat and insignificant in other views. The Fisherman's Knot always has considerable bulk and won't pull through a block or sheave. The Fisherman's Knot also lays flat along the line whereas the Figure Eight has a bit of a kink to it.

Stopper Knots

Stopper Knots are imperative to keeping a line from slipping through all of its blocks and pulling out. The idea is to have the line pass through the blocks as it makes its way to the cockpit, and then stay in the cockpit. 

Lets take a jib sheet as an example, the sheet comes off the winch and slips out of your hand. If there is no stopper knot, the sheet will pull through the fairlead and flap wildly in the wind as the jib flogs. You can't use the engine to bring the bow into the wind since the sheets can foul the prop. This whole dilemma could have been thwarted by using a stop knot, which would have kept the bitter end of the sheet from passing through the fairlead, allowing a much easier recovery. 

While it may seem logical to place the stop knot at the very end of the sheet, this is not advisable. Think about it, the sheet pulls away because it was under tension. Now the stop knot is jammed into a block and you have nothing to grab onto to pull it out! You needed a winch before because the line was under tension, now you have no way of getting it to the winch and it's still under load.

To make matters easier, locate the stop knot ahead of the bitter end. If the sheet were to pull away, you want to have enough tail to reach the winch and allow you to place a few wraps around the winch drum.

This does equate to a rather long sheet, you factor in the length that you would have needed, and then add the distance from a stop knot to the winch. This should be the length of your sheets.