Cruising

Summer Cruise Day 15

Today was a typical July day in the Atlantic; light winds, gentle seas, and no stress. We were making our way north on our return to Baltimore, but I decided I wanted a lot more seaway between us and shore in the event we came across more bad weather. At the speed we were moving, we would have reached the entrance to the bay by nightfall. This would have meant heaving to in one of the most commercially active areas on this coast or staying up all night doing watches. The other option was head very far out to sea and heave to for one more night and make our way in with day break. I chose to do the later. 

You can see our dirt towel on the starboard deck. We use this dirty thing to help contain the mud that gunk that comes up on the anchor chain and falls on the deck. During this trip, it got rather grungy looking, but it still serves it purpose.

You can see our dirt towel on the starboard deck. We use this dirty thing to help contain the mud that gunk that comes up on the anchor chain and falls on the deck. During this trip, it got rather grungy looking, but it still serves it purpose.

Proper cruising attire, life jacket with clipped in harness, T-shirt, and comfy pajama pants. When sailing, be comfortable!

Proper cruising attire, life jacket with clipped in harness, T-shirt, and comfy pajama pants. When sailing, be comfortable!

We sailed in very light winds, around 10 to 12 knots most of the time. The seas were so calm that we enjoyed walking around the deck and playing with Morty, our corgi, as the boat sailed itself. While we do have an autopilot, it seems to consume a lot of power. My favorite alternative is to centerline the rudder, lock it in place, and balance the sails. This method consumes no electricity and lets us walk around the boat without worrying about helming. Our favorite spot to hang out is next to the shrouds or up by the staysail tack. 

As the day progressed the winds became a smidgen stronger, so we switched from the drifter to the jib, in the event that the winds continued to grow. 

11760269_10205254036930335_8823576469254531572_n.jpg

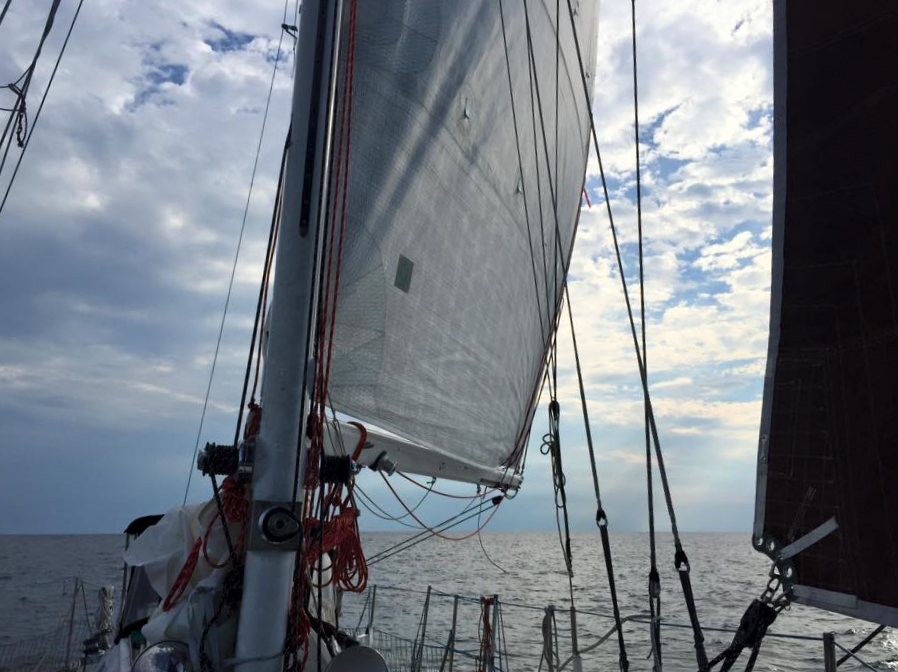
As the afternoon grew on, the sky began to fill more and more with clouds, hinting at stronger winds that evening and next day. While we never moved fast, we did always maintain a slow and steady speed, thoroughly enjoying the day out in the Atlantic, far from shore with no land in sight. 

By 6:30 PM, we were around 20 miles offshore. I was looking forward to this! No boats were visible on the horizon, no boats showed up on the AIS screen, we were completely alone!

We reefed down, putting two reefs in the main and lowered the jib for the night. Heaving to was an easy process in these light winds as we readied ourselves for dinner and the best night of the trip!

Summer Cruise Night 14

Tonight was very calm, nothing like last night. We slept very soundly as we slowly drifted along with the staysail and the double reefed main hove to. Since we were still relatively close to shore, I was getting up every hour to make sure we were fine, do a watch, and then go back to sleep for another hour.

The AIS proximity alarm only went off once to alert us that a ship was going to pass within 2 miles of us. The captain was very courteous over the radio. I alerted him to our position relative to his, he spotted us on his radar, I explained that we were a sailboat adrift, and he adjusted course to keep us a safe distance.

I much prefer to sleep hove to over anchor. You never have to worry about the anchor dragging, or tides and winds. The boat will stay steady and upright, gently riding through the seas as it lulls you to sleep. The boat will never ride over it's anchor rode while taking waves on the stern as in a wind over tide scenario, or lay beam to the seas tossing you about during the night. It always stays the upright with a gentle motion. The best sleep ever!


Sculling Oars Part 4

The weather has been very cooperative, so I've been able to get a lot of work done on the oars. 

Today I finished removing the excess wood from the blades and shaped the handle. I then sanded the whole thing to get rid of any bumps or rough spots. There are some knots on the blade that made it difficult to reduce it correctly, so that edge is still a little bit lumpy. These oars are my prototype oars to see how I like sculling the boats and figure out what works and what doesn't. 

My plan is to use these oars to learn how to scull the boats. If any changes are needed to the shape, I will discover it with these oars and make the necessary improvements on the next set. If I like them the way they are, I will use them until they die!  

Since these oars might not be permanent fixtures on the boat, I used wood from Home Depot. Not the best grade of lumber for boat building, but the price was right. The 2"x12"x16' douglas fir only cost around $18. I looked through all the lumber they had to find a board with vertical grain and relatively few knots. The sections of the oar that are clear of knots are a dream to plane and work, the knots take extra attention.


Sculling Oars Part 3

Today, the sculling oar for the Alberg came out of the clamps! I had it in clamps for 2 days to allow the glue to have plenty of cure time under pressure. I then began the process of shaping the oar handle and blade.

20151013_130622.jpg

The oar handle is laminated for strength, tapering down to the oar blade. The bottom half is larger than the top laminate, so some shaping was needed to make it all smooth. To bring them in line with each other, I used a block plane and a jack plane to reduce the wood on the sides and taper them in together. A rabbet plane would have been really handy, but I do not have one. To get the very edge, I took a hand driven chisel and carefully worked the wood away.

The blade at the moment looks like a 2x6 needing some major removal on the sides to give the oar its proper shape. Based on drawings I've seen, the blades should be tapered on the top to promote the oar turning onto its side as you scull. Basically, flat bottom with a pitched top.

To remove the wood on the sides of the blade, I took a mallet driven chisel to split the wood along its grain. I removed around 3-4mm of wood with each pass. While it is not a fast method compared to working with power tools, it is a cautious one that keeps you in control of how much is removed.

After I finished my work for the day on the oar for Windpuff (The Alberg 30), I glued up the oar for Wisdom (The Morgan 45). I put it in the clamps for the next few days and let the glue begin to cure.

Sculling Oars Part 2

The oars have been cut and one of the cut outs was selected to act as the oars top laminate to give the oar more strength. The selected piece was planed by hand until it was perfectly flat. The mating surfaces between the main oar piece and the top laminate had to be perfectly flat and smooth. This would ensure a tight seam with no voids so the glue would have the strongest bond possible. 

A block plane was used to coarsely reduce the side of the laminate and make it smooth. Then a jack plane was used to finish the smoothing process. The fir from home depot is not clear, as there are many knots apparent throughout the board, but the price was right for a prototype sculling oar. Why waste good wood on an oar that might not be the right fit for the job? What if I need a bend in the handle? What if the oar needs to be longer? This first oar will be a test, once I know what I want, I'll use good wood to make the real one.

Once the laminates are perfectly flush, Titebond III wood glue was applied to the top laminate and then firm clamping pressure was applied to fully mate the two surfaces.

Now the oar will remain in clamps for at least 24 hours before further work will continue on it.