
You are saving money by building your own Lithium battery bank, excellent! We built a massive 19.2kW` battery bank for $5,000 which would have cost us $18,000 if we bought Battle Born Batteries!
Battle Born Batteries, the gold standard for marine lithium batteries cost around $950 for a 12 volt 100 amp hour battery. This battery will provide 1,200 Watts of power to your application at a price tag of $950, or $1.26 per Watt.
The battery bank we built consists of five 48 volt 96 amp hour batteries, providing us a grand total of 23,040 Watts of power. Each battery contains 4,608 Watts and cost approximately $1000 to make, but contains 4x the power of a Battle Born; and for roughly the same price!
A 48v battery is created by linking 4 12v batteries in series, meaning that each 100ah 48v Battle Born setup would cost a grand total of $3,800!
Needless to say, it’s significantly cheaper to build your own battery than to buy one that is ready made.
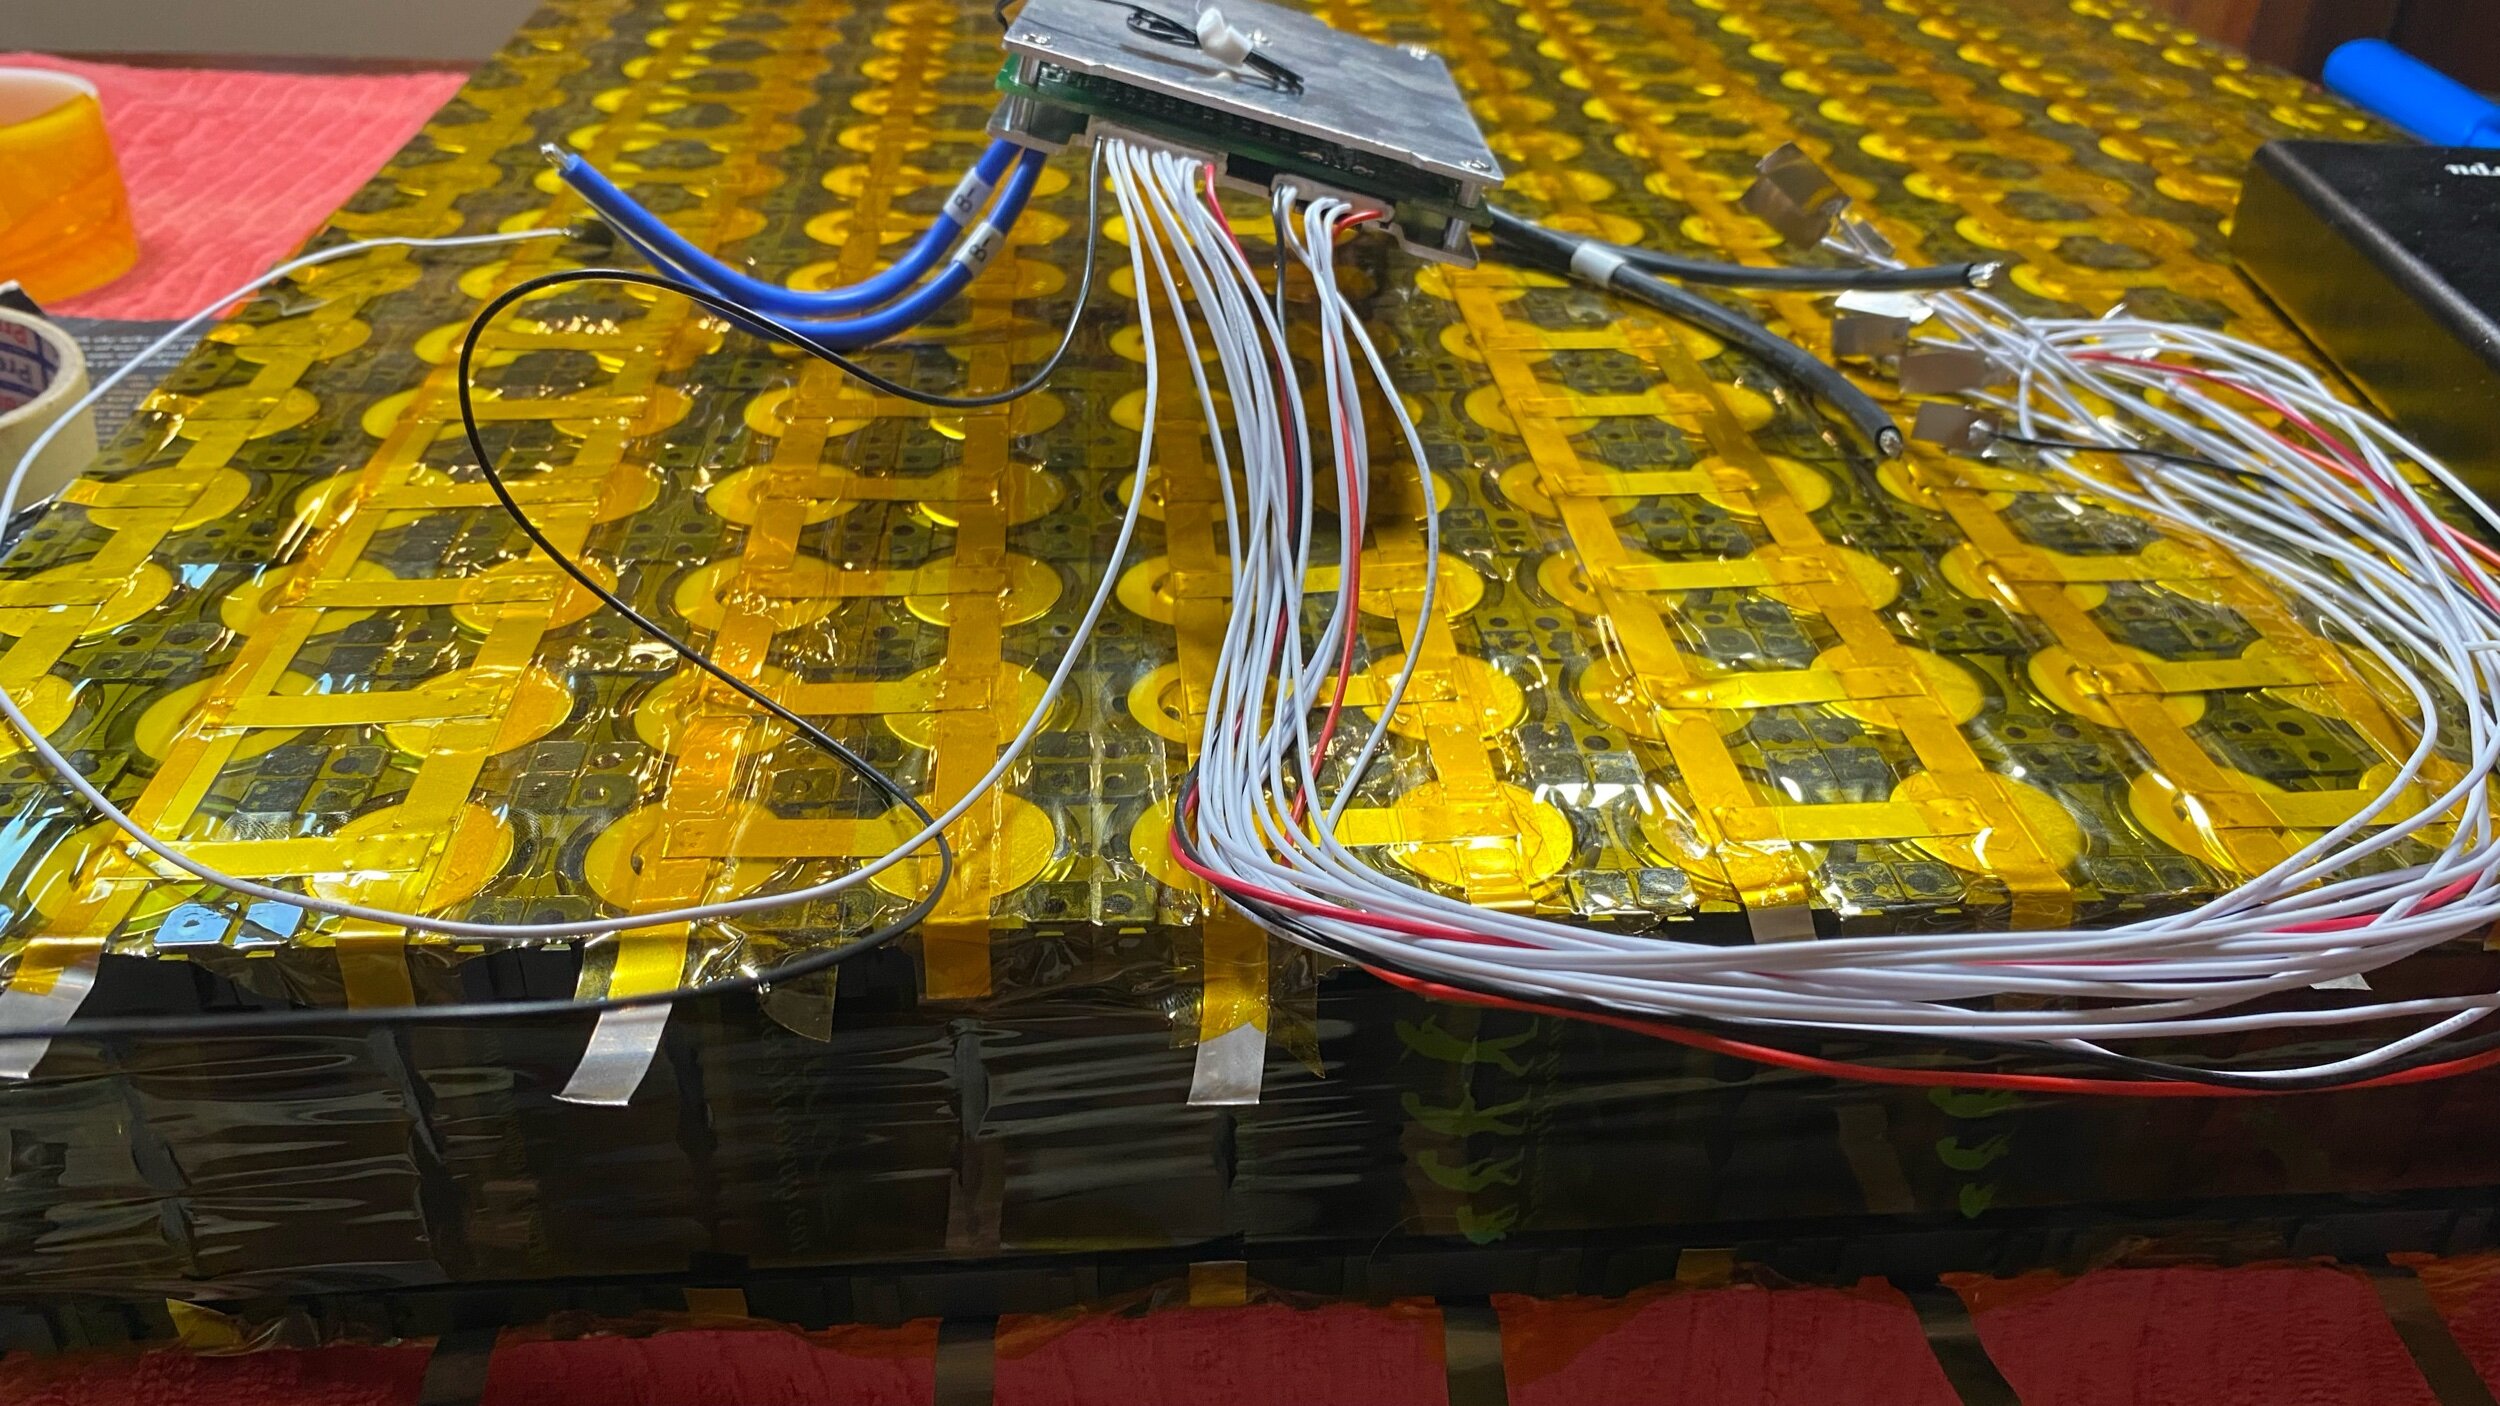
Wonderful! You assemble all the cells and the battery is done being built. Then you open up the BMS (Battery Management System) and pull it out of the package. Suddenly the easy assembly turns into a spider web of wires that need to go somewhere and if you get it wrong the BMS will fry! What do you do?!

It’s not really that complicated. The BMS has a lead that runs to each positive cell of the battery and an extra wire (the black one) that leads to the Negative terminal of the battery.

Ok, but what if you are building a high voltage battery with a ton of leads, now you have two black wires! Which one is the negative wire?
Easy, all BMS start with the large plug that has a bunch of wires where the black one on the far left is the Negative and the red one on the right is the positive, unless the BMS needs a supplemental plug to fit all the battery balancing leads, in which case, the smaller plug will be the supplemental and therefore the black wire will be a regular lead instead of the negative.
The Negative wire I have been referring to is called the “Most Negative” wire. The last positive balance lead, which is red on the opposite side of the plugs is called the “Most Positive” wire. With that knowledge alone, you can look at any BMS with any plug configuration and sort out which wire is the most negative, and by default, which wire is the most positive.
The concept is simple: The black wire attaches to the Most Negative terminal, and each wire that follows in sequential order attaches to the next positive cell.

See the Black Wire on the far left of the battery? That is the negative terminal of the battery and the black wire connects to that point. The next wire in the BMS balance lead is a white wire which connects to the same cell groups positive side, which is the other side of that same row of cells. This is the only part of the battery where you will have BMS leads going to both the negative and positive points of the same cell. All the other leads will connect to the positive points of the cell groups.
The next wire on the plug, moving left to right will connect to the next positive point of the battery from left to right.
The reason behind this is simple, the BMS needs to know the voltage of each cell group. To do this, the BMS needs to read the voltage of each cell group, but it uses the most negative as the Negative point in the circuit. If you get the order of the positive wires wrong, you will make the BMS think that one of the cell groups is incredibly high in voltage, as the voltage should increase by 3.xx volts per cell group as they add up in series.
Assuming that each cell is charged to 3.5v, the first positive lead connected to the first row of cells will tell the BMS that their voltage is 3.5, the second will tell the BMS 7.0v and the BMS will calculate that it is 3.5v. If you accidentally connected the second wire to the 3rd group of cells, you would tell the BMS that the “second” group is reading 10.5v, and the BMS would calculate the voltage to be 10.5-3.5= 7.0v in the second string. The BMS shuts down the battery pack if the voltages exceed the safe parameters, which are normally set to have a voltage minimum of 2.5v and a voltage maximum of 3.6v. If you tell the BMS that one of the cells is at 7.0v, it will shut down the whole pack and sadly it might also fry the BMS! Be very careful while you are connecting the balance leads that way the wires don’t get crossed and you don’t fry this expensive piece of equipment.

Once the balance leads are all connected, its just a matter of tiding up the wires so that this spider web of wire can be tamed by the power of zip ties!

After all the leads are tamed, I like to wrap the whole area over with 2 inch wide Kapton tape which holds them all close to the pack and reduces the risk of the wires getting hooked up on something and pulled free.


While the balance leads are the main concern for people who are thinking about building their lithium battery and worry about the BMS, there is one additional component that needs to be connected. The BMS monitors and controls the battery pack by checking its voltage, but it also will shut the pack down if it begins to over heat! Thermal runaway is a huge concern for boaters who are contemplating converting their batteries to Lithium.
The prospect of fitting a huge fire hazard that will continue to burn even underwater is a tough pill to swallow! The BMS has a temperature probe which must be attached (with Kapton tape) to the side of a cell. The BMS will also monitor the temperature of the cell it is attached to and if that cell begins to heat up, it will shut the pack down long before the battery can ignite into an inextinguishable flame.
I like the BMS from Overkill Solar, as it allows you to log into the BMS through a BlueTooth module and set the parameters of the battery manually. I have mine set very conservatively!
Before any parameters get too far out of whack, the BMS shuts down the battery pack and prevents it from getting into dangerous levels.
The BMS also works to balance out the cells in the pack so that if one of the cells is significantly higher voltage, it will balance the voltages and bring it down to safe levels while so that the rest of the cells can continue to charge as a whole.
We have used this BMS for a few months now and motored on the ICW with it powering our electric motor without issue. The solar panels charge up the batteries and this cuts them off when they get full as well as cuts the packs offline when they run empty during long motoring adventures up the ICW.
The best part so far about the lithium batteries for electric propulsion is the fact that you will have full power all the way down to 0% charge when the BMS takes the pack offline. With AGM batteries, the voltage gets low as the charge runs out and the motor just doesn’t have the same oomph that it had when the batteries were fully charged. These lithium batteries let you have full thrust at any state of charge, all the way from 100% down to 0%. The only problem with this wonderful feature is you have to keep an eye on the battery charge level, as you will be motoring along for hours and think everything is fine because the boat isn’t slowing down until the motor just cuts off because the BMS had to disconnect the pack due to one of the cells running out of power. It really is awesome!

If you are contemplating Lithium batteries and considering making them yourself, the BMS shouldn’t be a huge concern. It is just a box with a bunch of wires that need to be connected in a specific order. We managed to make our own batteries in two weeks inside our salon with very simple tools. This saved us thousands of dollars and has afforded us the ability to motor farther and faster on our electric motor.
