
When I bought Wisdom, she had a pressurized alcohol stove and oven in the galley. This is the equivalent to having a time bomb with no visible countdown. At some point, you know the thing will blow up in flames but you don't know when.

To alleviate my concern about burning Wisdom to the waterline, I quickly removed the stove and oven and replaced it with a simple alcohol and electric stove top. The space underneath the stove, where the oven used to be, is now available to be used as storage! More storage is always welcome, but there is one caveat: no fiddle.
When the boat heels over while sailing, anything in this space is liable to slide out of the storage area and onto the cabin sole. The space is lined with stainless steel, so the surface is pretty slick! I found myself using non-skid pads under particular items that lived in this space, such as the toaster, while other items were simply relocated to a safer place before sailing.
This quickly grew old until I found that the woven basket from IKEA didn't seem to slide too easily on the stainless steel. This opened up a whole new world of storage, as I could put galley and grilling items in this basket; this kept them close to where they were needed without the risk of them flying across the cabin when I heeled over.
For four years, life was simple. The toaster and the basket lived under the stove where the oven used to be. The basket was not the most efficient use of space for this area, and it also limited the size of what could be kept under there. Maddie got tired of us storing the pots and pans in the salon, when we had all that space available under the stove. She asked me to make a way to store these items below the stove where they are needed and to free up storage space in the salon. Her wish is my command!

I screwed small padeyes to the sides of the box, through the stainless steel plate (drilling through stainless steel is a real pain) and then attached an upper and lower section of rope. One end of the rope was spliced into an eye splice while the other end had a simple back splice. The line is tied to a bronze pelican hook, affording us the ability to open the netting in a hurry without much fuss yet still being able to adjust the tension of the net to fit the contents that we cram into it.


With the upper and lower lines set in place, it was time to begin making the net. I tied long lengths of line to the upper line with double constrictor knots. These knots will hold the lines in place without slipping while allowing me to ability to easily position them wherever I desire.
The lines were then hanging from the upper line, looking like a giant mess! I took the lines and tied zeppelin bend knots in them, forming the netting. Zeppelin bend knots are wonderful bend knots because the tails will exit the knot 90 degrees from where they entered. This means that when you tie the knot, the result will be an X. Having many X's set close together will form the net that will keep all our stored items in this area and not flying around the cabin.

A net is technically formed, though it looks like a real mess with all the tails hanging around. Maddie poked her head in to see how it was coming along at this point and she asked: "Can you make it look nice?" It did look like a mess at this point. Making quick work with a rigging knife, it quickly transformed into this:

Now that the net was in place and installed, it was time to get rid of that basket and stuff all our pots and pans into this space.
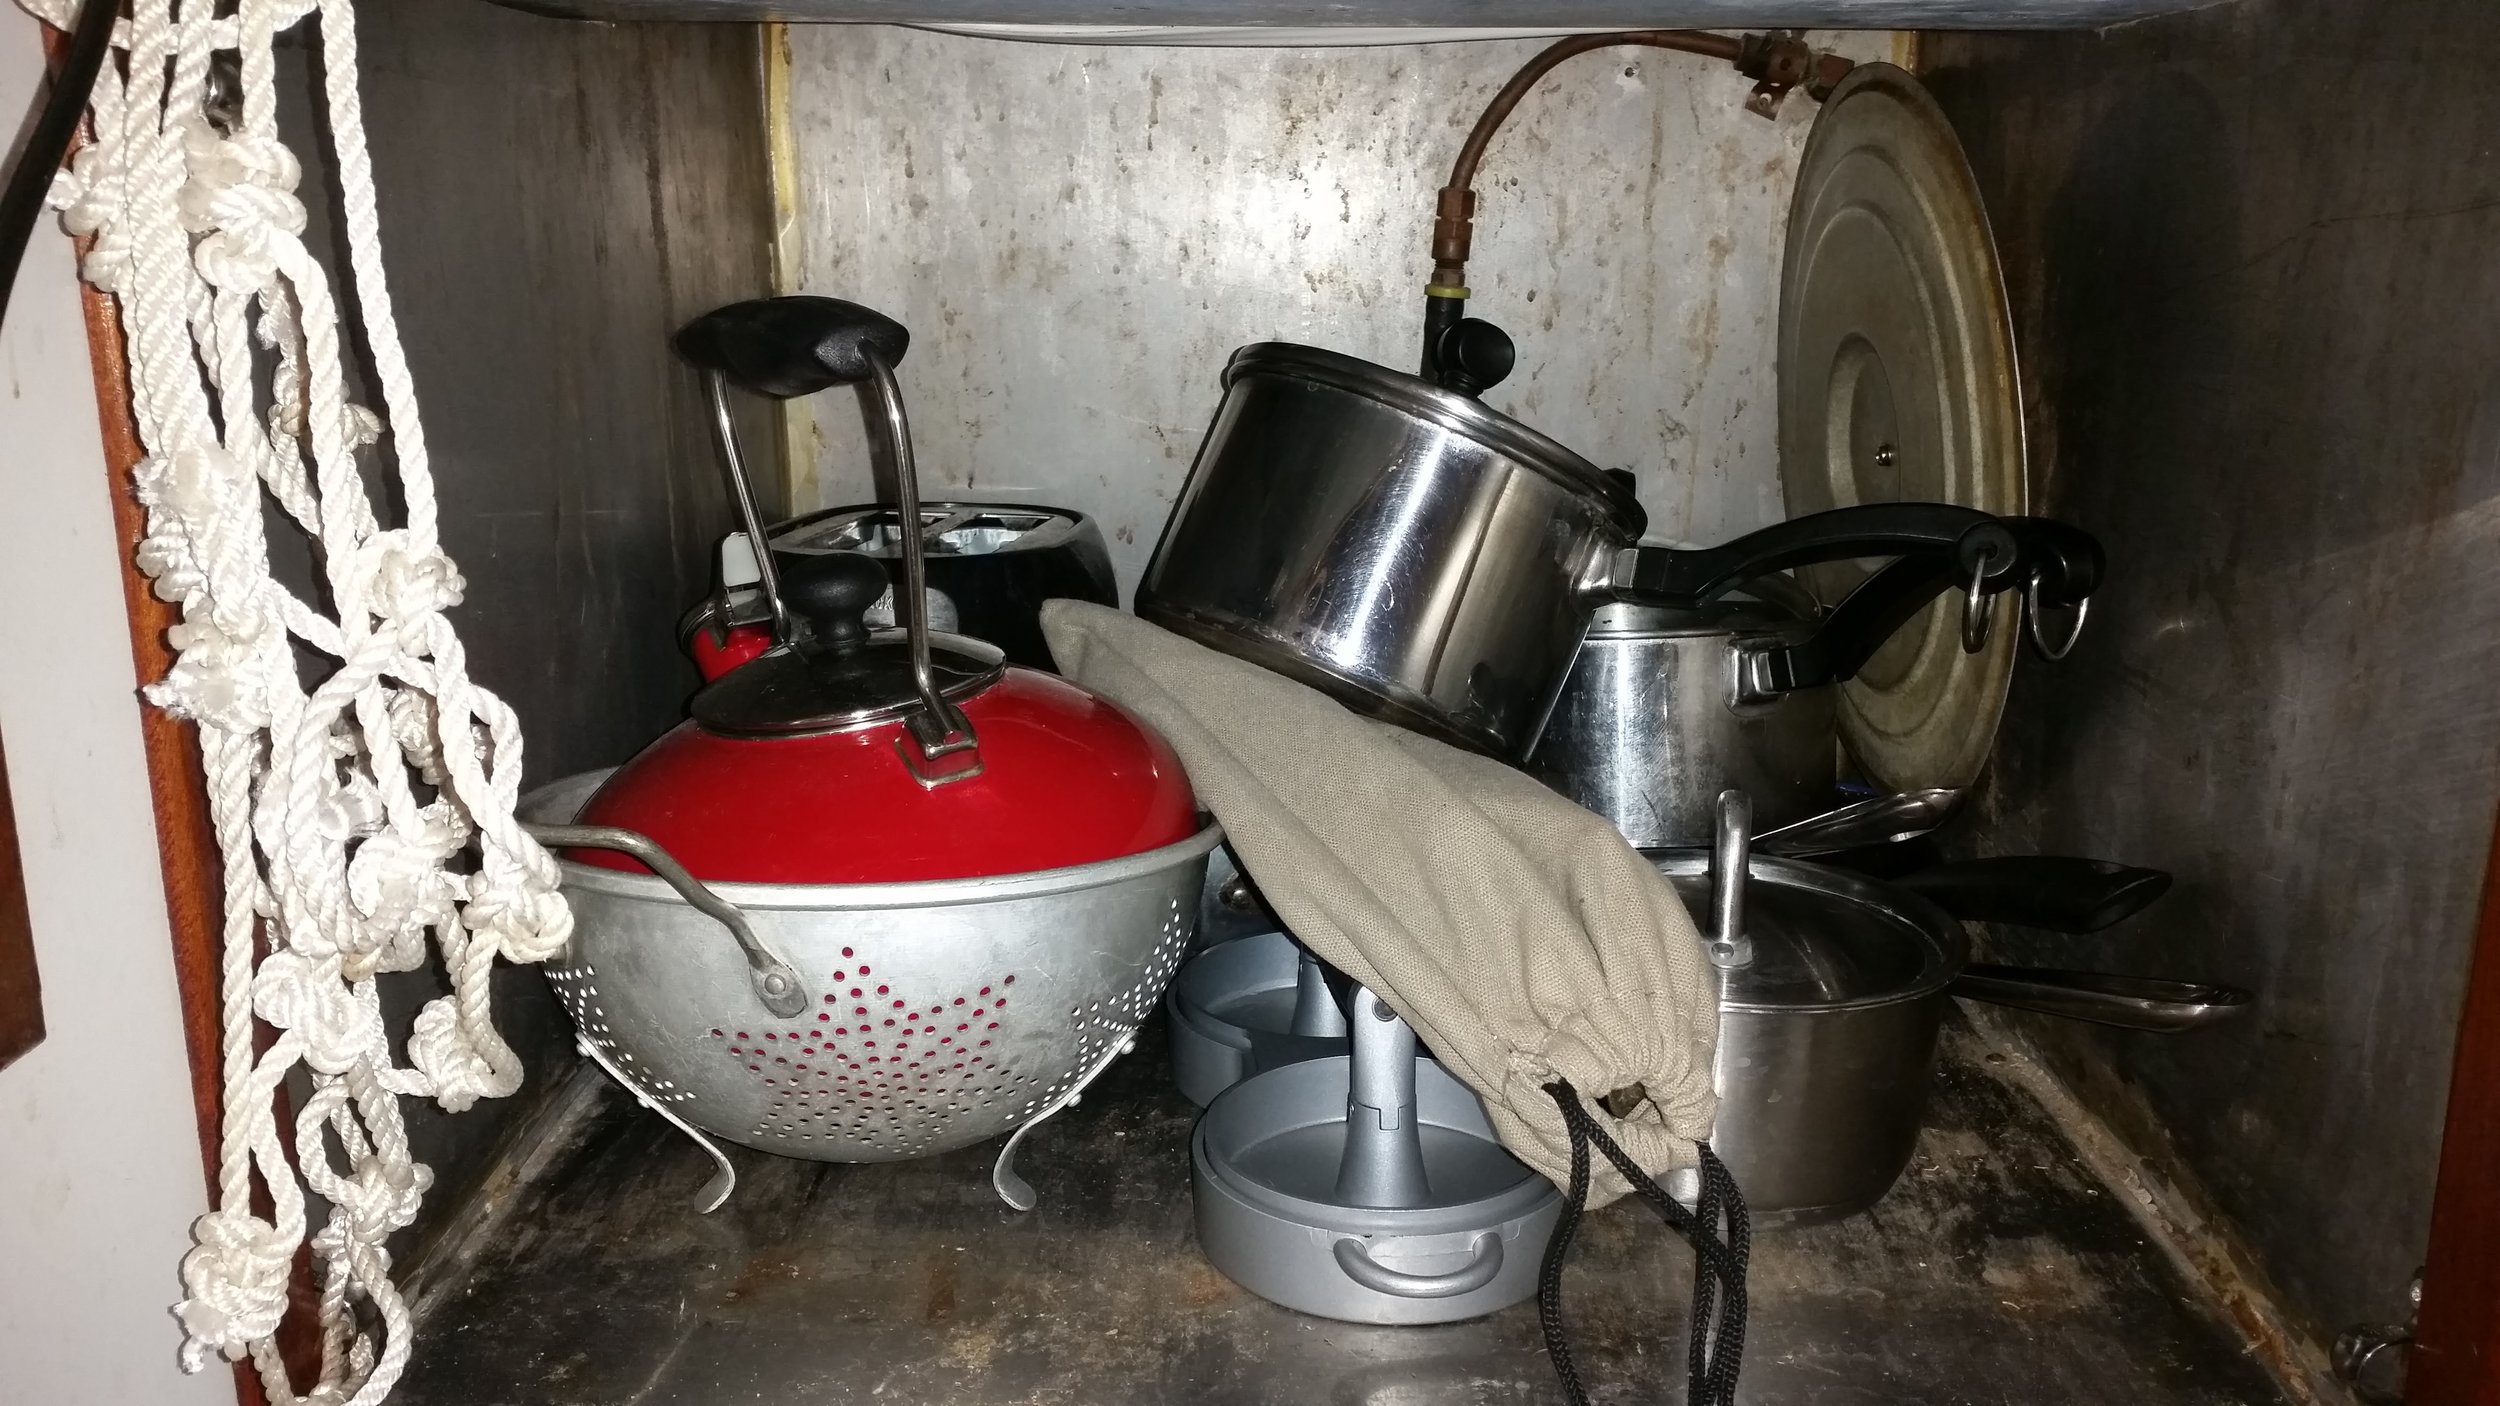

When we want to pull out a pot, all we need to do is unclip the net and retrieve what we need. Since it is all open and stainless steel, we also have to ability to store pots and pans after washing them before they dry completely without fear of wood rotting inside the cabinetry.
Like anything on a boat, it is all a work in progress. It will be interesting how this space beneath the stove evolves in its use as we sail and cruise.
