
Connecting two pieces of dyneema is a simple task, it simply requires a lot of material to bury and a properly executed taper. The end to end splice consists of a Mobious Brummel splice with tapered buries.
When I re-rigged Wisdom with synthetic standing rigging, I left the storm stays (inner forestay and check stays) in metal. We were going out into the Atlantic and I had no idea if the synthetic standing rigging with deadeyes would actually work. All the people I spoke to at the time about converting over to synthetics told me that it couldn't be done on a boat this size. I came up with this method, but it was till untested. If we came upon a severe storm, I wanted to know that the mast would stay up! Now that I know it works, I'm replacing the check stays with dyneema.
I originally designed an intricate cascading backstay adjuster which turned out to be unnecessary since it could be easily pulled by hand. Now I made 4 pieces for the backstay cascade out of STS-HSR which I never used. They ended up residing as expensive coils in a locker, waiting for the day they would become useful again. Since the checkstays are not under much tension, I decided that I would splice the scrap pieces together to make a piece that is long enough to reach from deadeye to mast tang.
I thought about ditching these pieces of dyneema, but they cost around $6 per foot or $240 for each stay.So I decided to save some money and use these shorter cut pieces by splicing them together to achieve the length I need.
Since these are going to be stays, I decided to go overboard with the buried sections. 9mm Dyneema needs (9mm x 72) 648mm or 25.5 inches of bury. This measurement usually includes the tapered end. I decided to make 25.5 inches of bury before the 25.5 inches of tapered section. This results in a buried section that is 51 inches long! When done on each side of the splice, this makes 102 inches of buried material.

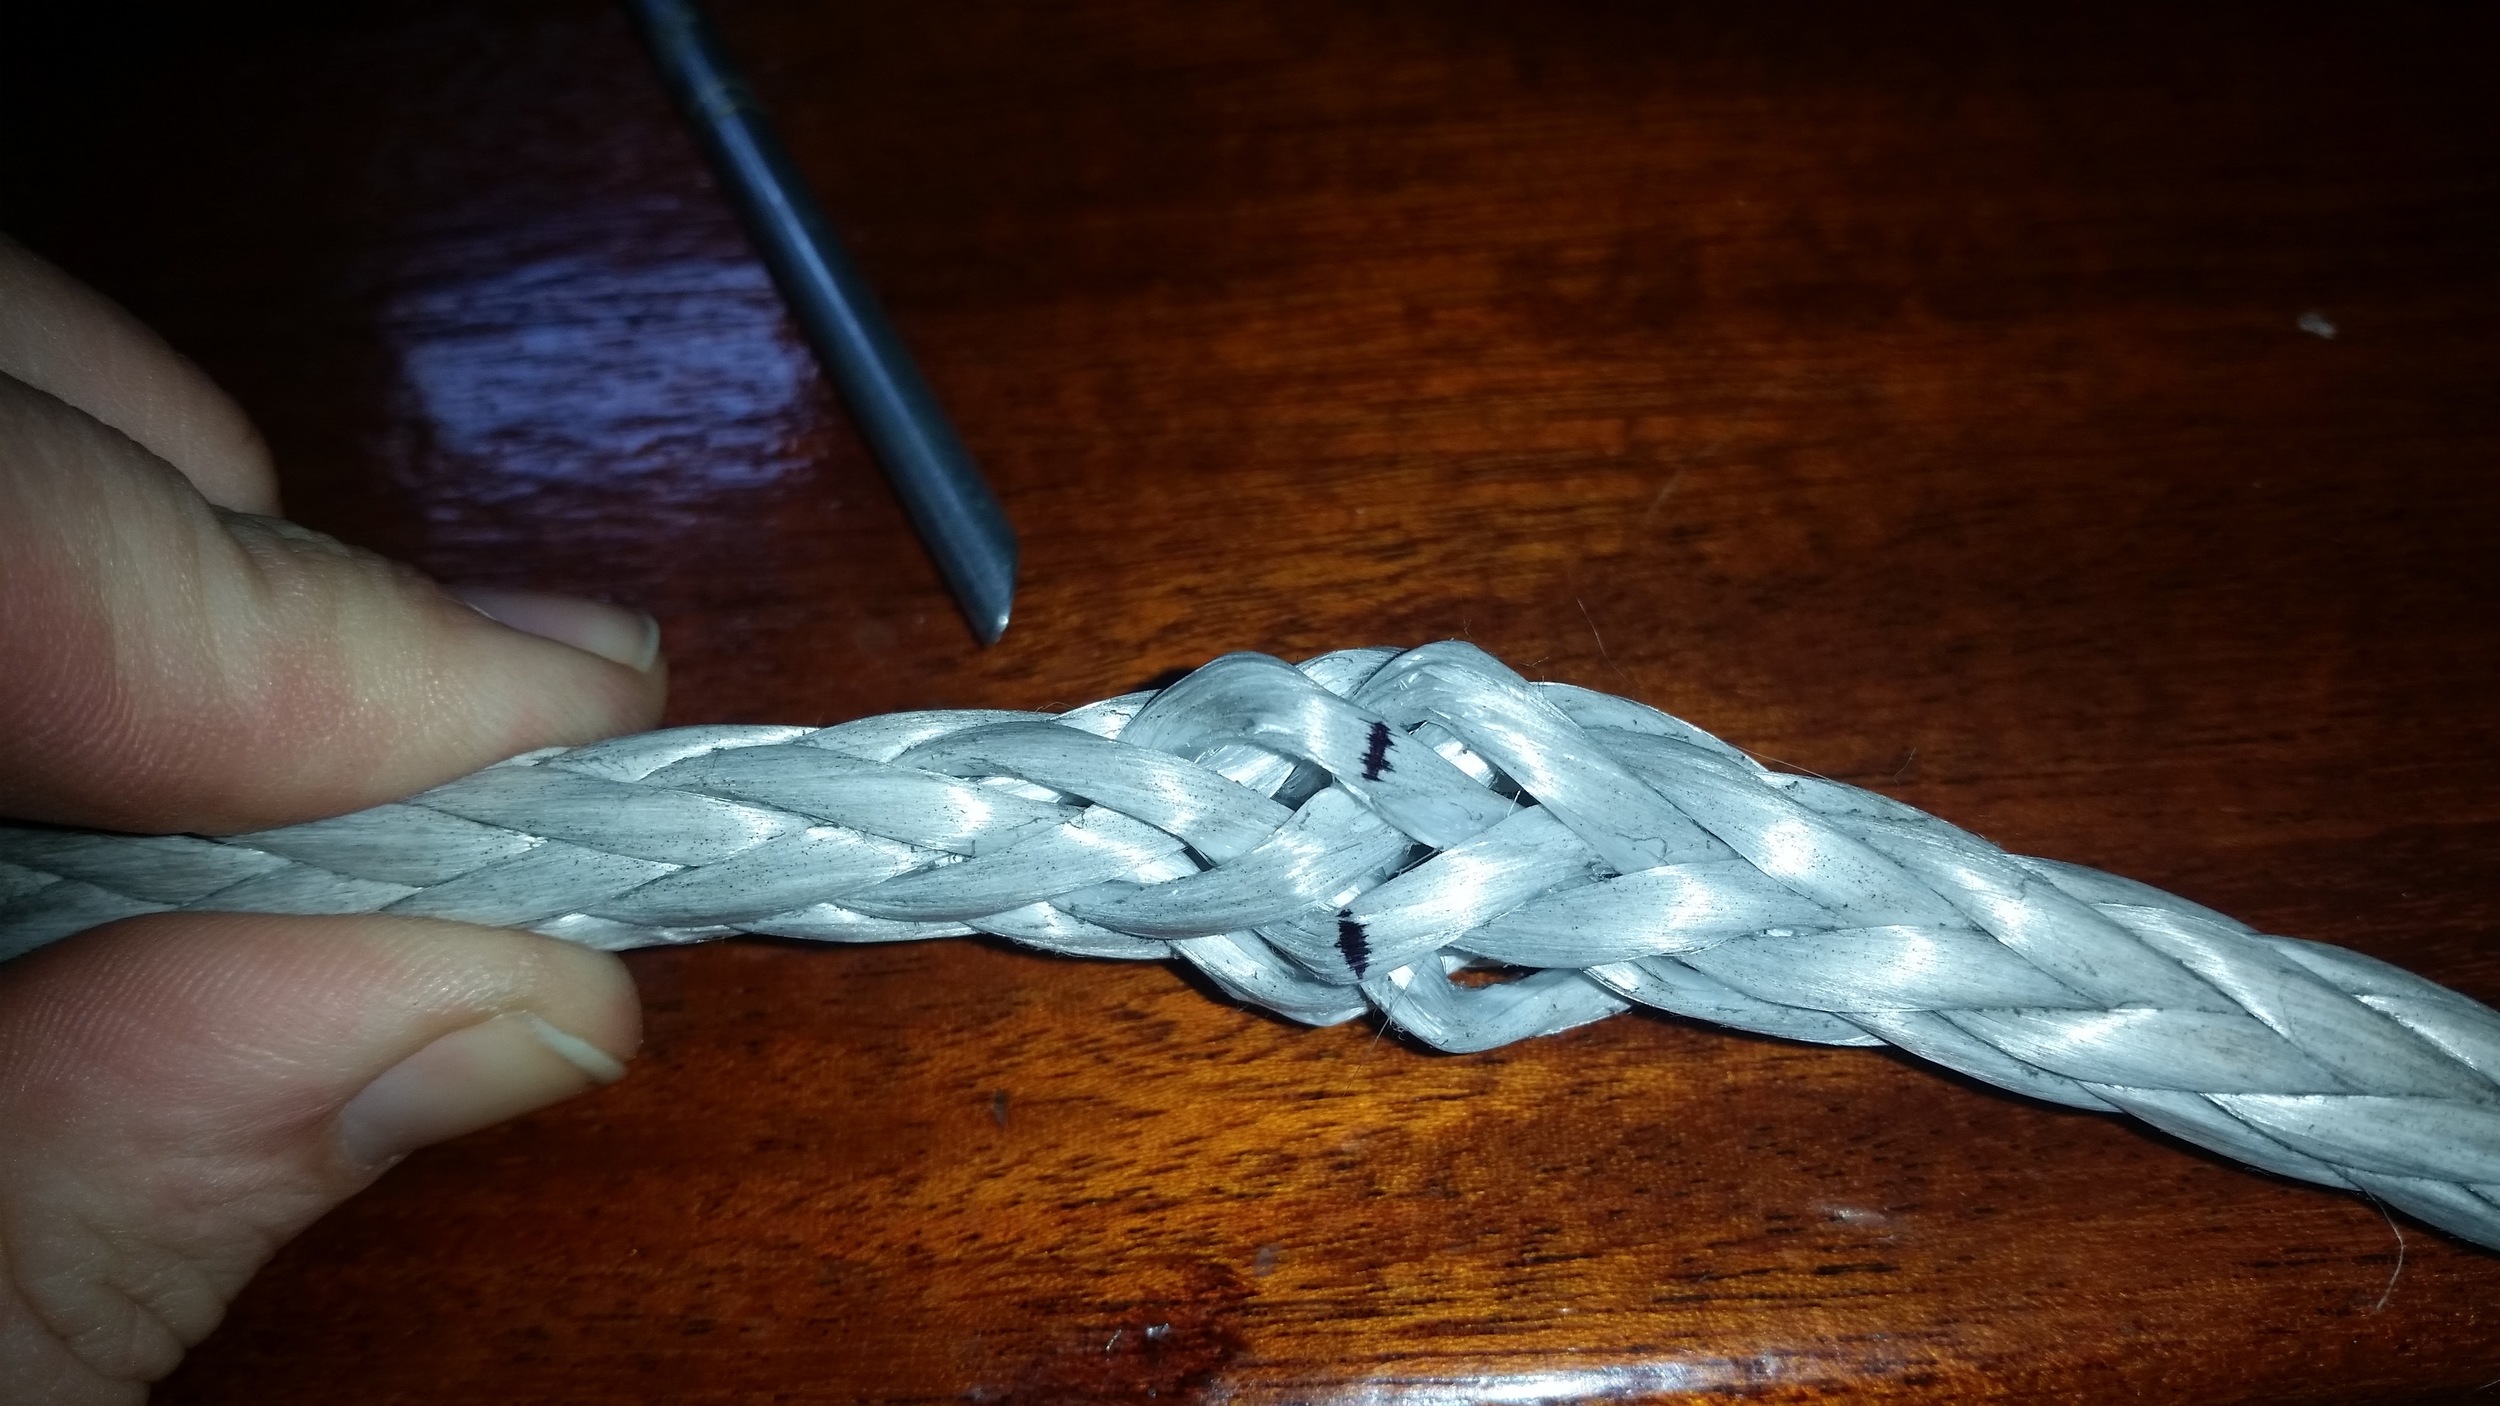
To begin, simply measure the tails and mark the strands with a marker that way they are easy to find later. I like to mark both strands on the V that I want to pass through. If you only mark one strand, you wont be sure if you are supposed to enter or exit above or below the neighboring weave. This might seem like an insignificant concern, but as a dentist and a perfectionist, being on the wrong side of the weave can alter the measurements by several millimeters.
I marked the section where the splice will cross, and then again for where the taper is to begin. This leads to a rather long tail, as you can see.
Then scruch the line together and pass the first line through the opening.

I like to secure this crossing with a pin that way the lines don't move while I'm working.
Now, repeat the process on the other line, creating a mobious brummel splice.


If you are unsure if you properly executed the splice, push back on the tails, if the splice opens up, you did it right! If it won't open up, then you simply passed one line through the other line twice, creating a very weak splice called the "Long Bury Splice".

Now, pull the tail back and insert the fid into the weave to open passage for the tail that will now be buried inside the other line, securing the splice.
Pull the tail into the weave a sufficient distance to bury the whole tail and now pop it out of the weave.


Pull the tail out until the marks you made to begin the taper show and push a pin through with a dirty paw (heat set dyneema is hard and offers a lot of resistance to a passing needle).

Now begin the tapering, this is purely mathematical. Count the number of strand rows from the mark to the end and divide by 12. This will tell you how many strands to skip between tapers. In my case, I trim every 5th strand, resulting in a slow and even taper.
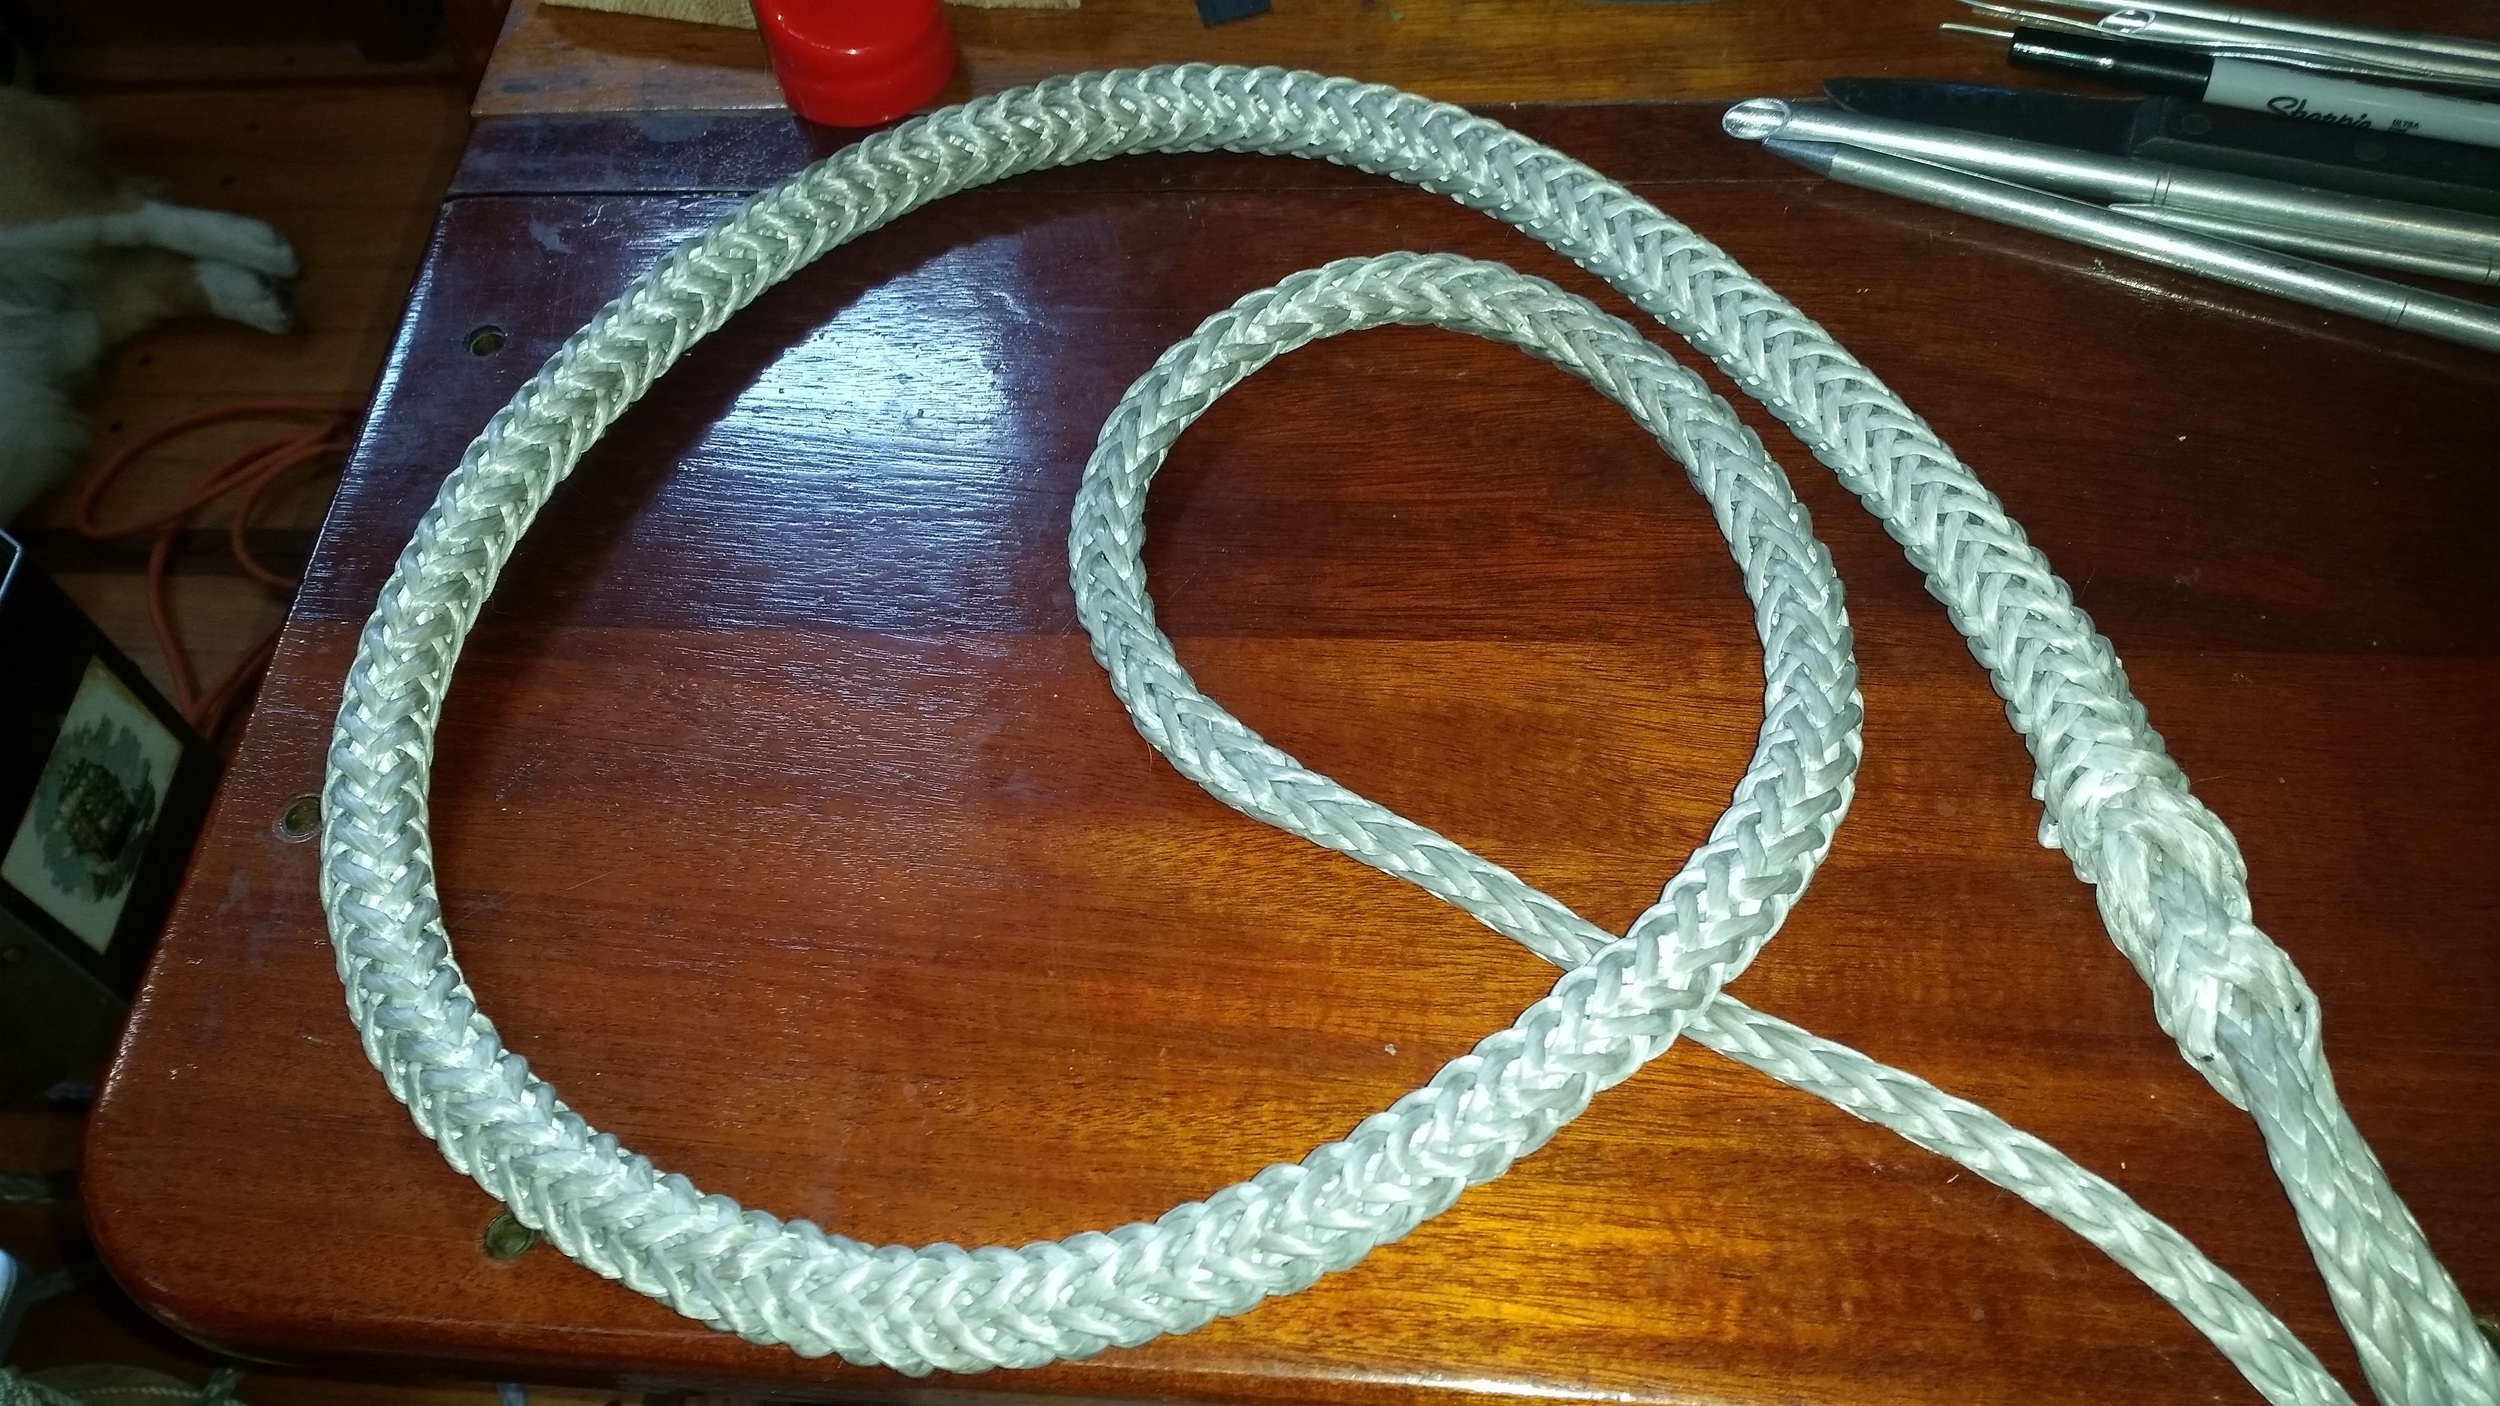
Now work the tapered end back into the rope and be proud of yourself! You just completed one side of an end to end splice! Repeat the same process on the other side and you will have yourself a very secure splice!
I didn't put in a locking stitch since I went overboard with the length of the tails and will be keeping a close eye on the splice as I take the constructional stretch out of the line. If you want to, a locking stitch will offer more security to the splice.
