
The ridge beam is a massive piece of douglas fir weighing 130 pounds and measuring 18 feet long. I am not a home builder, so I designed this tiny house using boat building rules. If the house were flipped over, this beam would become the keel and it is sized accordingly. My rational is when heavy snow piles up on the roof, this ridge beam is going to have to bear the weight of it all and must be built to withstand the hypothetical task.
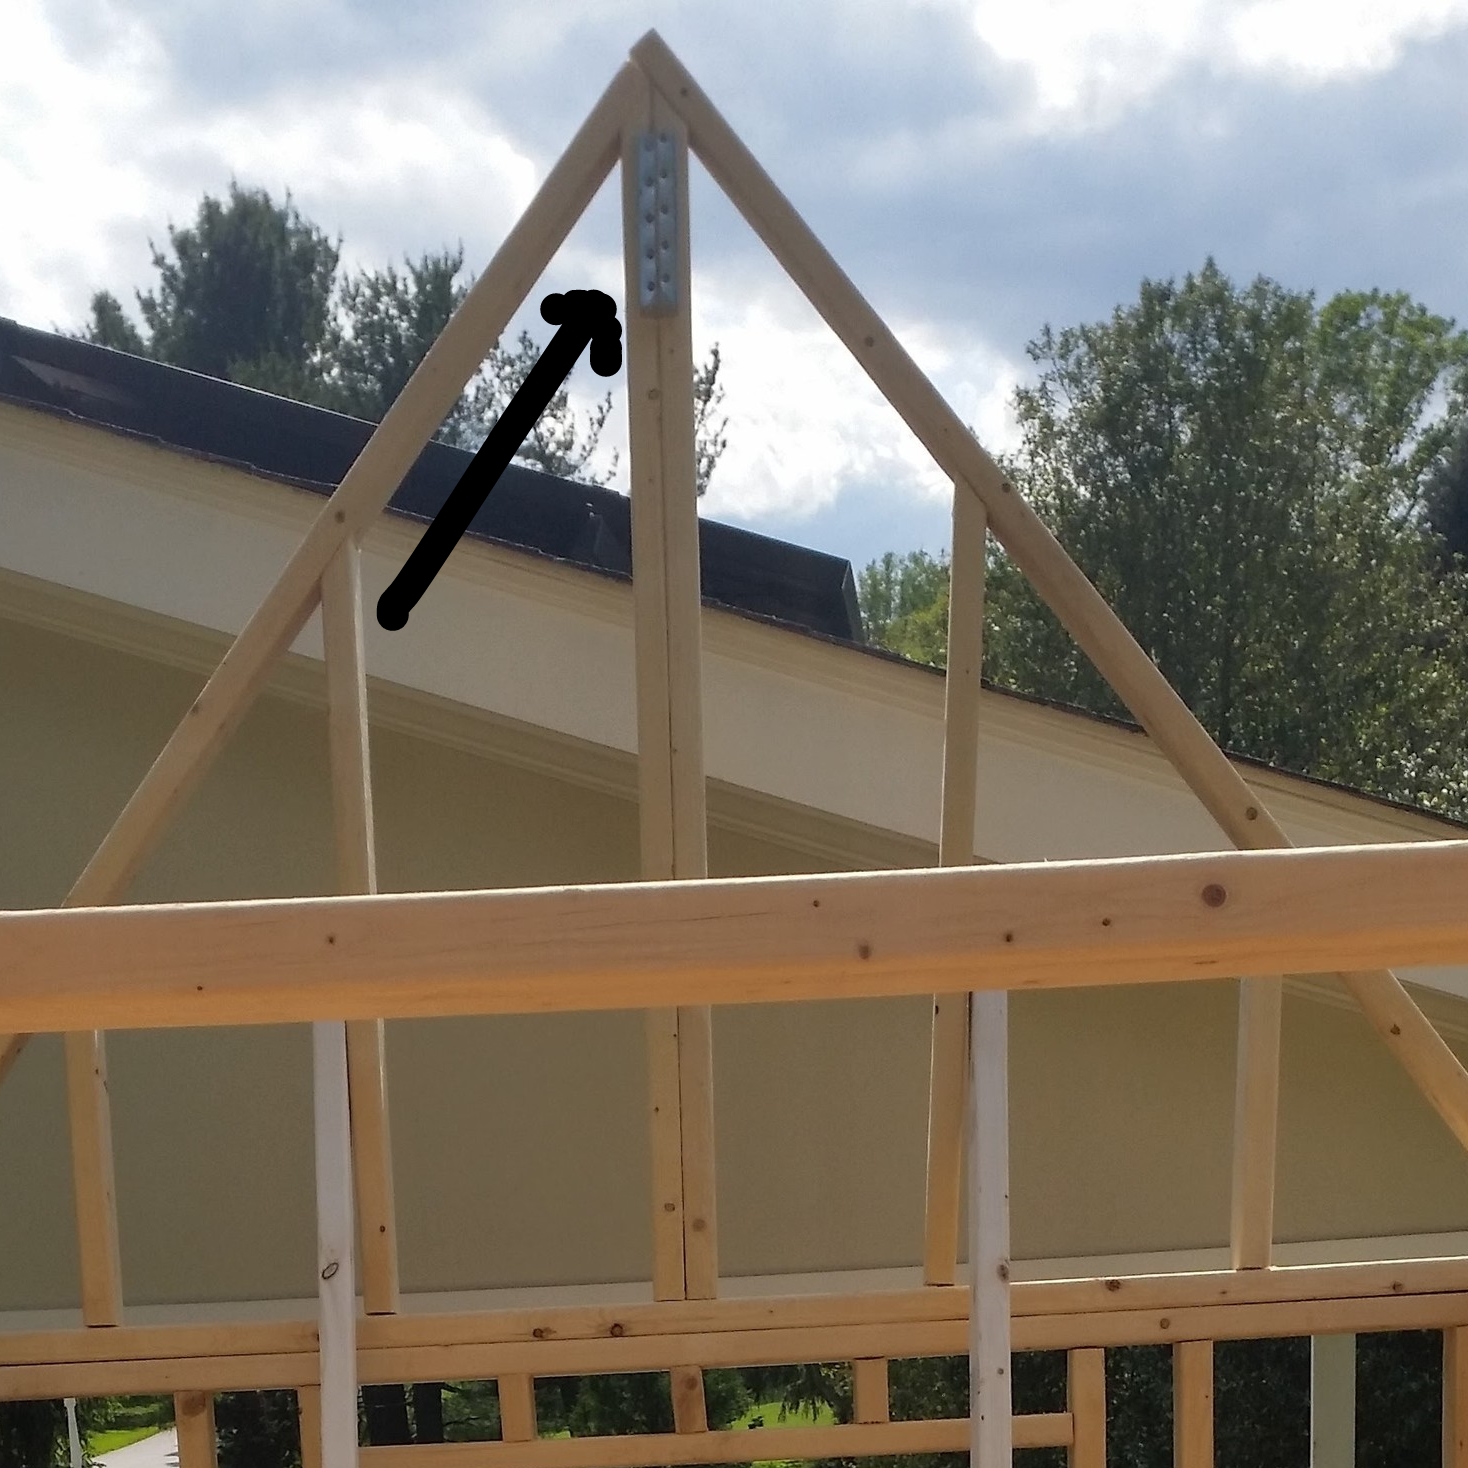
The ridge beam is going to rest in small metal channels that are set at the top of the trusses. These metal strong-ties will securely connect the end of the beam to the truss.

The only problem with our plan is we had to raise 130 pounds of 18 foot ridge beam 13 feet into the air. Rigging to the rescue!
The beam was carried into the tiny house via the back window on its side. It was fed into the house at an angle with the forward end passing over a temporary support to the frame walls. Additional 2x4s were placed across the frames to help support the beam. This gave us a very strong point to rest the beam on and if the beam fell, it would only go as far as the wood cross members.
Strong screws were used as blocks to guide a rope to make a pulley system. Two screws were set into the truss, one on each side of the peak, and a third screw was set on the underside of the ridge beam to keep the rope from slipping off.

A rope was securely tied to the trailer to provide an anchor point, over the truss, under the beam, back over the truss, and out to my mom who was manning the ropes. This assembly was tied on both ends so that as we (my dad and I) heaved the beam up, my mom could take out the slack in the line. This provided enough purchase for her to comfortably hold the beam in the air while we rested. We would heave up a few inches, then she would take up the slack, and we would rest; then repeat!
The screws and wood edges offered too much resistance to pull the assembly up by the pulley system, so it was relegated to holding the beam up and taking out the slack. We raised the single width section first and positioned it into the strong tie at the top of the truss and a lashing was tied to the beam to keep it attached to the truss while we focused on the other end of the beam.

The very heavy end (with the scarf joint and butt blocks) needed to be raised above the truss and lowered into the strong-tie channel to fully secure it. This came down to brute force as there was no nice way to rig a pulley system to hoist the beam into the place. I bit the bullet and lifted the very heavy beam high up and carefully into position. Then the ends were secured with screws to hold it in place!


Due to the extreme weight aloft, we had set up wooden stays inside the structure which were tied together and to the floor. We were very happy these were in place when that weight loaded the walls. If we were building on a level surface, they might not be needed. Being how we are building on a slight incline, the whole structure is leaning back. All of that weight up there would easily rip the trusses out and send the upper structure crashing down!
Now that the ridge beam is installed, it's time to start adding the rafters.
