
Now that all the studs are cut, it is time to assemble the frames.

I began by laying the frames on the grass and nailing them together based on the design plans.

The plans originally started out as the "Moschata Rolling Bungalow" from The Small House Catalog. Then Maddie wanted to change everything around to the point where I decided to draft my own set of plans.


The assembly progressed quickly since all the wood was cut to length.

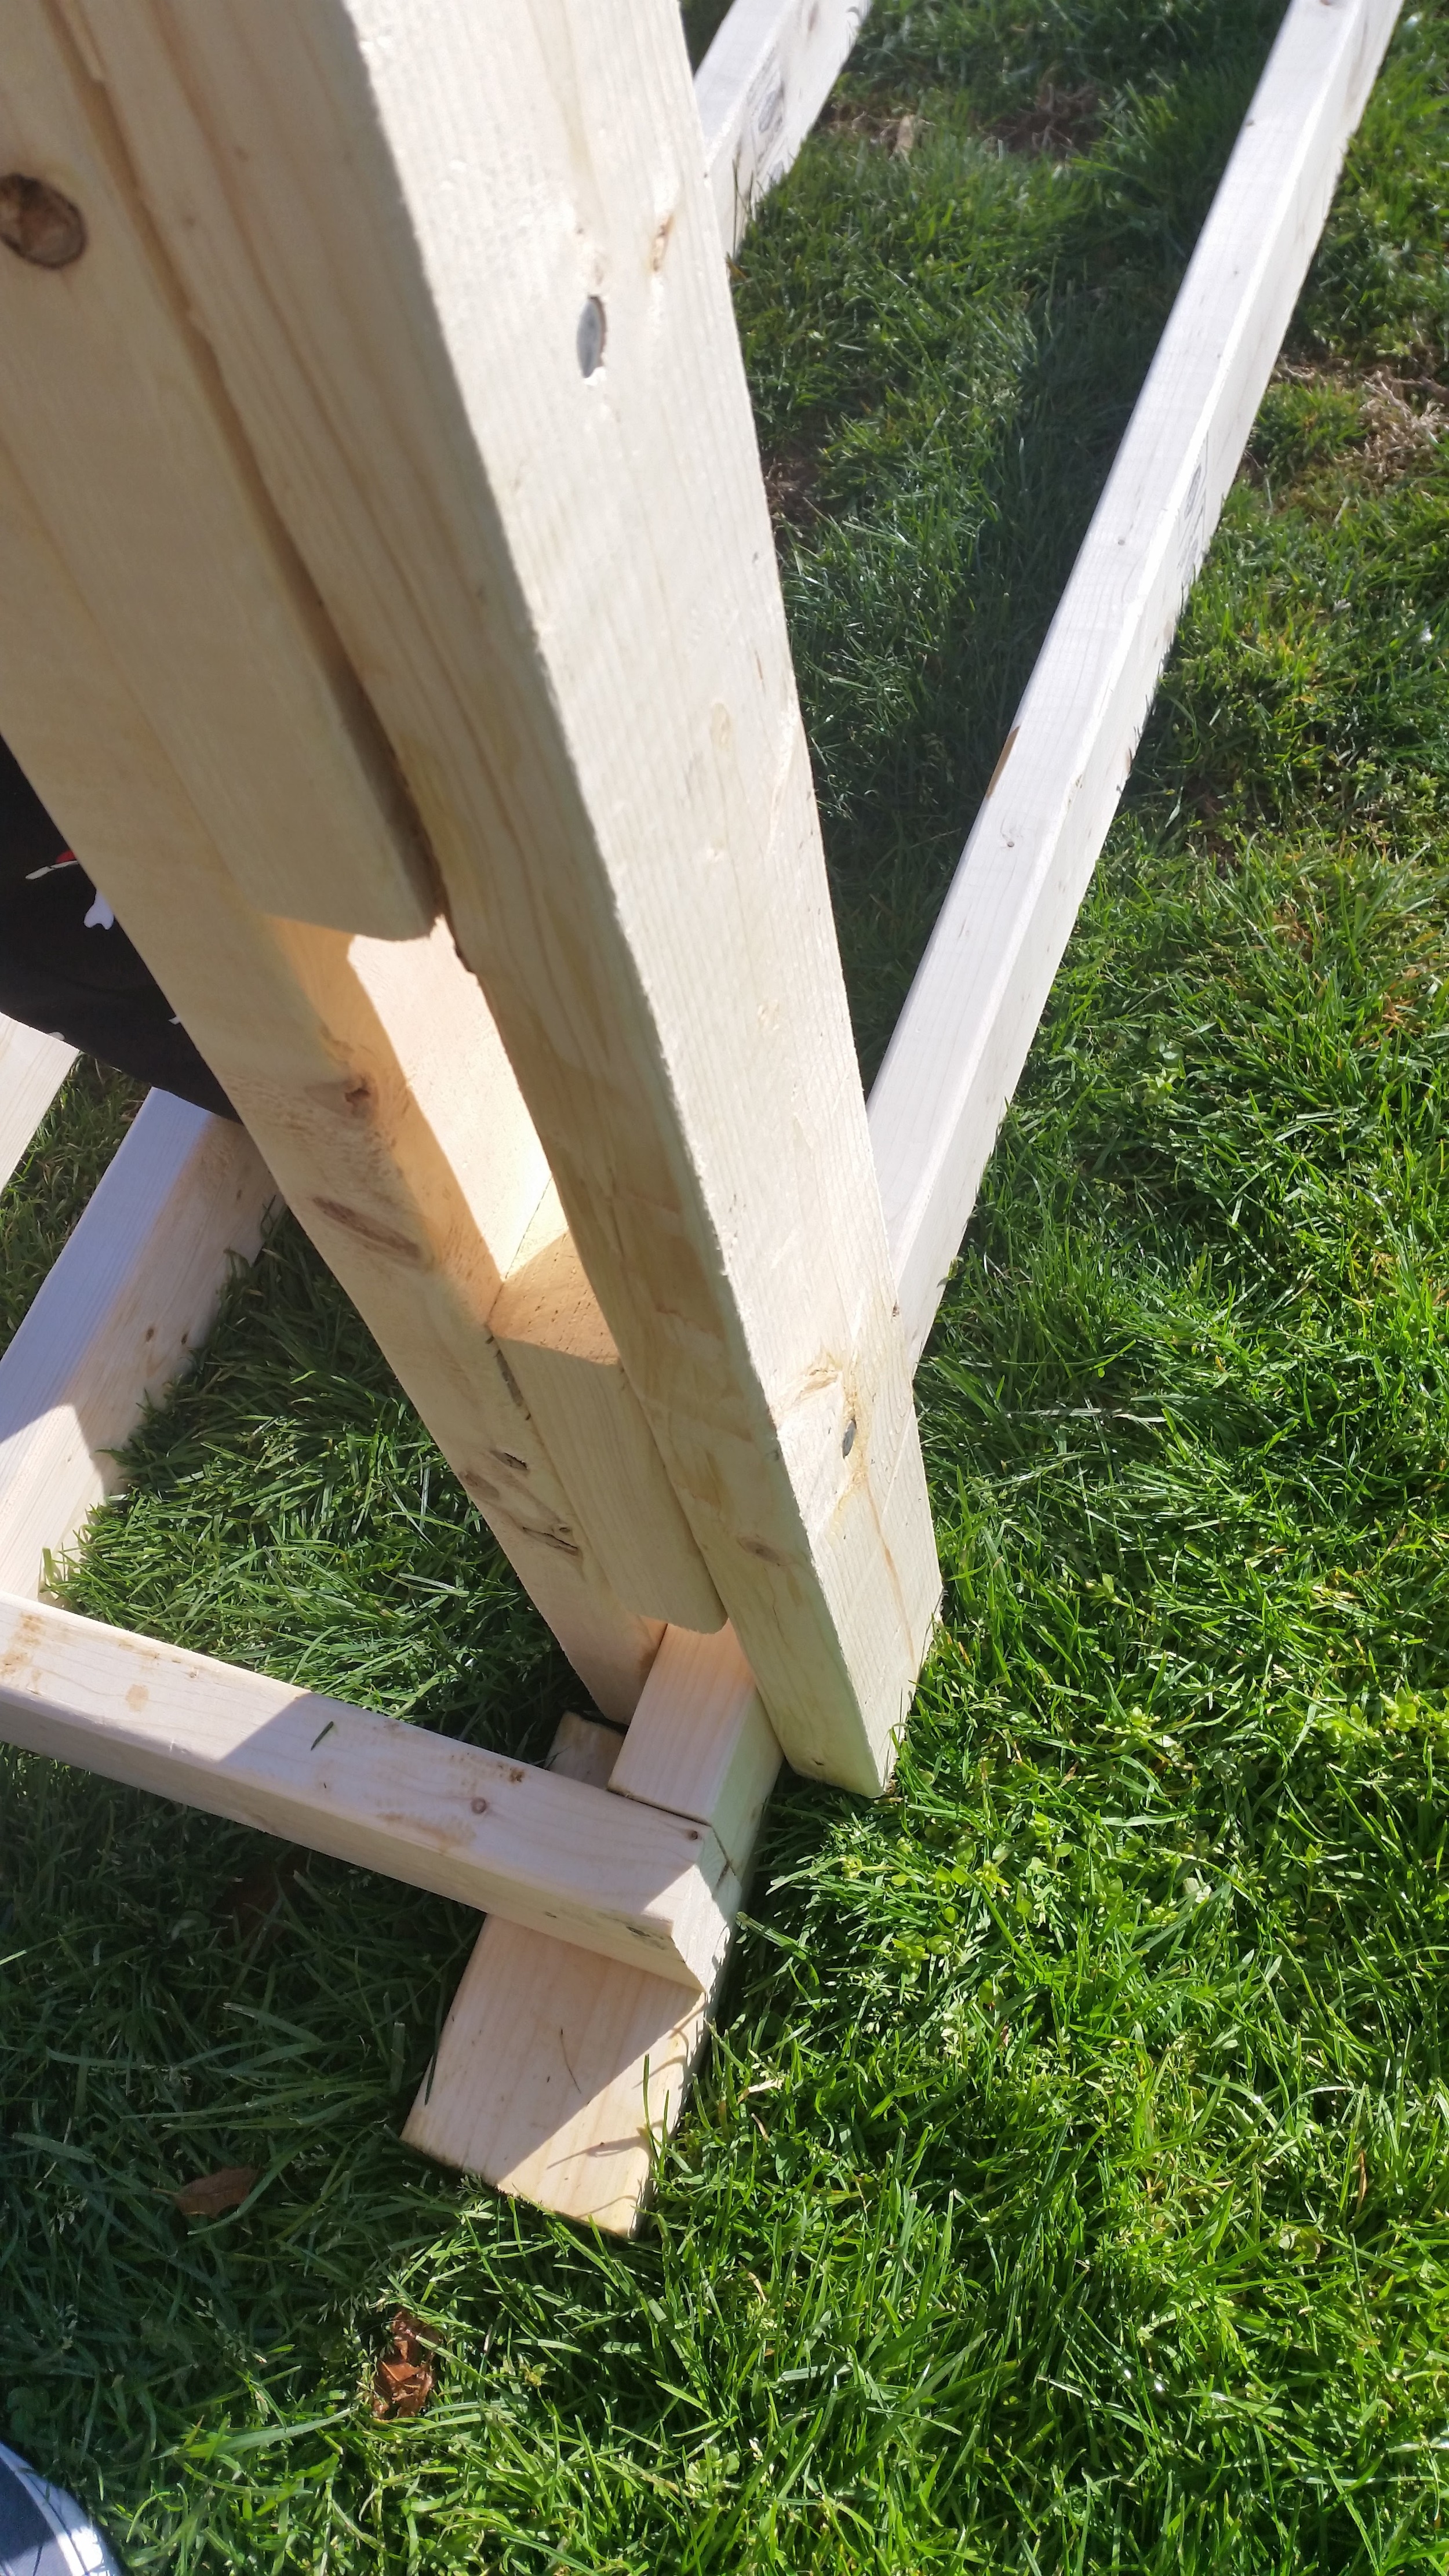
I did have to make a new tool to help twist the studs into position. Twist is a common form of warping that happens in lumber. The goal is to remove this twist before nailing the studs so that they remain straight in the wall. Simply twisting the board is too difficult, but with this board twister, it is almost effortless.
The tool simply slips over the twisted stud and provides a firm grasp on the lumber while offering a long lever arm to apply torque to the wood. With the board twisted into place, simply nail it to the correct location and release the tool. The nails will hold the board in place and in its appropriate orientation.
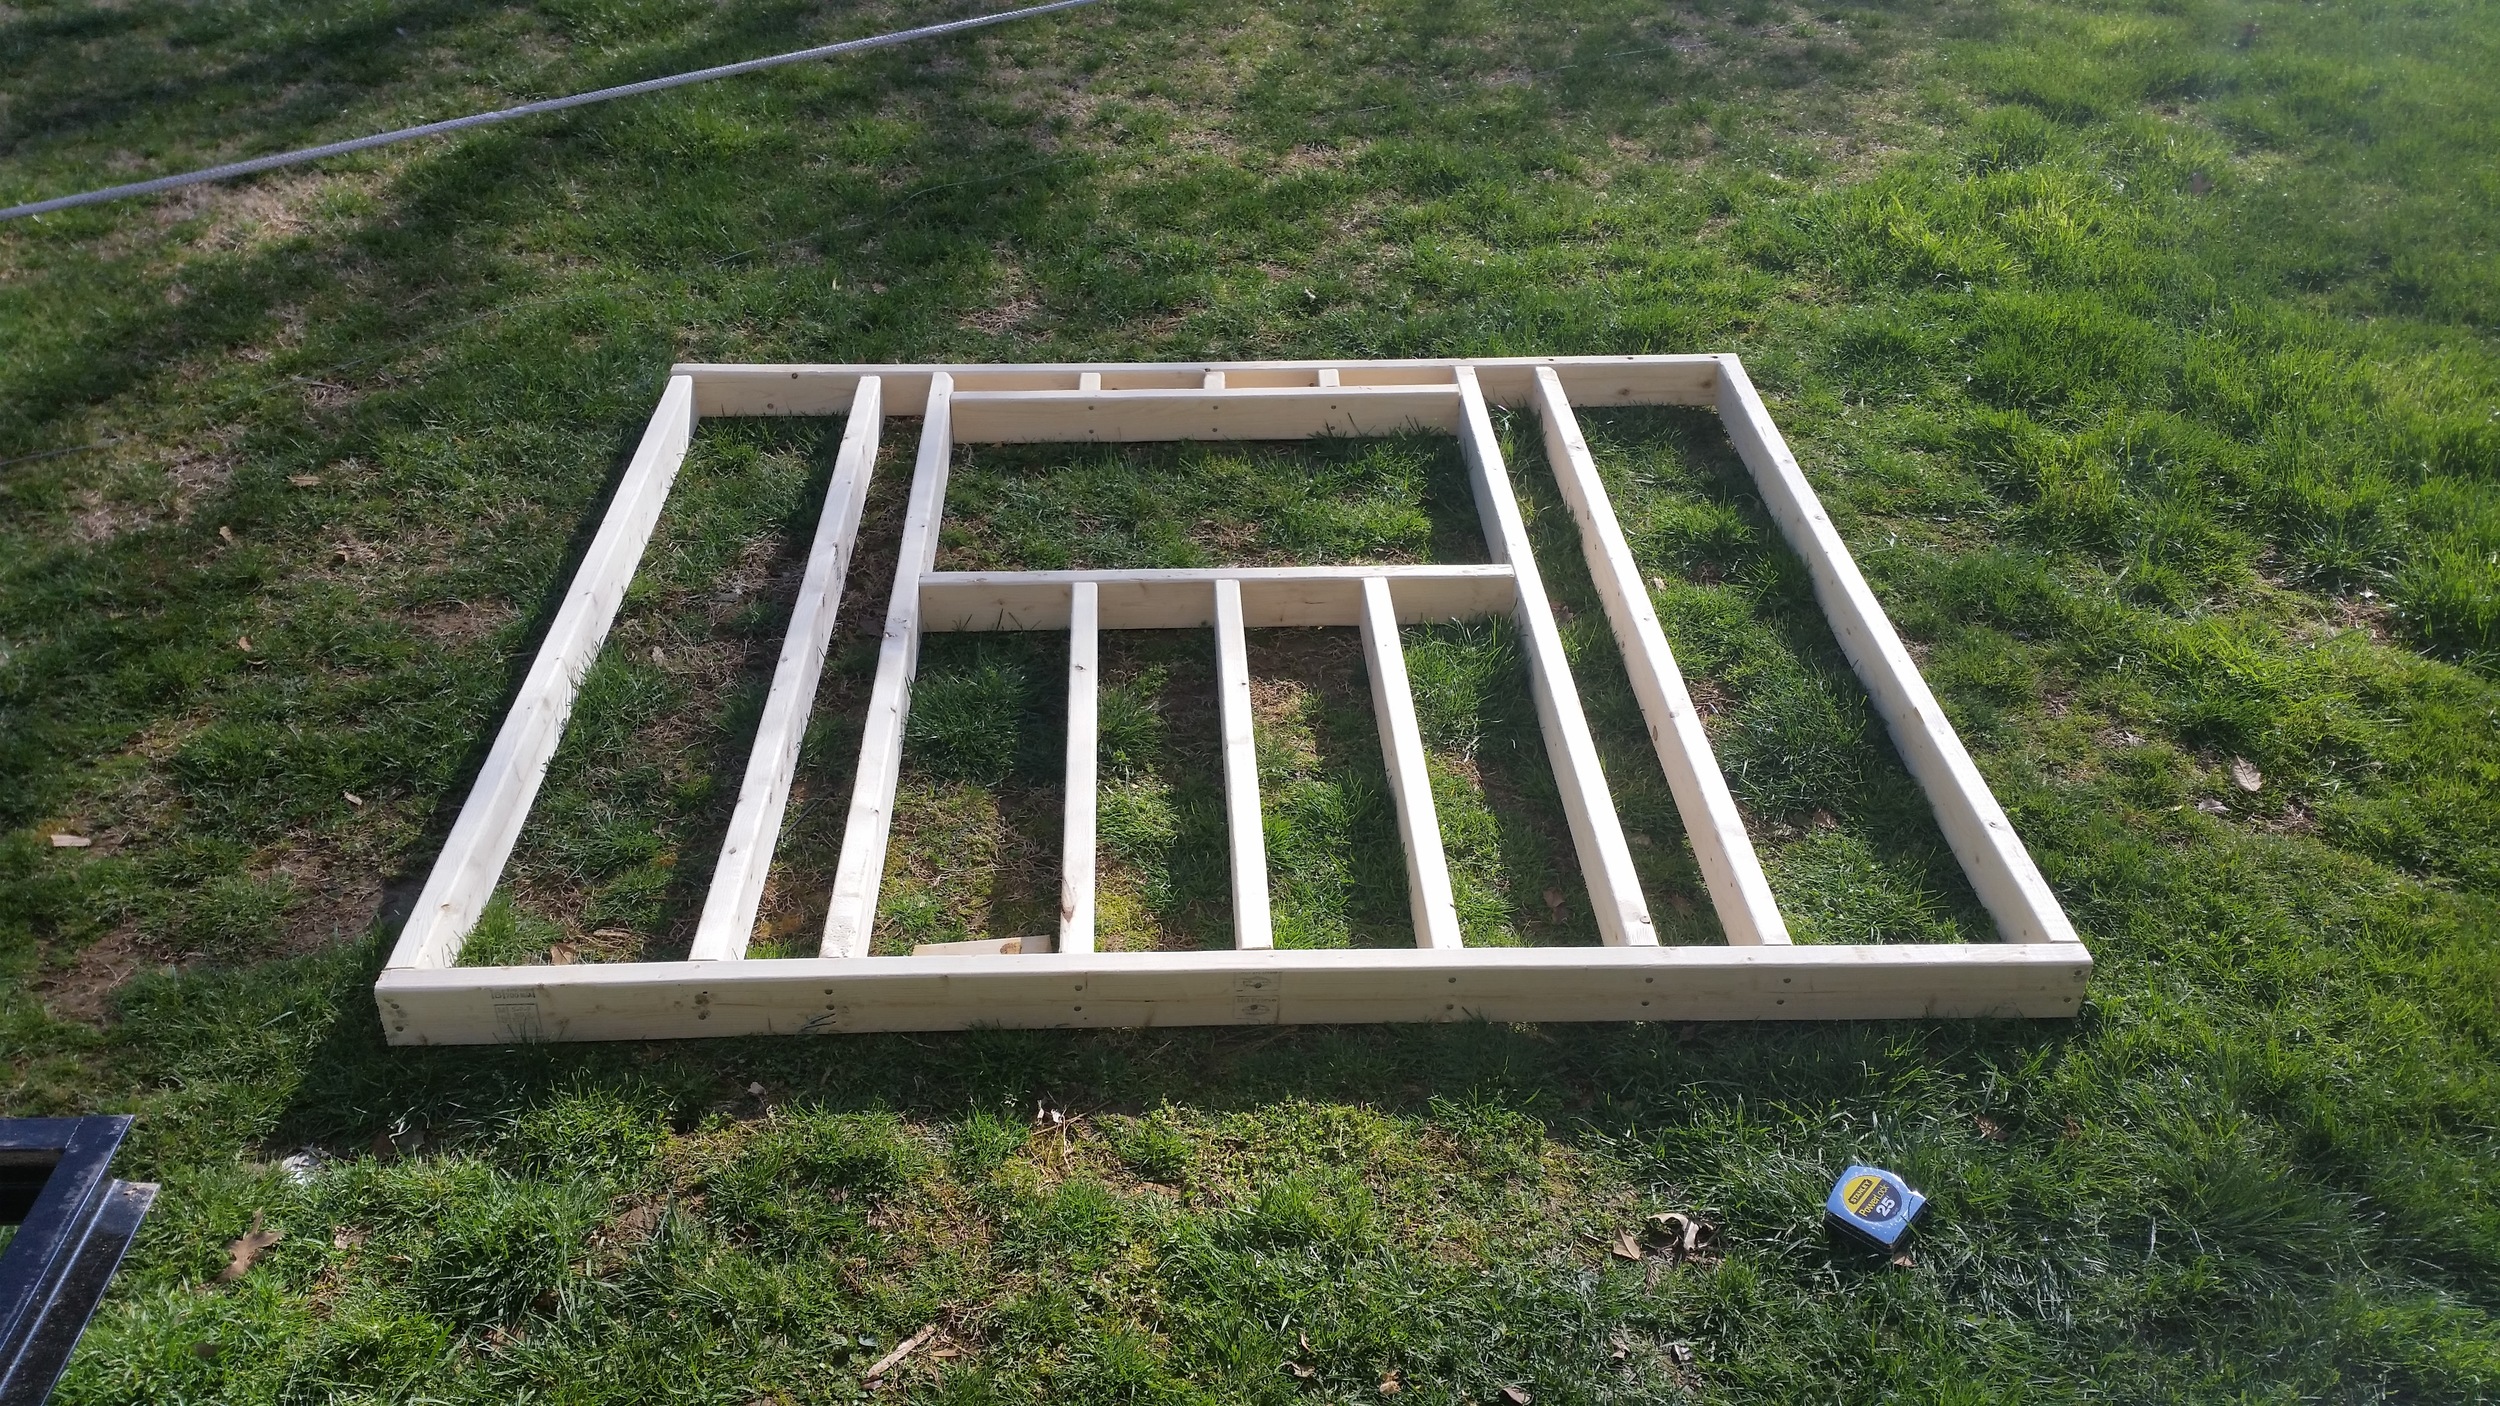


After a days work, all the frames were completed!
I coated the wood in tung oil to help protect them from moisture until the walls go up and the sheathing protects them from moisture issues.

I then moved the frames under the carport to store them out of the elements until we are ready to set them up.
