
The Monitor was never moved from its perfect position on the transom, instead, the pillow blocks were merely slid under the brackets to test fit and mark everything on the deck.
With both pillow blocks in position, I drilled a small pilot hole for the front bolt with a 12 inch long 1/4 inch drill bit. This very long yet narrow drill bit allowed me to drill through the clamp, pillow block, and deck in one throw. With holes in each part of the project, it was safe to remove and relocate everything, as the holes would allow for re-orientation at a later point.
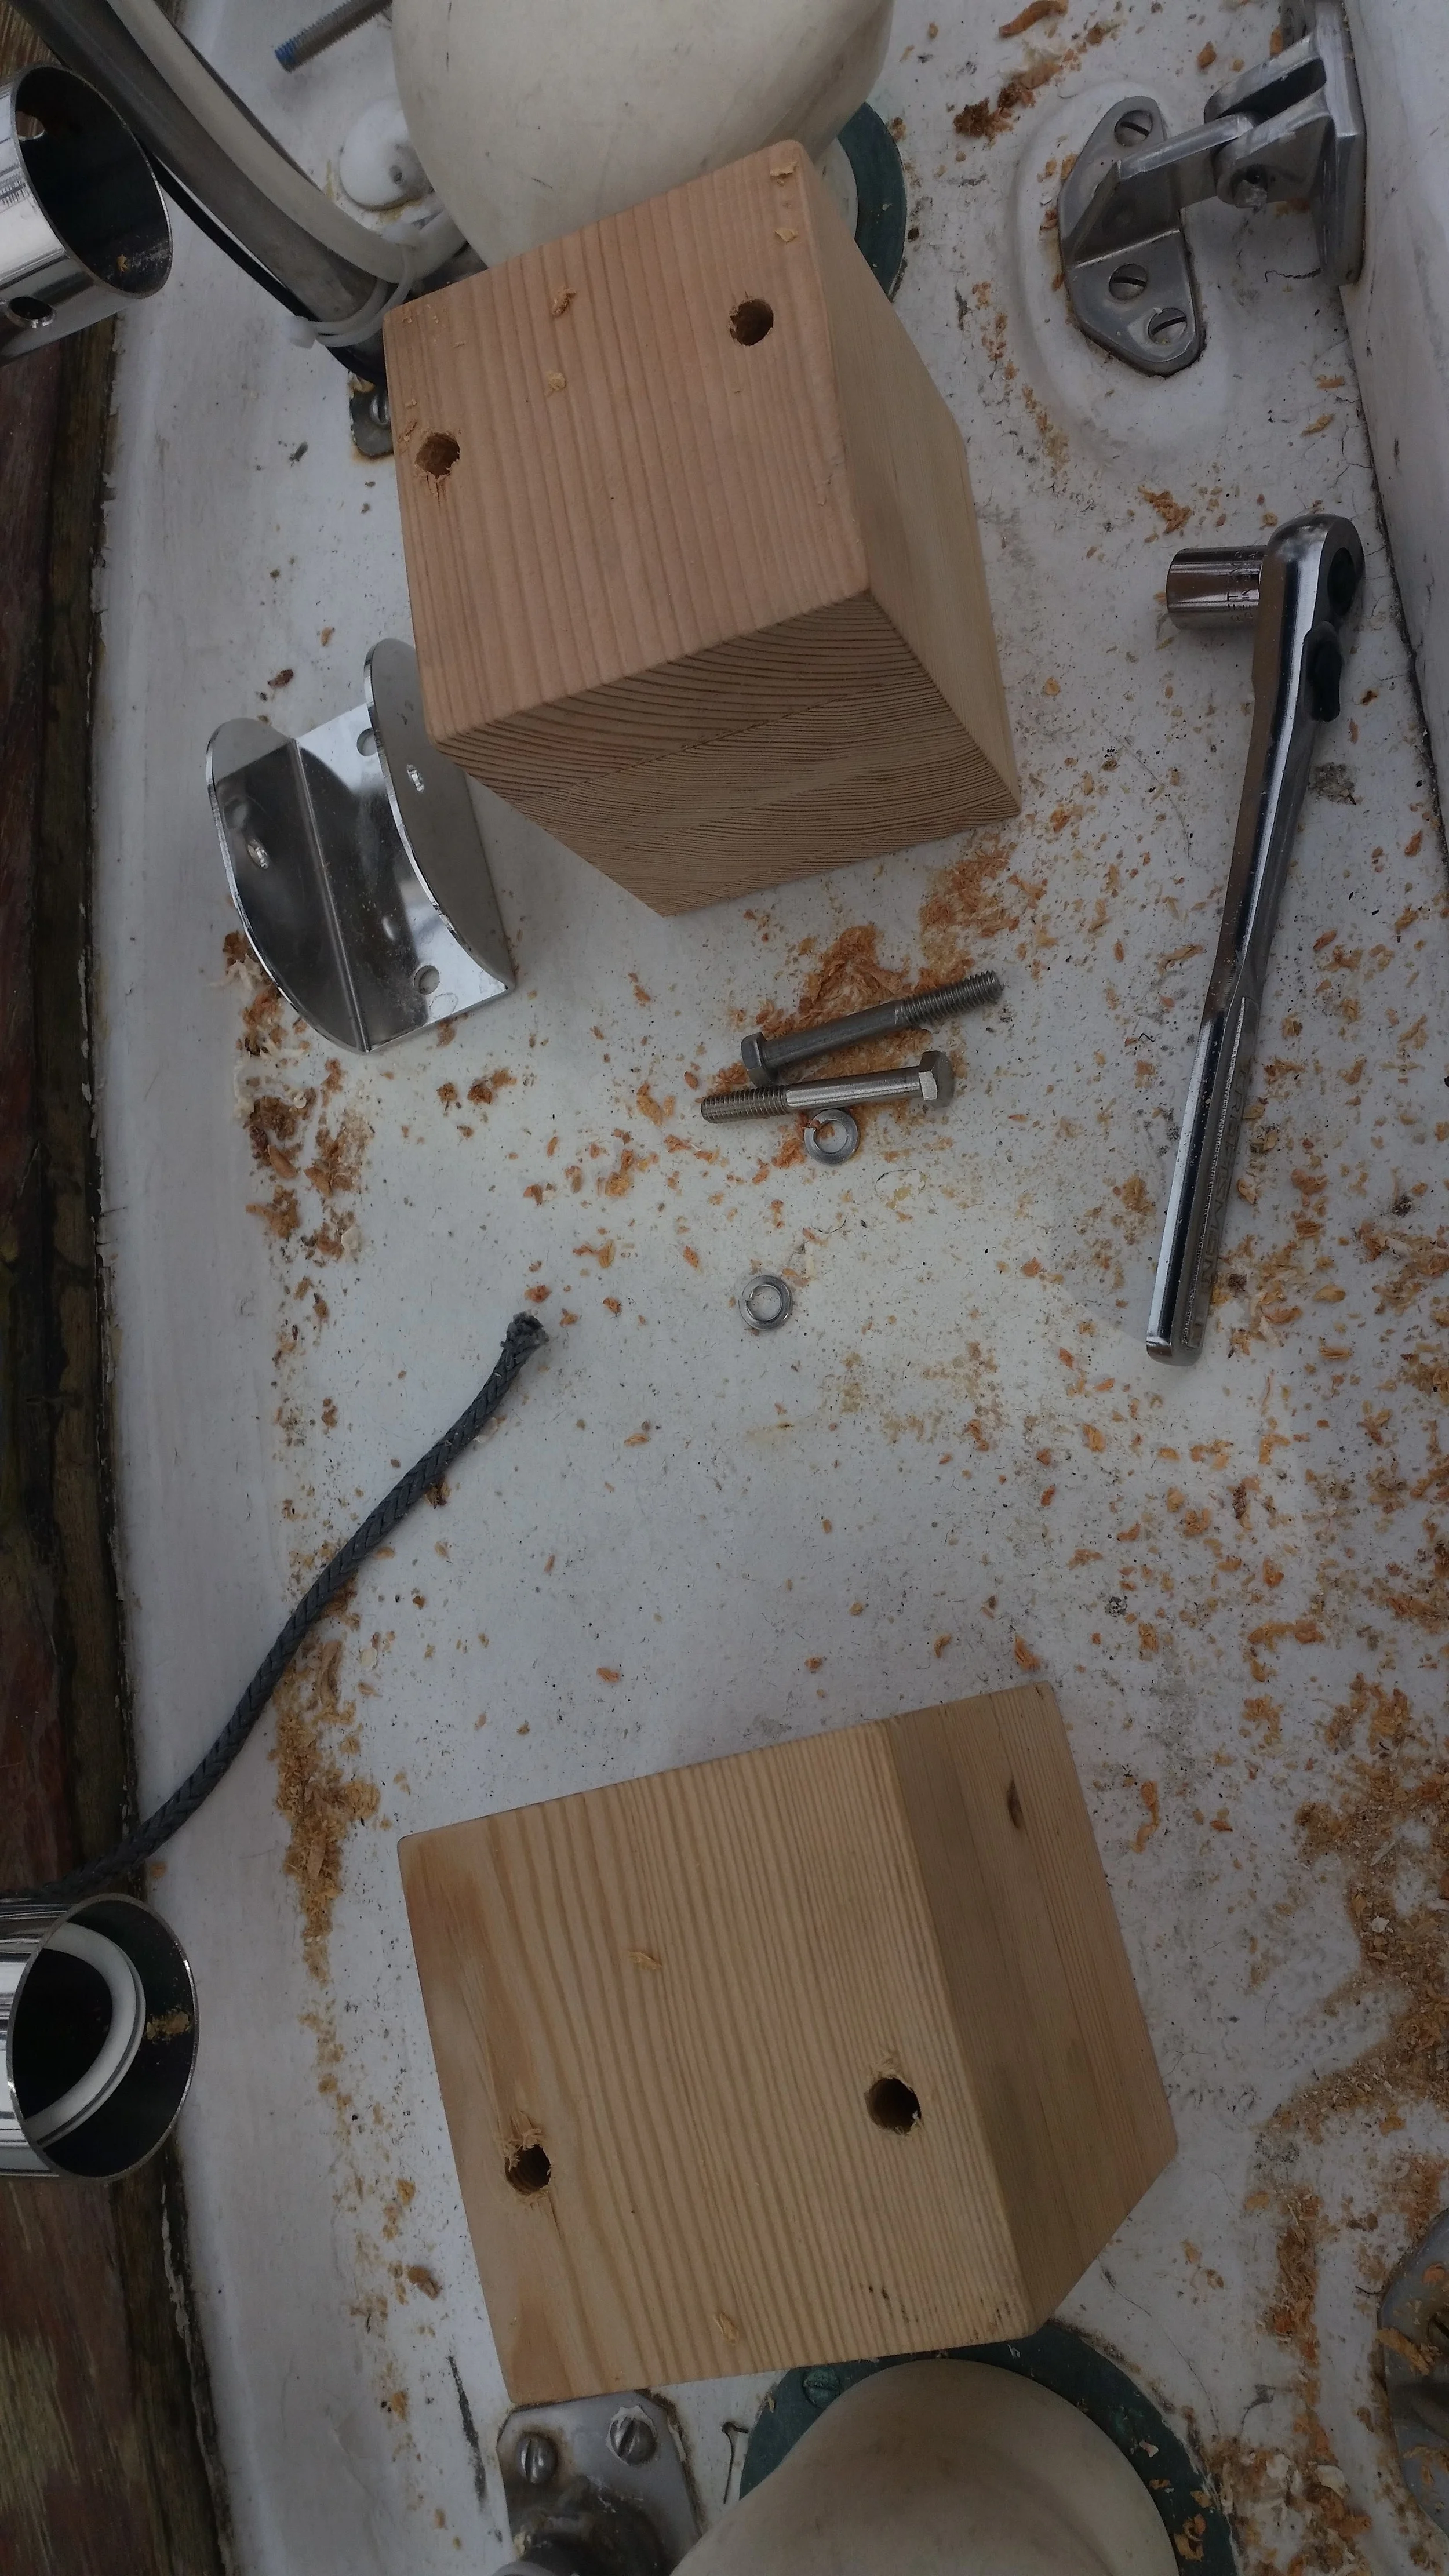
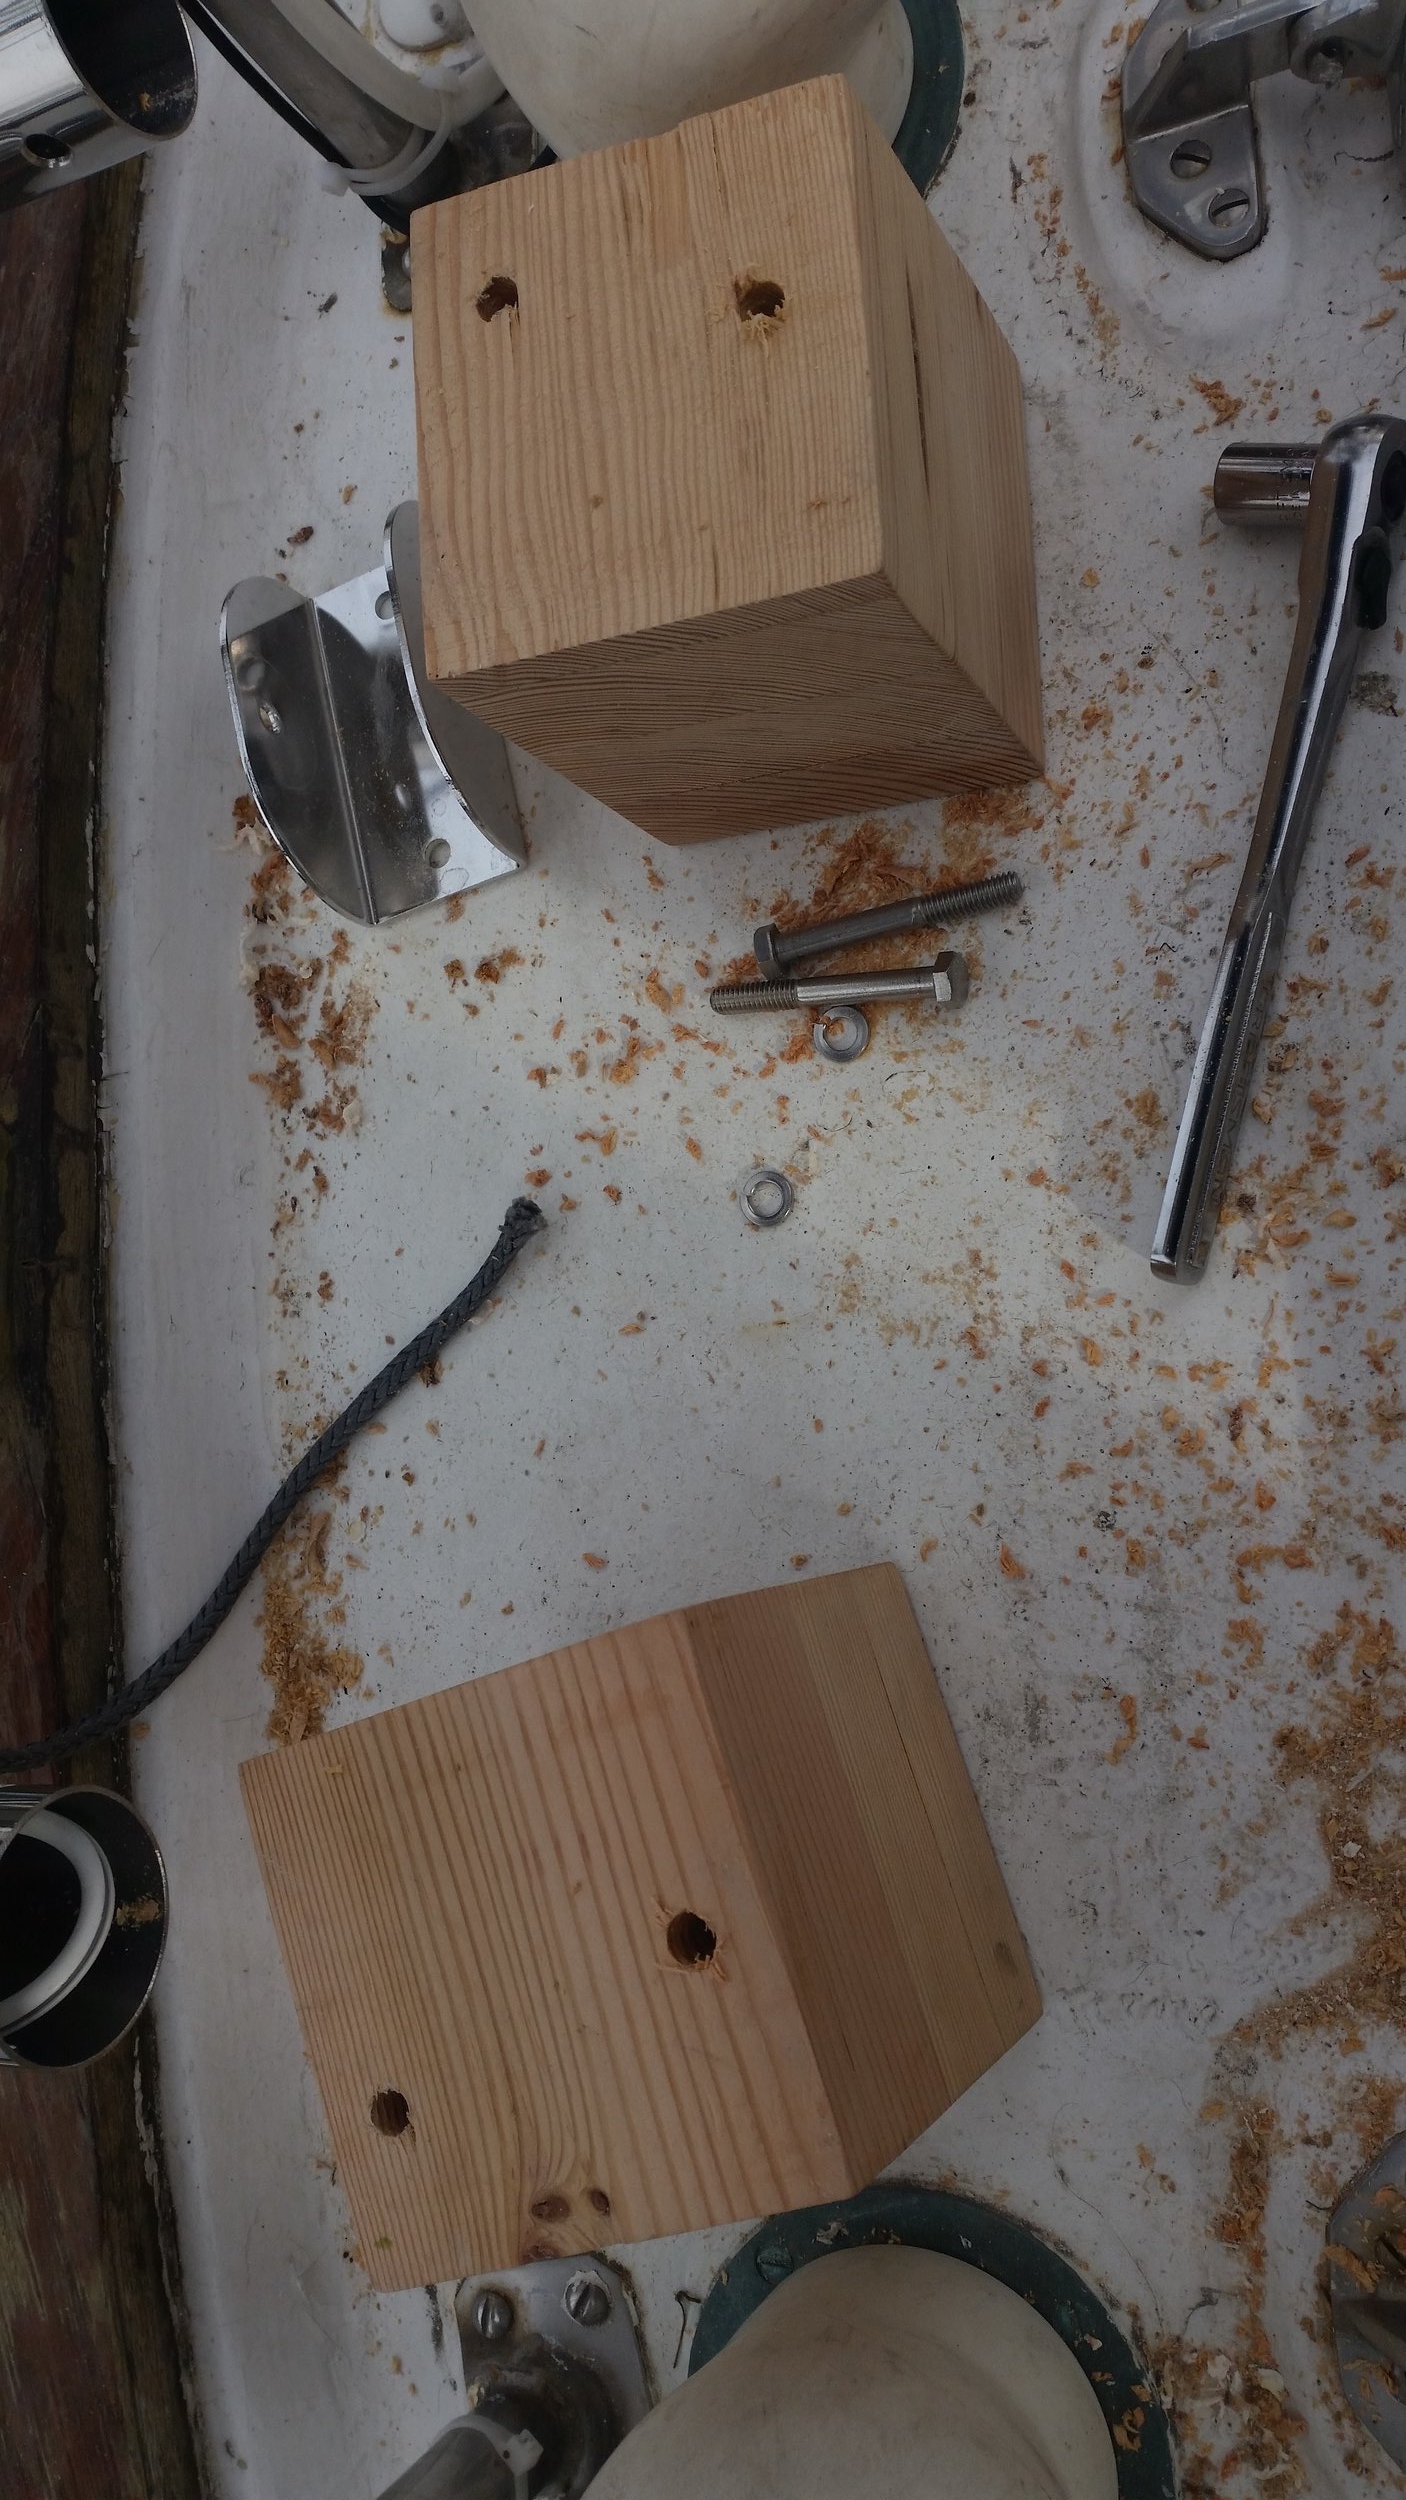
Sadly, I do not have extra long drill bits in every size, I only have 1/4 inch drill bits from when I was drilling the knees on the dinghy. The through bolts are 5/16 inch, so I need to enlarge the holes in everything. Luckily, with the holes marking the ideal locations, I can safely disassemble everything and drill from various angles with a larger drill bit.
Drilling these holes is similar to doing a root canal: you don't want to drill too large too fast, and you don't want to deviate your canal.
The final hole needs to be 3/8" to easily fit the 5/16" bolt. This will give us 1/32" leeway around the bolt inside the hole. If I just grab a 3/8" drill bit and bore out the 1/4" pilot hole, I could run into a few problems.
First, the pilot hole offers no resistance to penetration and the 3/8" drill bit would slice through the wood like a screw. Instead of cutting and removing the wood, the drill would slide through it and bind itself up when the resistance becomes too great. This resistance can bog down the drill and result in a stuck drill bit, or worse, cause the drill bit to break! To be safe, the hole was first bored out with a 5/16" drill bit and then followed by a 3/8" drill bit. To avoid the drill from bogging down, the drill bit was only inserted 1/2" at a time, then pulled back. Pulling it in and out allows the flutes of the bur to clear which will allow new wood to fill the flutes on the next insertion. If you jam the drill through in one go, the flutes will become filled with compact wood pulp. If you drill in small sections, the shavings will come out in light and airy fibers that will clear easily.
As a dentist, drilling a long tube through wood makes me think of doing a root canal. Odd as it may seem, the same principles apply to teeth as they do to wood. The main difference is the drills we use on teeth are more delicate than the drill you have in your work shop. If you jam a root canal drill all the way down a canal, it will bind against the side of the root and break off. In dental speak, we call this a "separated file" which sounds so much better than a broken drill bit! The trick to avoiding a "separated file" is to drill in small stages where the forces applied to your tools and instruments are kept to a minimum and work can proceed without issue.
The second point in drilling a long hole is you don't want to move the canal. In dental speak, we call this "transporting the canal". Transporting is simply moving the canal to somewhere it doesn't belong. In a tooth, where you are following the nerve canal, transporting typically refers to getting off track and drilling a hole out the side of the root (not a good time). If I transported the canal on the pillow block, the holes would no longer line up and I would be forced to make a new pillow block and drill a new pilot hole, basically starting over!
To avoid "transporting" you want to keep the pressure on the drill light and let the pilot hole guide you. This is easier to do if you follow the first rule, and drill in small increments where there is little force on the drill from the wood block.
Since my larger drill bits were not long enough to go all the way through the pillow blocks, I drilled them from both sides and made sure that the two larger holes met perfectly in the center. This practice also helps eliminate the risk of the exit hole in the bottom being transported to a different area of the block. If any transportation were to occur, it would be notable in the middle where the two canals meet in the formation of a ledge. An internal ledge will annoy you during the rest of the installation, as the bolt will get stuck on the internal ledge and not slide all the way through the block. If you develop a ledge, try applying lateral pressure to the drill to blend it into the side of the canal. If you can't get it go to away, practice getting the bolt past the ledge without any bedding compound. Once you are good at it, you will be better equipped at getting the bolt past the ledge when wet bedding compound is running all over the place!

Now that the first hole is drilled to size, the bolts can be inserted into the front holes to secure their position with respect to the deck and the Monitor. Holding the blocks in place, the through bolt to the Monitor was removed. The lines that held the Monitor in position were slackened and the entire unit was pushed away without moving the pillow blocks or brackets.
With the back hole exposed, the rear pilot holes could now be drilled and the same process repeated. There was only one hick-up, the sternrail would not allow the 12 inch long drill bit to fit, so I was forced to drill the pilot holes in a different manner.
With the Monitor out of the way, I grabbed a regular length 1/4" drill bit and marked the pilot holes through the bracket. I then moved the pillow blocks and proceeded to drill the rest of the pilot holes with the extra long 1/4" drill bit where I had more working room. With the pilot holes drilled, it was now time to figure out where the deck pilot hole needs to be. Sadly, it is not directly under the top pilot hole, as the drill deviates its path traveling through the wood. When the flutes of the bur hit the harder winter growth rings, they will push away; while at the same time they will sink into the softer summer growth rings. The ring pattern will cause the drill to deviate, despite your best efforts. These problems are compounded when using a very long drill bit that can flex and bend as it tunnels through the block. Had the laminates be set in an alternative ring pattern, the effects would cancel themselves out and result in a straighter hole. The truth is, no one will see where the bolts exist, so it doesn't really matter from an aesthetic point of view.
Entry holes
Exit holes
The top holes are where the pilot holes enter, the bottom holes are where the pilot holes exited the blocks. You can see that they are far from identical and it is impossible to predict where the final hole will come out.
With the new holes drilled through the back of the block, the blocks and brackets are reassembled in their correct positions. Bolts were driven through the front holes to secure the block from any movement during the marking process and a pencil was inserted into the rear hole.
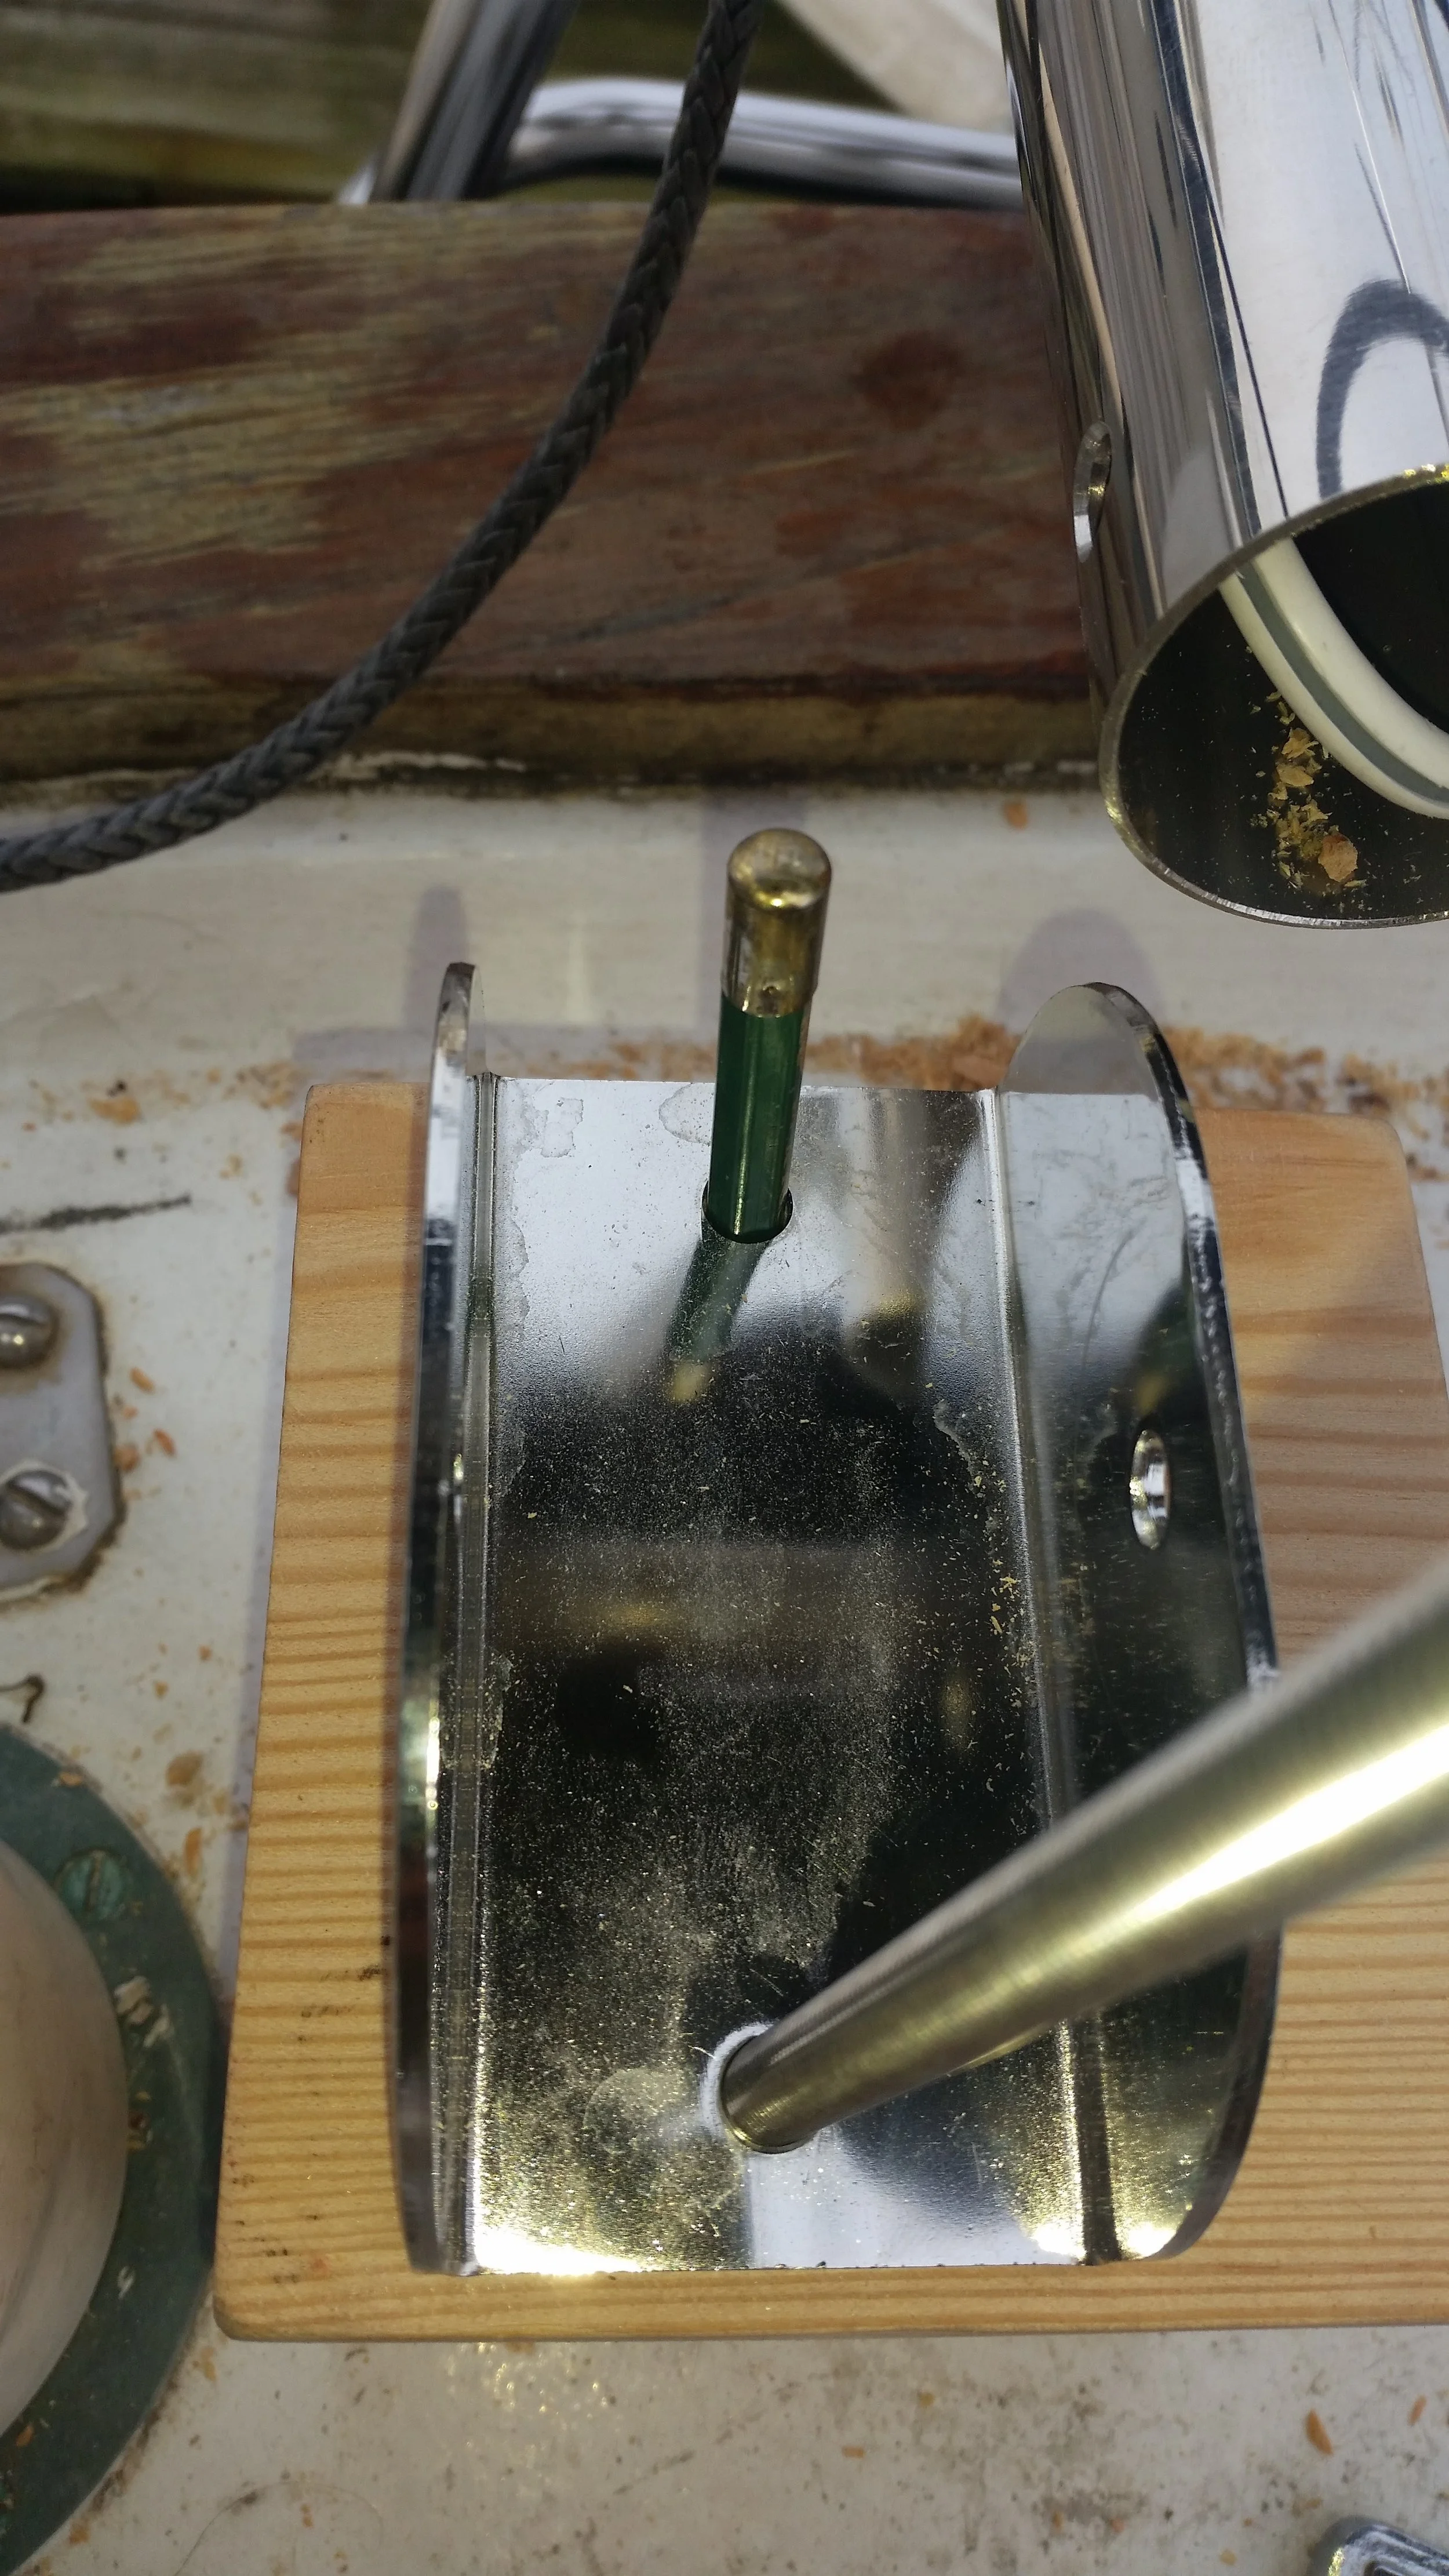
The pencil marks the point where I need to drill the rear hole through the deck. The problem with a pencil is the grey mark it makes can be hard to find on a dirty deck. Living in the city where the air is less than clean, the boat is constantly covered in a layer of dirt. I have long since given up on washing the oily dirt off as it returns the very next day. When we go on long trips, I do give the deck a good scrubbing to loosen and remove this layer of filth. Away from the city, the boat remains much cleaner as there is much less air pollution covering the boat. I hate to think about what it does to our lungs!
The faint pencil mark was not easily spotted on the dirty deck, and I was unable to fit a pen down the hole to mark in an offset color. Instead of drilling random holes and hoping that I chose the right spot on the deck, I opted to arc my line.
Arcing a line is very simple to do and makes identifying a point very easy. First, you simply spin the pencil around to create a nice mark on the deck. Then you push the pencil into the deck and spin the block. This will draw an arc on the deck that finishes at the desired spot which is denoted by a slightly larger mark.

With the marks easily found and identified, the pilot holes were made and then subsequently bored out to 3/8". Now the long through bolts could be installed and the whole assembly bedded down and bolted together.

The pillow blocks were oiled with 5 coats of tung oil. The wood was dry and the end grain was drinking the oil right up. After 5 coats of tung oil, the blocks were less quick to absorb the oil and I decided it was time to finish the installation. It is always easier to oil wood when it is separate from everything else, but for the sake of finishing the installation, I decided that 5 coats would be enough for now. More oil can always be applied later in the future.
With the bolts tightened, the unit was rock solid and firmly attached to the hull. Excess bedding compound oozed out from the fittings as the clamping pressure increased. I used a polysulfide bedding compound from Life Caulk for the top bracket because it is more flexible and easier to clean up on wood. The excess that squished out was allowed to cure. Once it has cured, it can easily be removed with a putty knife. If you try to get the excess off now, it will smear everywhere. If you wait until it cures, it will peel off and leave a clean edge.
While the bedding compound was still wet, I drilled and then screwed in large lag bolts into the unsupported side of the pillow blocks to help resist any sheer forces that the long bolts may be subjected to via the top brackets trying to bend sideways. This will just help to tie the blocks down to the deck and allow the long through bolts to support the Monitor without any issues of movement.
