
The planks were all oriented with their respective faying surfaces in the proper direction and all the materials needed at the ready. For this procedure, we need:
- Bedding Compound
- Wood Glue
- Dowels
- Table Clamps
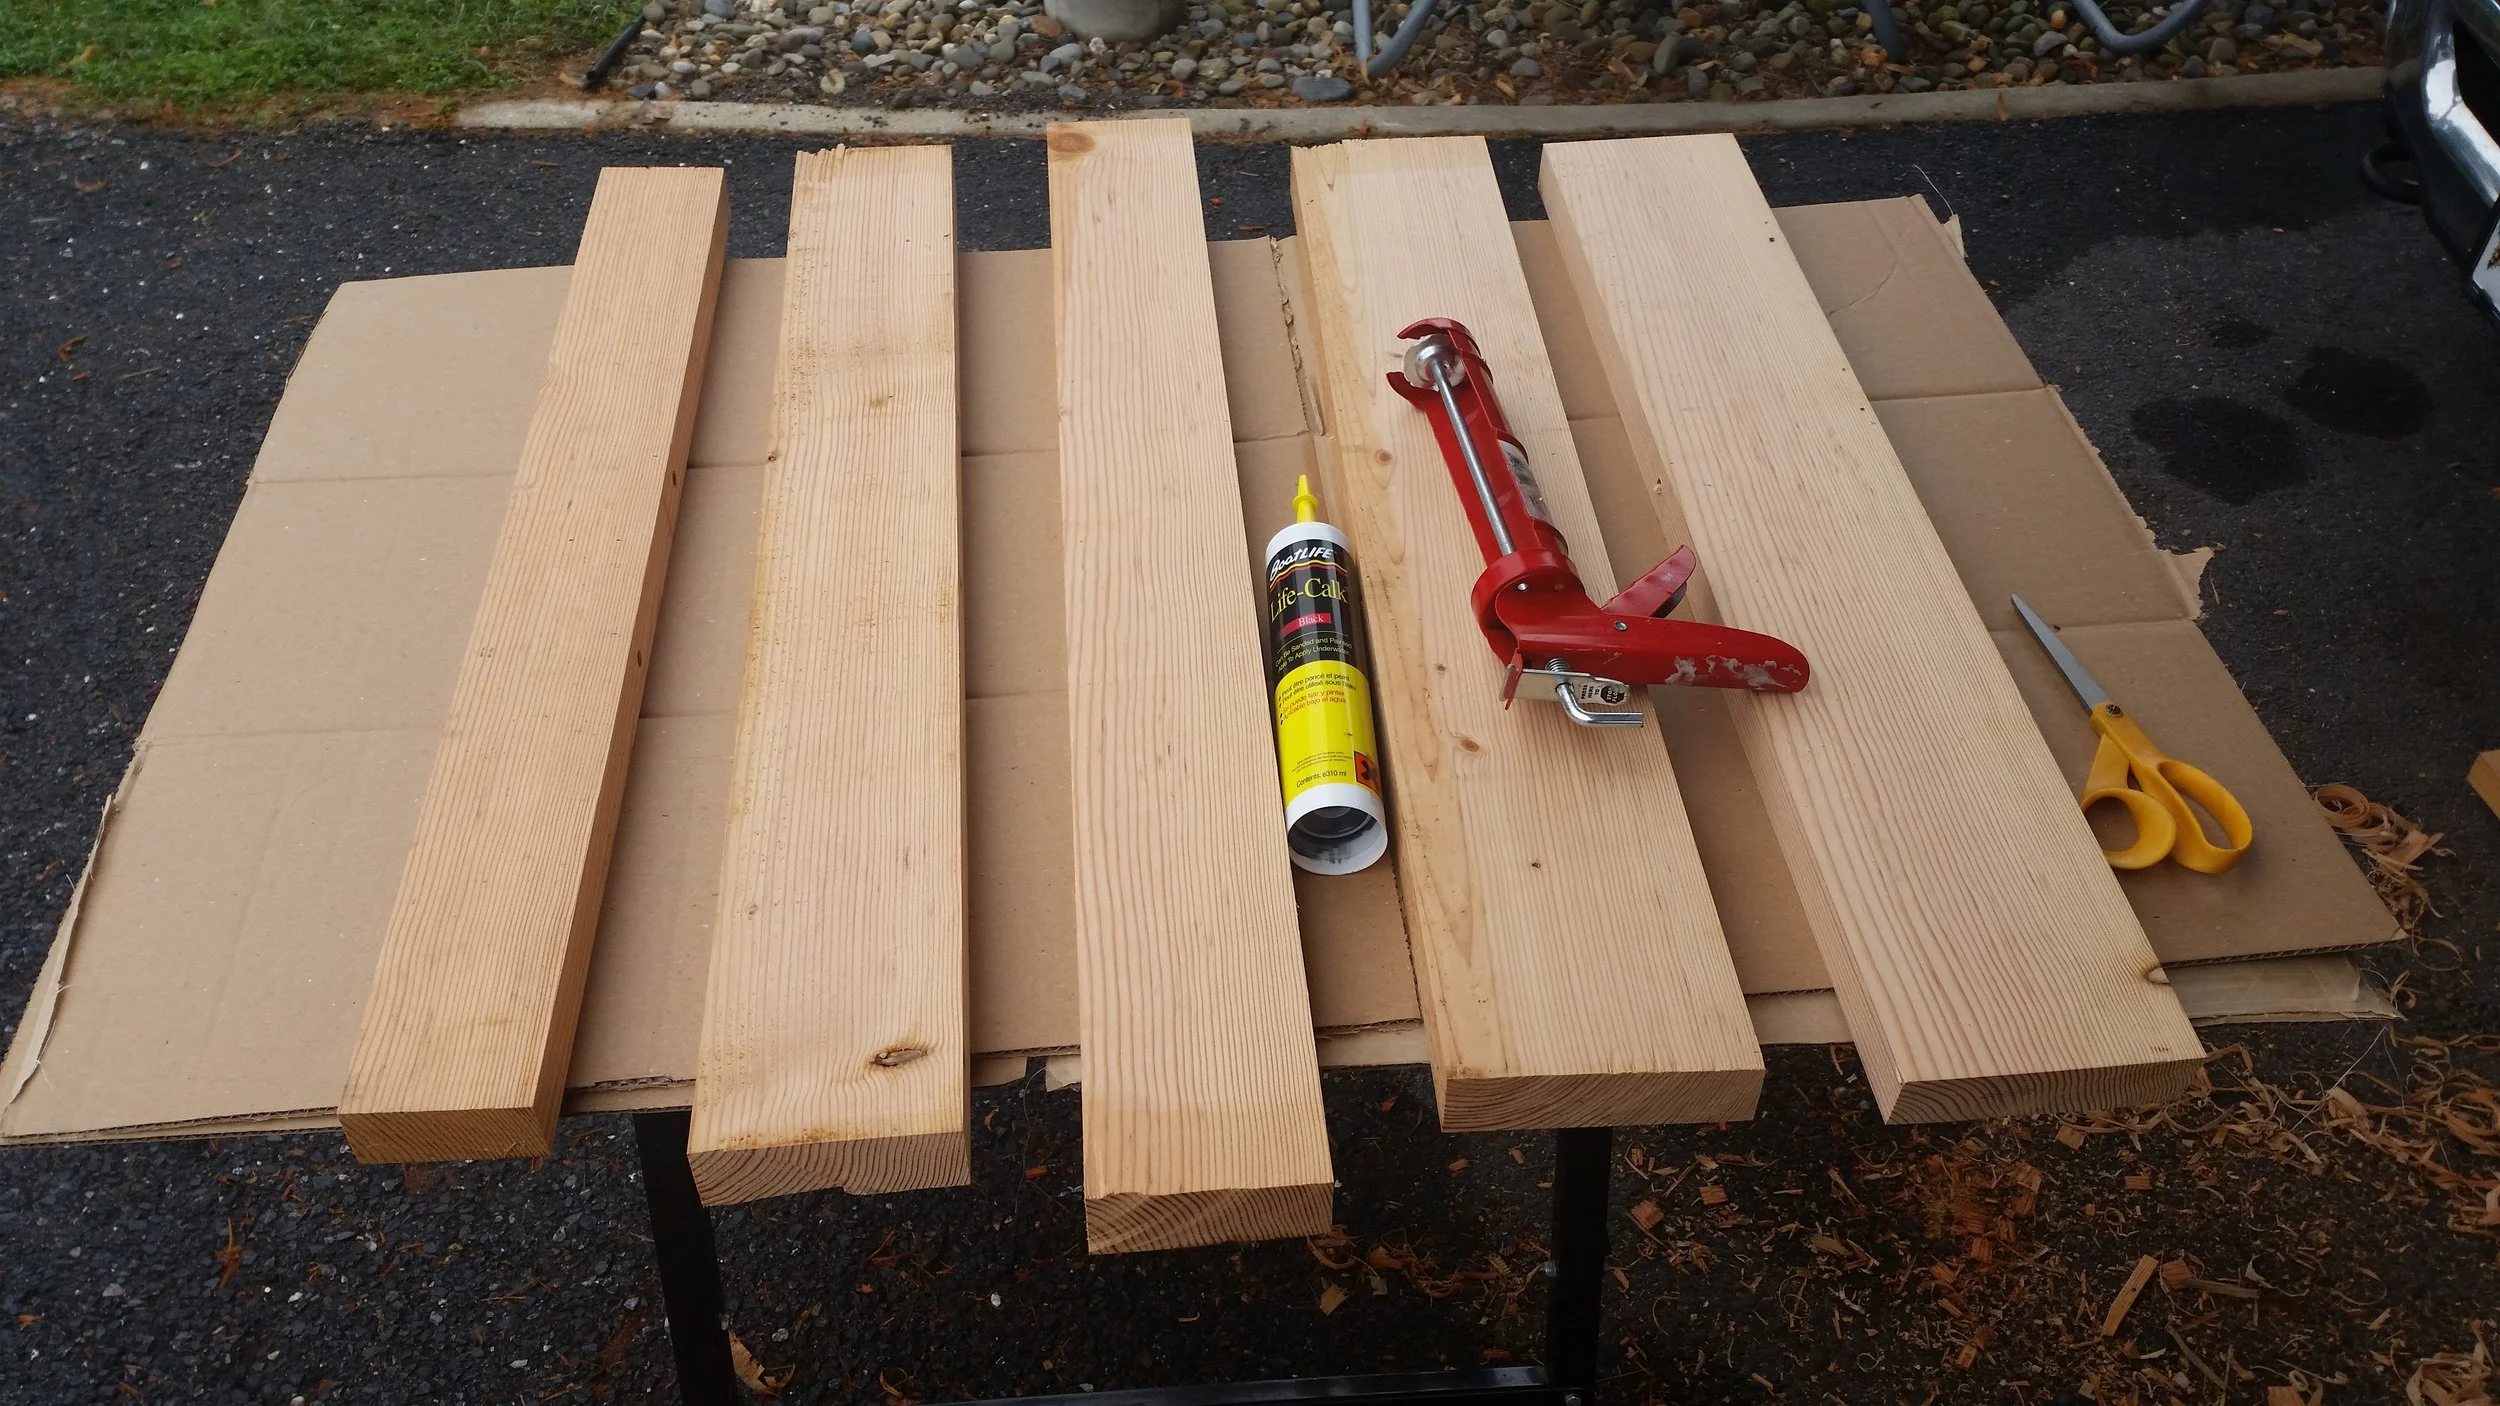
Everything was setup on an elevated work surface protected by an old box which can be discarded at a later point in time. The process is relatively simple, glue goes in the holes and bedding compound on the surface of the wood.
You can choose to glue the strakes together which will yield a solid board that will work very well to keep water out of the boat and keep the interior of the hull dry, for a while. A dinghy, unlike a piece of furniture, will be exposed to the harsh marine environment. The hull will sit in water where it will swell and then sit on the deck where it will dry out. It will be exposed to both fresh and salt water, and lastly, it will be exposed to the full heat transferred via the suns radiation.
Over time, the planks will begin to shrink and swell and the joints between them will become very stressed as the boards push and pull on each other. Eventually, cracks will develop in the board and un-seal-able leaks will become the bane of your dinghies existence! To avoid these issues, wood glue will not be used on the interface between the planks, instead a soft rubber polysulfide material will be used as it will allow the wood to shrink and swell without opening the seams.
While polysulfide will hold the planks together, it is never going to be as strong of a bond as wood glue, so some wood glue will be used to help secure the planks. The wood glue is only used on the interface between the dowels and the boards, giving the boards the flexibility to move on the dowels without tearing open a seam.
The wood glue I used is Titebond III, a water proof and outdoor rated wood glue. The polysulfide I used is Boat Life Life Caulk in black. Life Caulk is readily available in Black, White, and Mahogany. I chose black because I'm finishing the dinghy bright and black lines between the boards seems more cosmetically pleasing than white or purple lines.
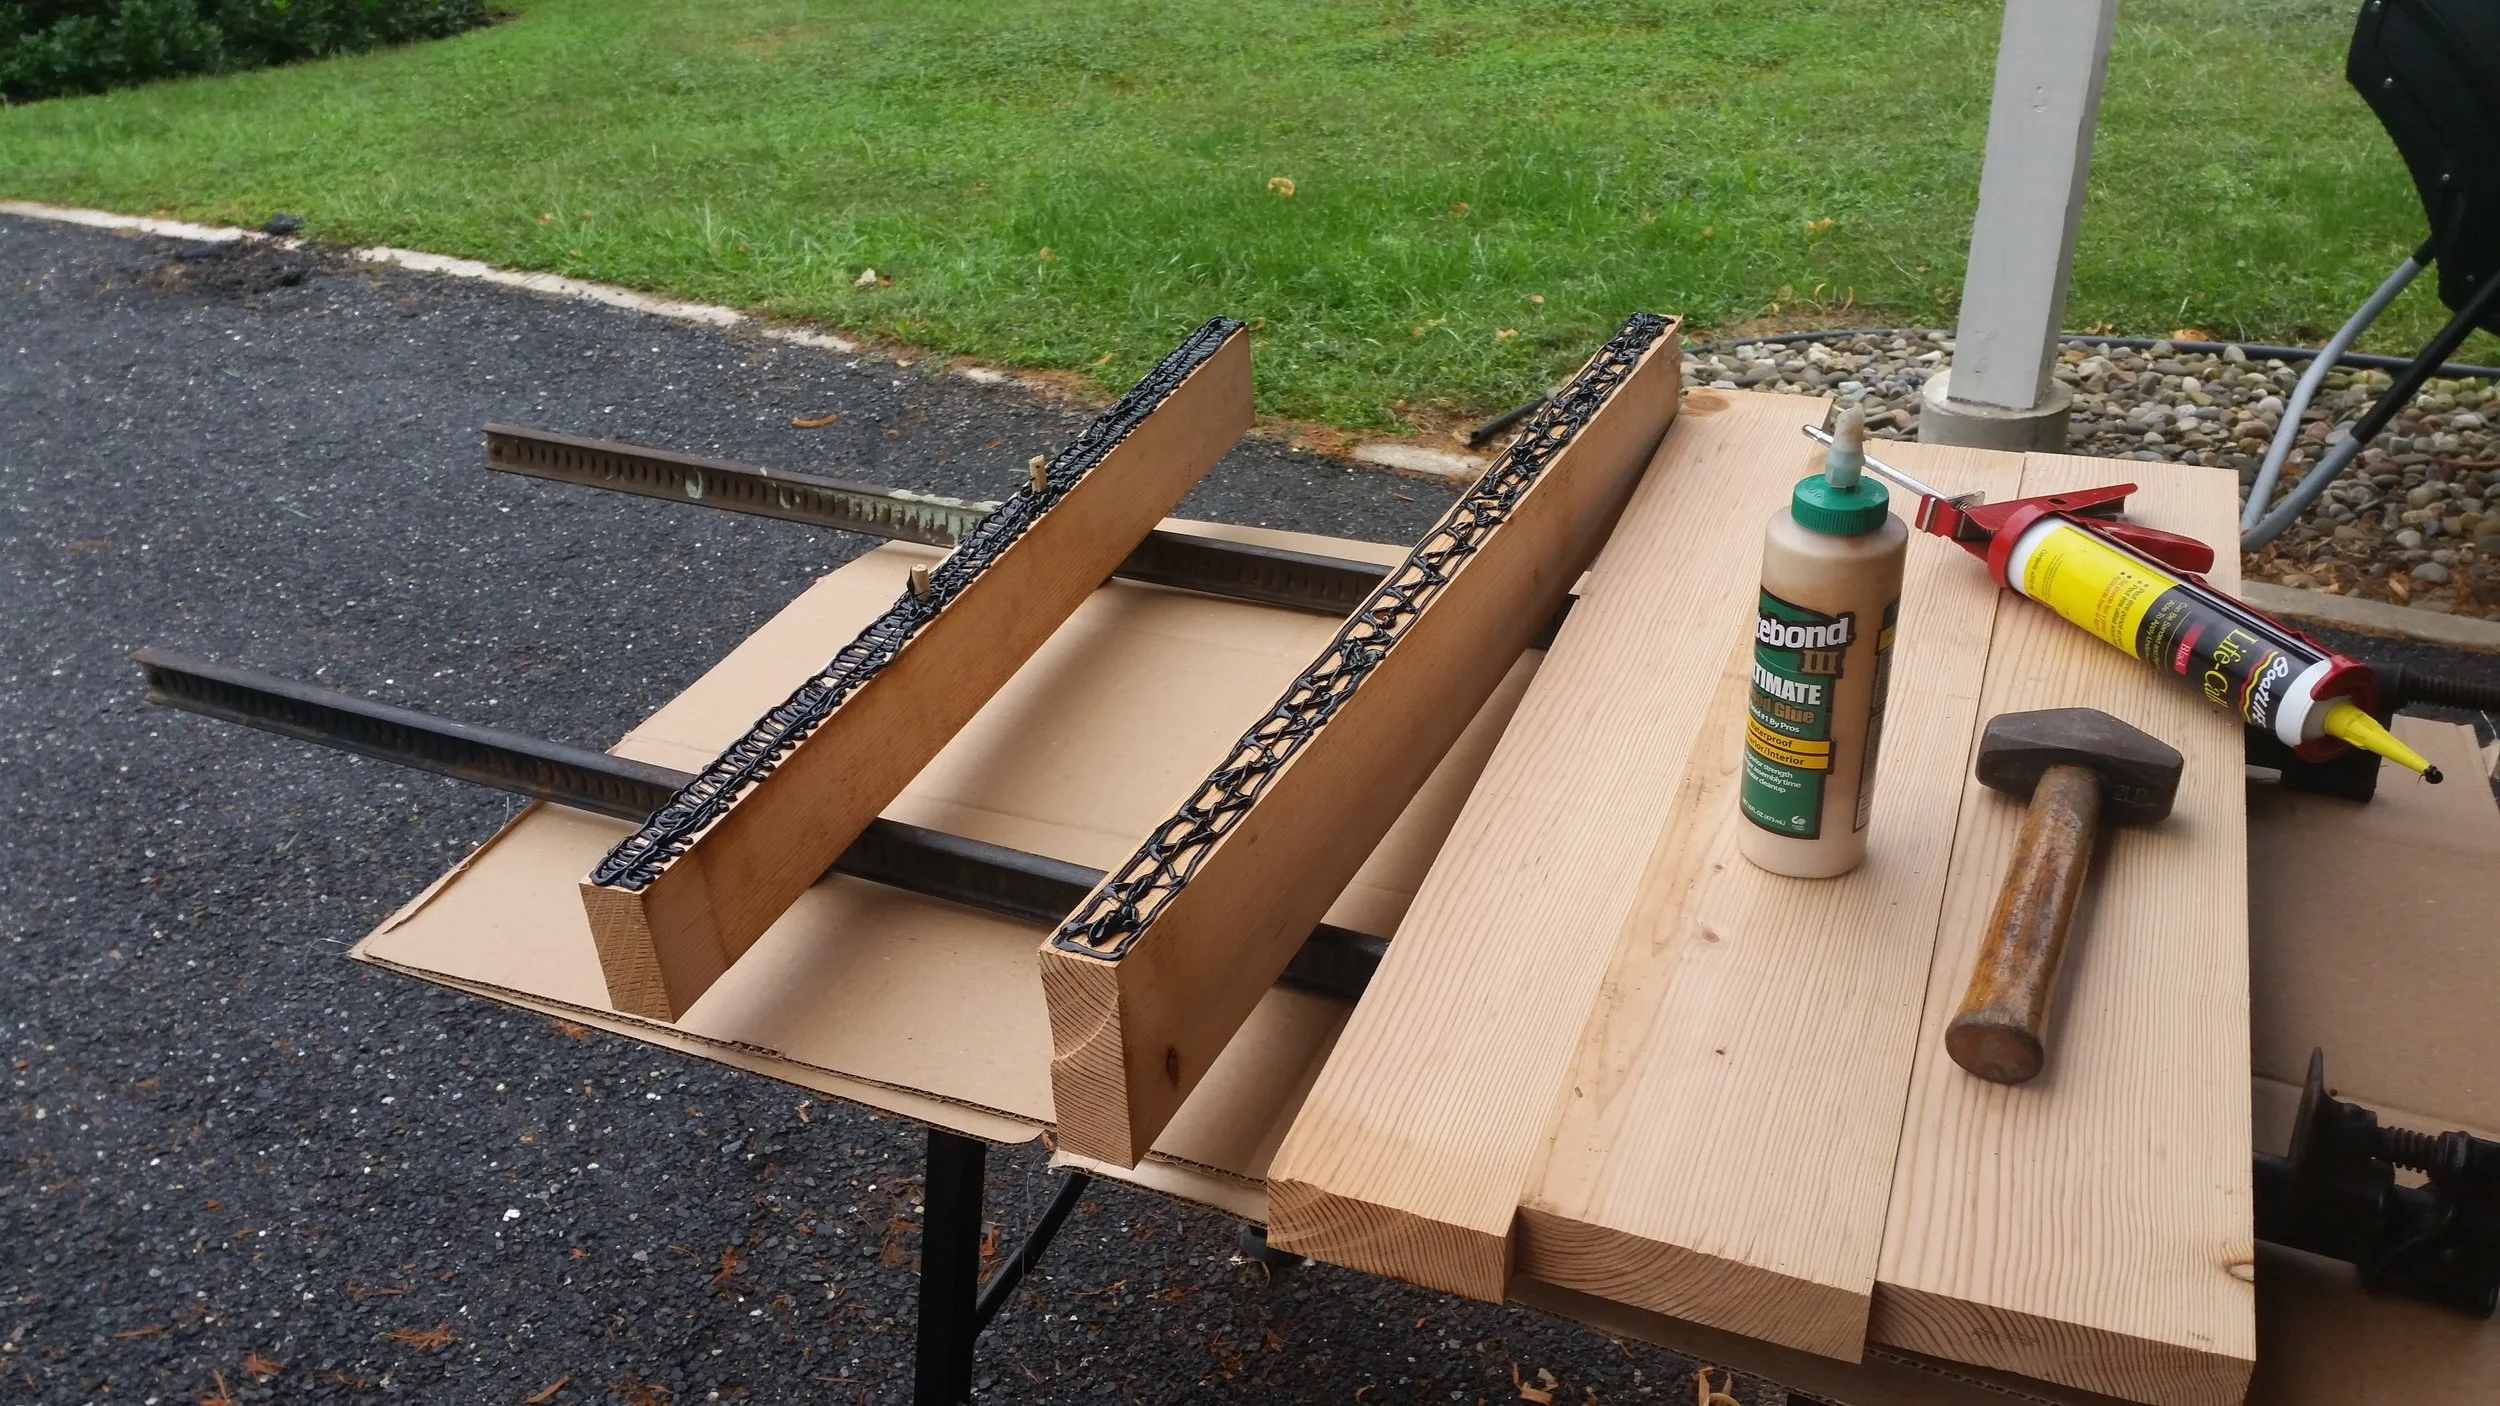
Wood glue was carefully placed only into the dowel hole and quickly followed by the dowel. A mallet proved indispensable to driving the dowels all the way down the hole as the wood had swelled with all the rain we have been having. The faying surfaces were covered with a very liberal amount of polysulfide bedding compound. It was laid down in a pattern where the outer perimeter is covered and then a zig zag between the lines connecting the perimeter line. When clamped down, this material will spread everywhere and provide a very uniform gasket that will keep water out from between the boards.

Once all the boards are glued, doweled, and bedded, apply pressure to the entire assembly with a set of table clamps. This will squeeze out most of the bedding compound, leaving a thin layer in the joint on the faying surfaces. You can attempt to scrape this excess off or just leave it to cure and peel it off later. It is actually easier to leave it in place at the moment instead of disturbing a gooey monster!
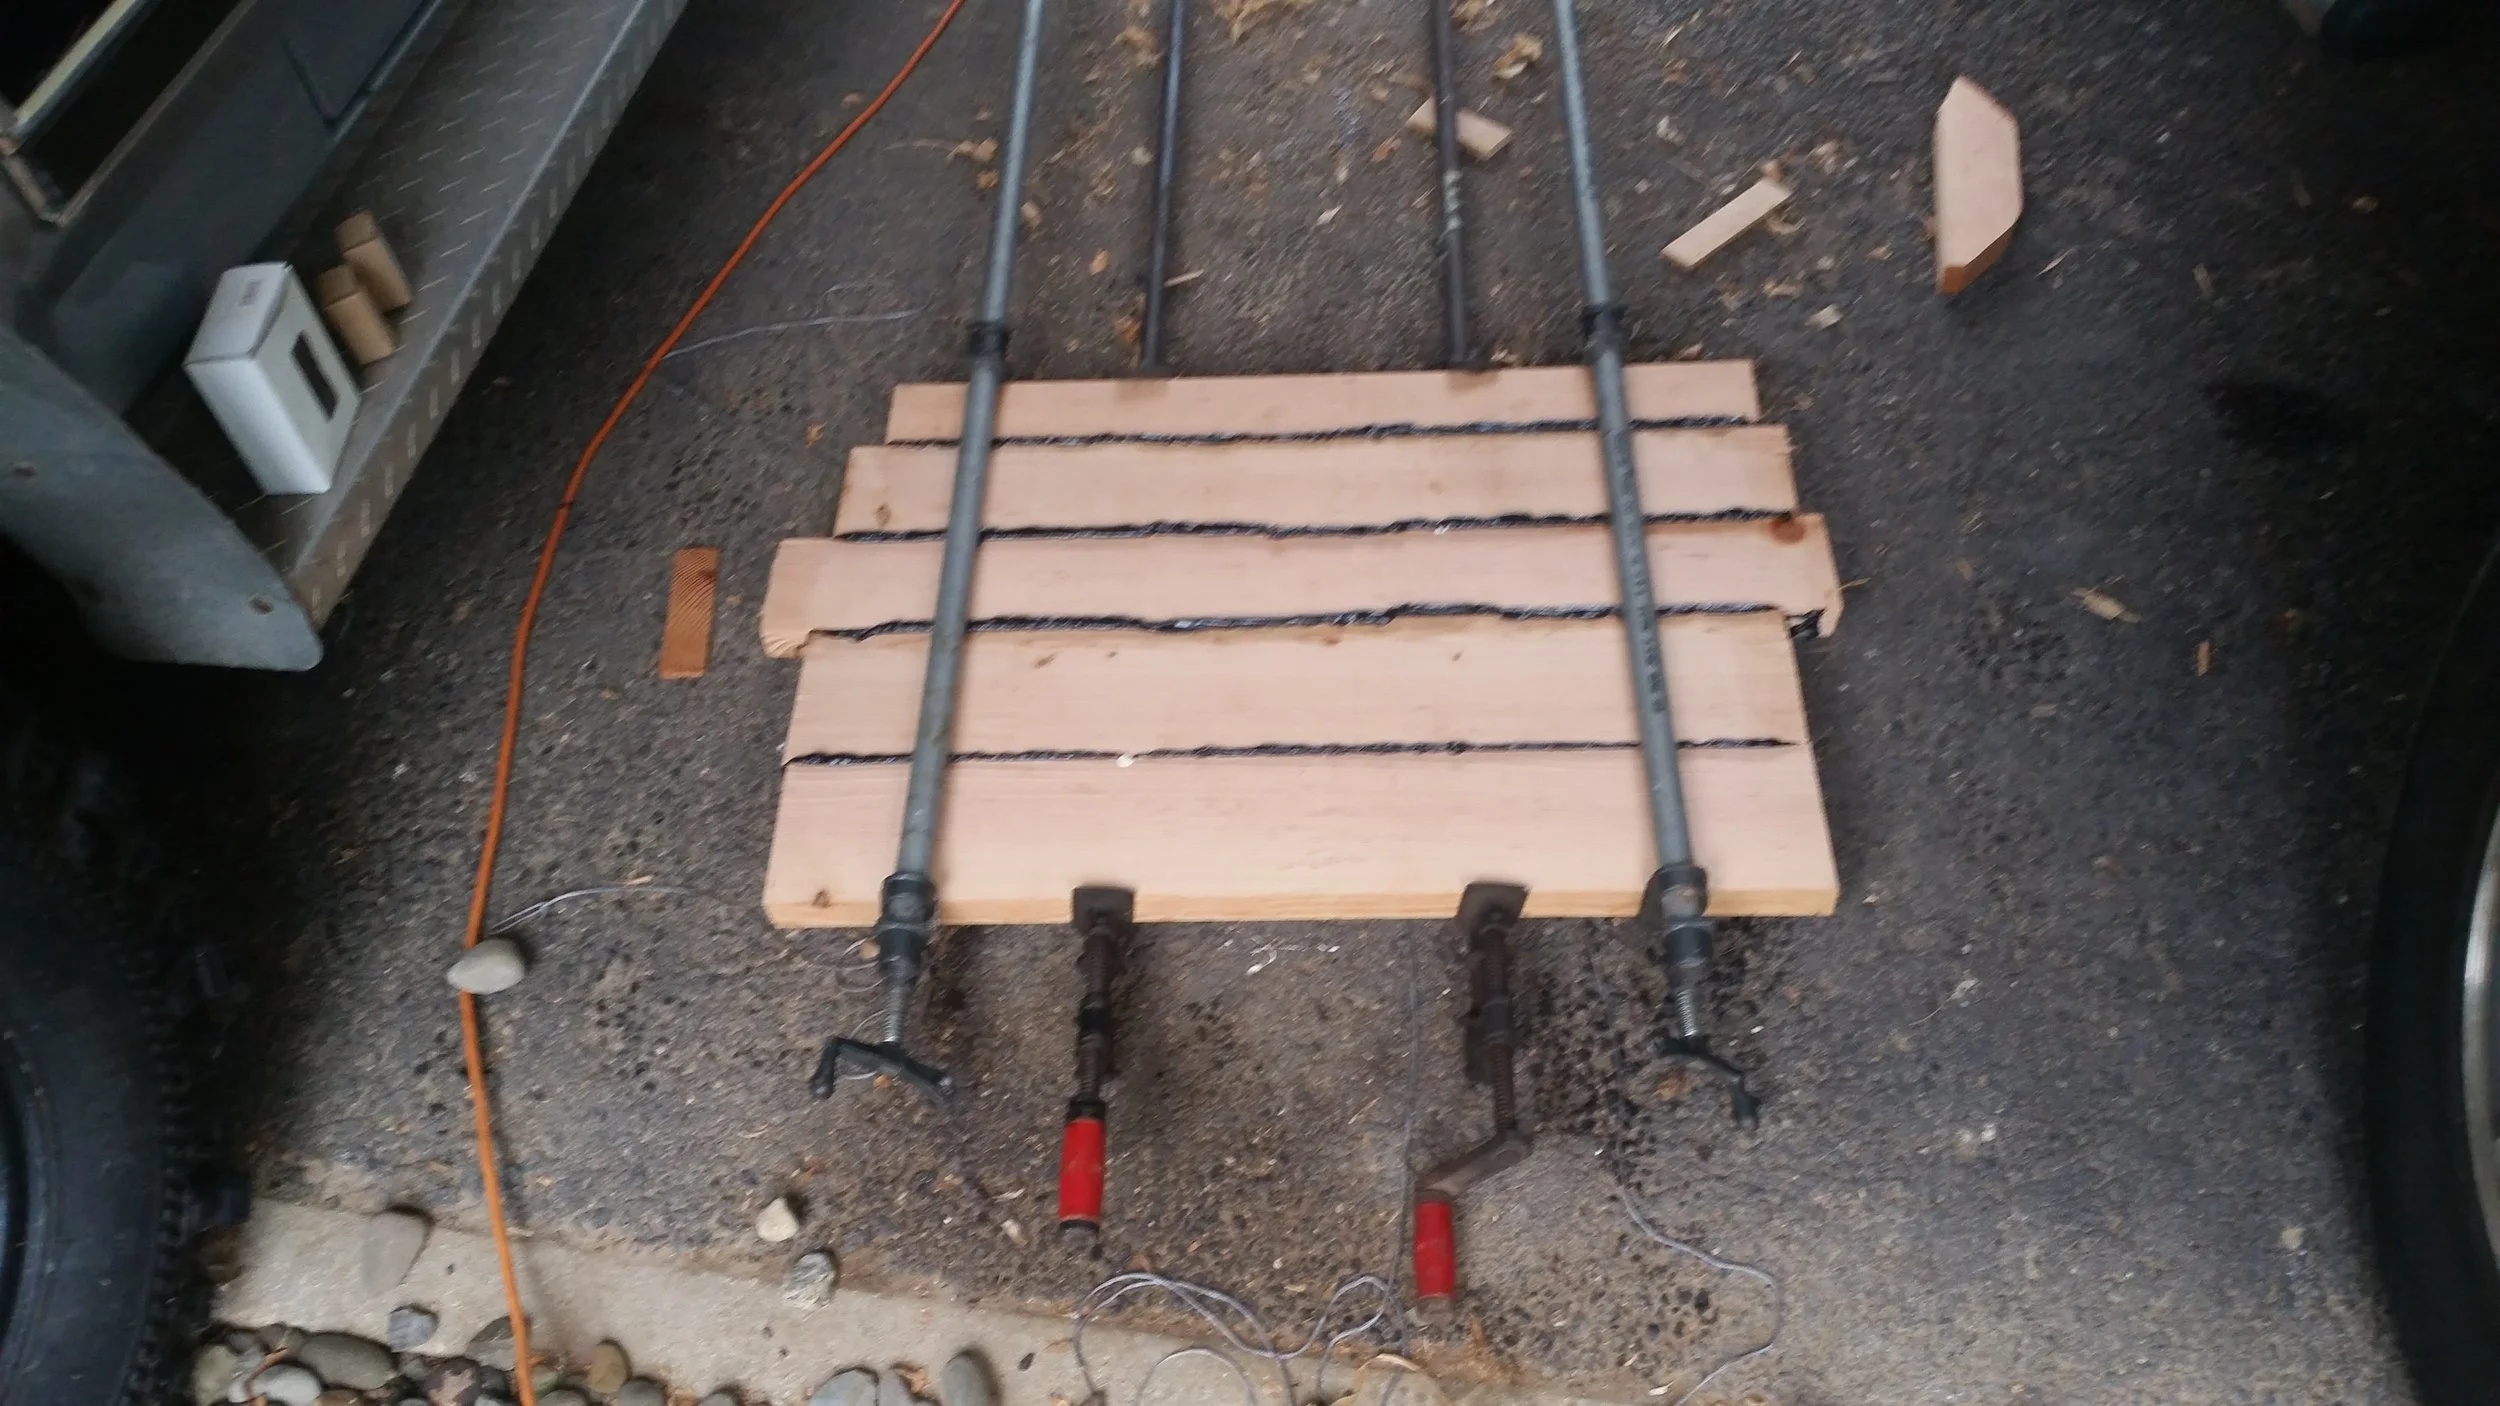
The board was moved to the ground and another set of clamps was set on it. Final clamping pressure was achieved on the boards and the last bit of excess oozed out from between the planks! Setting the clamps on opposite sides prevents the boards from bowing under a unilateral pressure. Having the clamps on opposite sides will even the forces placed on the boards and ensure that the result is a flat transom.
With the clamps exerting significant force on the boards and the glue and bedding compound curing, the boards were allowed to sit for the next four days. I waited until the polysulfide felt like a hard rubber instead of the squishy goo that it started out as. This change in state signals to me that the bedding compound is fully cured and the clamps are no longer needed to provide support to the boards.
