
The easiest way to make a Mobius Brummel is to have both tails free, pass the first tail through the second tail, then the second tail through the first tail. The end result is a solid splice which can't slide apart because they lock each other.

When you are splicing a stay, it is either not convenient or not possible to pass the second tail through and that is when this technique will shine. Following these steps, you can achieve the same Mobius Brummel Eye Splice with only one free tail.
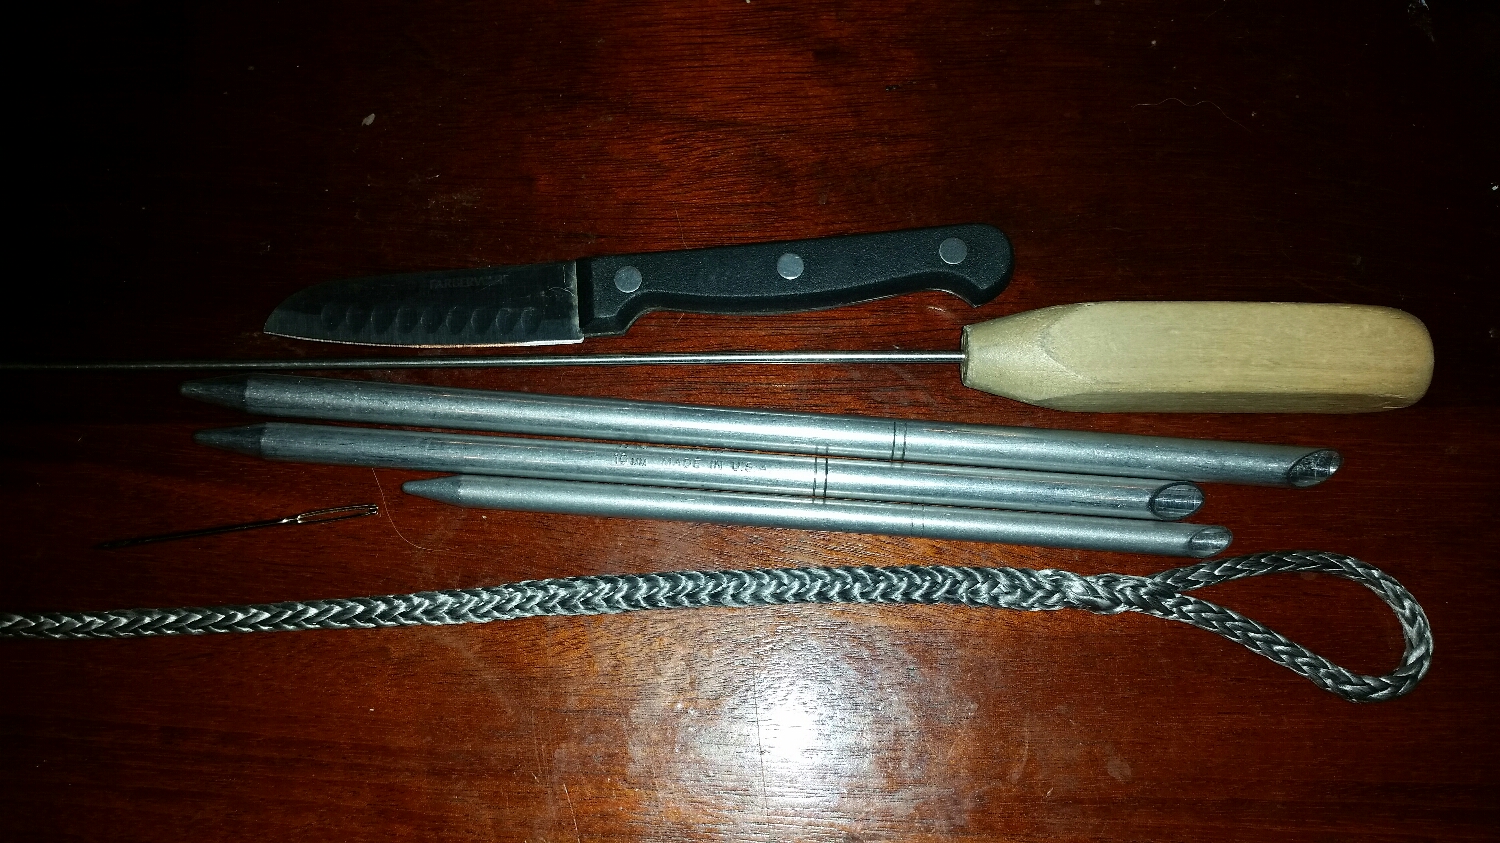
To complete the splice, you will need 2 large fids, 1 small fid, a pusher, sharp knife, and a large needle.
To begin, you must know your measurements. The important parts in this situation are the length of the tail that will be buried as well as the size of the eye.
The tail that is to be buried needs to be 72 times the diameter of the line. For this example, the line used is 6mm, therefore, 6mm x 72 = 432mm, or 17 inches. For this example, I did not use a long enough tail because this eye splice will never be subjected to loads and it's hard to capture the long tail in these pictures..
If you want a 3in eye in 6mm dyneema, your measurements would be: 6 inches for the eye, and 17 inches for the tail. This means that you would begin the splice at least 23 inches away from the end of the line. Having a longer than necessary tail will not cause any harm, whereas a short tail can lead to a weak splice. If you are unsure how much tail to give yourself, always error on the "too long" side.


The first step is to simply pass the fid and line through itself. Be sure to pass the fid through the line at or further inward than the measured distance needed. Like I said before, it is better to have too long a tail (which can be trimmed shorter if needed) than to have to undo the whole splice to gain a longer tail. So far, it is straight forward; but now we move to the trick to working with only one tail.
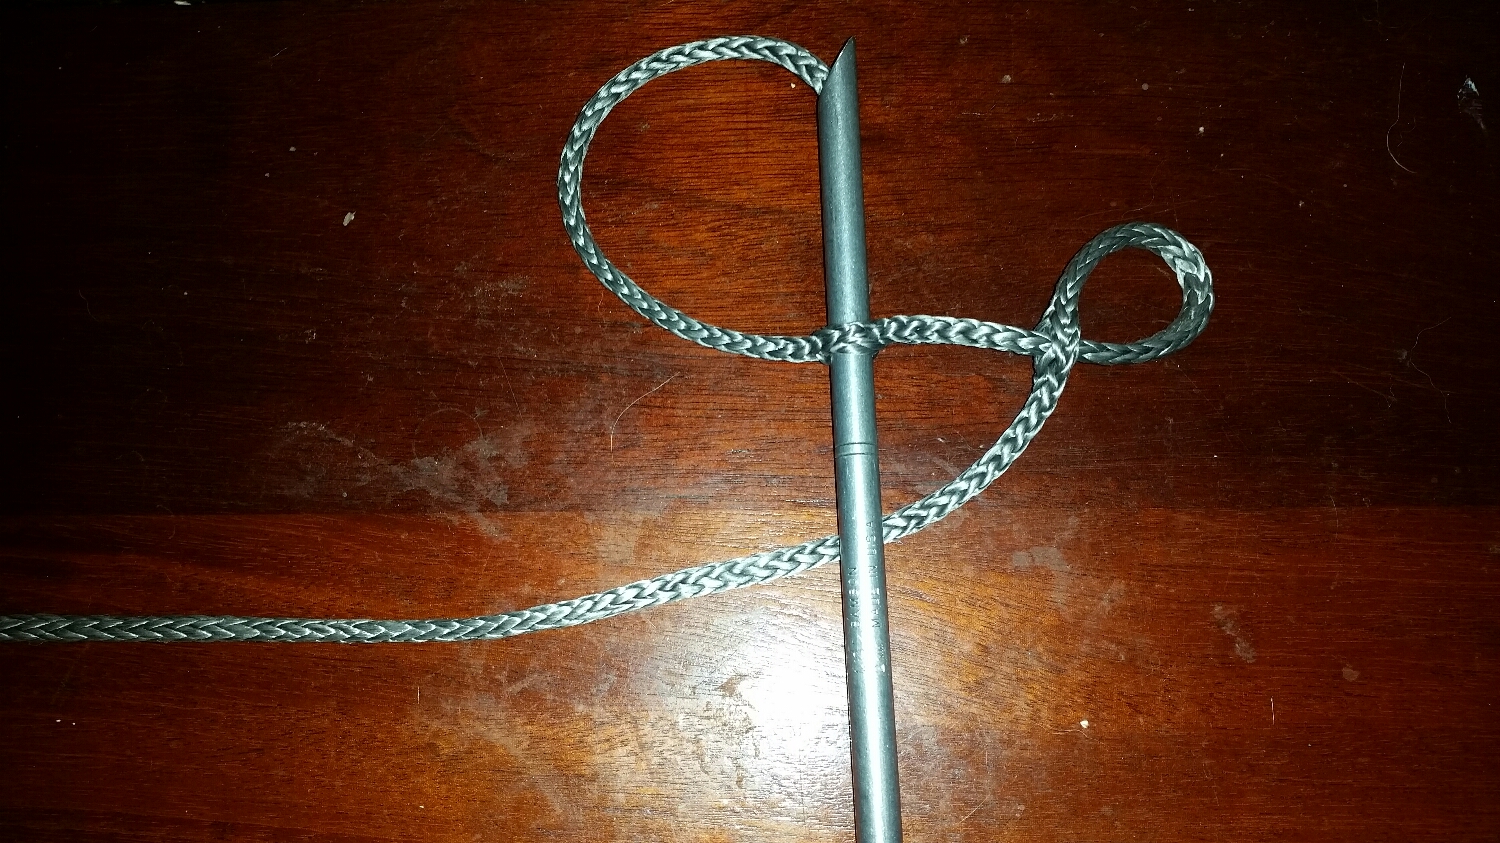


You will pass the fid through the tail at the location of the end of the eye, or beginning of the tail, depending how you want to think about that point. You will then pull the tail through itself and invert hole. This will introduce a twist in the hole which will be relieved later.
The tail should pass through in the same direction that the eye loop will pass through. If it is set the other way, you will introduce twice as many twists to the line which can cause undue stress on the fibers.

Push the fid through the twisted hole in preparation to pass the eye through the hole next.


I use the back of the other large fid to push the loop through the hole following the largest fid I have.
Once I have it to this stage, I work the rest of it by hand. You simply pass the eye through the twisted hole in the tail.

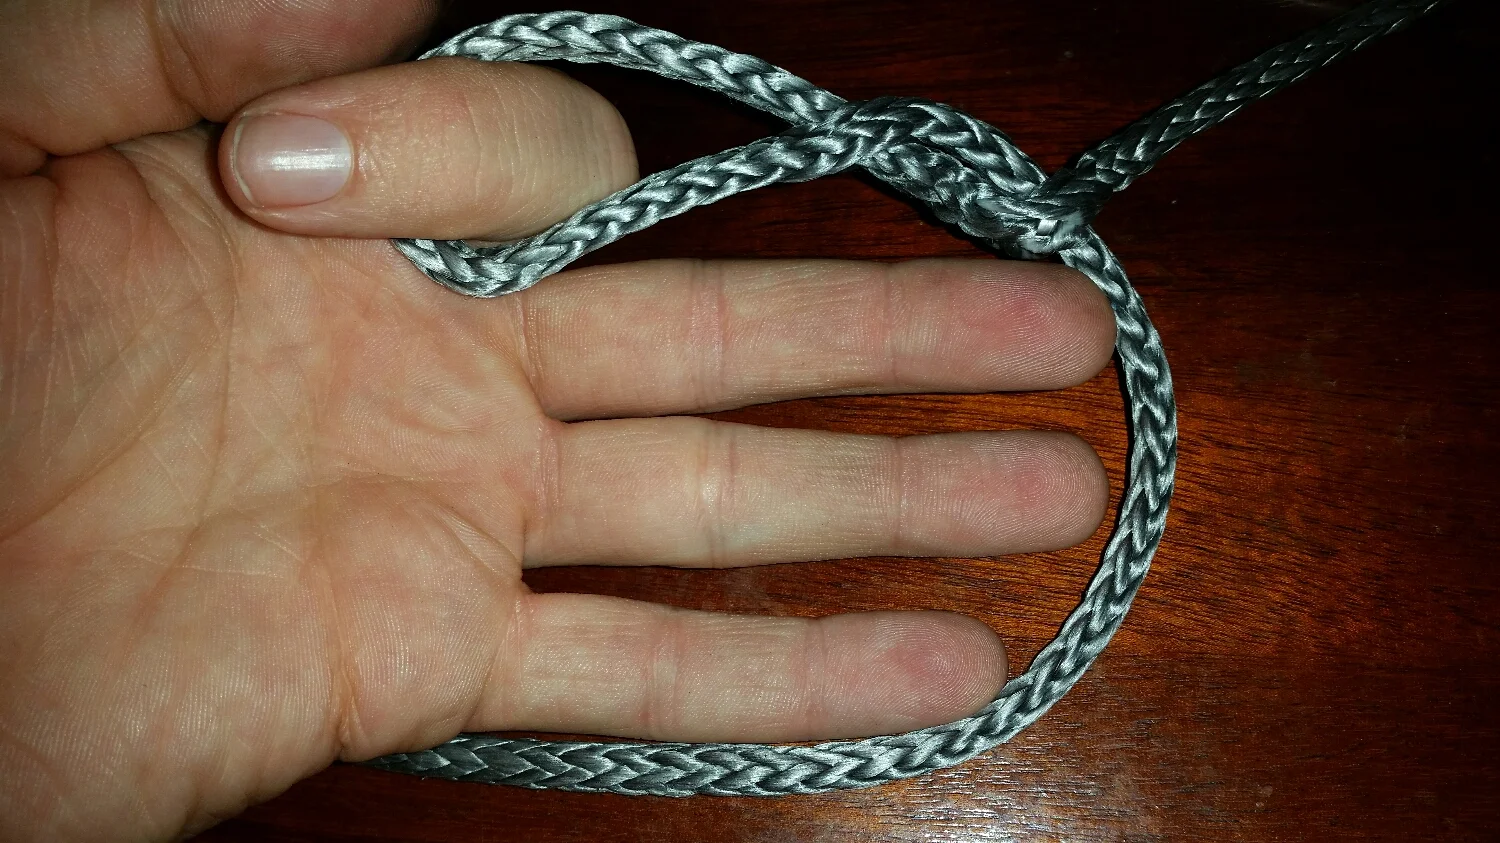

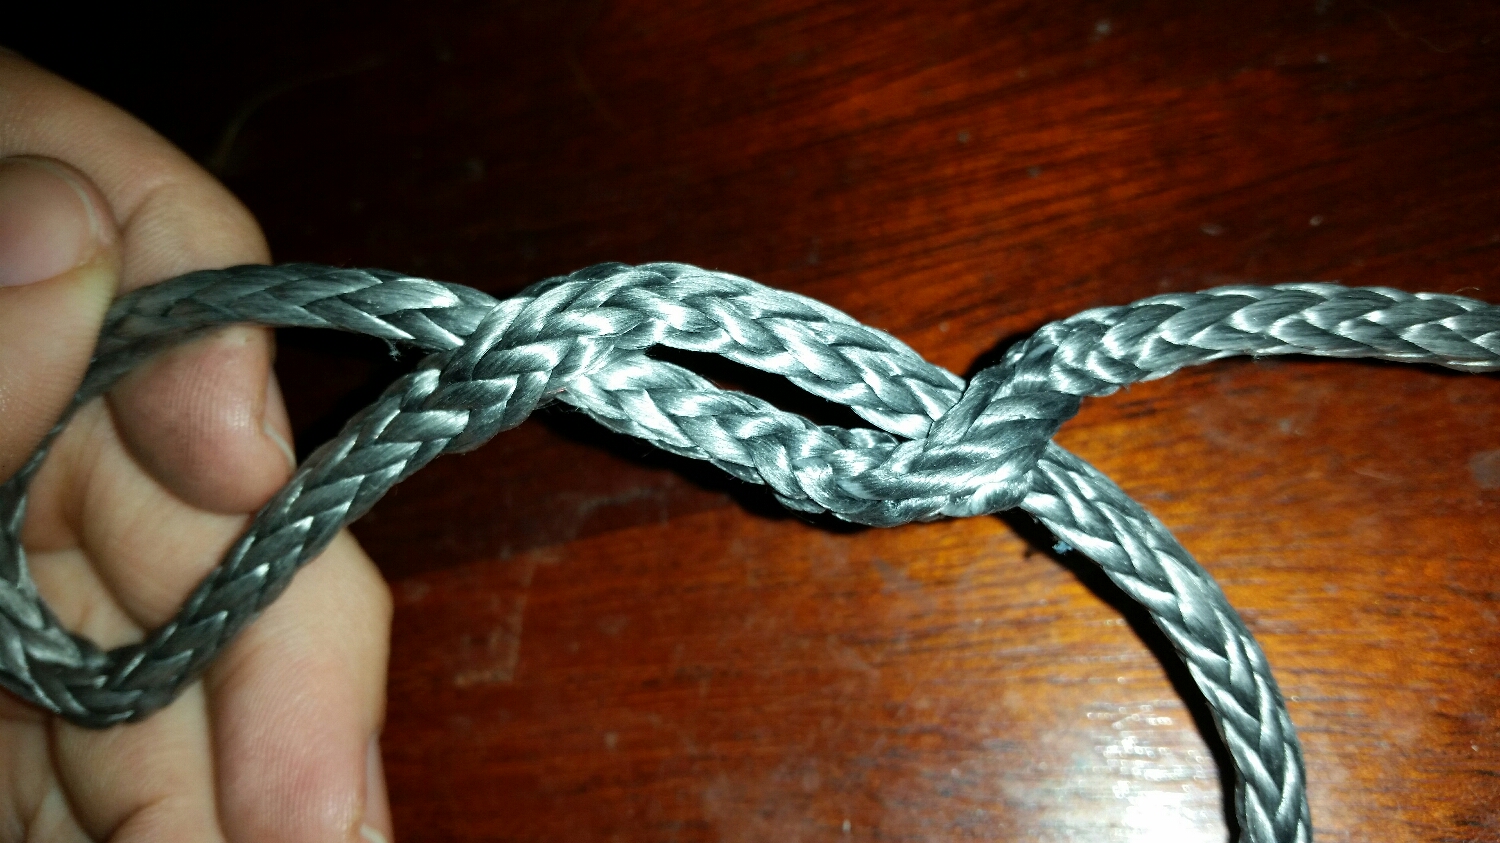
Work the line so that the twist undoes itself as the line is passed over the eye and down the line. You will now have the classic Mobius Brummel Eye Splice. You can see how the splice can slide to shrink the eye, but once the two sections meet, they will lock onto each other and make it impossible for the eye to open and the splice to fail (as long as the tail is properly buried).


Here we can see a closer look at how the splice should look. If it doesn't look like this, it would be wise to take it apart and try again. This splice is extremely strong, but certain variations that look very similar are very weak.


Work the small fid through the hollow portion of the line, making sure not to snag any of the woven fibers along the way. Push the tail through and pull it out the other end. On yours, the tail would be much longer, so you will have to bury more of it into the line.

Pull the tail out as far as you can and stick a large needle through the tail. This will keep it from sneaking back into the line while you work on your taper.
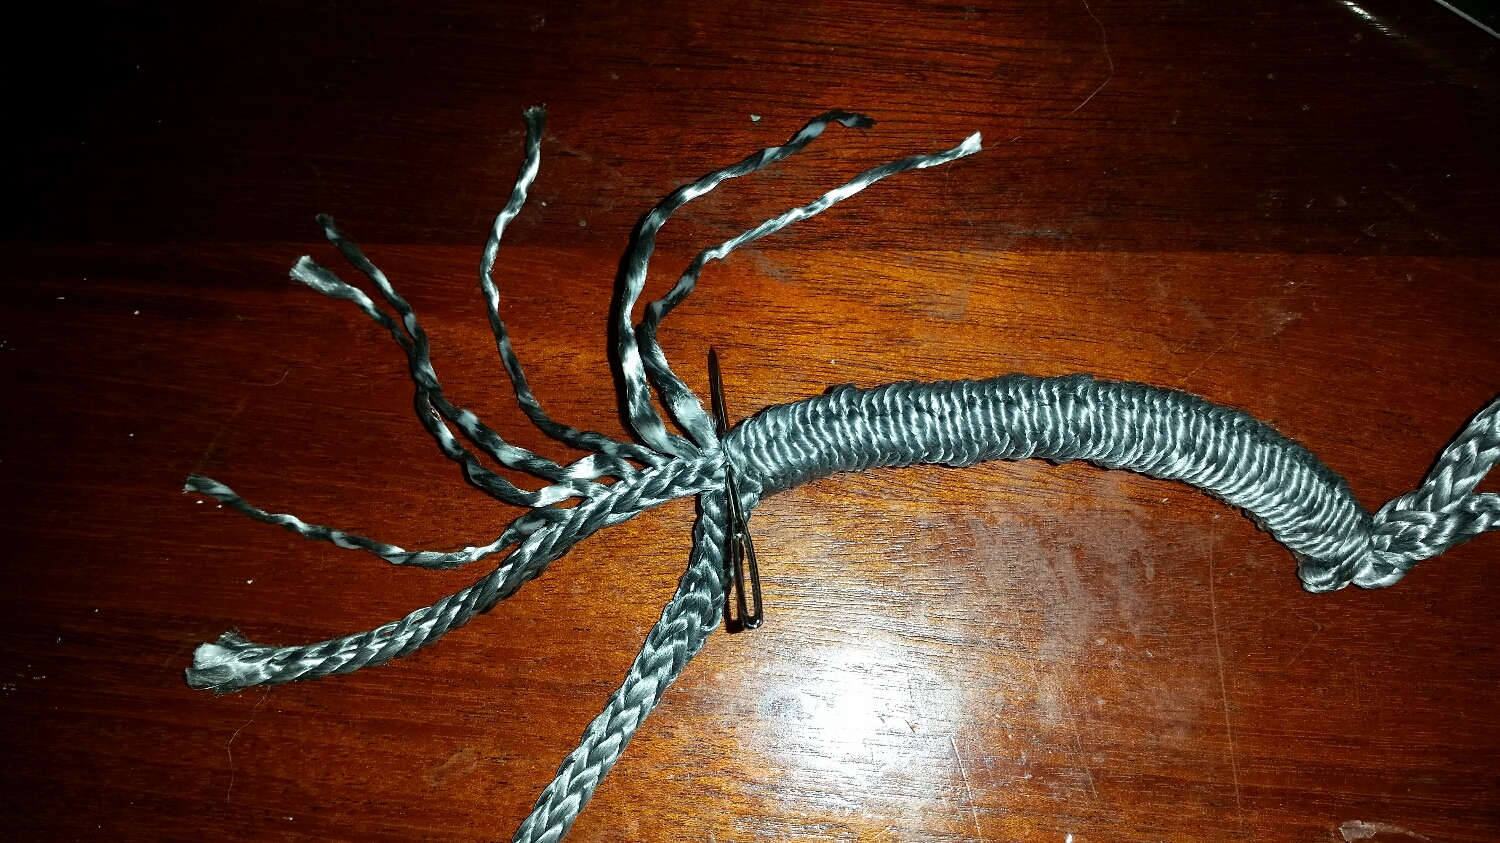
Taper is all math at this point. Dyneema is made of 12 strands, so count how many fibers are sticking out from the needle to the end of the tail. I then divide the number by 12 and ignore any decimals. In this example where there is too short of a tail, there were 15 fibers present. 15/12 = 1.25, so 1. This means that each fiber gets pulled out and then cut off. This will give a uniform reduction for the first 6 fibers. If there were 37 fibers, it would be 37/12 = 3.08, so 3. Then it would be every 3rd fiber gets pulled out for the taper.
When I was building my standing rigging (9mm dynemma), I was pulling out every 4th fiber. This gave a long gradual taper over the 25 inch tail to the splice which reduces any sharp bends that will stress and damage the dyneema line which could reduce its strength and lifespan.


Be sure to evenly cut the last 6 fibers and make some attempt at re-braiding or at the least, twisting the strands back together.


Now remove the needle and slide the outer layer over the tail to bury it. Work the line so that the weave looks like it did originally.

When you first load the line, it will stretch considerably at first. This is not creep, it is constructional stretch caused by bunching up the fibers in the 12 strand. Once under load, they will straighten out again allowing the line to stretch in the process.
Once this stretch has been satisfied, the line will then begin Phase I of its lifecycle, characterized by rapid elongation caused by creep. Once it reaches Phase II, the creep will slow down and the dyneema will deliver as promised!
